background image

masterpage:3 columns Right

55

Usi

ng th

e M

e

nu
s

D:\WINNT\Profiles\noriko\Desktop\SONY TROY 2\2681559131_Troy2 
EN\2681559131\01US06USI.fm

KDF-42E2000/KDF-46E2000/KDF-50E2000/KDF-55E2000

2-681-559-

13

(1)

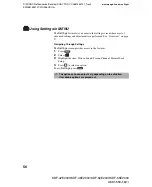
Using Cable in MENU

The 

Cable

 feature displays the most recently viewed channel on the cable 

input. 
Highlight

 Cable

 from the 

MENU

 control panel and press 

.

Using Antenna in MENU

The 

Antenna

 feature displays the most recently viewed channel on the 

antenna input. 
Highlight

 Antenna

 from the 

MENU

 control panel and press 

.

C

C

If you have not completed the initial channel setup (see page 28) 
both Cable and Antenna will tune to the lowest channel number. To 
run Auto Program see page 66.

Regularly Scheduled Programming

No program information is available.

0:24 Remaining

KNSD-WX

C39.2

TV-G

CC

CC

V S L D

1080i 16:9

Alt. Audio

If you have not completed the initial channel setup (see page 28) 
both Cable and Antenna will tune to the lowest channel number. To 
run Auto Program see page 66.

Full Focus

Sd Film Festivals Growth

0:29 Remaining

KPBS-HD

15.1

TV-G

CC

CC

V S L D

1080i 16:9

Alt. Audio

Summary of Contents for Grand Wega KDF-42E2000

Page 1: ...e difficulty operating your television Contact Sony Customer Support at http www sony com tvsupport or to speak with a support representative United States Canada 1 800 222 SONY 7669 1 877 899 SONY 7669 8 00 AM 10 00 PM EST Mon Fri 8 00 AM 6 00 PM Eastern 10 30 AM 7 15 PM EST Sat Sun 8 00 AM 5 00 PM Western Sony will work to resolve your questions more quickly than your retailer or place of purcha...

Page 2: ...rial No For Your Convenience Please contact Sony directly if you z Have questions on the use of your television after reading your manual z Experience difficulty operating your television Contact Sony Customer Support at http www sony com tvsupport oor to speak with a support representative United States 1 800 222 SONY 7669 8 00 AM 10 00 PM EST Mon Fri 10 30 AM 7 15 PM EST Sat Sun Canada 1 877 899...

Page 3: ...te the TV only on 120 V AC s The plug is designed for safety purposes to fit into the wall outlet only one way If you are unable to insert the plug fully into the outlet contact your dealer s If any liquid or solid object should fall inside the cabinet unplug the TV immediately and have it checked by qualified service personnel before operating it further s If you will not be using the TV for seve...

Page 4: ...eceive unscrambled digital cable television programming via subscription service to a cable service provider Availability of digital cable television programming in your area depends on the type of programming and signal provided by your cable service provider Trademark Information TruSurround XT SRS and the symbol are trademarks of SRS Labs Inc TruSurround XT technology is incorporated under lice...

Page 5: ...ving the cart apparatus combination to avoid injury from tip over 13 Unplug this apparatus during lightning storms or when unused for long periods of time 14 Refer all servicing to qualified service personnel Servicing is required when the apparatus has been damaged in any way such as power supply cord or plug is damaged liquid has been spilled or objects have fallen into the apparatus the apparat...

Page 6: ...he specified manner and without the specified number of persons it may drop and a serious injury may be caused Be sure to follow the instructions mentioned below s Carry the TV with the specified number of persons see page 13 s Hold the TV tightly when carrying it s Before carrying the TV disconnect any accessories or cables About the TV Although the TV is made with high precision technology black...

Page 7: ...ipment 29 VCR and Cable 30 VCR and Cable Box 31 DVD Player with Component Video Connectors 33 DVD Player with S VIDEO and Audio Connectors 34 Personal Computer 35 Camcorder or Video Game Equipment 36 Audio Receiver 37 Watching the TV Overview 38 Inserting Batteries into the Remote Control 38 Button Descriptions 39 Programming the Remote Control 41 Using Other Equipment with Your Remote Control 43 ...

Page 8: ...ns 68 Viewing Blocked Programs 69 Selecting Custom Rating Options 69 Accessing the Setup Settings 71 Selecting Setup Options 71 Programming Caption Vision CC 74 Other Information Overview 75 Contacting Sony 75 Replacing the Lamp 76 How to Replace the Lamp 76 Troubleshooting 80 Remote Control 80 Picture 81 Sound 82 Channels 82 General 83 PC Input Signal Compatibility Chart 85 Specifications 86 Inde...

Page 9: ...smoothness Clarity Integrated HDTV You can watch digital televised programs and enjoy the improved audio video quality offered by these programs Advanced Iris Automatically detects the brightness of the screen By adjusting the iris shutter this feature can provide you with the best contrast and brightness from one scene to the next for your TV viewing MENU Sony s unique user interface provides eas...

Page 10: ...ed or high definition video plus two channel digital audio Component Video Inputs Offers a high quality video for DVD 480p 480i and digital set top box 1080i 720p 480p 480i connections S VIDEO Inputs Provides a high quality image from connected equipment Favorite Channels Allows you to navigate a list of up to 16 favorite channels without leaving the current channel Steady Sound Equalizes volume l...

Page 11: ...ker off On moisture condensation If your TV is moved directly from a cold to a warm location or is placed in a humid room or if the room temperature changes suddenly the picture may blur or show poor color This is caused by moisture condensation on the lenses inside Wait a few hours to let the moisture evaporate before turning on the TV When the condensation has evaporated the picture will return ...

Page 12: ... wears out the screen goes dark Replace the lamp with a new Sony XL 2400 replacement lamp not supplied After lamp is replaced please set the Lamp Replacement option in the Setup Settings see page 76 and 73 Indicator Flashing because POWER flashing green The lamp for the light source is preparing to turn on When it is ready the green indicator stays on red The lamp door or the lamp is not securely ...

Page 13: ...hese parts to break off When moving the TV place one hand in the hole on the lower portion of the TV while grasping the top with the other hand as shown in the illustration below If you have connected cables and cords be sure to unplug them before moving the TV Take Precaution during Installation To ensure the safety of children and the TV keep children away from the TV during installation Climbin...

Page 14: ...ng the TV stand SU RG11S for KDF 42E2000 SU RG12S for KDF 46E2000 SU RG12L for KDF 50 55E2000 with a support belt designed for your TV When Installing Your TV against a Wall Keep your TV at least 4 inches 10 cm away from the wall to provide proper ventilation Blocking the ventilation opening of the cooling fan may damage the TV When using the SU RG11S for KDF 42E2000 SU RG12S for KDF 46E2000 SU RG...

Page 15: ...lation is blocked Do not install the TV near any ventilation as it may affect the normal TV operating temperature Model Viewing distance KDF 42E2000 min 5 9 ft approx 1 8 m KDF 46E2000 min 6 2 ft approx 1 9 m KDF 50E2000 min 6 6 ft approx 2 0 m KDF 55E2000 min 6 8 ft approx 2 1 m 30 30 50 inches min 6 6 ft approx 2 0 m 46 inches min 6 2 ft approx 1 9 m 55 inches min 6 8 ft approx 2 1 m 42 inches m...

Page 16: ...000 KDF 50E2000 KDF 55E2000 2 681 559 13 1 TV Controls and Connectors Front Panel PUSH OPEN MENU TV VIDEO CANNEL VOLUME POWER TIMER LAMP POWER STANDBY PUSH OPEN POWER POWER MENU TV VIDEO CHANNEL VOLUME TIMER LAMP 2 1 5 9 3 4 6 7 8 0 0 To open the panel To open the front panel of your TV push up the panel door just under the PUSH OPEN mark ...

Page 17: ...nge indicates one of the timers is set When it is set this LED will remain lit even if the TV is turned off For details see page 72 6 LAMP LED Flashes in red when the lamp for the light source has burned out For details see Replacing the Lamp on page 76 7 POWER Lights up in green when the TV is turned on If the LED blinks in red continuously this may indicate the display unit needs servicing see c...

Page 18: ... 1 Side and Rear Panel PUSH OPEN MENU TV VIDEO CANNEL VOLUME POWER TIMER LAMP POWER STANDBY VIDEO HD DVD IN 1080i 720p 480p 480i R AUDIO L MONO VIDEO P R P B Y 2 1 3 2 1 3 4 5 6 7 S VIDEO VIDEO AUDIO L MONO R L R AUDIO Y AUDIO OUT VAR FIX PB PR L R VIDEO IN HD DVD IN 1080i 720p 480p 480i SERVICE ONLY DIGITAL AUDIO OPTICAL OUT PCM DOLBY DIGITAL VHF UHF CABLE 5 4 7 6 8 0 9 qa qs ...

Page 19: ...O IN 1 3 VIDEO L MONO AUDIO R Connects to the composite video and audio output jacks on your VCR or other video equipment A third composite video and audio VIDEO 2 is located on the left side panel of the TV 7 DIGITAL AUDIO OPTICAL OUT PCM DOLBY DIGITAL Connects to the optical audio input of a digital audio component that is PCM Dolby Digital compatible 8 HDMI IN 6 HDMI R AUDIO L HDMI High Definit...

Page 20: ...0 ohm twin lead cable can be easily affected by radio frequency resulting in signal deterioration When the antenna cable connection is done you must perform an Initial Setup so your TV will create a list of channels you can view see page 28 After you can receive and view programming you should select the proper Wide Mode setting to display the picture in your preferred aspect ratio See Changing th...

Page 21: ...he adapter you will also need to use separate audio cables for sound as DVI connector is for video signals only About Using S VIDEO If the optional equipment you are connecting has an S VIDEO jack shown at left you can use an S VIDEO cable for improved picture quality compared to an A V cable Because S VIDEO carries only the video signal you also need to connect audio cables for sound as shown bel...

Page 22: ...ll vary depending on how your home receives a signal antenna and satellite cable and cable box and whether or not you plan to connect a VCR If you are connecting a VCR See the connections described on pages 30 and 31 If You Are Connecting See Page Cable System and or VHF UHF Antenna System 23 HD Cable Box HD Satellite Box Equipment with DVI Connection Satellite Receiver and Cable Antenna Equipment...

Page 23: ...ion and standard definition digital programming if available in your area along with the standard definition analog programming To switch between the VHF UHF antenna input and the CABLE input press the ANT button on the remote control This TV is capable of receiving unscrambled digital programming for both cable QAM and 8VSB and external VHF UHF antenna ATSC Do not use an indoor antenna which is e...

Page 24: ...the back of your TV z The HDMI jack provides both video and audio signals so it is not necessary to connect an audio cable 1 3 4 5 6 7 S VIDEO VIDEO AUDIO L MONO R L R AUDIO Y AUDIO OUT VAR FIX PB PR L R VIDEO IN HD DVD IN 1080i 720p 480p 480i SERVICE ONLY DIGITAL AUDIO OPTICAL OUT PCM DOLBY DIGITAL VHF UHF CABLE OUT IN Rear of TV AUDIO R AUDIO L Y PB PR Cable Satellite HDMI cable High Definition ...

Page 25: ...the TV s HDMI IN Video 6 jack by using an HDMI to DVI cable or an adapter both not supplied When using a HDMI to DVI cable or an adapter be sure to connect the DVI output connector first then connect to the HDMI input on your TV Cables are often color coded to connectors Connect red to red white to white etc z When connecting to a DVI output audio cable must be used simultaneously for the audio si...

Page 26: ...to the satellite receiver s SATELLITE IN jack 2 Use A V and S VIDEO cables to connect the satellite receiver s AUDIO and S VIDEO OUT jacks to the TV s AUDIO and S VIDEO IN jacks 3 Use a coaxial cable to connect your cable to the TV s CABLE jack or your antenna to the TV s VHF UHF jacks If your satellite receiver is not equipped with S VIDEO use a VIDEO cable yellow instead of the S VIDEO cable 1 3...

Page 27: ...onnect all power sources before making any connections You can use the TV s DIGITAL AUDIO OPTICAL OUT jack to connect a digital audio device that is PCM Dolby Digital compatible such as an audio amplifier Using an optical audio cable connect the device s OPTICAL IN jack to the TV s DIGITAL AUDIO OPTICAL OUT jack OPTICAL IN LINE OUT L AUDIO R LINE IN DIGITAL AUDIO OPTICAL OUT PCM DOLBY DIGITAL Opti...

Page 28: ...es then press Auto Program performed through Initial Setup will automatically create a list of receivable channels from both VHF UHF antenna and cable TV channels if both sources are connected To run Auto Program at a later time 1 Select Settings in MENU and then go to Channel settings 2 Select Auto Program then select Start The Auto Program setup in the initial setup does not apply for installati...

Page 29: ...You can connect a variety of optional equipment to your TV This section provides some of the individual connections you can make For multiple connections please refer to the Quick Setup Guide If You Are Connecting See Page VCR and Cable 30 VCR and Cable Box 31 DVD Player with Component Video Connectors 33 DVD Player with S VIDEO and Audio Connectors 34 Personal Computer 35 Camcorder or Video Game ...

Page 30: ...jack of the splitter to the TV s CABLE jack 3 Use a coaxial cable to connect the splitter s other output jack to the VCR s input jack 4 Use A V and S VIDEO cables to connect the VCR s AUDIO and S VIDEO OUT jacks to the TV s AUDIO and S VIDEO IN jacks If your VCR is not equipped with S VIDEO use a VIDEO cable yellow instead of the S VIDEO cable 1 3 4 5 S VIDEO VIDEO AUDIO L MONO R Y AUDIO OUT VAR F...

Page 31: ...output of your cable box Disconnect all power sources before making any connections 1 Connect the CATV cable to the single input jack of the splitter 2 Use a coaxial cable to connect one of the output jack of the splitter to the TV s CABLE jack 3 Use a coaxial cable to connect the splitter s other output jack to the cable box s input jack 4 Use a coaxial cable to connect the cable box s output jac...

Page 32: ... PB PR L R VIDEO IN HD DVD IN 1080i 720p 480p 480i VHF UHF CABLE 6 Cable box Rear of TV A V cable Cables are often color coded to connectors Connect red to red white to white etc If you are connecting a digital cable box you will need a special bi directional splitter designed to work with your cable box A V cable S VIDEO cable CATV cable VIDEO AUDIO L AUDIO R VCR Splitter Coaxial cable VIDEO AUDI...

Page 33: ...connect the DVD player s AUDIO OUT jacks to the TV s AUDIO IN jacks Be sure to use the same row of inputs that you used for the video connection HD DVD IN 4 or 5 The YPBPR jacks on your DVD player are sometimes labeled YCBCR or Y B Y and R Y If so connect the cables to like colors 1 3 4 5 S VIDEO VIDEO AUDIO L MONO R Y AUDIO OUT VAR FIX PB PR L R VIDEO IN HD DVD IN 1080i 720p 480p 480i Component v...

Page 34: ...L MONO R VIDEO IN Cables are often color coded to connectors Connect red to red white to white etc DVD player Rear of TV A V cable S VIDEO cable S VIDEO AUDIO R AUDIO L VIDEO If your DVD player is not equipped with S VIDEO use a VIDEO cable yellow instead of the S VIDEO cable To watch a DVD press TV VIDEO repeatedly to select the DVD input VIDEO 1 in the illustration If you have a non Sony DVD pla...

Page 35: ...o use your TV as your computer monitor you can connect your PC to the TV To connect a PC personal computer You have a choice of connecting PC to the TV s HDMI 6 Input or HDMI 7 Input only with HDMI connection HDMI to DVI cable will carry digital video from your PC to TV To listen to audio from your PC you will need to connect audio cable 7 6 L R AUDIO Rear of TV To audio output jack Audio cable HD...

Page 36: ...s on the camcorder or Video Game Equipment to the AUDIO and S VIDEO IN jacks on the rear panel of the TV as shown below To connect a camcorder or Video Game Equipment to VIDEO IN 2 Select Off in the Video 2 Component option in the Setup settings see page 73 Use an A V cable to connect the A V output jacks on the camcorder or Video Game Equipment to the A V input jacks on the left side of the TV If...

Page 37: ...ved sound quality you may want to play the TV s audio through your stereo system see page 63 Disconnect all power sources before making any connections Using an audio cable connect the TV s AUDIO OUT VAR FIX jacks to the audio receiver s audio LINE IN jacks AUDIO OUT VAR FIX L R Rear of TV AUDIO L AUDIO R Audio cable Line input Cables are often color coded to connectors Connect red to red white to...

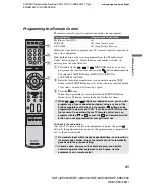
Page 38: ...ompartment Topic Page Inserting Batteries into the Remote Control 38 Button Descriptions 39 Programming the Remote Control 41 Manufacturer s Codes 42 Using Other Equipment with Your Remote Control 43 Special Buttons on the Remote Control 46 To avoid possible damage from battery leakage remove the batteries if you anticipate the remote control will not be used for an extended period Handle the remo...

Page 39: ...ff 9 SOUND Press to cycle through different sound settings Dynamic for enhanced treble and bass Standard for spoken dialog and Custom for flat setting 0 GUIDE Press to display the TV s program guide qa RETURN Press RETURN to either close the menu screen or move back to previous layer if you are in the multilayer menu item qs BD DVD DVD VCR Operating Buttons When FUNCTION is switched on BD Blu ray ...

Page 40: ...to step through the Wide Screen Mode setting The Wide Screen Mode setting can be also accessed in the Screen setting For details see Using the WIDE Button on page 49 and Wide Screen Mode for PC input on page 49 wd DISPLAY Press once to display channel number label current time and other information Press again to turn Display off See page 72 for details on setting the time wf V v B b Press V v B b...

Page 41: ...s the green button If the equipment turns on and off the programming is completed If not try the next code listed Sony Equipment Programmable Code Number BD Blu ray Disc DVD 101 DVR VCR 901 Sony Dream System SAT CABLE 801 Sony Satellite Receiver While and buttons are labeled as such you can still program any of your connected equipment using any one of the buttons regardless of the label For examp...

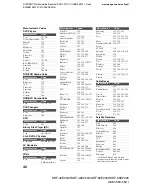
Page 42: ...lay 309 308 JC Penney 309 305 304 330 314 336 337 JVC 314 336 337 345 346 347 Kenwood 314 336 332 337 LG 332 LXI SEARS 332 305 330 335 338 Magnavox 308 309 310 Marantz 314 336 337 Marta 332 Memorex 309 335 Minolta 305 304 Mitsubishi MGA 323 324 325 326 Multitech 325 338 321 NEC 314 336 337 Olympic 309 308 Optimus 327 Orion 317 Panasonic 308 309 306 307 Pentax 305 304 Philco 308 309 Philips 308 309...

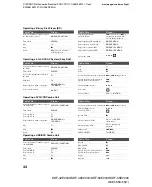
Page 43: ...Press To Do This Press Activate the remote control to operate the satellite receiver SAT CABLE FUNCTION Display channel number DISPLAY Turn on off POWER Display SAT Guide GUIDE Select a channel 0 9 ENT Display SAT Menu MENU Change channels CH Move highlight cursor V v B b Back to previous channel JUMP Select item To Do This Press To Do This Press Activate the remote control to operate the VCR DVR ...

Page 44: ... off POWER Pause X Select other equipment connected to the DAV F1 Search the picture forward or backward M or m during playback Disk skip F2 Specify the previous chapter track Specify the next chapter track Display the disc menu or top menu BD DVD MENU or TOP MENU Move highlight cursor V v B b Select a track directly 0 9 ENT Select item Master volume VOL MUTING To Do This Press To Do This Press Ac...

Page 45: ...ht cursor and select V v B b To Do This Press To Do This Press To Do This Press To Do This Press Activate the remote control to operate the DVR DVR VCR FUNCTION Jump forward to the next available chapter Turn on off POWER Stop x Play H Pause X Jump back while viewing live or record programs REPLAY Record z Slow mode m m press lightly Record Stop x Jump forward while viewing recorded programs Recor...

Page 46: ...e The TOOLS button is also available while in PC input mode The Tools menu items are different from your TV and other video inputs Alternate Audio is only available in TV mode when the program is broadcasted with an alternate audio Add to Favorites is available for TV mode only Close Picture Mode Sound Mode Wide Mode Add to Favorites Caption Vision CC Menu Item Reference pages Close Picture Mode s...

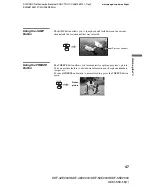
Page 47: ...n The JUMP button allows you to jump back and forth between the current channel and the last channel that was selected Using the FREEZE Button The FREEZE button allows you to temporarily capture a program s picture You can use this feature to write down information such as phone numbers recipes etc To cancel FREEZE and return to normal viewing press the FREEZE button again Previous channel JUMP FR...

Page 48: ...hen available you will see the alternate audio options as shown in the illustration above This option allows you to switch among these alternate audio streams The program you are watching may be broadcast in a different language Subchannels are additional channels of programming broadcast simultaneously For example channel 4 might include three subchannels 4 1 4 2 4 3 that are showing programs at ...

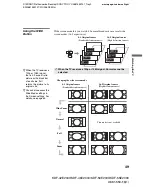
Page 49: ... Mode Full Wide Mode Zoom 16 9 Original source High definition source 4 3 Original source Standard definition source WIDE When the TV receives a 720p or 1080i signal Normal cannot be selected z When the TV receives a 720p or 1080i signal that is 4 3 aspect ratio picture with a black bar at each side Full returns the picture to its original size z You can also access the Wide Mode settings in the S...

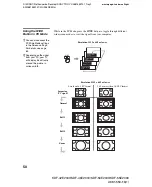
Page 50: ...n modes to view the signal from your computer z You can also access the PC Wide Mode settings in the Screen settings For details see page 64 z Depending on the signal from your PC your TV will display black frame around the picture in various width PC Wide Mode Normal PC Wide Mode Full 1 PC Wide Mode Full 2 PC Wide Mode Zoom Resolution 1152 x 648 or lower WIDE Resolution 1152 x 648 or lower Less t...

Page 51: ...0E2000 KDF 55E2000 2 681 559 13 1 PC Wide Mode Full 1 PC Wide Mode Full 2 PC Wide Mode Zoom Resolution higher than 1152 x 648 Less than 16 9 PC format 16 9 or more than 16 9 PC format Incoming PC signal Normal Full 1 Full 2 Zoom This mode is not available WIDE Resolution higher than 1152 x 648 This mode is not available Using the WIDE Button in PC Mode continued ...

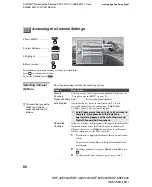
Page 52: ...ol panel on the screen rather than a variety of remote control button presses When you press the button you can select from basic TV functions External Inputs Favorites Cable Antenna or adjust TV settings R E T U R N T O O L S VISUAL SEARCH PAUSE PLAY STOP CH VOL G U I D E DISPLAY REPLAY ADVANCE NEXT PREV MUTING MENU 1 Press MENU on the remote MENU control panel appears 2 Press V v to highlight th...

Page 53: ...your equipment or skip unused inputs conveniently For details see page 54 Favorites The Favorites feature lets you select programs from a list of up to 16 favorite channels that you specify For details see page 54 Cable The Cable feature displays the most recently viewed channel on the cable input Antenna The Antenna feature displays the most recently viewed channel on the antenna input Settings T...

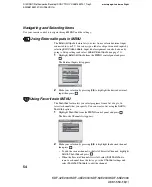
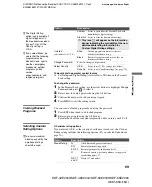
Page 54: ...tion by pressing M m to highlight the desired external input then press Using Favorites in MENU The Favorites feature lets you select programs from a list of up to 16 favorite channels that you specify You can create a list using the Add to Favorites option 1 Highlight Favorites from the MENU control panel and press The Favorite Channels list appears 2 Make your selection by pressing M m to highli...

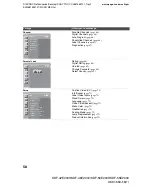
Page 55: ...n the antenna input Highlight Antenna from the MENU control panel and press C C If you have not completed the initial channel setup see page 28 both Cable and Antenna will tune to the lowest channel number To run Auto Program see page 66 Regularly Scheduled Programming No program information is available 0 24 Remaining KNSD WX C39 2 TV G CC CC V S L D 1080i 16 9 Alt Audio If you have not completed...

Page 56: ... you enter to the settings screen where most of advanced settings and adjustments are performed See Overview on page 57 Navigating Through Settings The Settings screen provides access to the features 1 Press 2 Select 3 Highlight the item Picture Sound Screen Channel Parental Lock Setup 4 Press to select an option To exit Settings press The options you can adjust vary depending on the situation Una...

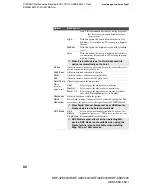
Page 57: ...ise Reduction page 60 DRC Mode page 60 DRC Palette page 61 Advanced Settings page 61 Sound Sound Mode page 62 Reset page 62 Treble page 62 Bass page 62 Balance page 62 Steady Sound page 62 Volume Offset page 62 Surround page 62 BBE page 62 MTS page 63 Alternate Audio page 63 Speaker page 63 Audio Out page 63 A V Sync page 63 Screen Wide Mode page 64 PC Wide Mode page 64 Auto Wide page 65 4 3 Defau...

Page 58: ...e 69 Setup Caption Vision CC page 71 Info Banner page 71 Label Video Inputs page 71 Clock Timers page 72 Language page 72 Video 2 Component page 73 Menu Color page 73 CineMotion page 73 Cooling Mode page 73 Lamp Replacement page 73 Product Information page 73 Settings Allows you to set change Antenna Channel Exit Digital Channels Auto Program Show Hide Channels Label Channels Diagnostics Favorite ...

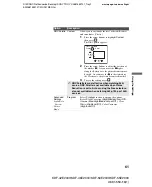
Page 59: ...om Select to display a picture with minimum enhancements You can alter the Picture settings Picture Brightness Color etc for each Picture Mode and each video input You may set up a Picture Mode Vivid Standard Custom independently for each Video input Video 1 to Video 7 including the Antenna input Your Picture Mode settings are automatically saved after each selection This allows you to customize t...

Page 60: ... picture Color Adjust to increase or decrease color intensity Hue Adjust to increase or decrease the green tones Color Temp White intensity adjustment Choose from four color temperatures Cool Select to give the white colors a blue tint Neutral Select to give the white colors a neutral tint Warm 1 2 Select to give the white colors a red tint Available only when Picture Mode is set to Custom Sharpne...

Page 61: ...ong the Reality axis the picture becomes more detailed As you move the z to the right along the Clarity axis the picture becomes smoother 3 To save the setting press DRC Palette is most effective when watching 480i source DRC Palette is not available when Noise Reduction is set to Auto or using the Freeze feature also not available when watching 480p 720p or 1080i sources Advanced Settings Availab...

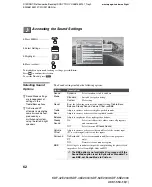
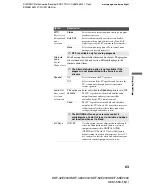
Page 62: ...ss Balance Steady Sound Volume Offset and BBE Treble Adjust to increase or decrease higher pitched sounds Bass Adjust to increase or decrease lower pitched sounds Balance Adjust to emphasize left or right speaker balance Steady Sound On Select to stabilize the volume across all programs and commercials Off Select to turn off Steady Sound Volume Offset Adjust to increase or decrease the sound level...

Page 63: ...reams Speaker On Select to turn on the TV speakers Off Select to turn off the TV speakers and listen to the TV s sound only through your external audio system speakers Audio Out This option can be set only when the Speaker option is set to Off Easy control of volume adjustments Variable The TV s speakers are turned off and the audio output from your audio system can still be controlled by the TV s...

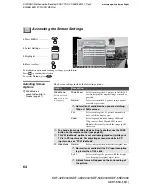
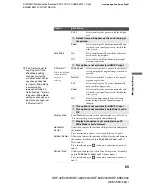
Page 64: ... keeping the original image as much as possible Normal Select to return the 4 3 picture to its original size and aspect ratio Normal is not available when you are watching 720p or 1080i sources Full Select to enlarge the 4 3 picture horizontally only to fill the display area Zoom Select to proportionally enlarge 1080i and 720p sources For 480p and 480i sources Zoom will vertically stretch the imag...

Page 65: ...ills the wide screen Off Select to continue using the current screen mode setting when the channel or input is changed This option is not available for HDMI PC input This option is not available if Auto Wide is set to Off Display Area Select Normal to return to the default display area Select 1 or 2 to enlarge the picture vertically and horizontally Display Area option is not available when PC Wid...

Page 66: ... MENU on page 54 Digital Channels Add Select to add digital channels Auto Program Automatically sets up the channel list on the TV for all receivable channels for the current input VHF UHF or CABLE Select to start the Auto Program Auto Program may take up to 20 to 50 minutes to complete A progress bar will display the approximate progress of the Auto Program and Digital Channels Add sequences Show...

Page 67: ...hannel that digital channel is automatically set to Hidden Label Channels Allows you to assign labels such as station call letters to channel numbers 1 Press V or v to scroll through the channel numbers Then press to select the channel number that you want to assign a label 2 Press V or v to scroll through the label characters A Z 0 9 etc Then press to select the highlighted character Repeat to ad...

Page 68: ...ettings can be accessed for the first time This password is required for any future access to the Parental Lock settings If you have lost your password see Lost password on page 83 Option Description Rating Turn ratings on off and select a rating system Off Turn Parental Lock off No programs are blocked from viewing See below for turning off the Digital Rating Child Maximum ratings permitted are U...

Page 69: ...omize the Parental Lock with downloadable digital ratings Clear All Select to clear the downloaded ratings This icon will appear on the information banner indicating the availability of the new downloadable rating information for Custom Digital Rating settings Unrated available only in U S A Allow Allows programs and movies that are broadcast without a rating Block Blocks all programs and movies t...

Page 70: ... MA Mature audience only Content Based Options FV Fantasy violence D Suggestive dialog L Strong language S Sexual situations V Violence The content ratings will increase depending on the level of the age based rating For example a program with a TV PG V Violence rating may contain moderate violence while a TV 14 V Violence rating may contain more intense violence Option Description English Rating ...

Page 71: ... broadcast with closed captioning On Caption Vision is turned on Off Caption Vision is turned off Program Allows you to set basic and advanced Caption Vision options See Programming Caption Vision CC on page 74 Info Banner Set to On or Off Select On to display the program name time remaining and other information if the broadcaster offers this service Also displays when the channel is changed or t...

Page 72: ...1 or Timer 2 To set the timer press b To go directly to programming Timer 1 or 2 press instead of pressing b 2 Press V or v to highlight one of the following options then press Program Select to set the Timer by day time duration and channel Off Select to turn off the Timer Your previous settings are saved 3 If you selected Program in step 2 press V and v to set the day s hour minute AM PM duratio...

Page 73: ...c color for the on screen settings CineMotion Select Auto to optimize the screen display automatically detecting film content and applying a reverse 3 2 pulldown process Moving pictures will appear clearer and more natural looking Select Off to disable the detection Cooling Mode Select High to use the TV at an altitude of 5 000 feet 1 500m or higher Select Normal to use the TV at normal altitude L...

Page 74: ...grams Text1 Text2 Text3 Text4 Displays network station information presented using either half or the whole screen if available Digital CC Allows you to set digital closed captioning to Basic or Advanced Advanced Allows you to select advanced digital closed caption options Select from the available options Advanced Settings Allows you to make additional settings for digital closed caption options ...

Page 75: ...ng these operating instructions you have additional questions related to the use of your Sony television please contact our Customer Information Services Center Before calling Sony customer support please write down the model and serial numbers of your TV Topic Page Contacting Sony 75 Replacing the Lamp 76 Troubleshooting 80 PC Input Signal Compatibility Chart 85 Specifications 86 Optional accesso...

Page 76: ...he lamp has been removed When the lamp eventually burns out you may hear a noticeable pop sound This is normal and it is inherent to this type of lamp In rare instances the bulb may pop inside the lamp unit but the lamp unit is designed to contain all of the broken glass pieces inside the lamp unit This television s lamp contains mercury and should be disposed of properly Consult your local author...

Page 77: ...oor Turn the knob counterclockwise to OPEN and pull out the cover 6 Pull out the lamp Hook a finger through the loop of the lamp handle and pull the handle upwards Then pull the lamp straight out The lamp is very hot immediately after use Never touch the glass portion of the lamp or the surrounding parts After the used lamp has cooled place it into the empty box of the replacement lamp Never put t...

Page 78: ... to CLOSE and secure the cover 9 Put the outside lamp cover back in its place 10 Select the Lamp Replacement option MENU Settings Setup menu and follow the on screen procedure If the lamp is not securely reattached the self diagnostic function may be triggered and the POWER indicator flashes three times see page 12 Consult your Sony dealer for a Sony XL 2400 replacement lamp Take great care when r...

Page 79: ...l of this product may be regulated if sold in the United States For disposal or recycling information please contact your local authorities or the Electronics Industry Alliance http www eiae org Do not leave the used lamp near flammable materials or within the reach of children Do not pour water onto the used lamp or put any object inside the lamp Doing so may cause the lamp to burst For replaceme...

Page 80: ...mperature Warning message appears turn off the TV and wait until the TV s projection lamp cools down approximately 5 minutes If the remote control still does not work make sure to dust the ventilation slots on the rear of the TV and the cooling fan to provide adequate ventilation around the TV Cannot change channels with the remote control If you are using the TV to change channels first press TV ...

Page 81: ...cars neon signs or hair dryers Double images Using a highly directional outdoor antenna or a cable may solve the problem Black box on screen You have selected a text option in the Setup setting and no text is available See page 71 to reset Setup selections To turn off this feature set the Caption Vision CC option to Off If you were trying to select closed captioning select CC1 instead of Text 1 4 ...

Page 82: ...itch to Mono which may reduce background noise during weak stereo broadcasts Cannot raise the volume on external speakers If the Speaker option is set to Off and the Audio Out option is set to Fixed in order to output the sound to your audio system use your audio receiver to adjust the sound see page 63 Or to use the TV remote control set the Audio Out option to Variable To turn on the TV speakers...

Page 83: ...Replace the lamp see page 76 Digital cable box does not work If you are connecting a VCR and digital cable box using a splitter as described on page 31 you must use a special bi directional splitter that is designed to work with your digital cable box Contact your cable provider for details Cannot record digital channels to VCR Only analog channels can be recorded to your VCR TV cabinet creaks Whe...

Page 84: ... is power off This is due to the strong light reflecting off the TV screen and reflections coming behind the screen This is a structural property of the projection TV and is not a defect Position your TV away from such light sources Lamp Replacement message appears It is time for you to replace the projection lamp used in you TV Turn to page 76 on How to Replace the Lamp and follow the direction o...

Page 85: ...5 720 x 400 31 5 70 SVGA 800 x 600 35 2 56 800 x 600 37 9 60 800 x 600 46 9 75 800 x 600 48 1 72 XGA 1024 x 768 48 4 60 1024 x 768 56 5 70 1024 x 768 60 75 WXGA 1280 x 768 47 4 60 1280 x 768 47 8 60 1152 x 648 40 3 60 CVT This TV does not support Sync on Green or Composite Sync If a signal other than in the above chart is input it may not be displayed properly or may not be displayed as you set Fo...

Page 86: ... Channel Coverage Terrestrial analog 2 69 Cable TV analog 1 125 Terrestrial digital 2 69 Cable TV digital 1 135 Number of Inputs Outputs HDMI IN 2 Video 1080i 720p 480p 480i PC 1 Audio Two channel linear PCM 32 44 1 and 48 kHz 16 20 and 24 bit Video IN 3 total 1 on side panel 1 Vp p 75 ohms unbalanced sync negative S Video IN 1 Y 1 Vp p 75 ohms unbalanced sync negative C 0 286 Vp p Burst signal 75...

Page 87: ...2S for KDF 46E2000 SU RG12L for KDF 50 55E2000 Lamp XL 2400 Ultra High Pressure Lamp Dimensions W H D KDF 42E2000 999 722 357 mm 39 3 8 28 1 2 14 1 8 inches KDF 46E2000 1096 766 382 mm 43 1 4 30 1 4 15 1 8 inches KDF 50E2000 1184 827 408 mm 46 5 8 32 5 8 16 1 8 inches KDF 55E2000 1301 907 442 mm 51 1 4 35 3 4 17 1 2 inches Mass KDF 42E2000 25 3 kg 55 8 lb KDF 46E2000 27 kg 59 5 lb KDF 50E2000 29 3...

Page 88: ...hannel Show Hide 66 Channels Auto Program 66 creating labels 67 CineMotion 9 73 Clear White 61 Clock Timers 72 Closed caption modes 71 Color Temp adjusting 60 Color adjusting 60 Connecting Audio receiver 37 Camcorder 36 DVD player 33 34 Personal Computer 35 VCR 30 32 Cooling Mode 73 D Diagnostics 67 Digital Channels 66 Digital Rating 68 Digital subchannels 48 Display Area 65 DISPLAY button 40 Disp...

Page 89: ...ck described 19 Satellite receiver using with remote control 43 Screen settings 57 64 Select Country 69 Settings Channel 58 66 Parental Lock 58 68 Picture 57 59 Screen 57 64 Setup 58 71 Sound 57 62 Settings MENU 53 56 Setup settings 58 71 Sharpness adjusting 60 Show Hide Channels 66 Sound Mode 62 Sound settings 57 62 Speaker 17 63 Specifications 86 87 Steady Sound adjusting 62 described 10 Support...

Page 90: ......

Page 91: ......

Page 92: ...e difficulty operating your television Contact Sony Customer Support at http www sony com tvsupport or to speak with a support representative United States Canada 1 800 222 SONY 7669 1 877 899 SONY 7669 8 00 AM 10 00 PM EST Mon Fri 8 00 AM 6 00 PM Eastern 10 30 AM 7 15 PM EST Sat Sun 8 00 AM 5 00 PM Western Sony will work to resolve your questions more quickly than your retailer or place of purcha...

Reviews: