– 11 –
KDS-R60XBR2/R70XBR2
RM-YD009
RM-YD009
TABLE OF CONTENTS
Section
Title
Page
––––––
––––
––––
Section
Title
Page
––––––
––––
––––
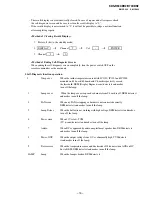
1. SELF DIAGNOSIS FUNCTION
.....................
13
2. DISASSEMBLY
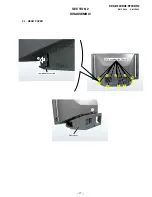
2-1.
Rear Cover ..........................................................
17
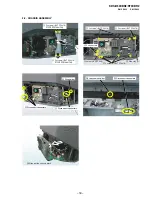
2-2.
Chassis Assembly ...............................................
18
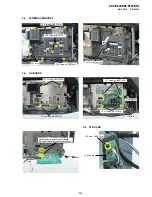
2-3.
Terminal Bracket ................................................
19
2-4.
UG Board ............................................................
19
2-5.
S1 Board .............................................................
19
2-6.
QM, QT Boards ..................................................
20
2-7.
AU, B2 Boards, GBlock Assembly ...................
21
2-8.
G, H3U, PH Board .............................................
22
2-9.
DC Motor SFF21C/C-NP ...................................
22
2-10. Power Supply Block ...........................................
23
2-11. DC Motor SFF25A/C-NP ..................................
23
2-12. DC Motor SFF24A/C-NP ..................................
24
2-13. Cover Unit ..........................................................
24
2-14. Lamp Guide (F) ..................................................
25
2-15. Screen Frame Block Assembly ..........................
25
2-16. H1 Board .............................................................
27
2-17. Optics Block Assembly ......................................
27
2-18. Mirror Cover Block Assembly ...........................
28
2-19. T1,S2 Board ........................................................
28
2-20. Notes on Harness Arranemens ...........................
29
3. ELECTRICAL ADJUSTMENTS
3-1.
Electrical Adjustment by Remote Commander ....
30
3-1-1. Method of Setting the Service Adjustment
Mode ...............................................................
30
3-1-2. Service Mode Adjustment ............................
30
3-1-3. Memory Write Confirmation Method ..........
30
3-1-4. Adjusting Buttons and Indicator ...................
31
3-2.
Test Reset ...........................................................
31
3-3.
H/V Center Confirmation and Adjustment ........
31
3-3-1. Adjustment .....................................................
31
3-4.
Registration Adjustment ....................................
32
3-5.
Picture Distortion Correction Mechanism
(R70XBR2) .........................................................
32
3-5-1. Preparation ....................................................
32
3-5-2. V-TRAP Correction 1 ...................................
33
3-5-3. V-TRAP Correction 2 ...................................
33
3-5-4. Picture Rotation Correction 1 .......................
33
3-5-5. Picture Rotation Correction 2 .......................
33
4. DIAGRAMS
4-1.
Block Diagram (1) ..............................................
34
Block Diagram (2) ..............................................
35
Block Diagram (3) ..............................................
36
Block Diagram (4) ..............................................
37
Block Diagram (5) ..............................................
38
Block Diagram (6) ..............................................
39
Block Diagram (7) ..............................................
40
Block Diagram (8) ..............................................
41
Block Diagram (9) ..............................................
42
Block Diagram (10) ............................................
43
Block Diagram (11) ............................................
44
Block Diagram (12) ............................................
45
Block Diagram (13) ............................................
46
Block Diagram (14) ............................................
47
Block Diagram (15) ............................................
48
Block Diagram (16) ............................................
49
4-2.
Frame Schematic Diagram .................................
50
4-3.
Circuit Boards Location .....................................
51
4-4.
Schematic Diagrams ...........................................
51
(1)
Schematic Diagram of AU (1/5) Board .............
52
(2)
Schematic Diagram of AU (2/5) Board ............
53
(3)
Schematic Diagram of AU (3/5) Board ............
54
(4)
Schematic Diagram of AU (4/5) Board ............
55
(5)
Schematic Diagram of AU (5/5) Board ............
56
(6)
Schematic Diagram of B2 (1/11) Board ...........
57
(7)
Schematic Diagram of B2 (2/11) Board ...........
58
(8)
Schematic Diagram of B2 (3/11) Board ...........
59
(9)
Schematic Diagram of B2 (4/11) Board ...........
60
(10) Schematic Diagram of B2 (5/11) Board ...........
61
(11) Schematic Diagram of B2 (6/11) Board ............
62
(12) Schematic Diagram of B2 (7/11) Board ............
63
(13) Schematic Diagram of B2 (8/11) Board ...........
64
(14) Schematic Diagram of B2 (9/11) Board ...........
65
(15) Schematic Diagram of B2 (10/11) Board ..........
66
(16) Schematic Diagram of B2 (11/11) Board .........
67
(17) Schematic Diagram of C (1/11) Board .............
68
(18) Schematic Diagram of C (2/11) Board .............
69
(19) Schematic Diagram of C (3/11) Board .............
70
(20) Schematic Diagram of C (4/11) Board .............
71
(21) Schematic Diagram of C (5/11) Board ..............
72
(22) Schematic Diagram of C (6/11) Board ..............
73
(23) Schematic Diagram of C (7/11) Board .............
74
(24) Schematic Diagram of C (8/11) Board .............
75
(25) Schematic Diagram of C (9/11) Board ..............
76
(26) Schematic Diagram of C (10/11) Board ...........
77
(27) Schematic Diagram of C (11/11) Board ...........
78
(28) Schematic Diagram of G (1/2) Board ................
79
(29) Schematic Diagram of G (2/2) Board ................
80
(30) Schematic Diagram of H1 Board (R60XBR2) ..
81
(31) Schematic Diagram of H2AU Board
(R60XBR2) .........................................................
82
(32) Schematic Diagram of H2B Board (R70XBR2)
83
(33) Schematic Diagram of H3U Board ....................
84
(34) Schematic Diagram of H4 Board (R70XBR2) ..
85
(35) Schematic Diagram of PH Board .......................
86


