background image

53

Advanced Operations

CCD-TR2300/TR3300    3-856-204-23 (1)

When shooting a very bright subject

A vertical band (smear) may appear on the screen if the shutter speed is set too high.

To select the best shutter speed

Shutter speed

1/725 – 1/10000

1/125 – 1/500

1/100

1/90

Subject

• A golf swing or tennis match in fine weather (to view the hit ball

clearly in still picture mode, set to 1/1000 to 1/4000)

• A landscape shot from a moving car
• A moving roller coaster in overcast days
• An athletic scene, marathon, etc.

• Indoor sports
• Replacement for the ND2 filter (to have the exposure)
• Recording pictures with less flicker under a fluorescent lamp

• In sunny weather (to avoid an out-of-focus picture due to a small

aperture)

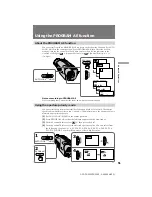
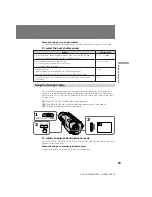
Using the twilight mode

You can record a bright subject in a dark place without ruining the atmosphere. The
aperture is automatically adjusted to maintain the appropriate exposure. The shutter
speed is fixed at 1/60. This mode is effective when you record night views, neon signs
or fireworks.

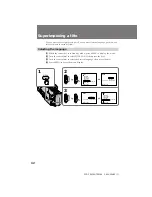
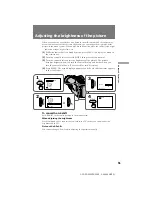
(

1

)

Set AUTO LOCK/HOLD to the center position.

(

2

)

Press PROGRAM AE so that the indicator appears in the viewfinder.

(

3

)

Turn the control dial to select 

Å

 indicator.

To return to automatic adjustment mode

Set AUTO LOCK/HOLD to AUTO LOCK, or press PROGRAM AE so that no indicator
appears in the viewfinder.

When shooting an excessively bright subject

Autofocus may not work effectively. Focus manually then.

2

PROGRAM

A E

1

3

AUTO LOCK

HOLD

Summary of Contents for Handycam CCD-TR2300

Page 1: ...rating the unit please read this manual thoroughly and retain it for future reference Owner s record The model and serial numbers are located on the bottom Record the serial number in the space provided below Refer to these numbers whenever you call upon your Sony dealer regarding this product Model No CCD Serial No Model No AC Serial No CCD TR3300 ...

Page 2: ...tes only For the Sony Factory Service Center nearest you call 416 499 SONY Canada only Caution Do not handle damaged or leaking lithium ion battery For the customers in the U S A WARNING This equipment has been tested and found to comply with the limits for a Class B digital device pursuant to Part 15 of the FCC Rules These limits are designed to provide reasonable protection against harmful inter...

Page 3: ...the START STOP mode 41 Superimposing a title 42 Making your own original titles 45 Releasing the STEADY SHOT function 46 Checking the tape condition before recording ORC 47 for manual adjustment Selecting automatic manual adjustment modes 48 Focusing manually 49 Using the PROGRAM AE function 51 About the PROGRAM AE function 51 Using the aperture priority mode 51 Using the shutter priority mode 52 ...

Page 4: ... video tapes and other materials may be copyrighted Unauthorized recording of such materials may be contrary to the provision of the copyright laws Precautions on camcorder care Do not let sand get into the camcorder When you use the camcorder on a sandy beach or in a dusty place protect it from the sand or dust Sand or dust may cause the unit to malfunction and sometimes this malfunction cannot b...

Page 5: ...r than Canadian model and CCD TR2300 4 CR2025 Lithium Battery 1 p 76 The lithium battery is already installed in your camcorder 5 Size AA R6 battery for Remote Commander 2 p 94 6 A V connecting cable 1 p 16 17 7 Shoulder strap 1 p 96 8 Battery case 1 p 24 9 Lens cap 1 p 10 64 This lens cap is already set on your camcorder º Edit Commander Station Edit Station 1 and Remote Commander 1 supplied with...

Page 6: ...e surface of the battery pack indicated by the z mark with the edge of the terminal shutter of the AC power adaptor Then fit and slide the battery pack in the direction of the arrow The CHARGE lamp orange lights up Charging begins When charging is completed the CHARGE lamp goes out If the battery pack is used right after the CHARGE lamp goes out it will last for a normal period normal charge If al...

Page 7: ...g time1 110 95 245 220 min Typical recordng time2 65 55 145 130 min The available time for a fully charged battery is indicated outside parentheses The available time for normal charged battery is indicated in parentheses Battery life will be shorter if you use the camcorder in a cold environment 1 Approximate continuous recording time indoors 2 Approximate minutes when recording while you repeat ...

Page 8: ...e minute reconnect the power cord again You cannot operate the camcorder using the AC power adaptor while charging the battery pack When a fully charged battery pack is installed the CHARGE lamp will light once then go out Installing the battery pack Align the grooves of the battery pack with the receptacles of the camcorder and slide the battery pack down until it catches on the battery release l...

Page 9: ...rtment by pressing the PUSH mark on the cassette compartment The cassette compartment automatically goes down To eject the cassette While pressing the small blue button on the EJECT switch slide it in the direction of the arrow To prevent accidental erasure Slide the tab on the cassette to expose the red mark If you insert the cassette with the red mark exposed and close the cassette compartment t...

Page 10: ...battery power the picture in the viewfinder appears only when you bring your face close to the viewfinder with STANDBY up Finder power save 1 Remove the lens cap 2 While pressing the small green button on the POWER switch set it to CAMERA 3 Turn STANDBY up 4 Press START STOP The camcorder starts recording The REC indicator appears and the red lamp lights up in the viewfinder The camera recording b...

Page 11: ...gain To start recording press START STOP Notes on recording mode This camcorder records and plays back in SP standard play mode and in LP long play mode The playback quality in LP mode however will not be as good as that in SP mode In LP mode you cannot record tapes in the Hi8 system When a tape recorded on this camcorder in LP mode is played back on other types of 8 mm camcorders or VCRs the play...

Page 12: ...m indoors to outdoors or vice versa Turn STANDBY up and point the camcorder at a white object for about 15 seconds so that the white balance is properly adjusted Using the zoom feature Zooming is a recording technique that lets you change the size of the subject in the scene For more professional looking recordings use the zoom function sparingly T side for telephoto subject appears closer W side ...

Page 13: ...uality deteriorates as you go toward the T side If you do not want to use the digital zoom set the D ZOOM function to OFF in the menu system The right side a in the power zoom indicator shows the digital zooming zone and the left side b shows the optical zooming zone If you set the D ZOOM function to OFF the a zone disappears a b T W T W ...

Page 14: ...rder When attaching a non Sony tripod make sure that the length of the tripod screw is less than 9 32 inch 6 5 mm Otherwise the screw may damage the inner parts of the camcorder If you wear glasses You can bend back the eyecup to get a better view of viewfinder c Cautions on the viewfinder Do not pick up the camcorder by the viewfinder d Do not place the camcorder so as to point the viewfinder tow...

Page 15: ...f the recorded portion play back Rec Review Hold down the side of EDITSEARCH until the camcorder goes back to the scene you want The last recorded portion is played back To go forward hold down the side Edit Search To stop playback Release EDITSEARCH To begin re recording Press START STOP Re recording begins from the point you released EDITSEARCH Provided you do not eject the tape the transition b...

Page 16: ...If you are going to connect the camcorder using the S video cable not supplied a you do not need to connect the yellow video plug of the A V connecting cable b If you use a monaural A V connecting cable you will get monaural sound If you connect directly to TV Open the jack cover and connect the camcorder to the inputs on the TV by using the supplied A V connecting cable Set the TV VCR selector on...

Page 17: ...he VCR to LINE Set the TV VCR selector on the TV to VCR If you are going to connect the Edit Station using the S video cable not supplied a you do not need to connect the yellow video plug of the A V connecting cable b If you connect directly to TV Connect the Edit Station to the inputs on the TV using the supplied A V connecting cable Set the TV VCR selector on the TV to VCR If your VCR or TV is ...

Page 18: ...he camcorder to OFF 5 Aligning the bottom of the camcorder with the arrow mark on the Edit Station slide the camcorder along the guide until it clicks 6 Set the POWER switch of the camcorder to VTR Caution Do not set the POWER switch to CAMERA The Edit Station can be used only for VTR mode To remove the camcorder 1 Set the POWER switch of the camcorder to OFF 2 While pressing HANDYCAM RELEASE on t...

Page 19: ...mote Commander insert the size AA R6 batteries Using the Edit Station CCD TR3300 for Canadian model only You can control playback using the buttons and jog dial on the Edit Station To use the jog dial turn the shuttle ring clockwise or counterclockwise to point the desired indication around the ring When using the Remote Commander with the Edit Station set COMMAND MODE on the Edit Station to VTR 2...

Page 20: ...double speed playback in the forward direction press 7 then press x2 during playback To resume normal playback press To view the picture frame by frame Press or 7 on the Remote Commander in playback pause mode If you keep pressing the button you can view the picture at 1 25 speed To resume normal playback press To change the playback direction Press on the Remote Commander for reverse direction or...

Page 21: ...twice To display the time when you recorded Press TIME on the camcorder or press DATA CODE on the Remote Commander twice To make the time disappear press it again When bars appear A blank portion of the tape is being played back The tape was recorded by a camcorder without the Data Code function The tape was recorded by a camcorder without having date and time set The tape is unreadable due to tap...

Page 22: ... 24 V car battery Choose the appropriate power source depending on where you want to use your camcorder Place Indoors Outdoors In the car CCD TR3300 for Canadian model only Edit Station HSA EC1 cannot be used for camera recording Note on power sources Disconnecting the power source or removing the battery pack during recording or playback may damage the inserted tape If this happens restore the po...

Page 23: ...her to the camcorder Both are charged simultaneously When charged both lamps go out normal charge If either lamp is still lit both batteries are not charged the NP F530 battery packs require about 240 minutes for a full charge and about 180 minutes for a normal charge You can also charge the battery pack in either of the above two ways by connecting the AC power adaptor to the Edit Station and set...

Page 24: ...300 120 min 70 min Notes on the battery life You may not use the battery case in cold environment The battery life may be shorter depending on the using environment The battery lives on the previous page are estimates the battery life may be shorter depending on the storage condition of the battery before being purchased and temperature To remove the battery case The battery case is removed in the...

Page 25: ...A and VTR modes COUNTER NORMAL TIME CODE Normally select NORMAL Select TIME CODE to display the RC time code in order to edit more precisely COMMANDER ON OFF Select ON when using the supplied Remote Commander for the camcorder Select OFF when not using the Remote Commander BEEP ON OFF Select ON so that beeps sound when you start stop recording etc Select OFF when you do not want to hear the beep s...

Page 26: ...matically adjust the recording condition to get the best possible recording REC MODE SP LP Select SP when recording in SP standard play mode Select LP when recording in LP long play mode D ZOOM ON OFF Select ON to activate digital zooming Select OFF to not use the digital zoom The camera goes back to 21x zoom REC LAMP ON OFF Select OFF when you do not want the camera recording battery lamp at the ...

Page 27: ...pe TBC ON OFF Select ON to correct for jitter Select OFF to not correct for jitter The picture may not be steady when you playback DNR ON OFF Select ON to reduce picture noise Select OFF to not reduce noise These settings are retained even when the battery is removed as long as the lithium battery is in place Note on TBC setting Set TBC to OFF when playing back A tape you have dubbed over A tape o...

Page 28: ...the date or time indicator no indicator in the viewfinder is recorded The clock is set to East Coast Standard Time at the factory You can reset the clock in the menu system To stop recording with the date or time Press DATE or TIME again The date or time indicator disappears The recording continues Note on the date or time indicator If you press DATE or TIME while you are recording in CINEMA mode ...

Page 29: ... TR3300 or FADER only for CCD TR2300 The fade indicator starts flashing 2 Press START STOP to start recording The fade indicator stops flashing When fading out b 1 During recording press FADER OVERLAP only for CCD TR3300 or FADER only for CCD TR2300 The fade indicator starts flashing 2 Press START STOP to stop recording The fade indicator stops flashing and then recording stops Note on fade indica...

Page 30: ...R2300 until the fade indicator disappears When the date or time indicator is displayed The date or time indicator does not fade in or fade out Note on fade in fade out Fade in fade out function is cancelled after executing this function When the title is displayed You cannot use the FADER function When FADER is set you cannot superimpose a title Fade in and fade out ...

Page 31: ... You cannot use the following functions while using the overlap function Also while using the following functions you cannot use the overlap function Digital effect Slow shutter Title When you select the overlap function after using the following operations the camcorder memorizes the image on the tape As the image is being memorized the OVERLAP indicator flashes quickly and the picture you are sh...

Page 32: ...se the following functions while using the wipe function Also while using the following functions you cannot use the wipe function Digital effect Slow shutter Title You can select wipe during recording When you select the wipe function after using the following operations the camcorder memorizes the image on the tape As the image is being memorized the WIPE indicator flashes quickly and the pictur...

Page 33: ...cture is mosaic SOLARIZE b The light intensity is more clear and the picture looks like an illustration B W The picture is monochrome black and white SEPIA The picture is sepia NEG ART c The picture is reversed PASTEL d The contrast of the picture is emphasized and the picture looks like an animated cartoon SLIM e The picture expands vertically STRETCH f The picture expands horizontally a b c f e ...

Page 34: ... turn off picture effect Press PICTURE EFFECT to highlight the picture effect indicator and press the button again The indicator in the viewfinder goes out Note on the picture effect When you turn the power off the camcorder returns automatically to normal mode 1 2 PICTURE EFFECT MOSAIC SOLARIZE B W SEPIA NEG ART PASTEL SLIM STRETCH Enjoying picture effect ...

Page 35: ...mpose on a moving picture The rate of the still picture increases by the number of the still bars 4 Press START STOP to start recording a moving picture with a still picture superimpose on When you stop recording press START STOP again To cancel still mode Press DIGITAL EFFECT to highlight the still indicator and press the button again The still indicator in the viewfinder disappears Notes on stil...

Page 36: ...s appear in the viewfinder 3 Turn the control dial to adjust the interval of flash motion 4 Press START STOP Flash motion recording starts To stop recording press START STOP again a normal recording b flash motion recording To cancel the flash motion Press DIGITAL EFFECT to highligfht the flash motion indicator and press the button again The flash motion indicator in the viewfinder disappears Note...

Page 37: ...ll picture is stored in memory 3 Turn the control dial to adjust the color scheme of the still picture The rate of the still picture increases by the number of the luminancekey bars 4 Press START STOP Luminancekey recording starts To stop recording press START STOP again To cancel the luminancekey Press DIGITAL EFFECT to highlight the luminancekey indicator and press the button again The luminance...

Page 38: ...RESET The counter resets to zero 3 Keep pressing the side of EDITSEARCH and release the button at the point where you want to start the insertion a 4 Press ZERO MEM on the Remote Commander The ZERO MEM indicator flashes 5 Press START STOP to start recording The recording stops automatically at the counter zero point To change the end point Press ZERO MEM to erase the ZERO MEM indicator then repeat...

Page 39: ...iewfinder a and a normal TV screen b look wide You can also watch the picture without black bands on a wide screen TV c 16 9 FULL The picture in the viewfinder d or on a normal TV e is horizontally compressed You can watch the picture of normal images on a wide screen TV f Using the wide mode function While the camcorder is in Standby mode press 16 9WIDE repeatedly so that the desired mode indicat...

Page 40: ...d in 16 9 FULL mode set it to full mode For details refer to the instruction manual of your TV Note that the picture recorded in 16 9 FULL mode looks compressed on a normal TV Notes on wide mode When you record in 16 9 FULL mode the date or time indicator will be widened on the wide screen TV If you dub a tape the tape is copied in the same mode as the original recording The wide mode is cancelled...

Page 41: ...lected 5 SEC five dots appear in the viewfinder The dots disappear at a rate of one per second When 5 seconds elapse and all the dots disappear the camcorder switches to Standby mode automatically If you select the camcorder records as long as you hold down START STOP To extend the recording time in 5 SEC mode Press START STOP again before all the dots disappear Recording continues for about 5 sec...

Page 42: ...ntrol dial to select TITLE LANG then press the dial 3 Turn the control dial to select the desired language then press the dial 4 Press MENU to erase the menu display 2 MENU ENGLISH FRANÇAIS MENU MENU TITLE LANG MENU FRANÇAIS ESPAÑOL PORTUGUÊS ENGLISH 3 1 MENU MENU COUNTER ORC TO SET REC MODE TITLE COL TITLE POS TITLE LANG TITLE1 SET MENU END MENU COUNTER ORC TO SET REC MODE TITLE COL TITLE POS TIT...

Page 43: ...ed in the language you selected in the menu system 2 Press START STOP to start recording 3 When you want to stop recording the title press TITLE again Note on titles The contents and the order of titles are different depending on the languages If you have not stored any original titles The titles begin from HELLO TITLE To add the title while you are recording 1 While in Standby mode press TITLE re...

Page 44: ...to select it 4 Press MENU to erase the menu display Notes on selecting a title You cannot select a title while you are recording You cannot select fade in fade out while you are adding a title You cannot record a title while you are recording with the date or time Superimposing a title MENU TITLE COL MENU END WHITE YELLOW VIOLET RED CYAN GREEN BLUE YELLOW MENU COMMANDER Hi8 COUNTER ORC TO SET REC ...

Page 45: ...ay To edit a title you have stored In step 2 select TITLE 1 SET or TITLE 2 SET whichever title you want to edit is stored in Then change the title Instead of selecting S in step 5 to store the title You can do one of the following Enter 22 letters Press MENU If you do nothing more than 5 minutes The power goes off automatically Turn STANDBY down once turn it again up and proceed from step 3 To del...

Page 46: ...Set STEADY SHOT to OFF Releasing the STEADY SHOT function To activate the Steady Shot function again Set STEADY SHOT to ON Notes on the Steady Shot function The Steady Shot function will not correct excessive camera shake If you install a wide conversion lens not supplied the camcorder may cause minor shading when STEADY SHOT is set to ON In this case set STEADY SHOT to OFF STEADY SHOT ON OFF ...

Page 47: ...te Each time you insert the cassette Perform the above procedures To see if you have performed ORC Perform steps 1 and 2 above If ORC ON is displayed the tape condition has been checked When the tab on the cassette exposes the red mark You can not use ORC Note on ORC TO SET setting When you set ORC TO SET the recording on the tape is erased for about 0 1 second so that the camcorder can check the ...

Page 48: ...ess Use AE SHIFT in the menu system Note on the previous settings Once you adjust the settings manually they are stored in memory in the following cases as long as the lithium battery is in place when you return to automatic adjustment mode when you set the POWER switch to OFF in five minutes after you remove the power source as long as the lithium battery is installed in the camcorder Selecting a...

Page 49: ...ject or subject reflecting the light Shooting a stationary subject when using a tripod Focusing manually When focusing manually first focus in telephoto before recording and then reset the shot length 1 Set FOCUS to MANUAL The f indicator appears in the viewfinder 2 Move the power zoom lever to the T side until the lever reaches the end 3 Turn the focus ring to achieve a sharp focus Be sure to not...

Page 50: ...manual focus mode press PUSH AUTO down Autofocus functions while PUSH AUTO is held down when it is released manual focus mode will be resumed To record a very distant subject Push FOCUS down to INFINITY The lens focuses on the most distant subject while FOCUS is held down When it is released manual focus mode is resumed Use this function when shooting through a window or a screen to focus on a mor...

Page 51: ...aperture priority mode You can select the aperture to determine the desired depth of focus field The shutter speed is automatically set between 1 60 and 1 2000 according to the aperture value to maintain appropriate exposure 1 Set AUTO LOCK HOLD to the center position 2 Press PROGRAM AE so that the indicator appears in the viewfinder 3 Turn the control dial to select AE A then press the dial 4 Tur...
Page 52: ...e aperture value is automatically adjusted according to the selected shutter speed to maintain appropriate exposure This mode is most effective when you shoot the picture with high speed movement Note that the shutter speed is indicated in the viewfinder as for example 100 for 1 100 shutter speed 1 Set AUTO LOCK HOLD to the center position 2 Press PROGRAM AE so that the indicator appears in the vi...
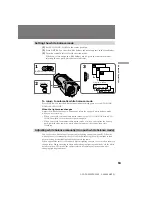
Page 53: ... fluorescent lamp In sunny weather to avoid an out of focus picture due to a small aperture Using the twilight mode You can record a bright subject in a dark place without ruining the atmosphere The aperture is automatically adjusted to maintain the appropriate exposure The shutter speed is fixed at 1 60 This mode is effective when you record night views neon signs or fireworks 1 Set AUTO LOCK HOL...

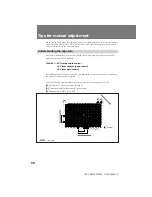
Page 54: ...he subject is bright with dark background b close the aperture higher F value When the subject moves at high speed c set the shutter speed value faster When a dark scene is shot overexposed d lower the gain Brighter Darker F1 6 F19 CLOSE 1 60 1 10000 1 4 1 30 18 dB 3 dB Item Aperture Shutter speed Gain Variation of exposure 0 5 EV 0 5 EV 1 0 EV 0 5 EV Selectable steps 16 steps Fast 16 steps Slow 4...

Page 55: ... To adjust the aperture You can select the aperture from the following 16 values F1 6 F2 F2 4 F2 8 F3 4 F4 F4 8 F5 6 F6 8 F8 F9 6 F11 F14 F16 F19 CLOSE To open the aperture larger aperture select a lower value To adjust the shutter speed You can select the shutter speed from the following 20 CCD TR3300 or 16 CCD TR2300 speeds CCD TR3300 1 4 1 8 1 15 1 30 1 60 1 90 1 100 1 125 1 180 1 250 1 350 1 5...

Page 56: ...dicator highlights in the viewfinder Turn the control dial to change to the desired setting To lock the manual settings After adjusting the setting set AUTO LOCK HOLD to HOLD The IRIS SHUTTER SPEED GAIN WHT BAL buttons and the control dial do not work in these manual settings To return to automatic adjustment mode Press repeatedly the button of the item you want to return to automatic adjustment m...
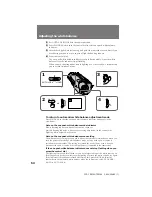
Page 57: ...al to select the desired shutter speed 1 30 1 15 1 8 or 1 4 As the indicator in the viewfinder becomes smaller the shutter speed becomes slower To return to automatic adjustment mode Press SHUTTER SPEED repeatedly until the shutter speed value indicator disappears in the viewfinder When recording with slow shutter function You cannot use flash motion overlap wipe still or luminauncekey function Au...

Page 58: ...from aperture control EV from shutter speed control EV from gain control The total exposure value can be varied or maintained at a constant level by controlling the aperture gain and shutter speed Use the following graph to select the setting One scale corresponds to 0 5 EV a Vertical axis Aperture value F value b Horizontal axis Shutter speed per second c Diagonal axis Gain level dB Tips for manu...

Page 59: ...nging only the shutter speed To reduce the exposure by 2 EV using the shutter speed you should change the shutter speed from 1 60 to 1 250 1 5 steps increase Example 2 setting the shutter speed to 1 500 and changing the gain level When the shutter speed is changed from 1 60 to 1 500 the EV from the shutter speed control changes to 3 EV To maintain total exposure 1 EV 2 steps should be added by inc...

Page 60: ...or disappears Otherwise the picture will be too bright under normal lighting conditions This function is also effective under following conditions On snow e g at a ski resort At the beach under strong sunshine A subject with a light source nearby or a mirror reflecting light A white subject against a white background Especially when you shoot a person wearing shiny clothes made of silk or syntheti...

Page 61: ...e The picture becomes brighter when you turn the control dial up and darker when you turn the control dial down Three levels for each direction 4 Press MENU The menu display disappears and the AE shift indicator appears in the viewfinder To cancel the AE shift Set AE SHIFT to the center position in the menu system When adjusting the brightness We recommend you to connect the camcorder to a TV so t...

Page 62: ... with the white balance set in a particular condition Monochromatic subject or background a w Outdoor mode Under a color matching fluorescent lamp Recording a sunset sunrise just after sunset just before sunrise b neon signs or fireworks c e Indoor mode Lighting condition changes quickly d Too bright place such as photography studios Under sodium lamps or mercury lamps When you shoot under a fluor...

Page 63: ...hen you are recording When you record in manual adjustment mode set AUTO LOCK HOLD to AUTO LOCK once then set it to the center position again When you record in automatic adjustment mode or when you replace the battery pack point the lens toward a white object for approx 10 seconds then start recording Adjusting white balance manually One push white balance mode You can set the white balance for a...
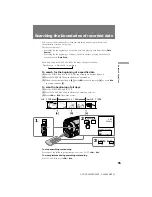
Page 64: ...set Quickly flashing indicator white balance is being adjusted with the control dial Lighting white balance has been set Note on the one push white balance mode setting The white balance setting for one push white balance mode is retained even when you turn the power off or change white balance mode as long as the power source is installed in the camcorder The setting is retained for about 1 hour ...

Page 65: ...f all days one after another playing back about 10 seconds of each Date Scan Each time you press DATE SEARCH the mode changes as follows To search for the beginning of a specific date 1 Set the POWER switch to VTR The tape transport buttons light up 2 Press DATE SEARCH on the Remote Commander 3 When the current position is b press 0 to search towards a or press to search towards c To scan the begi...

Page 66: ...tape counter 1 During playback press COUNTER RESET at the point you later want to locate The counter shows 0 00 00 in the viewfinder 2 Press π when you want to stop playback 3 Press ZERO MEM on the Remote Commander The ZERO MEM indicator flashes in the viewfinder 4 Press 0 to rewind or press to fast forward the tape to the counter s zero point The tape stops automatically when the counter reaches ...

Page 67: ...ing Make sure you mark index signals at more than two minute intervals Otherwise you may not be able to search for them correctly If you stop recording while the index signal is being marked the INDEX MARK indicator lights in the viewfinder the search may not be completed correctly If you mark an index signal on the tape with the Data Code recorded the Data Code will be erased at the point on whic...

Page 68: ...ck 2 Press 0 or The tape rewinds or advances rapidly and plays back for approximately 10 seconds form the point on which the index signal was marked If you want to continue playback press When you do not press any button the tape is automatically scanned to the next program To cancel index scan mode Press Normal playback resumes Locating the marking position INDEX 00 SCAN INDEX 00 SCAN 1 2 REW FF ...

Page 69: ...ed program is displayed in the viewfinder 3 Press 0 or Playback starts from the beginning of the desired program a the current position b the INDEX number To stop index search mode Press Normal playback resumes Note on the index number The index number 1 2 etc indicates the distance from the point you are now viewing a regardless of the direction DATE INDEX SEARCH INDEX 00 SCAN INDEX 02 SEARCH 1 D...

Page 70: ... tape with the red mark on the cassette exposed While the index signal is being erased the sound cannot be heard and a black band appears at the bottom of the picture This will not affect the recorded sound or picture The camcorder can detect index signals marked with VCRs but cannot erase them VCRs with an index function can detect index signals marked with this camcorder but cannot erase them An...

Page 71: ...The RC time code is written continuously Notes on writing the RC time code The RC time code writing stops when you press TIME CODE WRITE again before starting playback you press INDEX before starting playback you change from playback mode to another mode When you are writing the RC time code from the middle of a tape without the time code written writing starts several frames before the current pi...

Page 72: ...ommend you to rewrite the RC time code You can create your own video program by editing with any other h 8 mm H Hi8 j VHS k S VHS VHSC K S VHSC l Betamax or ED Betamax VCR that has video audio inputs Before editing Connect the camcorder to the VCR as described in Connections for playback on page 16 Set the input selector on the VCR to LINE if available 1 While pressing the small green button on th...

Page 73: ... to set the camcorder in playback pause mode 3 On the VCR locate the recording start point and set the VCR in recording pause mode 4 Press P on the camcorder and VCR simultaneously to start editing To edit more scenes Repeat steps 2 to 4 To stop editing Press π on both the camcorder and the VCR Note on the DISPLAY function If you have displayed the viewfinder screen indicators on the TV erase the ...

Page 74: ... a VCR or TV If your VCR or TV is a monaural type connect only the white plug for audio on both the camcorder and the VCR or TV If you are going to connect the camcorder using the S video cable not supplied a you do not need to connect the yellow video plug of the A V connecting cable b Do not connect the S video cable to the camcorder if your VCR or TV doesn t have any S video jack To check the p...

Page 75: ...press P to set it to playback pause mode 4 Press COUNTER RESET to set the counter to zero 5 On the camcorder locate the point where the insert should begin by pressing 0 then press r REC and P to set it to recording pause mode 6 Press ZERO MEM on the Remote Commander The ZERO MEM indicator flashes and the end point of the insert is stored in memory 7 Press P on the camcorder and the VCR simultaneo...

Page 76: ...e lithium battery has positive side and negative side as illustrated Be sure to insert the lithium battery with the positive side facing out WARNING The battery may explode if mistreated Do not recharge disassemble or dispose of in fire Caution Keep the lithium battery out of the reach of children Should the battery be swallowed consult a doctor immediately Changing the lithium battery When replac...

Page 77: ... viewfinder Press TIME to display the time indicator When you press the same button again the indicator goes off The year indicator changes as follows Note on the time indicator The internal clock of this camcorder operates on a 12 hour cycle 12 00 AM stands for midnight 12 00 PM stands for noon Resetting the date and time 1996 1997 2029 1 3 4 2 1 2 3 4 1 2 1 2 MENU 1996 JAN 1 12 00 CLOCK SET MENU...

Page 78: ...ting to Hi8 H AUTO Standard 8 h AUTO or OFF H OFF When you play back The playback mode SP LP or Hi8 standard 8 mm is selected automatically according to the format in which the tape has been recorded The quality of the recorded picture in LP mode however will not be as good as that in SP mode Note on AFM HiFi stereo When you play back a tape the sound will be in monaural if You record the tape usi...

Page 79: ...dicator in the viewfinder decreases gradually as battery power is used up When you use the NP F530 F730 InfoLIHTIUM battery the minute indicators appear with the remaining battery indicator while recording When the remaining battery indicator reaches the lowest point the i indicator appears and starts flashing in the viewfinder When you use the NP F530 F730 battery the i indicator may flash even i...

Page 80: ...efore you should charge the battery pack right before using the camcorder The switch on the battery pack This switch is provided so that you can mark the charged battery pack Set the switch to the green mark position when charging is completed When removed from the charging adaptor the switch exposes the green mark When removed from your camcorder no mark is indicated The life of the battery pack ...

Page 81: ... the correct direction Alkaline batteries are not rechargeable Do not use a combination of new and old batteries Do not use different types of batteries The batteries slowly discharge while not in use Do not use a battery that is leaking If battery leakage occurred Wipe off the liquid in the battery case carefully before replacing the batteries If you touch the liquid wash it off with water If the...

Page 82: ...his happens clean the video heads with the Sony V8 25CLH cleaning cassette not supplied After checking the picture if it is still noisy repeat the cleaning Do not repeat cleaning more than 5 times in one session Caution Do not use a commercially available wet type cleaning cassette It may damage the video heads Note If the V8 25CLH cleaning cassette is not available in your area consult your neare...

Page 83: ...he battery pack will get hot during charging This is normal Others Unplug the unit from the wall outlet when not in use for a long time To disconnect the power cord pull it out by the plug Never pull the cord itself Do not operate the unit with a damaged cord or if the unit has been dropped or damaged Do not bend the AC power cord forcibly or put a heavy object on it This will damage the cord and ...

Page 84: ...a TV it must be an NTSC system based TV Check the following list NTSC system countries Bahama Islands Bolivia Canada Central America Chile Colombia Ecuador Jamaica Japan Korea Mexico Peru Surinam Taiwan the Philippines the U S A Venezuela etc PAL system countries Australia Austria Belgium China Denmark Finland Germany Great Britain Holland Hong Kong Italy Kuwait Malaysia New Zealand Norway Portuga...

Page 85: ...em p 26 The ambient temperature is too low The battery pack has not been charged fully m Charge the battery pack again p 6 The battery pack is completely dead and cannot be recharged m Use another battery pack p 8 You use other types of battery except NP F530 F730 The battery pack is discharged during a long period of storage m Charge the battery pack again p 6 The tape is stuck to the drum m Ejec...

Page 86: ...t it to AUTO p 50 Shooting conditions are not suitable for autofocus m Set FOCUS to MANUAL to focus manually p 49 START STOP MODE is set to 5 SEC or m Set it to p 41 A title is displayed m Stop superimposing the title p 43 The stereo tape is played back with HiFi SOUND set to 1 or 2 in the menu system m Set to STEREO in the menu system p 27 The picture has been recorded with WIND set to ON in the ...

Page 87: ...corder is not malfunctioning The camcorder is not malfunctioning The camcorder is operating in Demo mode m Exit Demo mode p 93 Picture Symptom The image on the viewfinder screen is not clear A vertical band appears when a subject such as lights or a candle flame is shot against a dark background A vertical band appears when shooting a very bright subject The menu is not displayed on the TV The pla...

Page 88: ...does not indicate a problem Repeat again to charge with the same battery pack Trouble check When the CHARGE lamp flashes again Install another battery pack When the CHARGE lamp does not flash again If the CHARGE lamp lights up and goes out after a while there is no problem Remove the battery pack from the AC power adaptor Then install the same battery pack again When the CHARGE lamp flashes again ...

Page 89: ...pe Operating temperature 32 F to 104 F 0 C to 40 C Storage temperature 4 F to 140 F 20 C to 60 C Dimensions Approx 3 1 4 x 1 13 16 x 6 1 2 inches 81 x 45 x 163 mm w h d including projecting parts and controls Mass Approx AC V315 1 lb 1 oz 480 g AC V316 V316A 1 lb 3 oz 560 g Design and specifications are subject to change without notice Edit Station for CCD TR3300 for Canadian model only Refer to t...

Page 90: ...CT button p 34 6 DIGITAL EFFECT button CCD TR3300 only p 35 7 TITLE button p 43 8 16 9WIDE button p 39 9 Eyecup p 14 º Viewfinder lens adjustment lever p 11 Power zoom lever p 12 BATT battery PUSH button p 8 STANDBY switch p 10 11 START STOP button p 10 11 Hooks for shoulder strap p 96 Battery mounting surface START STOP MODE switch p 41 1 2 3 4 5 6 7 8 9 º ...

Page 91: ...ort of video equipment and peripherals connected to it This jack has the same function as the jack indicated as CONTROL L or REMOTE º Cassette compartment p 9 Grip strap p 14 2 headphone jack p 19 RFU DC OUT RFU adaptor DC output jack p 16 S VIDEO jack p 16 17 VIDEO AUDIO jacks p 16 17 MIC jack PLUG IN POWER Connect an external microphone not supplied This jack also accepts a plug in power microph...

Page 92: ...play window p 97 PUSH AUTO button p 50 ª FOCUS switch p 49 Tape transport buttons p 19 20 74 75 π STOP stop 0 REW rewind PLAY playback FF fastforward P PAUSE pause r REC recording EDITSEARCH button p 15 ª Accessory shoe Supplies power to optional accessories such as a video light º Focus ring p 49 Remote sensor p 95 Aim the Remote Commander here for remote control Camera recording battery lamp p 1...

Page 93: ...cial effects If the demonstration appears when you turn on the camcorder for the first time exit the demo mode to use your camcorder To enter Demo mode 1 Remove the cassette and set the POWER switch to VTR 2 Turn STANDBY up 3 While holding down set the POWER switch to CAMERA Demonstration starts If a cassette is inserted the demo mode will stop Note that once you enter demo mode this mode is retai...

Page 94: ...der The buttons that have the same name on the Remote Commander as on the camcorder function identically 9 START STOP button p 10 11 º INDEX ERASE p 70 Power zoom button p 12 INDEX SEARCH button p 68 69 70 DISPLAY button p 19 To prepare the Remote Commander To use the Remote Commander you must insert two size AA R6 batteries Use the supplied size AA R6 batteries 1 Remove the battery cover from the...

Page 95: ...r on the Edit Station Remote control direction Notes on the remote commander Keep the remote sensor away from strong light sources such as direct sunlight or illumination Otherwise the remote control may not be effective Be sure that there is no obstacle between the remote sensor on the camcorder and the Remote Commander This camcorder works in commander mode VTR 2 The commander modes 1 2 and 3 ar...

Page 96: ...96 CCD TR2300 TR3300 3 856 204 23 1 Identifying the parts Attaching the shoulder strap Attach the supplied shoulder strap to the hooks for the shoulder strap 1 2 3 ...

Page 97: ...ndicator p 34 Wide mode indicator p 39 Zoom indicator p 13 Playing back or recording in Hi8 format p 78 Recording playing back mode indicator p 78 Tape counter RC time code indicator p 25 71 Standby indicator p 10 ª Remaining tape indicator º Date search Date scan indicator TIME CODE WRITE indicator ZERO MEM indicator p 65 66 71 Remaining battery indicator p 79 Date or Time indicator p 28 Recordin...

Page 98: ...e tape is near the end The flashing is slow 3 The tape has run out The flashing becomes rapid 4 No tape has been inserted 5 The tab on the tape is out red 6 Moisture condensation has occurred p 81 7 The video heads may be contaminated p 82 This indicator appears only on the viewfinder 8 Some other trouble has occurred Disconnect the power source and contact your Sony dealer or local authorized fac...

Page 99: ...in Fade out 29 30 FADER 29 Flash motion 36 GAIN 55 House current 22 I J K L Index 67 70 LANC 91 Lithium battery 76 LUMI 37 M N Manual adjustment 48 Manual focus 49 50 Menu system 25 27 MIC microphone jack 91 O P ORC 47 OVERLAP 31 PICTURE EFFECT 33 34 Playback on a TV 19 Playback pause 20 Power sources 22 24 Power zoom 12 13 PROGRAM AE 51 53 PUSH AUTO 50 Q R RC time code 71 Rec review 15 Remote con...

Page 100: ...CCD TR2300 TR3300 3 856 204 23 1 Sony Corporation Printed in Japan ...

Reviews: