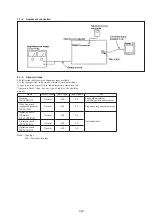
6-23
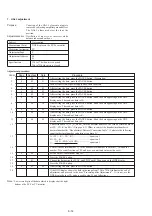
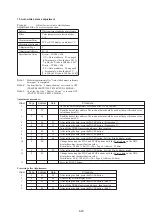
15. Auto white balance adjustment
Purpose :
Adjust for correct auto white balance.
Adjustment error :
Poor color reproduction.
Subject
White pattern standard picture frame
Filter
Color temperature correction filter
C14
Measurement Point
EVF or DDS display on monitor TV
Measuring Instrument
Adjustment Page
F
Adjustment Address
4E, 4F
Specification Value
R ratio = 2XX0h ± 40h
XX = Data at address : F5 on page F
For example, when the data XX
is B8, the R ratio is 2B80h ± 40h
B ratio = YY80h ± 80h
YY = Data at address : F6 on page F
For example, when the data YY
is 5Eh, the B ratio is 5E80h ± 80h
Note 1 :
Make this adjustment after “Auto white balance reference
data input” is completed.
Note 2 :
Confirm that the “Camera-shaking” correction to OFF.
(TR96/TR620E/TR720E/TR740E/TR916 MODEL)
Note 3 :
Confirm that the “Digital Zoom” is turned OFF.
(EXCEPT TR501E/TR503E MODEL)
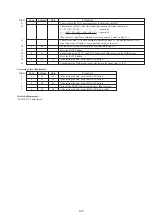
Adjustment procedure:
Processing after Adjustments:
Order
Page
Address
Data
Procedure
1
Put on the color temperature correction filter C14 on the lens.
2
F
F5
Read the data of this address. The read-out data should be used as the specification value
calculation data XX.
3
F
F6
Read the data of this address. The read-out data should be used as the specification value
calculation data YY.
4
6
00
01
After setting the data, press the PAUSE button. (Preparation 1)
5
F
02
21
After setting the data, press the PAUSE button. (Preparation 2)
6
Turn off the UNREG power supply once, then turn it on.
7
6
00
01
After setting the data, press the PAUSE button.
8
6
01
35
After setting the data, press the PAUSE button.
9
6
02
04
After setting the data, press the PAUSE button. Sets the R ratio display mode.
10
F
4E
Change data using the PLAY and STOP buttons until the R ratio data on the DDS
display becomes the specification value.
R ratio data = 2000h + 10h
×
D
F5
(D
F5
= Page F, Address : F5 data)
11
6
02
05
After setting the data, press the PAUSE button. Sets the B ratio display mode.
12
F
4F
Change data using the PLAY and STOP buttons until the B ratio data on the DDS
display becomes the specification value.
B ratio data = 80h + 100h
×
D
F6
(D
F6
= Page F, Address: F6 data)
13
Press the PAUSE button.
Order
Page
Address
Data
Procedure
1
6
01
00
After setting the data, press the PAUSE button.
2
6
02
00
Releases the B ratio display mode.
3
F
02
00
After setting the data, press the PAUSE button. (End 2)
4
Turn off the UNREG power supply once, then turn it on.
5
6
00
00
After setting the data, press the PAUSE button. (End 1)
( )
( )
Summary of Contents for Handycam CCD-TR501E
Page 7: ......
Page 8: ......
Page 9: ......
Page 10: ......
Page 11: ......
Page 12: ......
Page 13: ......
Page 14: ......
Page 15: ......
Page 16: ......
Page 17: ......
Page 18: ......
Page 19: ......
Page 20: ......
Page 21: ......
Page 22: ......
Page 23: ......
Page 24: ......
Page 30: ...2 6 2 11 INTERNAL VIEWS LEFT SIDE RIGHT SIDE ...
Page 32: ......
Page 33: ......
Page 34: ......
Page 35: ......
Page 36: ......
Page 37: ......
Page 38: ......
Page 39: ......
Page 40: ......
Page 41: ......
Page 42: ......
Page 43: ......
Page 44: ......
Page 45: ......
Page 46: ......
Page 47: ......
Page 48: ......
Page 49: ......
Page 50: ......
Page 51: ......
Page 52: ......
Page 53: ......
Page 54: ......
Page 55: ......
Page 56: ......
Page 57: ......
Page 58: ......
Page 59: ......
Page 60: ......
Page 61: ......
Page 127: ......
Page 166: ......
Page 168: ......
Page 169: ......
Page 170: ......
Page 171: ......
Page 172: ......
Page 173: ......
Page 174: ......
Page 175: ......
Page 176: ......
Page 177: ......
Page 178: ......
Page 179: ......
Page 180: ......
Page 181: ......
Page 182: ......
Page 183: ......
Page 184: ......
Page 185: ......
Page 186: ......
Page 187: ......
Page 188: ......
Page 189: ......
Page 190: ......
Page 191: ......
Page 192: ......
Page 193: ......
Page 194: ......
Page 195: ......
Page 196: ......
Page 197: ......
Page 198: ......
Page 199: ......
Page 200: ......
Page 201: ......
Page 202: ......
Page 203: ......

