background image

4

M

ak

ing good use of y

our camc

or

der

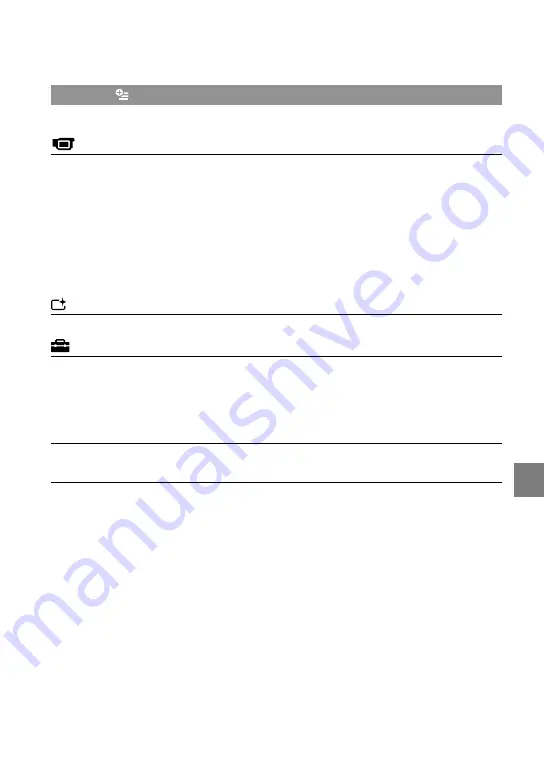
List of the   OPTION MENU

The following items are available on the OPTION MENU only.

 tab

SPOT MTR/FCS................

Adjusts the brightness and focus for the seleted subject simultaneously.

SPOT METER ....................

Adjusts the brightness of images to a subject you touch on the screen.

SPOT FOCUS ....................

Focuses on a subject you touch on the screen.

TELE MACRO ...................

Shoots a subject in focus with, the background out of focus.

EXPOSURE ........................

Adjusts the brightness of movies and photos.

FOCUS ...............................

Focuses manually.

SCENE SELECTION .........

Selects an appropriate recording setting according to the type of scene, 

such as night view or beach.

WHITE BAL. ......................

Adjusts the white balance.

 tab

FADER ................................

Fades scenes in or out.

 tab

BLT-IN ZOOM MIC ..........

Records movies with directional sound relative to the zoom setting.

MICREF LEVEL .................

Sets the microphone level.

SELF-TIMER ......................

Used during photo recording.

TIMING ..............................

Sets the timing to be sued to start recording for [SMTH SLW REC].

The tab depends on the situation / no tab

SLIDE SHOW ....................

Plays a series of photos.

SLIDE SHOW SET............

Sets the repetition option for the slide show.

Summary of Contents for Handycam HDR-CX100E

Page 1: ...e 2009 Sony Corporation HDR CX100E CX105E CX106E Table of contents 8 Getting started 10 Recording 14 Playback 18 Saving movies and photos with a computer 23 Saving images with a DVD writer recorder 35 Making good use of your camcorder 39 Additional information 49 ...

Page 2: ... Otherwise fire or injury may result AC Adaptor Do not use the AC Adaptor placed in a narrow space such as between a wall and furniture Use the nearby wall outlet wall socket when using the AC Adaptor Disconnect the AC Adaptor from the wall outlet wall socket immediately if any malfunction occurs while using your camcorder Even if your camcorder is turned off AC power source mains is still supplie...

Page 3: ...product Disposal of waste batteries applicable in the European Union and other European countries with separate collection systems This symbol on the battery or on the packaging indicates that the battery provided with this product shall not be treated as household waste By ensuring these batteries are disposed of correctly you will help prevent potentially negative consequences for the environmen...

Page 4: ...llation If this equipment does cause harmful interference to radio or television reception which can be determined by turning the equipment off and on the user is encouraged to try to correct the interference by one or more of the following measures Reorient or relocate the receiving antenna Increase the separation between the equipment and receiver Connect the equipment into an outlet on a circui...

Page 5: ...ure the image and sound are recorded without any problems Compensation for the contents of recordings cannot be provided even if recording or playback is not possible due to a malfunction of the camcorder recording media etc TV color systems differ depending on the country region To view your recordings on a TV you need a PAL system based TV Television programs films video tapes and other material...

Page 6: ... Operating Guide the internal memory of the camcorder and Memory Stick PRO Duo media are called recording media In this Operating Guide both Memory Stick PRO Duo media and Memory Stick PRO HG Duo media are referred as Memory Stick PRO Duo media You will find the Handycam Handbook PDF on the supplied CD ROM p 48 The screenshots are from Windows Vista The scenes may vary depending on the operating s...

Page 7: ...otos on a connected TV p 21 Saving movies and photos on a disc Saving movies and photos with a computer p 23 You can create a disc with either high definition image quality HD or standard definition image quality SD from high definition image quality HD movies imported to the computer See page 26 on the characteristics of each type of disc Creating a disc with a DVD writer or a recorder p 35 Delet...

Page 8: ...reparing a computer Windows 23 When using a Macintosh 24 Selecting the method for creating a disc computer 26 Creating a disc with one touch One Touch Disc Burn 28 Importing movies and photos to a computer Easy PC Back up 29 Changing the destination drive or folder for movies and photos 29 Starting PMB Picture Motion Browser 30 Creating a high definition image quality HD disc 31 Playing a high def...

Page 9: ...g cable connection 37 Making good use of your camcorder Deleting movies and photos 39 Changing the recording media 40 To check the recording media settings 40 Dubbing or copying movies and photos from the internal memory to Memory Stick PRO Duo media 41 Customizing your camcorder with menus 42 Using the HELP function 42 Getting detailed information from the Handycam Handbook 48 Additional informat...

Page 10: ...t in the direction of the arrow until it clicks 3 Connect the AC Adaptor and the power cord mains lead to your camcorder and the wall outlet wall socket Be sure that the mark on the DC plug is facing right The CHG charge lamp lights up and charging starts The CHG charge lamp turns off when the battery pack is fully charged 4 When the battery is charged disconnect the AC Adaptor from the DC IN jack...

Page 11: ...pack and the AC Adaptor When you remove the battery pack or disconnect the AC Adaptor close the LCD screen and make sure that the Movie Photo lamps p 12 are turned off Do not short circuit the DC plug of the AC Adaptor or battery terminal with any metallic objects This may cause a malfunction In the default setting the power turns off automatically if you leave your camcorder without any operation...

Page 12: ...een touch until the item appears 3 Set SUMMERTIME date and time then touch The clock starts If you set SUMMERTIME to ON the clock advances 1 hour The date and time does not appear during recording but they are automatically recorded on the recording media and can be displayed during playback To display the date and time touch HOME SETTINGS VIEW IMAGES SET DATA CODE DATE TIME You can turn off the o...

Page 13: ...d off You can turn off your camcorder also by pressing POWER When POWER ON BY LCD is set to OFF turn off your camcorder by pressing POWER p 46 Changing the language setting You can change the on screen displays to show messages in a specified language Touch HOME SETTINGS CLOCK LANG LANGUAGE SET a desired language POWER button ...

Page 14: ...recorded with high definition image quality HD on the internal memory p 40 45 Fasten the grip belt Open the lens cover Open the LCD screen of your camcorder Your camcorder is turned on To turn on your camcorder when the LCD screen is already open press POWER p 12 POWER button ...

Page 15: ...set to ON in the default setting To adjust the angle of the LCD panel first open the LCD panel 90 degrees to the camcorder and then adjust the angle If you rotate the LCD panel 180 degrees to the lens side you can record movies photos in mirror mode When you open or close the LCD screen or adjust the angle be careful not to press the buttons on the side of the LCD screen by mistake In the default ...

Page 16: ...TTINGS MOVIE SETTINGS X V COLOR ON Some settings may be required on a TV to view the movies Refer to the instruction manuals of the TV Shooting photos In the default setting photos are recorded on the internal memory p 40 Open the lens cover Open the LCD screen of your camcorder Your camcorder is turned on To turn on your camcorder when the LCD screen is already open press POWER p 12 Press MODE to...

Page 17: ...s You cannot record photos while is displayed Recording and playing movies and photos easily Easy Handycam operation Simply press EASY To cancel Easy Handycam operation press EASY again after you finish recording or menu operations During Easy Handycam operation you can set basic options such as changing the image size or deleting images among the setting and adjustment items Other items are set a...

Page 18: ...ISUAL INDEX screen by pressing VIEW IMAGES on the LCD screen as well Touch or tab a desired movie appears with the movie or photo that was most recently played or recorded If you touch the movie or photo with you can continue playback from the previous time appears on the photo recorded on the Memory Stick PRO Duo media To the index screen of scenes by a certain interval Film Roll Index Previous N...

Page 19: ...cated on the panel behind the LCD panel The recording date time and shooting conditions are recorded automatically during recording This information is not displayed during recording but you can display it during playback by touching HOME SETTINGS VIEW IMAGES SET DATA CODE a desired setting To adjust the sound volume of movies While playing back movies touch adjust with You can adjust the sound vo...

Page 20: ...m lever while viewing photos PB ZOOM If you touch a point in the PB ZOOM frame the point comes to the center in the frame When viewing photos recorded on Memory Stick PRO Duo media playback folder appears on the screen Previous To start stop slide show To the VISUAL INDEX screen Next OPTION MENU ...

Page 21: ... your camcorder and touch HOME OTHERS TV CONNECT Guide on the LCD screen When an item is not on the screen touch until the item appears Use the supplied AC Adaptor as the power source p 11 Connect your camcorder and TV referring to TV CONNECT Guide When the A V connecting cable is used to output movies movies are output with standard definition image quality SD Play back movies and photos on your ...

Page 22: ...tible with the Photo TV HD standard Photo TV HD allows for highly detailed photo like depiction of subtle textures and colors By connecting Sony s Photo TV HD compatible devices using an HDMI cable or the component A V cable a whole new world of photos can be enjoyed in breathtaking full HD quality The TV will automatically switch to the appropriate mode when displaying photos Setup of the TV will...

Page 23: ...is sufficient for the following operations Importing the movies and photos to the computer One Touch Disc Burn Creating an Blu ray disc AVCHD format disc DVD video Intel Pentium 4 2 8 GHz or faster is required when creating a DVD video by converting high definition image quality HD to standard definition image quality SD Copying a disc Application DirectX 9 0c or later This product is based on Dir...

Page 24: ...corder uninstall PMB from the computer and then re install it in order from lower to higher If you install a higher version of PMB first some functions may not work correctly See page 48 on the Handycam Handbook Confirm that your camcorder is not connected to the computer Turn on the computer Log on as an Administrator for installation Close all applications running on the computer before installi...

Page 25: ... computer if required to complete the installation When the installation is completed following icons will appear Remove the CD ROM from your computer Other icons may appear No icon may appear depending on the installation procedure The Handycam Handbook is not installed in this procedure p 48 To disconnect your camcorder from the computer Click the icon at the bottom right of the desktop of the c...

Page 26: ...ies and photos to a computer Easy PC Back up p 29 Creating a AVCHD format disc with high definition image quality HD p 31 HD Ordinary DVD playback devices a DVD player a computer that can play DVDs etc Importing movies and photos to a computer Easy PC Back up p 29 Creating a standard definition image quality SD disc p 33 SD To create a Blu ray disc the BD Add on Software for PMB must be installed ...

Page 27: ...of following type with PMB For Blu ray disc see page 32 Disc type Features DVD R DVD R DVD R DL Unrewritable DVD RW DVD RW Rewritable Always maintain your PLAYSTATION 3 to use the latest version of the PLAYSTATION 3 system software The PLAYSTATION 3 may not be available in some countries regions ...

Page 28: ...uality SD disc from high definition image quality HD movies import movies to a computer first p 29 and then create a standard definition image quality SD disc p 33 Install PMB beforehand p 24 however do not start PMB Connect your camcorder to the wall outlet wall socket using the AC Adaptor supplied for this operation p 11 With DISC BURN on your camcorder you can save movies and photos recorded on...

Page 29: ... are imported to your computer When the operation is completed the PMB screen appears When the operation is completed a screen to indicate that movies are being analyzed may appear It may take a long time to analyze movies In the meantime you can operate PMB You can create either high definition image quality HD discs Blu ray disc AVCHD format disc p 31 or standard definition image quality SD disc...

Page 30: ...PMB to start PMB You can view edit or create discs of movies and photos using PMB Reading PMB Guide For details on how to use PMB read the PMB Guide Double click the PMB Guide short cut icon on the computer screen to open the PMB Guide If the icon is not displayed on the computer screen click Start All Programs Sony Picture Utility Help PMB Guide You can also open the PMB Guide from Help of PMB ...

Page 31: ...rograms Sony Picture Utility PMB 3 Click Folders or Calendar on the left side in the window and select the folder or date then select the high definition image quality HD movies High definition image quality HD movies are marked with You cannot save photos on a disc To select plural movies hold the Ctrl key down and click thumbnails 4 At the top of the window click Manipulate AVCHD HD Creation The...

Page 32: ...s Connect your computer to the internet when you install BD Add on Software Place an empty Blu ray disc in the disc drive and click Manipulate Blu ray Disc HD Creation in step 4 of Creating a high definition image quality HD disc p 31 Other procedures are the same as that for creating a high definition image quality HD disc Your computer must support the creation of Blu ray discs BD R unrewritable...

Page 33: ... Sony Picture Utility PMB 3 Click Folders or Calendar on the left side in the window and select the folder or date then select the movies and photos High definition image quality HD movies are marked with To select plural movies and photos hold the Ctrl key down and click thumbnails 4 At the top of the window click Manipulate DVD Video SD Creation The window used to select movies and photos appear...

Page 34: ... want to edit then click Manipulate Video Trimming on the menu to display the Video Trimming window See PMB Guide on the operation p 30 Capturing photos from a movie You can save a frame of a movie as a photo file On the movie playback window of PMB click to display Save Frame windows See PMB Guide on the operation p 30 Click ...

Page 35: ... a DVD R for creating a disc See page 32 to create a Blu ray disc Player Choosing a method and disc type AVCHD format playback devices a Sony Blu ray disc player PLAYSTATION 3 etc Creating a high definition image quality HD disc with a DVD writer etc USB cable connection p 36 HD Ordinary DVD playback devices a DVD player a computer that can play DVDs etc Creating a standard definition image qualit...

Page 36: ...riter etc to the USB jack of your camcorder with the USB cable supplied The USB SELECT screen appears on the camcorder screen 2 Touch USB CONNECT when movies are recorded on the internal memory or USB CONNECT when movies are recorded on a Memory Stick PRO Duo media on the camcorder screen 3 Record movies on the connected device For details refer to the instruction manuals supplied with the device ...

Page 37: ...quality SD A V connecting cable supplied Connect the A V connecting cable to the input jacks of another device A V connecting cable with S VIDEO sold separately When connecting to another device via the S VIDEO jack by using an A V connecting cable with an S VIDEO cable sold separately higher quality images can be produced than with an A V connecting cable Connect the white and red plug left right...

Page 38: ...uch as a counter etc on the screen of the monitor device connected touch HOME SETTINGS OUTPUT SETTINGS DISP OUTPUT LCD PANEL the default setting To record the date time or camera settings data touch HOME SETTINGS VIEW IMAGES SET DATA CODE a desired setting In addidion touch HOME SETTINGS OUTPUT SETTINGS DISP OUTPUT V OUT PANEL When the screen size of display devices TV etc is 4 3 touch HOME SETTIN...

Page 39: ...YES To delete all photos at one time In step 2 touch DELETE DELETE ALL YES YES Formatting the recording media Formatting deletes all the movies and photos to recover recordable free space Connect your camcorder to the wall outlet wall socket using the AC Adaptor supplied for this operation p 11 To avoid the loss of important images you should save them p 23 before formatting the recording media Pr...

Page 40: ...le photos Selecting the recording media for movies Touch HOME MANAGE MEDIA MOVIE MEDIA SET The MOVIE MEDIA SET screen appears Touch the desired medium Touch YES The recording medium is changed Selecting the recording media for photos Touch HOME MANAGE MEDIA PHOTO MEDIA SET The PHOTO MEDIA SET screen appears Touch the desired recording medium Touch YES The recording medium is changed To check the r...

Page 41: ...media slot or image data may be damaged Close the Memory Stick Duo media cover after inserting the Memory Stick PRO Duo media The Create a new Image Database File screen appears when you insert new Memory Stick PRO Duo media while the Movie lamp is lit Touch YES To record only photos on Memory Stick PRO Duo media touch NO If Failed to create a new Image Database File It may be possible that there ...

Page 42: ...de the HOME MENU screen touch You cannot select the grayed items or settings Using the HELP function To see the descriptions on the HOME MENU touch HELP on the HOME MENU screen The bottom of turns orange Then touch the menu item you want to know about Using the OPTION MENU The OPTION MENU appears just like the pop up window that appears when you right click the mouse on a computer The menu items y...

Page 43: ...43 Making good use of your camcorder You cannot use the OPTION MENU during Easy Handycam operation ...

Page 44: ...ect p 41 COPY by date p 41 EDIT DELETE p 39 DELETE p 39 PROTECT Sets the protection to avoid deleting movies PROTECT Sets the protection to avoid deleting photos DIVIDE Divides movies PLAYLIST EDIT ADD ADD Adds movies in a playlist ADD by date ADD by date Adds movies recorded on a same day at one time in a playlist ERASE ERASE Erases movies from a playlist ERASE ALL ERASE ALL Erases all movies fro...

Page 45: ...orizontal or vertical REMAINING SET Sets how the remaining recording time of the media is to be displayed CONVERSION LENS Optimizes the Steadyshot function and focus according to the attached lens AUTO BACK LIGHT Adjusts the exposure for backlit subjects automatically PHOTO SETTINGS IMAGE SIZE Sets the photo size FILE NO Sets how to assign the file number AUTO SLW SHUTTR Adjusts the shutter speed ...

Page 46: ... Sets the output image resolution when connecting your camcoder to a TV with an HDMI cable CLOCK LANG CLOCK SET p 12 AREA SET p 12 SUMMERTIME p 12 LANGUAGE SET p 13 GENERAL SET DEMO MODE Sets whether the demonstration appears or not CALIBRATION Calibrates the touch panel A SHUT OFF Changes the A SHUT OFF setting p 11 POWER ON BY LCD Sets whether the camcoder is turned on and off when you open and ...

Page 47: ... Adjusts the brightness of movies and photos FOCUS Focuses manually SCENE SELECTION Selects an appropriate recording setting according to the type of scene such as night view or beach WHITE BAL Adjusts the white balance tab FADER Fades scenes in or out tab BLT IN ZOOM MIC Records movies with directional sound relative to the zoom setting MICREF LEVEL Sets the microphone level SELF TIMER Used durin...

Page 48: ...reen displayed click Handycam Handbook 3 Select the desired language and the model name of your camcorder then click Handycam Handbook PDF The model name of your camcorder is printed on its bottom surface 4 Click Exit Exit then remove the CD ROM from your computer To view the Handycam Handbook double click the short cut icon on the computer screen When using a Macintosh open the Handbook GB folder...

Page 49: ...to be ready to shoot after the power is turned on This is not a malfunction Disconnect the AC Adaptor from the wall outlet wall socket or remove the battery pack then reconnect it after about 1 minute If your camcorder still does not work press RESET p 58 using a pointed object If you press RESET all settings including the clock setting are reset Your camcorder gets warm Your camcorder may become ...

Page 50: ...lashes slowly the file is damaged or unreadable Battery power is low No Memory Stick PRO Duo media is inserted p 41 When the indicator flashes there is not enough free space for recording images Delete unnecessary images p 39 or format the Memory Stick PRO Duo media p 39 after storing the images on other media The Image Database File is damaged Check the Image Database File by touching HOME MANAGE...

Page 51: ...r camcorder Do not wrap your camcorder with a towel for example and operate it Doing so might cause heat to build up inside When disconnecting the power cord mains lead pull it by the plug and not the cord lead Do not damage the power cord mains lead such as by placing anything heavy on it Do not use a deformed or damaged battery pack Keep metal contacts clean If the battery electrolytic liquid ha...

Page 52: ...argeable battery is not charged the camcorder operation will not be affected as long as you are not recording the date Procedures Connect your camcorder to a wall outlet wall socket using the supplied AC Adaptor and leave it with the LCD screen closed for more than 24 hours Note on disposal transfer of the camcorder Even if you perform DELETE ALL DELETE ALL DELETE ALL or MEDIA FORMAT or formatting...

Page 53: ...array of Sony s ClearVid and the image processing system BIONZ allow still image resolution equivalent to the sizes described The focal length figures are actual figures from wide angle pixel readout Input Output connectors A V Remote Connector Component video and audio output jack HDMI OUT jack HDMI mini connector USB jack mini B HDR CX105E CX106E output only LCD screen Picture 6 7 cm 2 7 type as...

Page 54: ... recording start stop turning the power on off and zooming Expected recording time of movies in the internal memory minute To set the recording mode touch HOME SETTINGS MOVIE SETTINGS REC MODE In the default setting the recording mode is HD SP p 45 High definition image quality HD in h hour m minute Recording mode Recording time HD FH 55 m 55 m HD HQ 1 h 55 m 1 h 20 m HD SP 2 h 25 m 1 h 40 m HD LP...

Page 55: ...on Measured when using the camcorder at 25 C 77 F 10 C to 30 C 50 F to 86 F is recommended The recording and playback time will be shorter in low temperatures or depending on the conditions under which you use your camcorder ...

Page 56: ...timedia Interface are trademarks or registered trademarks of HDMI Licencing LLC Microsoft Windows Windows Media Windows Vista and DirectX are either registered trademarks or trademarks of Microsoft Corporation in the United States and or other countries Macintosh and Mac OS are registered trademarks of Apple Inc in the U S and other countries Intel Intel Core and Pentium are trademarks or register...

Page 57: ...ing remaining time FADER Indicator Meaning LCD backlight off 9999 9999 Approximate number of recordable photos and recording media Playback folder 100 112 Current playing movie or photo Number of total recorded movies or photos Bottom Indicator Meaning FACE DETECTION DETECTION SET Manual focus SCENE SELECTION White balance SteadyShot off SPOT MTR FCS SPOT METER EXPOSURE TELE MACRO X V COLOR CONVER...

Page 58: ...START STOP button 15 DISC BURN button 28 POWER button 12 DISP display button 19 To turn off the backlight of the LCD screen press and hold DISP down To turn it on press and hold DISP down again EASY button 17 HDMI OUT mini jack 21 USB jack 24 28 29 36 HDR CX105E CX106E output only VIEW IMAGES button 18 Access lamp Internal memory Memory Stick PRO Duo media 41 While the lamp is lit or flashing the ...

Page 59: ...G Charge lamp 10 Speaker DC IN jack 10 A V Remote Connector 21 37 START STOP button 15 Grip belt 14 Hook for a shoulder belt Tripod receptacle Attach a tripod sold separately to the tripod receptacle using a tripod screw sold separately the length of the screw must be less than 5 5 mm 7 32 in BATT battery release lever 11 ...

Page 60: ... T Troubleshooting 49 Turning the power on 12 TV 21 TV CONNECT Guide 21 U USB 23 36 Using a wall outlet wall socket as a power source 11 V VISUAL INDEX 18 Volume 19 W Warning indicators 50 Windows 23 Z Zoom 15 17 20 A AVCHD 26 35 A V connecting cable 37 B Battery 10 Blu ray disc 32 C Capturing photos from a movie 34 Charging the battery abroad 11 Charging the battery pack 10 Computer 23 Computer s...

Page 61: ......

Page 62: ......

Page 63: ......

Page 64: ...s product and answers to frequently asked questions can be found at our Customer Support Website http www sony net Printed on 70 or more recycled paper using VOC Volatile Organic Compound free vegetable oil based ink Printed in Japan ...

Reviews: