26
HCD-DZ555K/DZ556KB/DZ750K
8. Volume Test
Procedure:
1. Press the
?/1
button to turn the power on.
2. Press three buttons
.
,
H
and
>
simultaneously.
3. The message “VOLUME MIN” is displayed.
4. When the VOLUME control is turned in the direction of (+),
the message “VOLUME MAX” is displayed.
5. When the VOLUME control is turned in the direction of (–),
the message “VOLUME MIN” is displayed.
6. To exit from this mode, press the
?/1
button to turn the set
off, the message “COLD RESET” is displayed.
Note:
The segments of the frame of SPEAKER FORMATION are blinking
while test mode.
9. Protection Factor (SD Detection/DC Detection)
Identification Test Mode
When an error is detected, the FL tube alternately displays
“PROTECTOR
h
PUSH POWER”.
r
Press the
?/1
button.
* Buttons other than the
?/1
button are invalid.
“STANDBY” blinks three times on the FL tube.
r
The protection release state (POWER OFF) is established.
(No FL tube display)
r
Press the
?/1
button.
The power to the system turns on, and the normal operation is
established. (Restore)
During the protection state:
1. If the AC plug is connected or disconnected during the
protection state, the protection state is released, and the normal
operation is established. (The protection state is not
maintained.)
2. The protection factor is displayed by pressing the
FUNCTION ,
A
and
>
buttons at the same time during
the protection state
(during the “PROTECTOR
h
PUSH POWER” display).
k
When SD is detected: Repeats
“SD DETECT
When DC is detected: Repeats
“DC DETECT
When the “L” output from the SD (shutdown) port on the S-
MASTER POWER Driver is detected, the power system other
than that of the FL tube is turned off, and the protection state
is established.
DC detection
When the “L” output from the power/speaker error detection
circuit (DC detection port) is detected for two seconds
continually, the power system other than that of the FL tube is
turned off, and the protection state is established.
10. Automatic Acoustic Field Calibration Microphone
Test Mode
Procedure:
1. Press the
?/1
button to turn the power on.
2. Press the FUNCTION button to set the function “ DVD”.
3. Insert ECM-AC2 supplied as an accessory into the AUDIO
IN/MIC 1/A.CAL MIC jack.
4. While pressing the
X
and
A
buttons simultaneously, turn
the VOLUME control in the direction of (+) .
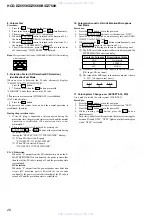
5. Confirm that the following are shown on the display panel.
1
The JACK inserted/non-inserted detection display and the
STEREO/MONO detection display.
2
Presence of DIGITAL voice input to the microcomputer.
(OK: input, NG: no input)
3
The value of the MIC input to the microcomputer. (shown
“0 – 255” (Changes in real time))
11. Color System Change-over (EXCEPT E32, MX)
It is a mode to switch the color system (PAL/NTSC).
Procedure:
1. Press the
?/1
button to turn the power on
2. Press the FUNCTION button to set the function “DVD”.
3. Press the
?/1
button to turn the power off.
4. While pressing the
X
button, press the
?/1
button
simultaneously.
5. Each time you perform this operation the color system toggles
between PAL and NTSC. “NTSC” lights up in the front display
when “NTSC” is selected.
*
*
* *
* *
*
*
1
2
3
Content of display
Discriminant state
NON
Not detected
ST
STEREO
MN
MONO
www. xiaoyu163. com
QQ 376315150
9
9
2
8
9
4
2
9
8
TEL 13942296513
9
9
2
8
9
4
2
9
8
0
5
1
5
1
3
6
7
3
Q
Q
TEL 13942296513 QQ 376315150 892498299
TEL 13942296513 QQ 376315150 892498299


