17
P
re
par
at
io
n
s
Connecting the
Power Cord
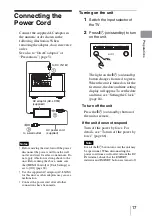
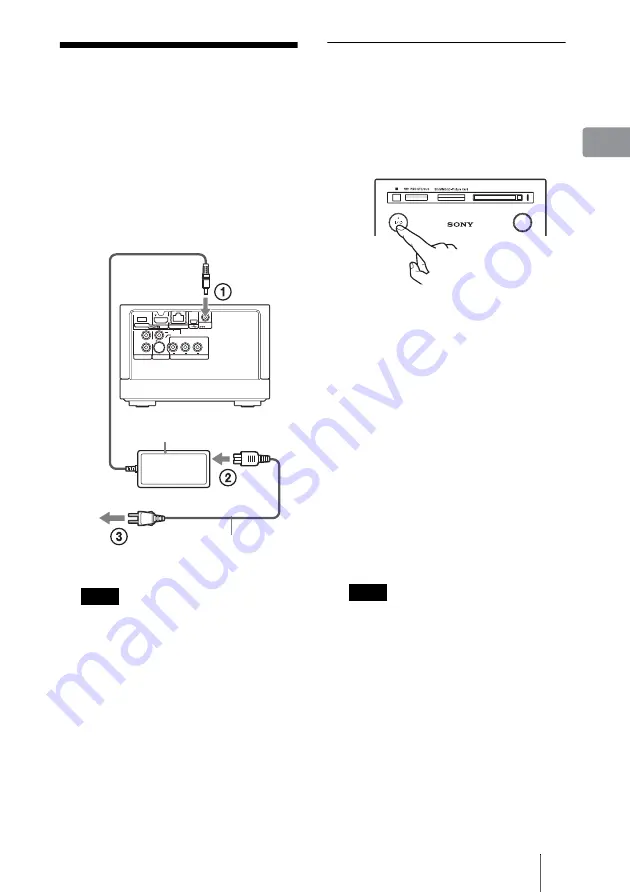
Connect the supplied AC adaptor in
the numeric order shown in the
following illustration. When
removing the adaptor, do so in reverse
order.
See also to “On AC adaptor” of
“Precautions” (page 5).
Notes
•
Before moving the unit, turn off the power,
disconnect the power cord from the wall
outlet, and wait for at least one minute. Do
not apply vibration or strong shock to the
unit. Before doing the above, make sure
that [HDMI Control] of [Unit Settings] is
set to [Off] (page 60).
•
Use the supplied AC adaptor (AC-LX1M)
for this unit, as other adaptors may cause a
malfunction.
•
Connect the power cord after all other
connections have been made.
480i/480p/
720p/1080i
RESOLUTION
OUT
S-VIDEO
VIDEO
L
R
AUDIO OUT
VIDEO OUT
COMPONENT VIDEO OUT
Y
LAN(10/100)
DC IN
16V
P
B
P
R
AC power cord
(supplied)
AC adaptor (AC-LX1M)
(supplied)
to a wall outlet
to DC IN 16V
Turning on the unit
1
Switch the input selector of
the TV.
2
Press
\
/
1
(on/standby) to turn
on the unit.
The light on the
\
/
1
(on/standby)
button changes from red to green.
When the unit is turned on for the
first time, the date and time setting
display will appear. To set the date
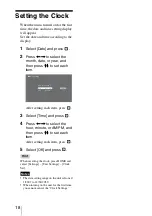
and time, see “Setting the Clock”
(page 18).
To turn off the unit
Press the
\
/
1
(on/standby) button of
the unit or remote.
If the unit does not respond
Turn off the power by force. For
details, see “To turn off the power by
force” (page 66).
Note
Even if the
\
/
1
button turns red, the unit may
be operational. When disconnecting the
power cord from a wall outlet or from the DC
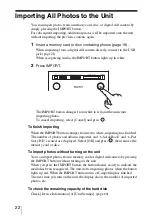
IN terminal, check that the EXPORT
indicator and IMPORT button are turned off.
CF/Microdrive
EXPORT
IMPORT

