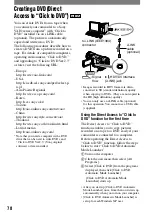
74
HDR-HC1 2-631-458-11(1)
Copying still images to a computer (Continued)
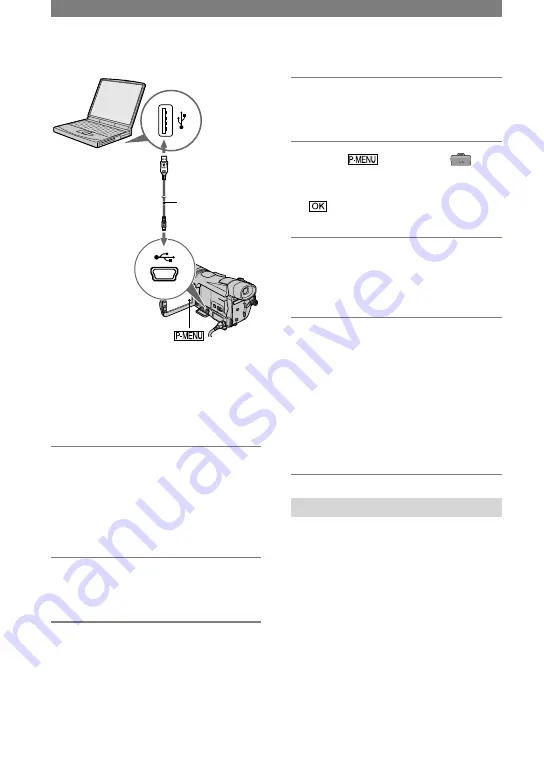
to USB jack
USB cable
(supplied)
to USB jack
• Do not connect your camcorder to the computer
at this point.
• The computer may not recognize the camcorder
if you connect them with the USB cable
(supplied) before turning on your camcorder.
• Refer to 76 page for the recommended
connection.
1
Turn on the computer.
Close down all applications running on
the computer.
For Windows 2000/Windows XP
Log on as Administrators.
2
Insert a “Memory Stick Duo” into
your camcorder.
3
Prepare the power source for
your camcorder.
Use the supplied AC Adaptor as the
power source (p. 13).
4
Slide the POWER switch down to
turn on the PLAY/EDIT lamp.
5
Touch
[MENU]
(STANDARD SET)
[USB
SELECT]
[MEMORY STICK]
.
6
Connect the USB cable (supplied)
to the USB jack on your
camcorder.
7
Connect the other end of the USB
cable to the USB jack on your
computer.
[USB CONNECT] appears on the LCD
screen of your camcorder.
It may take some time for the computer
to recognize the camcorder when you
connect the USB cable for the first time.
Copying the pictures
For Windows users
Double-click the [Removable Disk] icon
displayed in [My Computer]. Then, drag
and drop a picture in the folder onto the
hard disk drive of your computer.
Summary of Contents for HDR HC1 - 2.8MP High Definition MiniDV Camcorder
Page 9: ...9 ...
Page 23: ...23 Getting Started ...
Page 120: ......
Page 121: ......
Page 122: ......


