Attaching to the Camera
8
Attaching to the Camera
Attach the V-wedge shoe attachment to the camera and
attach the viewfinder to the V-wedge shoe attachment.
• When attaching the viewfinder to the camera or
removing it from the camera, be sure to lock the
viewfinder in its standard position.
• When removing the viewfinder from the camera, be
sure to secure the tripod with its tilt-lock mechanism
and hold the viewfinder firmly.
Be careful not to fall or drop the viewfinder and camera.
• When attaching the V-wedge shoe attachment, be sure
to use the supplied hexagonal screws.
• When attaching the viewfinder to the HXC-D70 or
PMW-320/350/400/500, use the shoe conversion
bracket (supplied)
. (HDVF-L750 only)
For how to change the position of the viewfinder attached
to the camera, see “Adjusting the Viewfinder Position”
on page 10.
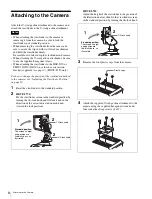
1
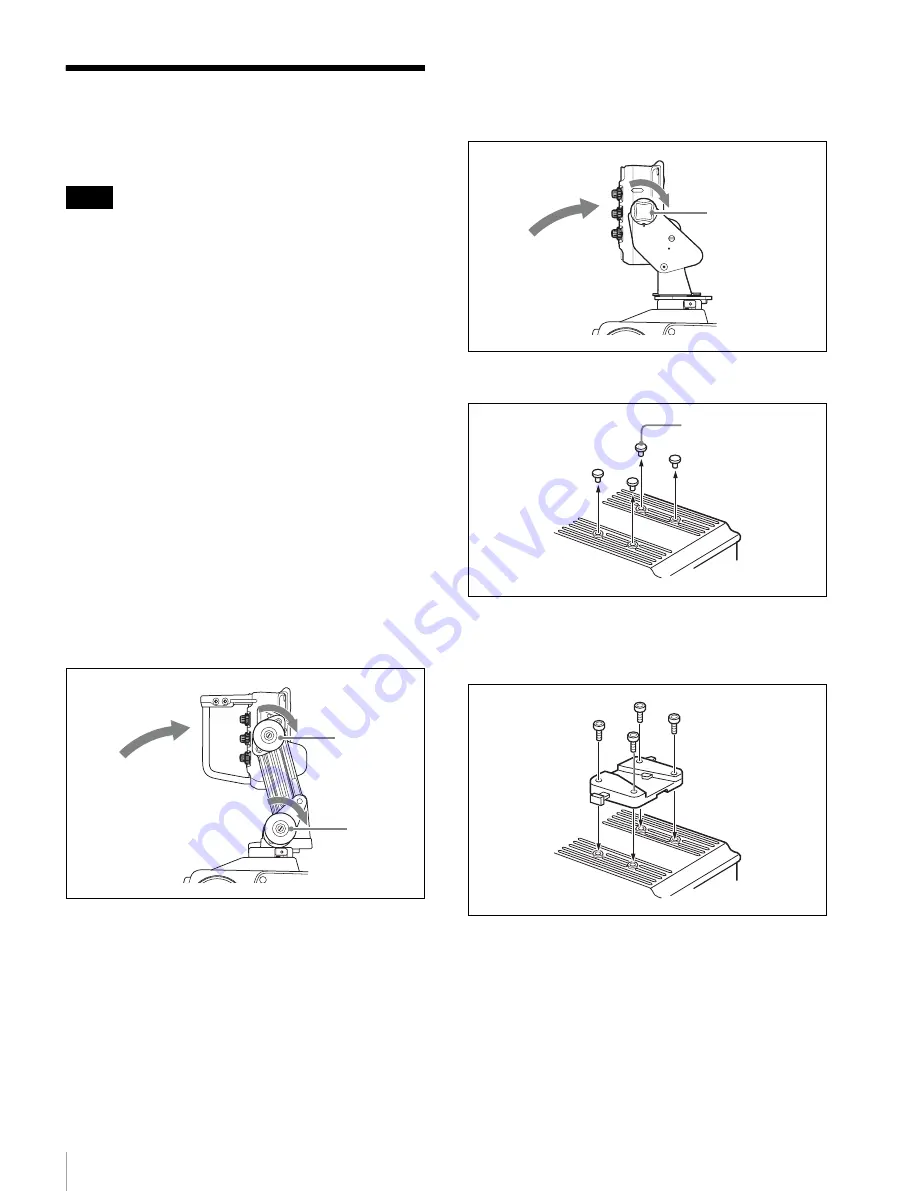
Reset the viewfinder to the standard position.
2
HDVF-L770:
Fix the viewfinder screen in the standard position by
turning the tilt-lock knob and lift-lock knob in the
direction of the arrow indicated on each knob
(toward the lock position).
HDVF-L750:
Adjust the height of the viewfinder to the position of
the illustration below, then fix the viewfinder screen
in the standard position by turning the tilt-lock knob.
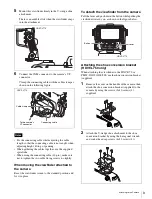
3
Remove the four plastic caps from the camera.
4
Attach the supplied V-wedge shoe attachment to the
camera using the supplied hexagonal wrench and
four socket head cap screws (4 ×12).
Notes
Standard position:
The screen’s height
and position are
fixed fully back, as
illustrated.
Tilt-lock knob
Lift-lock knob
2
1
2
Standard position:
The screen’s height
and position are
fixed fully back, as
illustrated.
Tilt-lock knob
2
1
Plastic caps


