75
Function Settings
C
h
a
p
te
r 5
S
yst
em
Ad
m
in
is
tr
a
to
r Se
tt
in
g
s
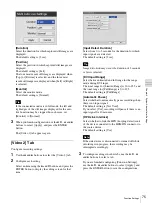
[Duration]
Select the duration for which captured still images are
displayed.
The default setting is [3 sec].
[Position]
Select the position in which captured still images are
displayed.
The default setting is [Left].
The four most recent still images are displayed when
[Top] or [Bottom] is selected, and the three most
recent still images are displayed when [Left] or [Right]
is selected.
[Monitor]
Select the monitor mode.
The default setting is [Normal].
If the connected monitor is in full mode, the left and
right edges of the still images displayed for the auto
live function may be cropped. In such cases, set
[Monitor] to [Normal].
3
When you finish configuration, use the
V
,
v
,
B
, and
b
buttons to select [Apply], and press the ENTER
button.
The [Video 1] tab appears again.
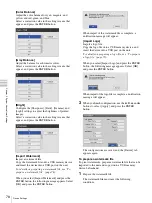
[Video 2] Tab
Configure recording settings.
1
Use the
B
and
b
buttons to select the [Video 2] tab.
2
Configure each setting.
Select an item using the
V
and
v
buttons, and press the
ENTER button to display the setting screen for that
item.
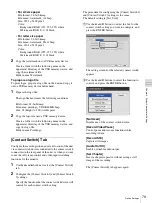
[Input Detect Duration]
Select from 0 to 3 seconds for the duration for which
input signals are detected.
The default setting is [3 sec].
Image distortion may occur if a duration of 2 seconds
or less is selected.
[DVI Input Range]
Select between limited and full range for the range
mode during DVI input.
The tonal range for [Limited Range] is 16 to 235, and
the tonal range for [Full Range] is 0 to 255.
The default setting is [Full Range].
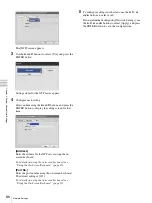
[Automatic Pause]
Select whether to automatically pause recording when
there is no input signal.
The default setting is [Not Used].
If you select [Use], recording will pause if there is no
input signal for 10 minutes.
[HPD sink interlock]
Select whether to link the HPD (hot plug detect) sink
of the device connected to the HDMI IN connector to
the source device.
The default setting is [Use].
If the sink device is disconnected or turned off while
recording is in progress, the recording may be
interrupted accordingly.
3
To configure settings in other tabs, use the
V
,
v
,
B
,
and
b
buttons to select a tab.
If you are finished configuring [Function Settings],
use the
V
,
v
,
B
, and
b
buttons to select [Apply], and
press the ENTER button to save the configurations.
Tip
Tip
Note
Summary of Contents for HVO-500MD
Page 106: ......


