11
Installation
Installation
Connecting a Camera Control Unit
(CCU)
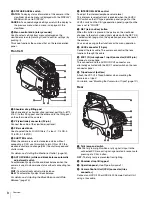
When operating the camera in a system with a CCU, connect
between the CCU connector of the camera and the CAMERA
connector of the CCU, using a triax cable.
When required, secure the cable, using the supplied cable
clamp belt.
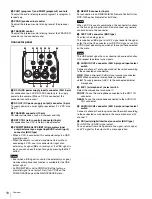
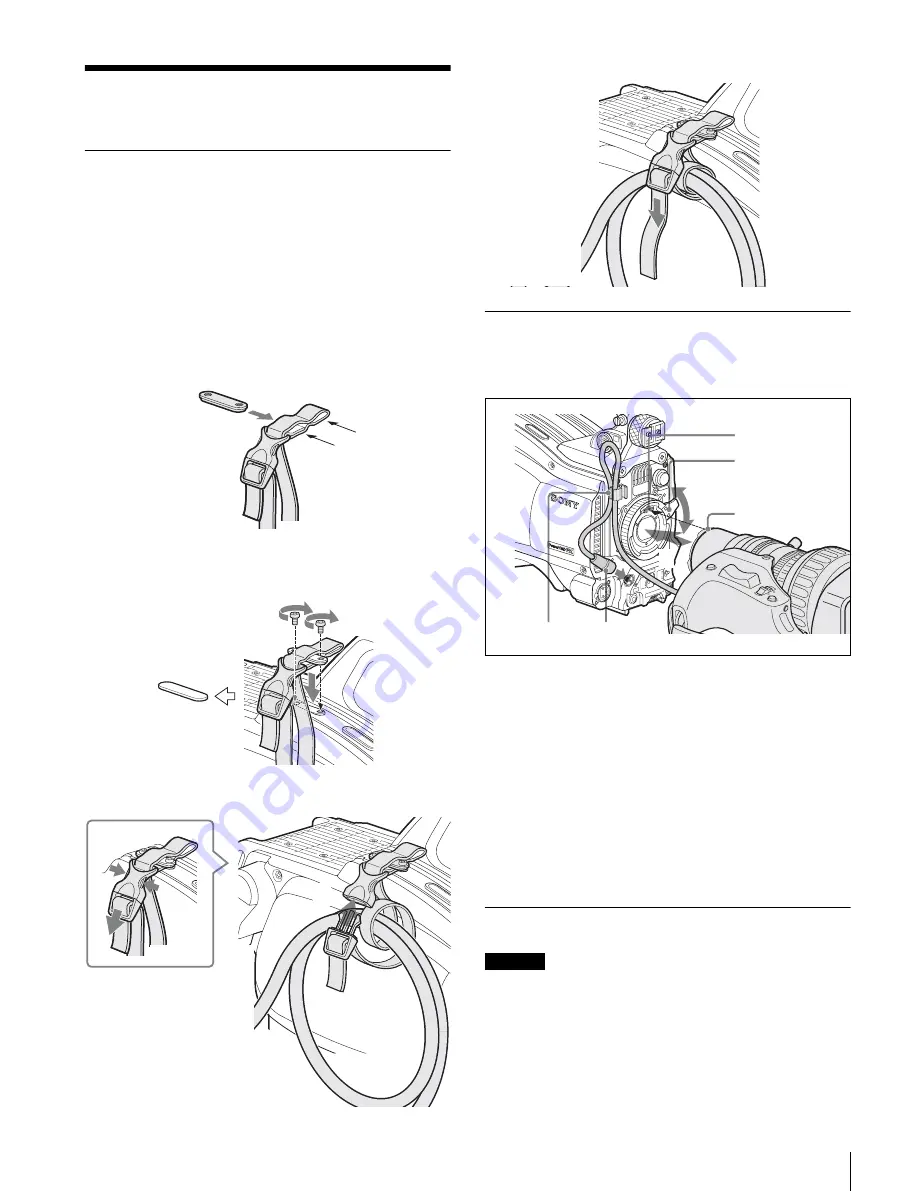
To use the cable clamp belt
1
Insert the belt bracket
C
into hole
A
or
B
of the cable
clamp belt.
2
1
Remove the back screw-hole cover on the top of
the camera and
2
secure the cable clamp belt to the
camera, using the two supplied screws (+B3
×
10).
3
1
Release the buckle,
2
bundle the cable with the
belt,
3
then lock the buckle again.
4
Adjust the length by pulling down the end of the belt.
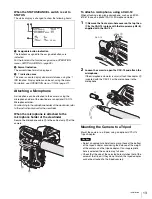
Attaching a Lens
For information on handling lenses, refer to the operation
manual for the particular lens
1
Push the lens fixing lever
A
upward and remove the
lens mount cap from the lens mount.
2
Align the lens’ alignment pin
C
with the notch
B
in
the upper part of the lens mount and insert the lens
into the mount.
3
While supporting the lens, push the lens fixing lever
A
downward to secure the lens.
4
Connect the lens cable to the LENS connector.
5
Secure the lens cable with the cable clamp.
Attaching a Viewfinder
When the viewfinder is attached, do not leave the camera with
the eyepiece facing the sun. Direct sunlight can enter through
the eyepiece, be focused in the viewfinder and cause fire.
Example: Attaching an HDVF-200 Viewfinder
For details on the viewfinder, refer to the operation manual for
the viewfinder.
A
B
C
1
2
1
2
3
Caution
OFF
ON
SEL
WHT
BLK
SHUT
TER
RET
L
E
N
S
INET
ERCO
M LE
VEL
MIC
VF
4
1
2
3
C
A
B
5
Summary of Contents for HXC-100
Page 43: ...43 Appendices ...
Page 44: ...Printed in Japan ...

