24
Saving and Restoring Configuration Data
Chap
te
r 2
A
d
m
inis
tra
tion M
e
nu
2
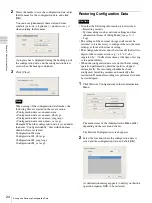
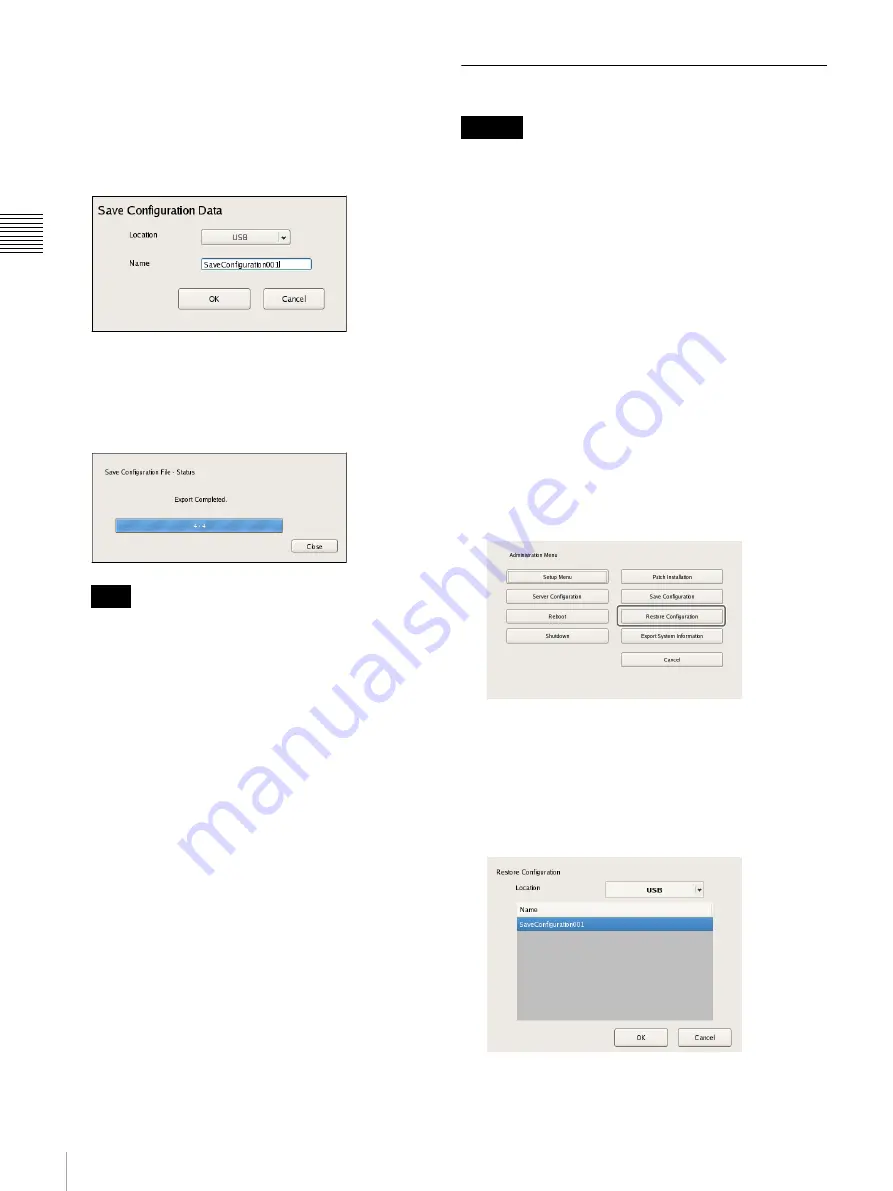
Select the media to save the configuration data, enter
the file name for the configuration data, and click
[OK].
You can use alphanumeric characters and some
symbols (periods (.), hyphens (-), underscores (_))
when entering the file name.
A progress bar is displayed during the backing up of
the configuration data, and the configuration data is
saved when the backup is finished.
3
Click [Close].
When saving of the configuration data finishes, the
following files are created in the save location.
<Configuration data save name>.item
<Configuration data save name>_db.tar.gz
<Configuration data save name>_img.tar.gz
<Configuration data save name>_os.tar.gz
Example: When the configuration data is saved under
the name “Configuration001,” files with the names
shown below are created.
Configuration001.item
Configuration001_db.tar.gz
Configuration001_img.tar.gz
Configuration001_os.tar.gz
Restoring Configuration Data
• Note that the following information is not restored.
– Recording records
– System settings such as network settings and time
information (Items of [Setup Menu]
)
– Logs
• The settings of the external storage itself cannot be
restored, so it is necessary to configure them to the same
settings as those at the time of saving.
• The configuration data cannot be restored if the first two
digits of the current version (e.g.: “a.b” of “a.b.c”
separated by “.”) differ from those at the time of saving
or the model differs.
• When the configuration data is restored, the recording
operation performed up until that point is stopped
automatically. If a recording schedule has been
configured, recording resumes automatically after
restoration. If manual recording was performed, it needs
be started again.
1
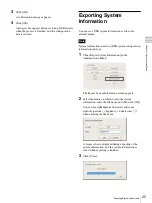
Click [Restore Configuration] in the Administration
Menu.
The menu items of the Administration Menu differ
depending on the server and clients.
The Restore Configuration screen appears.
2
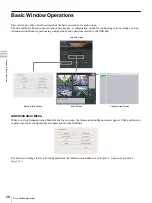
Select the location where the configuration data is
saved and the configuration data, and click [OK].
A confirmation message appears to notify you that this
operation requires NSR to be restarted.
Note
Caution
Summary of Contents for Ipela NSR-1050H
Page 138: ......


