53
Settings Related to Monitoring
C
h
ap
te
r 4
A
pplic
at
io
n
S
e
tti
n
gs
Settings Related to
Monitoring
You can configure the following settings related to the
monitor layout and camera images.
•
“Configuring Monitor Layout Settings” (page 53)
You can create multiple layouts according to your
operating environment and objective.
•
“Assigning Cameras to Monitor Frames” (page 60)
You can assign a camera to each monitor frame.
•
“Configuring Layout Tours” (page 60)
You can sequentially switch the display of each display
at a preset time.
Configuring Monitor Layout Settings
By setting the number and size of camera monitor frames,
you can create a layout according to your operating
environment and objective.
• When you register a camera, the layouts 2×2, 3×3, and
4×4 are created as the default layouts automatically. The
size of the monitor frame cannot be changed for the
default layout.
• Created layouts are saved on the NSR they are created
on. For example, layouts created on a remote client
(RealShot Manager Advanced Client Software) are
saved on the remote client.
Creating a New Layout
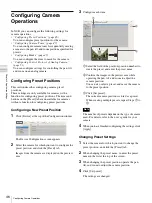
1
Click [Layout] at the top of the Configuration window.
The Layout Configuration screen appears.
2
Select “Custom Layout A” or “Custom Layout B”
from the [Layout] tree, and click
(Add).
“Custom Layout A” and “Custom Layout B” are
preset layout groups. Use them according to your
objective.
The area on the left side changes to the display for
setting the layout.
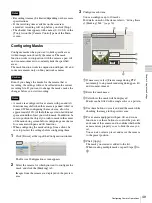
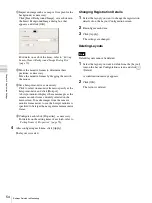
3
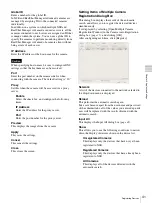
Configure each item.
For details on each of the items, refer to
of Layout Configuration Screen” (page 55)
.
1
Enter a name for the layout, as necessary.
You can enter up to 32 characters.
2
Set the number and layout of monitor frames.
Click [Template], set each item in the Insert
Template dialog box that appears, and click [OK].
For details on each of the items, refer to
Items of Insert Template Dialog Box” (page 58)
Notes
Note
1
5 3 2
6
4
Summary of Contents for Ipela NSR-1050H
Page 138: ......


