54
Settings Related to Monitoring
C
h
a
p
te
r 4
A
ppli
c
at
ion S
e
ttings
3
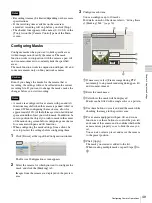
Import an image such as a map or floor plan for the
background, as necessary.
Click [Insert Background Image], set each item in
the Insert Background Image dialog box that
appears, and click [OK].
For details on each of the items, refer to
Items of Insert Background Image Dialog Box”
(page 59)
.
4
Move the monitor frames to determine their
positions, as necessary.
Move the monitor frames by dragging them with
the mouse.
5
Set a hotspot monitor, as necessary.
Click to select one monitor frame to specify as the
hotspot monitor, and click [Hotspot].
A hotspot monitor displays the same images as the
camera monitor frame currently selected on the
main screen. To make images from the camera
monitor frame easier to see, the hotspot monitor is
specified to be larger than a regular camera monitor
frame.
6
Configure each tab of [Properties], as necessary.
For details on the setting items of each tab, refer to
“Setting Items of Properties” (page 56)
.
4
After configuring each item, click [Apply].
The layout is created.
Changing Registration Details
1
Select the layout you want to change the registration
details of on the Layout Configuration screen.
2
Reconfigure each item.
3
Click [Apply].
The settings are changed.
Deleting Layouts
Default layouts cannot be deleted.
1
Select the layout you want to delete from the [Layout]
tree on the Layout Configuration screen, and click
(Delete).
A confirmation message appears.
2
Click [OK].
The layout is deleted.
Note
Summary of Contents for Ipela NSR-1050H
Page 138: ......


