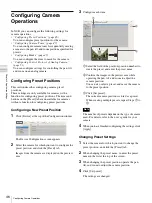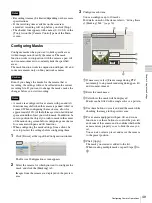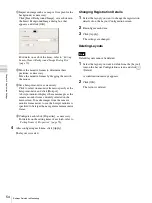
55
Settings Related to Monitoring
C
h
ap
te
r 4
A
pplic
at
io
n
S
e
tti
n
gs
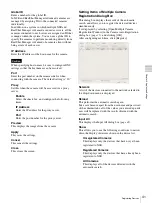
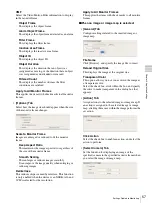
Setting Items of Layout Configuration
Screen
This screen is displayed by clicking [Layout] in the
Configuration window.
After changing the settings, click [Apply] to save your
settings.
A
[Layout] Tree
This displays a list of the configured layouts in a tree
structure.
Selecting a layout from the tree displays the setting details
in the area on the right.
(Add)
This creates a new layout.
Select “Custom Layout A” or “Custom Layout B,” and
click this button.
“Custom Layout A” and “Custom Layout B” are
preset layout groups. Use them according to your
objective.
(Delete)
This deletes a layout.
Select the layout you want to delete from the tree, and
click this button to delete the layout.
Default layouts cannot be deleted.
B
Name
Enter the name of the layout. It can be up to 32 characters
long.
C
Show on the Main Window
Select the check box to enable this layout to be displayed
on the main screen.
D
Hotspot
Set the hotspot monitor.
Click to select one monitor frame to specify as the hotspot
monitor, and click this button.
If you set a hotspot monitor, when you click a certain
monitor frame or an alarm is generated, images are
displayed on the monitor frame set as the hotspot monitor.
A hotspot monitor displays the same images as the camera
monitor frame currently selected on the main screen. To
make images from the camera monitor frame easier to see,
the hotspot monitor is specified to be larger than a regular
camera monitor frame.
E
Insert Background Image
This displays the Insert Background Image dialog box
for importing an image such as a map or floor
plan for the background.
F
Apply Template
This displays the Insert Template dialog box
for
setting the number and layout of monitor frames.
G
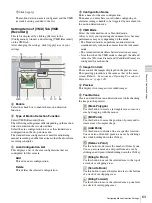
Tool Buttons
(Insert Image)
Use this button to display the Insert Image dialog box
for inserting an image.
(Insert Image Map)
Use this button to insert an image map.
(Remove Item)
Use this button to remove the selected item.
(Remove Assigned Cameras)
Use this button to remove the cameras assigned to the
selected monitor frame.
(Bring to Front)
Use this button to move the selected image in front of
all others.
(Bring Forward)
Use this button to move the selected image forward.
(Send Backward)
Use this button to move the selected image backward.
(Send to Back)
Use this button to move the selected image behind all
others.
(Flip Horizontally)
Use this button to flip the selected image horizontally.
(Rotate)
Use this button to spin the selected image 90 degrees
clockwise.
Note
Note
B C
D E F
G
J
I
H
A
K
L M
N
Summary of Contents for Ipela NSR-1050H
Page 138: ......

