63
Configuring Motion Detection Settings
C
h
ap
te
r 4
A
pplic
at
io
n
S
e
tti
n
gs
7
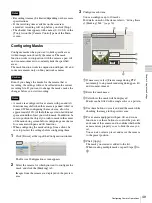
Click [Apply].
The motion detection area is configured, and the VMD
(recorder) setting is added to the list.
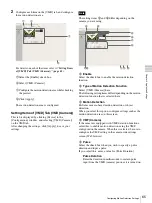
Setting Items of [VMD] Tab (VMD
(Recorder))
This tab is displayed by clicking [Device] in the
[Configuration] window, and selecting [VMD (Recorder)]
on the VMD tab.
After changing the settings, click [Apply] to save your
settings.
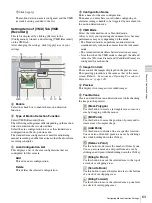
A
Enable
Select the check box to enable the motion detection
function.
B
Type of Motion Detection Function
Select [VMD (Recorder)] here.
The following setting items differ depending on the motion
detection function that is selected here.
Select the area configuration to use as the standard area
configuration in the drop-down menu.
The standard area configuration is used for monitoring,
manual recording, and the like at times other than for alarm
recording schedules.
C
Area Configuration List
This displays a list of the area configurations that are
configured for this camera.
Add
This adds a new configuration.
Delete
This deletes the selected configuration.
D
Configuration Name
Enter a name for the area configuration.
The name you enter here is used when configuring an
alarm recording schedule to be triggered by movement in
the motion detection area.
E
VMD Mode
Select the Advanced mode or Standard mode.
Always verify your operating environment first, because
performance may vary depending on the mode.
• The Standard mode can perform motion detection
simultaneously with more cameras than the Advanced
mode.
• The Advanced mode offers better detection accuracy.
• Note that when the VMD mode is changed, the default
values for [Previous Frame] and [Candidate Frame] are
configured for each mode.
F
Image Controls
These control the images displayed in the preview area.
The operating procedure is the same as that of the main
screen. Refer to
“Functions and Operating Procedure of
G
Preview
This displays live images or recorded images.
H
Tool Buttons
Create and edit the motion detection area while checking
the image in the preview.
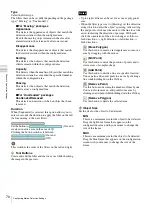
(Move Polygon)
Use this button to create a rectangular area or move a
area by dragging with the mouse.
(Edit Point)
Use this button to move the position of points and to
create areas of complex shape.
(Add Point)
Use this button to divide a line at a specific location.
You can also add an edit point to an area by clicking a
line while holding down the Ctrl key.
(Remove Point)
Use this button to decrease the number of lines by one.
You can also remove an edit point from an area by
clicking an edit point while holding down the Ctrl key.
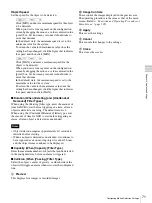
(Bring to Front)
Use this button to move the selected area to the top of
a stack of overlapping areas.
(Send to Back)
Use this button to move the selected area to the bottom
of a stack of overlapping areas.
(Bring Forward)
Use this button to move the selected area up one level
in a stack of overlapping areas.
K L
M
J
I
A
B
D
F
E
C
G
H
Summary of Contents for Ipela NSR-1050H
Page 138: ......

