66
Configuring Motion Detection Settings
C
h
a
p
te
r 4
A
ppli
c
at
ion S
e
ttings
F
Preview
This displays the images from the camera.
Use the following procedure to create an area for detecting
motion.
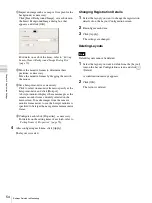
• Click and drag the mouse over the image to create a
motion detection area (red frame).
By dragging each edge of the area, you can change the
size of the area.
• Enter pixel values in the [Active Area] boxes to set the
motion detection area.
G
For a camera equipped with pan, tilt, and zoom functions,
use this to change the direction and zoom of the camera
when configuring an area.
H
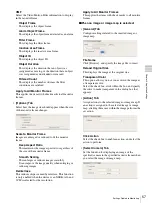
Advanced settings
Configure advanced settings, as necessary.
Camera Position
Select the camera position to configure.
Current Position
Select this to process the same area on the screen,
regardless of the direction the camera is facing.
Preset Position
Select this option when configuring settings for each
preset.
If you select this, select a preset from the drop-down
menu, and move the camera to that preset position.
When the camera is moved to the preset position you
specified, the settings for that position are enabled.
The settings for one preset position cannot be used for
another preset position.
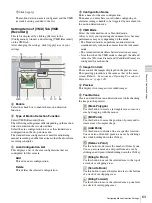
Object Type
Select [Moving] or [Unattended].
The following items differ for [Moving] and
[Unattended].
You can only configure one of [Moving] and
[Unattended] within each screen.
•
When Moving:
Threshold
Enter a value for the threshold for motion detection.
•
When Unattended:
Detection Time
Enter from 40 to 43200 (seconds) for the time from
when an object stops moving until the object is
detected as unattended and an alarm is triggered.
The countdown is reset if the object starts moving
again during the specified duration.
After an unattended object is detected (after the alarm
occurs), another unattended object may not be
detected for up to one minute.
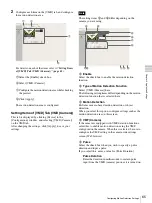
Area 1 to Area 4
Select Active or Inactive for each detection area.
Minimum Detectable Object Size
Enter a minimum size for the object to be detected.
Alternatively, configure the size by using the mouse to
drag the minimum detectable object size setting frame
(light blue). You can change the size by dragging each
of the edges. The setting frame cannot be deleted.
Maximum Detectable Object Size
Enter a maximum size for the object to be detected.
Alternatively, configure the size by using the mouse to
drag the maximum detectable object size setting frame
(blue). You can change the size by dragging each of
the edges. The setting frame cannot be deleted.
I
Apply
This saves the settings.
J
Cancel
This cancels the changes to the settings.
K
Close
This closes the screen.
Caution
Summary of Contents for Ipela NSR-1050H
Page 138: ......


