69
Configuring Motion Detection Settings
C
h
ap
te
r 4
A
pplic
at
io
n
S
e
tti
n
gs
8
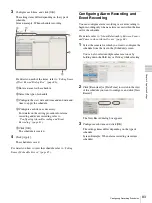
Select the package to use as the default package.
The default package is used for monitoring, manual
recording, and the like at times other than for alarm
recording schedules by VMF.
9
Click [Apply].
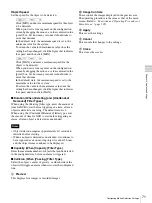
Setting Items of [VMD] Tab (VMF)
This tab is displayed by clicking [Device] in the
[Configuration] window, and selecting [VMF] on the
VMD tab.
After changing the settings, click [Apply] to save your
settings.
A
Enable
Select the check box to enable the motion detection
function.
B
Type of Motion Detection Function
Select [VMF] here.
The following setting items differ depending on the motion
detection function that is selected here.
In the drop-down menu, select the package to use as the
default package.
The default package is used for monitoring, manual
recording, and the like at times other than for alarm
recording schedules by VMF.
C
VMF Package List
This displays a list of the VMF packages configured for
this camera.
Add
This displays the Select Package Type dialog box for
adding a new VMF package.
Delete
This deletes the selected VMF package.
D
Sequential
Select this option to detect specific phenomena by
applying the filters in sequential order.
The filters are applied sequentially from the left.
When this option is selected, you can set the time and
sequence in which to apply the filters.
[Sequential] cannot be specified when setting an object
detection package.
Parallel
Select this option to detect specific phenomena by
applying all detection criteria simultaneously.
To switch between sequential and parallel, the
button for each filter and
inactive area must be turned off. When a button is
(On), click to set it to
(Off).
E
Pulse
Select the check box when you wish to specify a pulse
duration and input a pulse.
If you select this, enter a value for [Pulse Duration].
Pulse Duration
Enter in milliseconds the duration to sustain the moving or
non-moving status of an object as detected by VMF.
F
Inactive Area Frame
Configure the inactive area frame.
Set the button to
(On), and
create an inactive area in the area of
L
.
Clicking the button switches it between
(On) and
(Off).
G
(Preview)
Click this button to confirm the operation of the filtering
used in the configured package.
H
Package Name
Enter a name for the package.
I
Select the check box in front of the filter name to enable
the filter.
You can change the filter name, as necessary.
P
N O
M
A
B
L
K
J
I
H
C
E
F
G
D
Caution
Summary of Contents for Ipela NSR-1050H
Page 138: ......


