98
Configuring Action Settings
C
h
a
p
te
r 4
A
ppli
c
at
ion S
e
ttings
3
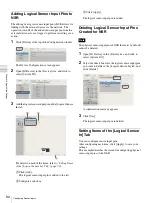
Select [Action] in the tree, and select [New Action].
The New Action dialog box appears.
4
Configure each item, and click [OK].
For details on each of the items, refer to
of New Action Dialog Box (Event/Alarm Action)”
(page 98)
.
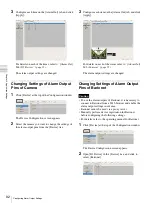
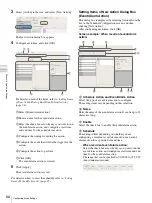
1
Select [Event/Alarm Action].
2
Enter a name for the event/alarm action.
3
Select the check boxes for the days you want to run
the event/alarm action, and configure a start time
and end time for the event/alarm action.
4
Configure the timing for ending the action.
5
Configure the event that will be the trigger for the
action.
6
Configure the action to perform.
7
Click [OK].
The event/alarm action is created.
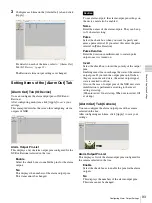
5
Click [Apply].
The event/alarm action is saved.
For details on how to view the schedule, refer to
Items of Schedule Screen” (page 85)
.
Setting Items of New Action Dialog Box
(Event/Alarm Action)
This dialog box is displayed by selecting [Action] from the
tree in the Schedule Configuration screen, and then
clicking [New Action].
After configuring each item, click [OK].
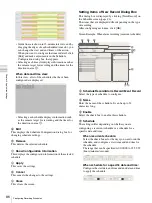
Screen example: When recurrent event/alarm
action:
A
Schedule Action and Event/Alarm Action
Select the type of event/alarm action to configure.
The setting items vary depending on this selection.
B
Name
Enter the name of the event/alarm action. It can be up to 32
characters long.
C
Enable
Select the check box to enable this event/alarm action.
D
Schedule
The settings differ depending on whether you are
configuring a recurrent event/alarm action or an event/
alarm action for a specific date and time.
When recurrent event/alarm action:
Select the check boxes for the days you want to run the
event/alarm action, and configure a start time and end
time for the event/alarm action.
The range that can be specified is 00:00:00 to 23:59:59
(hours/minutes/seconds).
1
2
7
5
3
4
6
B
C
A
I J
H
G
D
EF
Summary of Contents for Ipela NSR-1050H
Page 138: ......


