Sony IPELA SNC-CH110, User Manual
The Sony IPELA SNC-CH110 is a cutting-edge surveillance camera with exceptional specifications. Capture high-quality images and video footage with ease. Enhance your security system by downloading the user manual for free from our website, where we offer a wide selection of product manuals for easy access.
Share
Download


Reviews:
No comments
Related manuals for IPELA SNC-CH110

BB-HCM381A - Network Camera
Brand: Panasonic Pages: 2

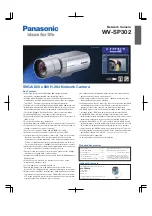
i-Pro WV-SP302
Brand: Panasonic Pages: 2

BB-HCM381A - Network Camera
Brand: Panasonic Pages: 28

BL-C20
Brand: Panasonic Pages: 18

FE9181-H
Brand: Vivotek Pages: 170

P3365-V
Brand: Axis Pages: 98

TB5328 SERIES
Brand: Vivotek Pages: 317

P1355-E
Brand: Axis Pages: 64

M31-L SERIES
Brand: Axis Pages: 30

SF8174
Brand: Vivotek Pages: 13
PZ7111
Brand: Vivotek Pages: 12
DCS-2230L
Brand: D-Link Pages: 72

DCS-4622
Brand: D-Link Pages: 96
DCS-4622
Brand: D-Link Pages: 67

BB-HCE481A - Network Camera
Brand: Panasonic Pages: 2

BB-HCE481A - Network Camera
Brand: Panasonic Pages: 28

BB-HCM381A - Network Camera
Brand: Panasonic Pages: 160
i-Pro WV-SP302
Brand: Panasonic Pages: 2


