background image

A

d

mini

s

tra

ting
 t

he 

Came

ra

Setting the Schedule — Schedule Menu

77

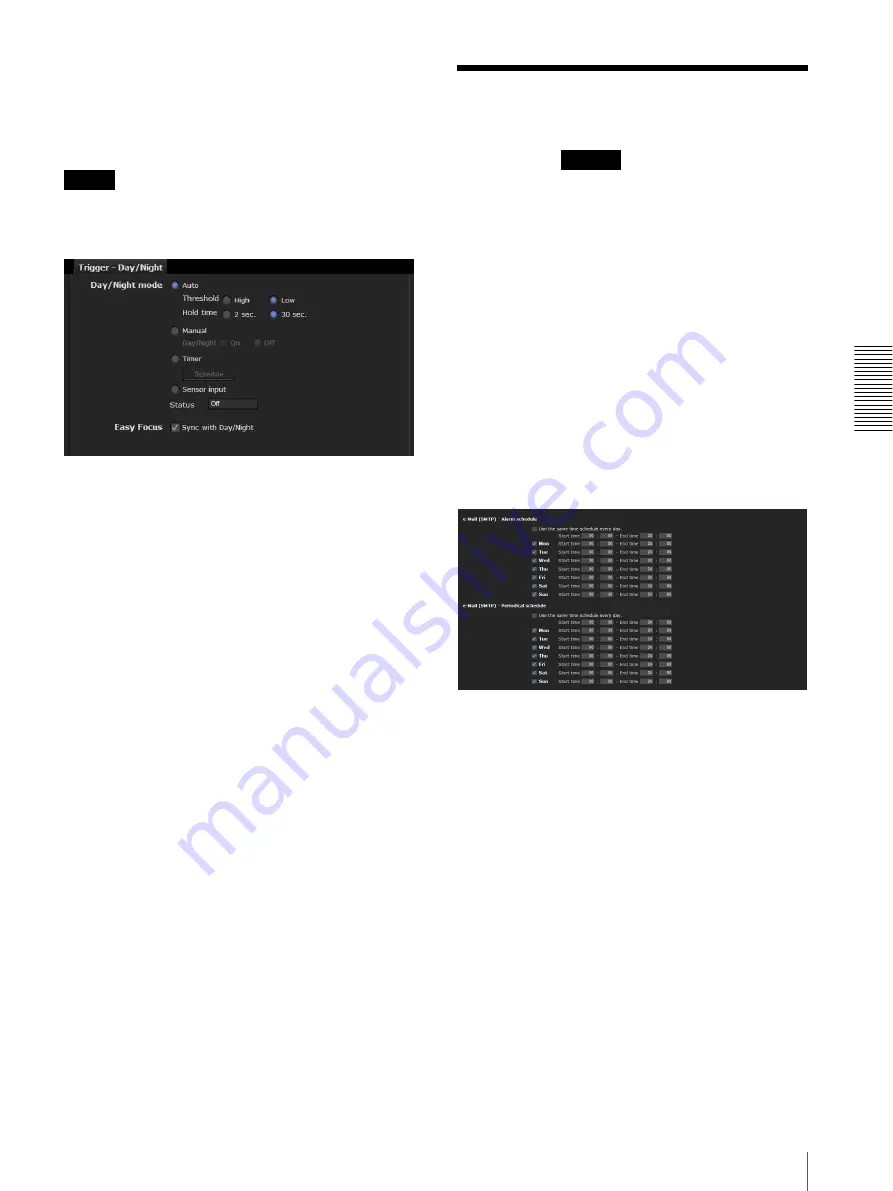
When you click 

Day/Night

, the 

Trigger-Day/Night


menu is displayed. You can set the necessary options 
here. The setting options and setting procedures are the 
same as those in the Day/Night tab of the Camera menu 
(page 43).

Note

The day/night function is invalid when 

Day/Night 

is set 

to 

Auto

 in the 

Trigger-Day/Night

 menu, even if you 

click 

Trigger

.

OK/Cancel

See “Buttons common to every menu” on page 32.

Setting the Schedule 

— Schedule Menu

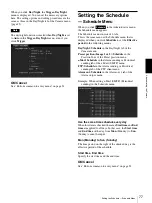
When you click 

 in the Administrator menu, 

the Schedule menu appears.
The Schedule menu consists of 6 tabs.
This is the same menu as the Schedule menu that is 
displayed when you click 

Schedule

 to set the 

Effective 

period

 in the following menus.

Day/Night:


Schedule

 in the Day/Night tab of the 

Camera menu

Preset position (Image 1 or 2):


Schedule

 in the 

Position Tour of the Preset position menu

e-Mail: Schedule

 in the Alarm sending or Periodical 

sending tab of the e-Mail (SMTP) menu

FTP:


Schedule

 in the Alarm sending or Periodical 

sending tab of the FTP client menu

Alarm out:


Schedule

 in the Alarm out 1 tab of the 

Alarm output menu

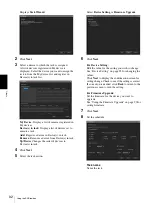
Example: When setting e-Mail (SMTP) (Periodical 

sending) in the Schedule menu

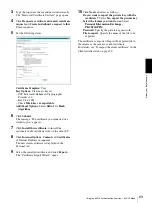
Use the same time schedule every day

When this item is checked, the same 

Start time

 and 

End 

time

 are applied to all days. In that case, the 

Start time


and 

End time

 of the day from 

Mon

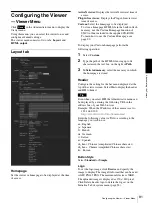
 (Monday) to 

Sun


(Sunday) cannot be input.

Mon (Monday) to Sun (Sunday)

The time period on the right of the checked day is the 
effective period of the schedule.

Start time, End time

Specify the start time and the end time.

OK/Cancel

See “Buttons common to every menu” on page 32.

Schedule

Summary of Contents for IPELA SNC-CH120

Page 1: ...de Software Version 1 2 Before operating the unit please read this manual thoroughly and retain it for future reference SNC CH120 CH160 CH220 CH260 SNC DH120 DH120T DH160 DH220 DH220T DH260 4 199 270 12 1 2010 Sony Corporation ...

Page 2: ... a monitor image via e mail 27 Sending a monitor image to an FTP server 27 Controlling Alarm out 1 27 Controlling the Day Night function 27 Switching TCP UDP Transmission Mode 28 Using the System Utility 29 SNC viewer 29 SNC Desktop viewer 30 Administrating the Camera Basic Operations of the Administrator Menu 32 How to set up the Administrator menu 32 Configuration of the Administrator menu 33 Co...

Page 3: ...0T DH260 75 Alarm out 1 Tab 75 Setting the Operations from the Viewer Trigger Menu 76 Setting the Schedule Schedule Menu 77 Setting the Sensor input Camera tampering detection Motion detection SNC CH120 CH160 CH220 CH260 DH120T DH160 DH220T DH260 Event detection Menu 78 Sensor input tab Set the sensor input 78 Camera tampering detection tab Set the camera tampering detection 78 Motion detection ta...

Page 4: ...RD TO THIS MANUAL THE SOFTWARE OR OTHER INFORMATION CONTAINED HEREIN AND HEREBY EXPRESSLY DISCLAIMS ANY IMPLIED WARRANTIES OF MERCHANTABILITY OR FITNESS FOR ANY PARTICULAR PURPOSE WITH REGARD TO THIS MANUAL THE SOFTWARE OR SUCH OTHER INFORMATION IN NO EVENT SHALL SONY CORPORATION BE LIABLE FOR ANY INCIDENTAL CONSEQUENTIAL OR SPECIAL DAMAGES WHETHER BASED ON TORT CONTRACT OR OTHERWISE ARISING OUT O...

Page 5: ... Guide when printed out may differ from those that appear on your screen Installation Manual printed matter The supplied Installation Manual describes the names and functions of parts and controls of the Network Camera connection examples and how to set up the camera Be sure to read the Installation Manual before hand System Requirements The following computer environment is necessary for the comp...

Page 6: ...ervice Pack 2 or later on page 9 Configuring Windows Firewall in When using Windows Vista on page 11 or Configuring Windows Firewall in When using Windows 7 on page 14 Assigning an IP address using SNC toolbox 1 Insert the CD ROM in your CD ROM drive A cover page appears automatically in your Web browser If it does not appear automatically in the Web browser double click the index htm file on the ...

Page 7: ...ify the IP address manually Select Use the following IP address and type the IP address Subnet mask and Default gateway in the relevant boxes 10 Set the DNS server address To obtain the DNS server addresses automatically Select Obtain DNS server address automatically To specify the DNS server addresses manually Select Use the following DNS server address and type the Primary DNS server address and...

Page 8: ...perate as follows Example In case of SNC toolbox If message Internet Explorer appears click Yes If the message File Download Security Warning appears click Run Note If you select Save in the File Download Security Warning dialog you will not be able to perform the installation correctly Delete the downloaded file and click the Setup icon again If the message Internet Explorer Security Warning appe...

Page 9: ...b site to the zone Be sure to add the protocol https 6 Click OK to complete the setting Restart Internet Explorer when the above procedure is completed and access the camera Configuring Windows Firewall SNC toolbox may not operate correctly depending on the configuration of Windows Firewall No cameras are shown in the list even if they are detected In this case confirm the Windows Firewall configu...

Page 10: ... Vista Installing software A warning message regarding the active contents may appear when you install software such as SNC toolbox from the CD ROM In this case operate as follows Example In case of SNC toolbox If the pop up AutoPlay appears when a CD ROM is inserted into the CD ROM drive click Install or run program Note If you click Open folder to view files the Web browser will not open automat...

Page 11: ...of ActiveX Control the information bar or Security Warning may appear In this case operate as follows If the message Information Bar appears click Close If the information bar appears click on the bar and select Install ActiveX Control If the message User Account Control Windows needs your permission to continue appears click Continue If Internet Explorer Security Warning appears click Install The...

Page 12: ...ol Panel from the Start menu of Windows 2 Click Windows Firewall 3 Select Turn Windows Firewall on or off If the message User Account Control Windows needs your permission to continue appears click Proceed 4 Select Exceptions in the Windows Firewall dialog 5 Click Add Program 6 If the Add Program dialog appears select SNC toolbox and click OK SNC toolbox is added to the Program or port list 7 Clic...

Page 13: ...select Save in the File Download Security Warning dialog you will not be able to perform installation correctly Delete the downloaded file and click the Setup icon again If the message User Account Control Do you want to allow the following program from an unknown publisher to make changes to this computer appears click Allow The software installation starts Installing ActiveX Control During insta...

Page 14: ...iguration as follows Example In the case of SNC toolbox To turn Windows Firewall off 1 Select Control Panel from the Start menu of Windows 2 Click Windows Firewall 3 Select Turn Windows Firewall on or off 4 Select Disable Windows Firewall The cameras will be displayed in the list To turn Windows Firewall on 1 Select Control Panel from the Start menu of Windows 2 Click Windows Firewall 3 Select All...

Page 15: ...e camera using the Web browser installed on your computer Use Internet Explorer as a Web browser 1 Start the Web browser on the computer and type the IP address of the camera in the URL address bar The viewer window is displayed Display sample Note When accessing the camera images will not be displayed in the following conditions When the maximum number of viewers exceeds 5 The bit rate including ...

Page 16: ...LAN settings of Internet Explorer the image may not be displayed In that case disable Automatic configuration and set the Proxy server manually For the setting of the Proxy server consult your network administrator When you install ActiveX Control you should be logged in to the computer as Administrator If you are using Windows XP Service Pack 2 or later Windows Vista or Windows 7 the information ...

Page 17: ...ware personal firewall or pop up blocker on your computer the camera performance may be reduced for example the frame rate for displaying the image may be lower The Web page displayed when you log in to the camera uses JavaScript The display of the Web page may be affected if you use antivirus software or other software described above on your computer ...

Page 18: ...ec Tab page 44 Select the White Balance mode according to the installation position White balance page 41 Select the brightness of the image sent from the camera Exposure page 40 Brightness page 42 Select the quality of the image sent from the camera Video codec Tab page 44 Select the view size of the image View size page 21 Synchronize the date and time of the camera with those of the computer Da...

Page 19: ...rs Each type of user can use the corresponding functions below z Usable function Not usable function The access rights of the administrator and the user can be set in Setting the User User Menu of the Administrator menu on page 64 Function Administrator User Full Pan Tilt Preset position Light View Monitor a live image z z z z z z View the date and time z z z z z z Control the frame rate JPEG mode...

Page 20: ...the camera for the first time When you access the network camera using ActiveX viewer for the first time the Security Warning appears Click Yes and install ActiveX Control You can use all the functions of the viewer with ActiveX Control Plug in free viewer This viewer allows the user to select from three image display methods JPEG JPEG Flash or ActiveX viewer JPEG method JPEG images will be displa...

Page 21: ... hide the detail setting menu or click it again to show the menu Information panel Check the date and time here View panel You can change the screen mode size of the image image codec mode and frame rate Also still images and movies can be saved movie saving can also be stopped from here Screen Mode Select Window or Full Screen View size Selects the view size to be displayed Click View size list b...

Page 22: ...ging Pan Tilt control Click the arrow button the direction in which you want to move the camera Keep it pressed to move the camera continuously To return to the home position click Zoom control Press to zoom out and press to zoom in Zooming continues while the button remains pressed Exclusive control Click this button to display the time remaining for operation authority However if operation autho...

Page 23: ...the camera is shown here There are two modes for on screen pan tilt zoom operation using a mouse Area zoom mode and Vector dragging mode In the Area zoom mode clicking will pan or tilt the camera towards the center of the image The Area zoom will move the camera in the direction that displays the area selected by the operator and zooms in at the same time The operator can choose a part of the imag...

Page 24: ...isplay The available functions are as follows Notes Pan Tilt limitation The SolidPTZ function controls streaming by cropping or reducing a maximum size image Thus the more the camera zooms out the less area to be panned or tilted and becomes unavailable at the WIDE setting Zoom The SolidPTZ function enables you to display an area of the cropped image from the maximum image size when zoomed in at t...

Page 25: ...ng tilting and zooming by specifying the area Area zoom mode only Click and hold the left button of the mouse on the monitor image and drag the mouse diagonally to draw a red frame around the portion you want to enlarge The camera moves so that framed portion is positioned at the center of the display and is zoomed in Note When the specified area is zoomed in the center may be shifted or some port...

Page 26: ...peration continues while you are clicking on the button Controlling the Camera on a Full Image When the camera is in controllable condition the full image appears on the panorama panel The full image is the still image of entire area to be shot by the camera in reduced sized image By clicking on the full image the selected location appears on the panorama panel To create a full image Create the fu...

Page 27: ...nel The still image of the time you click is captured and the image file is sent to the FTP server Controlling Alarm out 1 You can control Alarm out 1 To use this function you need to make Alarm out 1 active in the Trigger menu of the Administrator menu page 76 1 Click Alarm out 1 on the Trigger panel The alarm output is switched by clicking The alarm output mode can be selected from Toggle or Tim...

Page 28: ...as the communication port HTTP communication is adopted for video communications HTTP is the protocol used for reading the usual Web page In an environment capable of reading Web pages you can watch video by selecting the TCP port Unicast When Unicast is selected as the communication port RTP Real time Transport Protocol is adopted for video communications Since RTP is the protocol for running vid...

Page 29: ...ns on the wizard When the license agreement policies are displayed agree after reading them carefully and install the SNC viewer Using the SNC viewer Click SNC viewer in the control panel Connection tab You can set the connection method Select the start up connection from TCP Unicast and Multicast If TCP connection is selected you can configure proxy settings by selecting Use proxy View tab Screen...

Page 30: ...ndows Vista or Desktop in the case of Windows 7 Installing the SNC desktop viewer 1 Click Download When the license agreement policies are displayed on the SNC desktop viewer download screen agree after reading them carefully and download the SNC desktop viewer 2 Execute the downloaded SncDesktopViewer gadjet file Using the SNC desktop viewer When installation is finished SNC desktop viewer is dis...

Page 31: ...Select the PTZ operation mode for the Gadget screen from the options Area zoom PTZ control bar and Vector dragging Click Exit to exit Gadget When you click Set you will see the following setting screen Tip The operation mode of Solid PTZ has been changed for this device ...

Page 32: ...r the Administrator The Administrator menu appears 3 Click the menu name example System on the left side of the Administrator menu The clicked menu appears Example System menu 4 Select the required tab above the menu and set each setting option in the tab Example Date time tab of System menu See pages 34 to 83 for details of the menu tabs and setting options 5 After setting click OK The settings y...

Page 33: ...istered positions is also set here Saving the Camera Position and Action Preset position Menu on page 65 e Mail SMTP Displays the e Mail SMTP menu for sending an e mail Sending an Image via E mail e Mail SMTP Menu on page 68 FTP client Displays the FTP client menu for sending an image file etc to an FTP server Sending Images to FTP Server FTP client Menu on page 72 Alarm output SNC CH120 CH160 CH2...

Page 34: ...r their turn for control authority during operation by one user The selectable number is from 0 to 5 This is effective when Exclusive control mode is set to On Notes To use Exclusive control mode the date and time of this unit and the connected computer must be set correctly first To use Exclusive control mode do not disable the Web browser Cookie If it is disabled this mode cannot be used When yo...

Page 35: ...e for NTP server address NTP server 2 Enter the second choice for NTP server address NTP server 3 Enter the third choice for NTP server address DHCP server Select DHCP server when you need to get NTP server information from DHCP server Multicast Select Multicast when you search for an NTP server with Multicast Time zone Set the time difference from Greenwich Mean Time in the area where the camera ...

Page 36: ...e and time Camera ID Set to display Camera ID Codec Set to display the bit rate and frame rate Zoom ratio Set to display the zoom ratio Camera direction Set to display the name of a preset position Event Set to display an event record Notes The items except for Off and Text cannot be set at the same time Depending on the length of the string you enter in Text the string display may crossover the o...

Page 37: ...ult Resets the camera to the factory settings Retain current network settings When this item is checked only the current network settings will be retained after reset Click Factory default and the message Setup data will be initialized Are you sure appears When you click OK the network indicator on the camera starts to blink After adjustments of the default settings have finished the camera reboot...

Page 38: ...mage may be interrupted or image and or audio files may not be created correctly during image capturing Delete image By pressing Delete you can delete the full image recorded in the camera Delete thumbnails Click Delete to delete the thumbnails set in the Preset Setting menu Delete header logo Click Delete to delete the header logo set in the Viewer menu Delete superimpose logo Click Delete to del...

Page 39: ...ocus The current image focus position is superimposed when adjusting the focus For the details on each button refer to the Control bar of the Plug in free viewer page 24 Note If you click the buttons in this tab in order to adjust the focus easily the settings below are temporarily changed Privacy Masking and Cropping are deactivated SNC CH120 CH160 DH120 DH120T DH160 do not support the Privacy Ma...

Page 40: ...ocus Click Start button in Easy Focus to set the focus to the optimum position Notes The most suitable focus may not be available depending on imaging conditions If so click the 20 5 1 1 5 20 buttons to adjust the focus When SolidPTZ is set to On Easy Focus may not work properly In this case set SolidPTZ to Off Picture Tab You can set the color conditions exposure etc of the camera Preview screen ...

Page 41: ...be fixed to Off Tip Depending on the setting the range of Auto controlled shutter speed is as follows Shutter speed Fixed When Auto slow shutter is Off Shutter speed is fixed to the value set in Shutter speed When Auto slow shutter is set except for Off The range of shutter speed is from the value set in Auto slow shutter to the value set in Shutter speed Shutter speed Auto When Auto slow shutter ...

Page 42: ... the sharpness in 7 steps from 3 to 3 Selecting 3 provides the sharpest picture Contrast Select the contrast in 7 steps from 3 to 3 Selecting 3 provides the highest contrast OK Cancel See Buttons common to every menu on page 32 Privacy masking tab SNC CH220 CH260 DH220 DH220T DH260 Using the privacy masking enables you to hide images by masking specified parts of the images when streaming Preview ...

Page 43: ... settings according to the lighting using the Sensor mode or switch the Day Night mode using the Manual mode Manual Switch the day night mode manually When you select Manual On and Off become active When you select On the camera works in night mode When you select Off it works in day mode Timer Normally the camera works in day mode It switches to night mode at the time you set in the Schedule menu...

Page 44: ...ping to On and click the Area setting button The area setting window appears 2 Setting the trimming portion Hold down the left button of the mouse on the still image and drag the cursor diagonally The area in a red frame is the trimming portion 3 Click OK at the bottom of the window The cropped image is displayed on the main viewer 4 To close the image click in the upper right corner SolidPTZ Sele...

Page 45: ...192 a a Image 1 Image 2 1280 1024 a 1280 960 a 1280 800 a 1280 720 a 1024 768 a 1024 576 a 800 480 a 768 576 a 720 576 a 704 576 a 720 480 a 640 480 a a 640 368 a a 384 288 a a 320 240 a a 320 192 a a Image 1 Image 2 1920 1440 1600 1200 1680 1056 a Image 1 Image 2 1920 1080 a 1440 912 a 1376 768 a 1280 1024 1280 960 1280 800 a 1280 720 a f 1024 768 1024 576 a f 800 480 a f 768 576 720 576 704 576 ...

Page 46: ... the I picture insertion interval Adaptive rate control This function adjusts the frame rate and the bit rate automatically so that the camera plays back a smooth image to suit the connected computer environment If On is selected the MPEG4 or H 264 image rate is automatically adjusted Image 1 Image 2 Codec Framerate fps Codec Framerate fps Single codec H 264 30 MPEG4 30 JPEG 30 Dual codec H 264 25...

Page 47: ...4 to 65534 Two port numbers the number specified here and an odd number with 1 added to the specified number are actually used for video data communication and control The setting for Image 1 and Image 2 apply for Video port number 1 and 2 respectively Note Specify different numbers for the video port number Multicast streaming Set whether the camera uses multicast streaming for MPEG4 H 264 video ...

Page 48: ...select Obtain an IP address automatically DHCP make sure that a DHCP server is operating on the network Use the following IP address Select this option when you set a fixed IP address With this setting specify the IP address Subnet mask and Default gateway manually IP address Type the IP address of the camera Subnet mask Type the subnet mask Default gateway Type the default gateway DNS server Conf...

Page 49: ...IPv6 can be used simultaneously with IPv4 Only IPv6 specific details are explained here For common details see IPv4 setting on page 48 On Off To use IPv6 select On Prefix Enter the Prefix value 0 to 128 IPv6 MTU Enter the MTU value for IPv6 1280 1500 The value must not exceed the MTU value for the Ethernet port OK Cancel See Buttons common to every menu on page 32 QoS Tab In this tab you can mark ...

Page 50: ...formation is displayed Network address Enter the network address of the target on which to perform QoS Prefix Enter the prefix value of the target on which to perform QoS Tip The prefix value represents the number of bits from the left side of the network address Port Enter the port number for the data traffic of the device e g HTTP 80 Protocol Select the protocol DSCP Set a value to mark the data...

Page 51: ... sent On Select if authentication is required when an e mail is sent Select one of the authentication methods from the following and specify the POP server name User name and Password as required SMTP Select when SMTP authentication is required POP before SMTP Select when POP before SMTP authentication is required Note When you set Authentication to On make sure to select either or both SMTP or an...

Page 52: ... ip_address Type the IP address or host name of the host to which you want to connect To enter an IPv6 address http IPv6 address http IPv6 address port port Specify the port number to which you want to connect If you want to use the established port number 80 you do not need to input a value path Type the command parameter Type the command parameter if necessary You can use the special tags mentio...

Page 53: ...tings All settings will be initialized To avoid this check that SSL connection is possible by performing the following steps 1 Set the SSL function to On and select Allow HTTP connection for some clients 2 Click OK to close the main viewer and the setting window 3 Display the main viewer in SSL connection Refer to Using the SSL function on page 15 for connection 4 After checking that SSL connectio...

Page 54: ...and time are not correctly set it may cause browser connection problems To display certificate information When the certificate has been set in the camera correctly its information appears on Status Issuer DN Subject DN Validity Period and Extended Key Usage Status Shows if the status of the certificate is valid or invalid The following statuses are recognised Valid The certificate is correctly st...

Page 55: ...e 1 to 4 You can import a trusted CA certificate route certificate etc to the camera Up to four certificates from trusted CAs can be imported to the camera Only PEM format is supported To import the CA certificate 1 Click Browse to select the CA certificate to be saved in the camera 2 Click Submit The selected file will be imported to the camera Note Import process will be invalid if the selected ...

Page 56: ...in the PC the certificate of CA which has signed the certificate to be installed in the camera The extension of the certificate file is normally cer Double click this file The following Certificate dialog appears 2 Click Installation Certificate The Certificate Import Wizard appears 3 Click Next 4 Select Automatically selects the certificate store based on the type of certificate and click Next Co...

Page 57: ...e You need to log in as Administrator to perform these steps 1 Open Run of the Windows menu then enter mmc and click OK 2 Select File in the Console 1 window and Add Remove Snap in when Windows XP Professional is used Add Remove Snap in dialog appears 3 Click Add to display Add Stand alone Snap in dialog You need to follow this step if using Windows XP Professional 4 Select Certificates from the l...

Page 58: ...s unit serves as a supplicant in the 802 1X network The supplicant can enter the 802 1X network after appropriate authentication by the authentication server Authenticator An authenticator forwards certificate request data or response data that the supplicant or authentication server issues to the other party Normally a hub or router serves as an authenticator Authentication server An authenticati...

Page 59: ...hentication and a certificate is used for server authentication OK Cancel See Buttons common to every menu on page 32 Client certificate Tab When TLS is selected as the EAP method client certificate is imported for authentication at the camera Client certificate Import display or delete the client certificate To import the client certificate Click Browse to select the client certificate to be impo...

Page 60: ...rivate key password click this button The current password is cleared and the password text box is actived to allow new password entry Note Click at the bottom of the menu if you want to cancel changing the private key password after clicking Reset Doing so restores the other setting items in the Client certificate tab to their previous settings OK Cancel See Buttons common to every menu on page 3...

Page 61: ... for Active Directory 1 Open Active Directory Users and Computers from Administrative Tools of the Windows menu 2 Select Users of the domain with which you want to perform 802 1X connection 3 Select New from the context menu then select Group and configure the group for 802 1X connection For example the group Wired_802 1X_Group is assumed for explanation purposes Configuring the Internet Authentic...

Page 62: ...rily store the certificate and configure so that the client PC and Windows Server 2003 computer can be connected through the network 1 Start Internet Explorer on the client PC 2 Type the CA s URL in the address bar and click Go To The CA s URL is normally as follows The Microsoft Certificate Services page opens Note If the Microsoft Certificate Service page does not appear using the URL above chec...

Page 63: ... this certificate to install the certificate in the certificate store on the client PC 8 Click Internet Options Content and Certificates of Internet Explorer in sequence The new client certificate is displayed in the Personal tab 9 Select the installed certificate and click Export The Certificate Export Wizard opens 10 Click Next and select as follows Do you want to export the private key with the...

Page 64: ...viewer mode to be displayed after authentication Full The user can operate all functions in this mode Pan Tilt In addition to the Light mode the user can operate pan tilt zoom Preset position In addition to the Light mode the user can perform the camera s preset position settings Light In addition to the View mode the user can select the image size of the main viewer select codec and capture a sti...

Page 65: ...you set 192 168 0 0 24 and Allow you can allow access from computers having an IP address between 192 168 0 0 and 192 168 0 255 Note You can access the camera even from a computer having an IP address whose access right is set to Deny if you enter the user name and password set for the Administrator boxes in the User menu OK Cancel See Buttons common to every menu on page 32 Saving the Camera Posi...

Page 66: ...reset position name of the selected preset number using up to 32 characters Set Click to save the current camera position to the selected preset number To save a preset position operate as follows 1 Move the camera to the position to be saved while checking the image with the preview viewer 2 Select a preset number for saving and type the preset position Name 3 Click the Set button The camera posi...

Page 67: ... OK when On is selected the tour function will fail Sequence Set the sequence of the tour The preset positions saved using the Position tab are displayed in Preset position list Select the preset position from Preset position list then click Add The selected preset position is added in the Sequence list Repeat this procedure to specify the preset positions in sequence To check a preset position se...

Page 68: ...periodically The e Mail SMTP menu consists of three tabs Common Alarm sending and Periodical sending Common Tab Setting the e Mail SMTP Function e Mail SMTP Select On when you use the e Mail SMTP function Note The frame rate and operability on the main viewer may be reduced while a file is being transmitted by the e Mail SMTP function SMTP server name Type the SMTP server name using up to 64 chara...

Page 69: ...P address of the POP server This setting is necessary when the SMTP server that sends e mails performs authentication using the POP user account POP port number Enter a port number from 110 to 65535 The standard port number is 110 If TLS is enabled the standard port number for POP3s is 995 Authentication mode Select Login or CRAM MD5 as the authentication method for SMTP authentication Note The mo...

Page 70: ...one No suffix is added The image file name is assigned to the image to be sent via e mail Date time The date time suffix is added to the image file name The date time suffix consists of lower two digits of the year 2 digits month 2 digits date 2 digits hour 2 digits minute 2 digits second 2 digits and sequential number 2 digits thus adding 14 digit number to the image file name Sequence number A s...

Page 71: ...e e mail using up to 10 alphanumeric characters hyphen and _ under score The actual image file name will be the specified image file name with a suffix and the extension jpg Suffix Select a suffix to be added to the file name used when the e mail is sent None The name of the sent file will be the image file name Date time The date time suffix is added to the image file name The date time suffix co...

Page 72: ...using up to 64 characters Password Type the password for the FTP server using up to 64 characters Re type password To confirm the password type the same characters as you typed in the Password box Passive mode Set whether you use the passive mode of FTP server or not when connecting to the FTP server Select On to connect to the FTP server using the passive mode OK Cancel See Buttons common to ever...

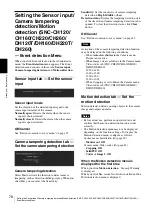
Page 73: ... tampering such as direction shifting or spray Motion detection The alarm detected by the motion detection function Click Detection and the Motion detection menu is displayed to allow you to set the motion detection function page 78 Note When a preset position is set in the menu of Preset Position Alarm linked position the alarm is invalid if the camera is moved to a preset position Effective peri...

Page 74: ...ed to the image file name Sequence number clear Click Clear to reset the Sequence number suffix to 1 Mode Select the periodical sending mode Periodical mode An image file is sent periodically according to the specified Interval and Effective period Tour mode An image file is sent each time the camera is moved to a preset position during the tour Interval Type the interval at which you want to send...

Page 75: ... Schedule Menu on page 77 Day Night Controls the alarm output linked to the day night function Sensor input 1 Select this option when you link the alarm output to an external sensor that is connected to sensor input of the camera I O port Camera tampering detection Select this option when you link the alarm output to the tampering detection such as when the camera position is moved or the camera i...

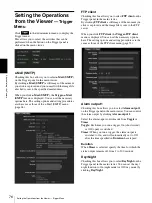
Page 76: ... viewer By clicking FTP client a still image of the moment you click is captured and the image file is sent to the FTP server When you click FTP client the Trigger FTP client menu is displayed You can set the necessary options here The setting options and setting procedures are the same as those of the FTP client menu page 72 Alarm output 1 Checking this box allows you to select Alarm output 1 on ...

Page 77: ...llowing menus Day Night Schedule in the Day Night tab of the Camera menu Preset position Image 1 or 2 Schedule in the Position Tour of the Preset position menu e Mail Schedule in the Alarm sending or Periodical sending tab of the e Mail SMTP menu FTP Schedule in the Alarm sending or Periodical sending tab of the FTP client menu Alarm out Schedule in the Alarm out 1 tab of the Alarm output menu Exa...
Page 78: ...High Middle or Low Detection status Display the tampering detection state of the time when Camera tampering detection tab is opened To clear the detection status click Clear button OK Cancel See Buttons common to every menu on page 32 Note Activation of the camera tampering detection function may be delayed in the following conditions When Auto slow shutter in the Camera menu Picture tab is active...

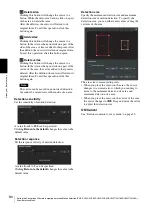
Page 79: ...t menu Click the desired item in the setting item list to set the respective detection area Detection target All PTZ position or Preset position VMD settings VMD Motion detection Set detection area detection response detection response speed and detection size for Motion detection Click the desired item in the setting item list to set the respective detection area Detection area Specify the effect...

Page 80: ...or will return its original form To exit this operation click this button again Note The vertex can be moved in an outward direction but cannot be moved toward the inside of an area Detection sensitivity Set the sensitivity of motion detection A value from 1 to 100 can be specified Clicking Return to the default changes the value to the default value Detection response Set the response velocity of...

Page 81: ... using up to 64 characters in the text box on the right of Path 3 In Selected memory select the memory in which the homepage is stored Header Configure the setting for the bar menu displayed at the top of the viewer screen Select On to display the header and Off to hide it Tip Even when you select Off the Administrator menu can be displayed by entering the following URL in the address box of your ...

Page 82: ...xt1 text Text2 text and Text3 text Enter the text to be displayed on the viewer screen Text1 link Text2 link and Text3 link Specify the URL of the link to assign a link to the text Text color Background color 1 and Background color 2 Specify the font color of the text and background colors The colors are specified in the same way as specifying those for the header Show comment if camera selected S...

Page 83: ...options of Streaming if it is checked Image size Displays the setting menu of Image size if it is checked Frame rate Displays the setting menu of Frame rate if it is checked Preset position Displays the setting menu of Preset position if it is checked Trigger Displays the setting options of Trigger if it is checked PTZ operation Displays the setting menu of PTZ operation mode if it is checked Soun...

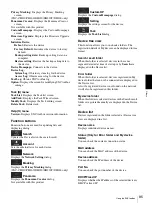
Page 84: ...etects cameras connected to the local network and lists them on the Network tab window When you are using Windows Vista message User Account Control An unidentified program wants access to your computer may appear In this case click Allow How to use SNC toolbox Menu bar All functions can be selected from here File F menu Import Reads the Device list file CSV format Export Outputs the Device list i...

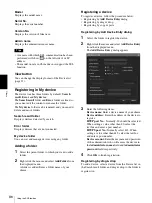
Page 85: ...plays the Privacy Masking dialog SNC CH220 CH260 DH220 DH220T DH260 only Panorama Displays the Panorama Creator dialog Not available with this product Custom HP Displays the Custom Homepage dialog Setting Displays the settings screen for the device Task Displays the Task List dialog Device tree view This function allows you to customize folders The registration details of My device can be displaye...

Page 86: ... mouse and select Add Folder from the displayed menu A folder is added Enter a folder name of your choice Registering a device To register a device follow the procedure below Registering by Add Device Entry dialog Registering by drag drop Registering by copy paste Registering by Add Device Entry dialog 1 Select the folder to register the device 2 Right click the mouse and select Add Device Entry f...

Page 87: ...o which will move the device folder Select a device folder from the Device list or Device tree and right click the mouse Select Cut from the displayed menu or select Cut from the Edit menu Next select the folder to move to and select Paste Changing the Device list display method Details display Select Normal from the View menu or click to set to the details display Details display with thumbnails ...

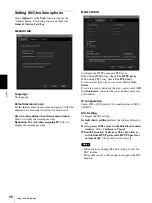
Page 88: ...xy check Use HTTP proxy When using FTP proxy check Use FTP proxy To auto detect the proxy server select On for Auto detect If you are not auto detecting the proxy server select Off for Auto detect and enter the proxy address and proxy port number IP configuration Select IPv4 or IPv6 priority for combined use of IPv6 and IPv4 SSL Setting Configure the SSL setting Default client certificate Enter th...

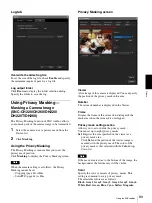
Page 89: ...e 44 is On SolidPTZ page 44 is On Privacy Masking screen Viewer A live image of the camera is displayed You can specify the position of the privacy mask in this area Number The set mask number is displayed in the Viewer Frame Display the frame of the set mask to distinguish the mask area when the set mask is overlapped Privacy mask setting section Allows you to set or delete the privacy mask You c...

Page 90: ... file size of the homepage should be 2 0 MB or less To see the created homepage set the Homepage in the Layout tab from viewer menu Uploading the homepage to the camera using the Custom Homepage 1 Select the device to upload from the Device list You can select multiple devices at the same time 2 Click the Custom Homepage The Custom Homepage dialog opens Read the notes carefully Note If you cannot ...

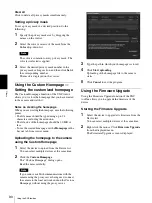
Page 91: ...y devices to upgrade in Paralleled upgrade quantity 4 To back up the camera setting check Backup device setting 5 Click Start upgrading Upgrading starts Notes To stop upgrading click Stop upgrading To protect some devices during the process of upgrading upgrading cannot be canceled Do not turn off the power until the device restarts after upgrading Using the Schedule Task You can specify the time ...

Page 92: ...om Device s in task Up Down Changes the order of devices in Device s in task 4 Click Next 5 Select the task action Select Device Setting or Firmware Upgrade 6 Click Next For Device Setting Edit the value for the setting you wish to change See Device Setting on page 93 for changing the values Click Next to display the confirmation screen for setting change Check to see if the setting is correct If ...

Page 93: ...rom the Tools menu or when you right click on the device selection screen and click Device Setting in the displayed menu the Device Setting screen is displayed Display sample Setting tree All settings are sorted into categories Click to display the subcategories under a category Click to hide the subcategories Select a subcategory to display setting items on the right side of the screen Item Displ...

Page 94: ...67 Setting items Pages to refer to in Administrating the Camera e Mail SMTP Sending an Image via E mail e Mail SMTP Menu on page 68 Common Common Tab Setting the e Mail SMTP Function on page 68 Alarm sending Alarm sending Tab Setting the e mail sending mode when detecting the alarm SNC CH120 CH160 CH220 CH260 DH120T DH160 DH220T DH260 on page 70 Periodical sending Periodical sending Tab Setting th...

Page 95: ... computer When using Windows Vista right click Command prompt in Start All Programs Accessories and select Run as administrator 2 Enter the IP address and the MAC address of the camera to assign a new IP address using the following ARP commands Example 3 When the following line is displayed on the command prompt hold down Ctrl and press C Display stops You will normally receive a reply after about...

Page 96: ...he following CGI commands Method GET POST Command JavaScript parameter format standard format With the above inquiry you can obtain the following setting information The following explains the setting information using the inqjs snmp JavaScript parameter format var sysDescr SNC CH120 or SNC CH160 SNC CH220 SNC CH260 SNC DH120 SNC DH120T SNC DH160 SNC DH220 SNC DH220T SNC DH260 1 var sysObjectID 1 ...

Page 97: ...on The maximum length of string is 255 characters 3 sysName string Set the case of mib 2 system sysName 0 in the string position The maximum length of string is 255 characters 4 enaAuthTraps value Set the case value of mib 2 snmp snmp EnableAuthenTraps 0 in the string position Type 1 enable or 2 disable in the value position 5 community ID r communityName IpAddressString Set the community attribut...

Page 98: ... individual IP address can be automatically distributed by the Dynamic Host Configuration Protocol DHCP The DHCP server assigns the IP addresses to the terminals Digital certificate An electronic certificate that a CA Certificate Authority attests that a public key to cancel a secret code is issued by an authentic publisher Digital zoom Zooming in out function of an image without using an optical ...

Page 99: ...tion for data transmission to the FTP server POP server A server for storing incoming e mail until you have read it Primary DNS server One of the DNS servers that can first reply to a request by connected devices or other DNS servers Proxy server A server or software that acts as an intermediary between a local network and the Internet so that it can connect to the Internet in place of a computer ...

Page 100: ...it changes encryption keys based on PSK during on going communication UDP Acronym for User Datagram Protocol A standard protocol used for Internet connection Compared with the other protocol TCP UDP can transmit data faster but reliable communication is not guaranteed Unicast Transmission of data to specified equipment on a network by specifying a single address WPA Acronym for Wi Fi Protected Acc...

Page 101: ...t saving time 35 Default gateway 48 Default policy 65 delete 38 Delete custom homepage 38 device setting 93 DHCP server 48 Digital certificate 98 DNS server 48 Domain suffix 49 Dynamic IP address notification 51 E EAP method 59 98 EAP TLS authentication 98 Effective period 67 71 73 74 75 e mail 51 68 e Mail SMTP 33 68 76 e Mail SMTP Menu 68 e Mail SMTP notification 51 e mail address 52 End time 77...

Page 102: ...Reboot 37 Recipient e mail address 52 69 Remote path 73 Reset 66 Restore setting 37 Resume time on inactivity 67 Re type password 64 72 S saves the setting data 37 Schedule 33 77 Schedule Menu 77 Schedule Task 91 Secondary DNS server 48 Security 33 65 Security function 65 Security Menu 65 Security Warning 8 9 11 78 sending images 27 Sensor input 1 66 75 Sequence 67 Sequence number clear 70 71 73 7...

Page 103: ...ec 44 Video port number 47 View size 21 Viewer authentication 64 Viewer Menu 81 Viewer mode 19 64 W welcome page 15 Windows Firewall 9 Windows Vista 10 Windows XP Service Pack 2 8 WPA 100 WPA2 100 Z Zoom 22 25 34 Sony Corporation ...

Reviews: