background image

11

GB

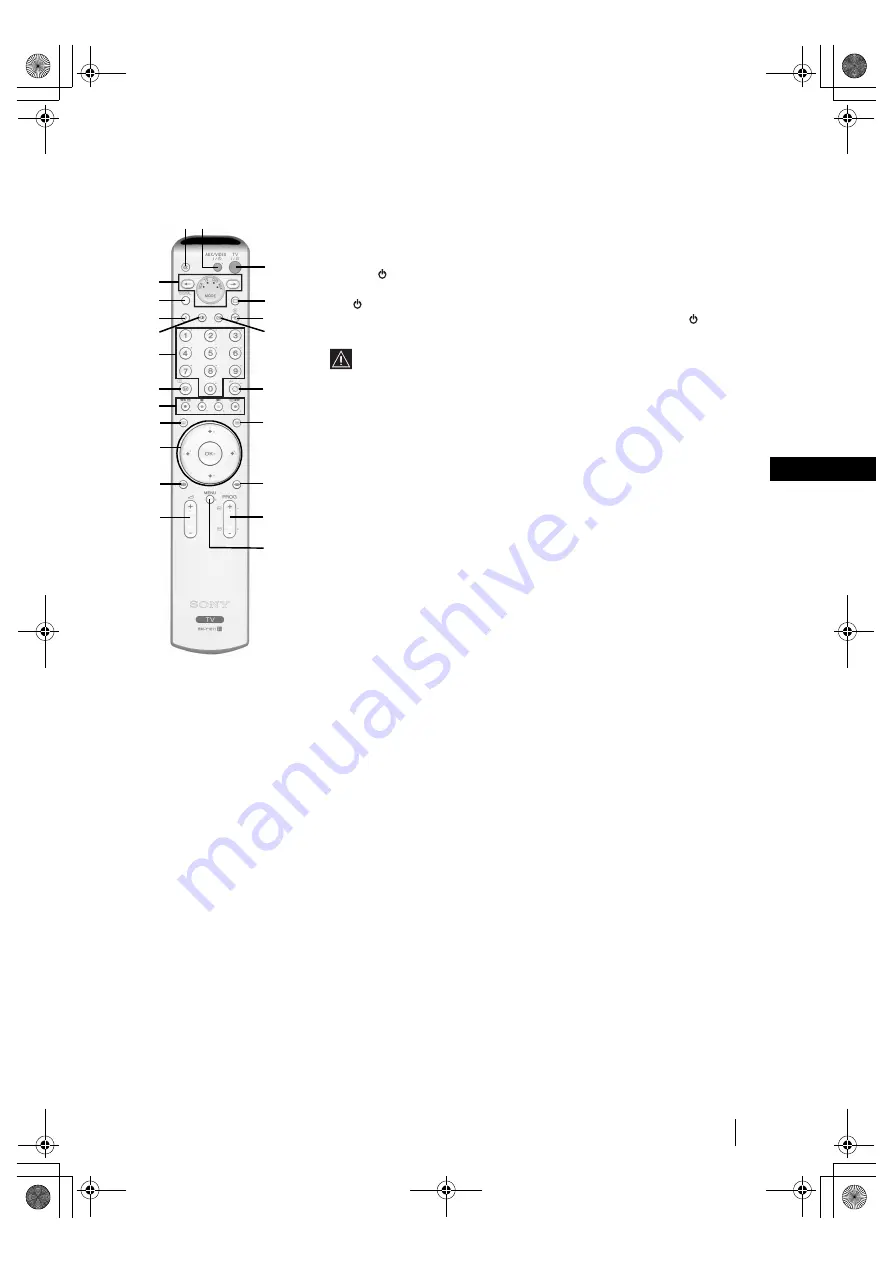
Overview of Remote Control Buttons

1


Muting the sound:

 press this button to mute the TV sound. Press again to 

restore the sound.

2


VIDEO I/

:

 press this button to switch your VCR or DVD on or off.

3

TV I/

: To Temporarily Switch Off TV (standby mode): 

Press this button to temporarily switch off TV (the standby indicator

on the TV 

lights up). Press again to switch on TV from standby mode.

•  To save energy we recommend switching off completely when TV is  

not in use.

•  If the “Auto Shutoff” option is set to “On” (see page 29) the TV 

switches automatically into standby mode after 15 minutes without a 
TV signal and without any button being pressed.

4

Media Selector: 

press these buttons to select which device you want to operate, 

TV, VCR, DVD or AUX. A green light will be momentarily lit to show which one 
you have selected. For details refer to pages 53-55.

5

Selecting Digital TV mode:

 press this button to switch on Digital mode and to 

switch off Analogue mode or Video Input mode.

6

Selecting Analogue TV mode:

 press this button to switch on Analogue mode 

and to switch off Digital mode, Analogue Teletext or Video Input mode.

7

Selecting the sound effect:

 press this button repeatedly to change the sound 

effect. For details on different sound effects refer to page 24.

8

Selecting picture mode:

 press this button repeatedly to change the picture 

mode. For details on the different picture modes, refer to page 22.

9

Switching off the picture:

 press this button to switch off the picture. Only the 

picture is switched off; the sound remains on. Press again to cancel.

q;

Selecting input source:

 press this button repeatedly until the desired input 

symbol of the source appears on the TV screen. Refer to page 52.

qa

Selecting broadcast channels:

 if Media Selector (

4

) is switched to TV, 

press these buttons to select channels. For double-digit programme numbers, 
enter the second digit within 2.5 seconds.

qs

a) In Digital mode:

 press this button to display the digital menu. For details, see 

page 33.

b) In Analogue mode: 

press this button to display all on-screen indication such 

as channel number, etc. Press again to cancel.

qd

a) Watching last channel selected:

 if Media Selector (

4

) is switched to 

TV, press this button to return to the previous channel you were watching 
(provided you watched it for at least 5 seconds).

b) Selecting VCR double-digit:

 if Media Selector (

4

) is switched to VCR, 

press this button to select double-digit channels for Sony's VCR e.g. 23, press
 -/-- first and next the buttons 2 and 3. 

continued...

Overview & Installation

6

q;

9

5

ws

1 2

3

4

7
8

qa

qs

qd

qf

qg

qh

qj

qk

ql

w;

wa

01GBKEP37XS1.fm  Page 11  Tuesday, March 30, 2004  8:57 AM

Summary of Contents for KDE-P37XS1

Page 1: ...7XS1 KDE P42XS1 2004 Sony Corporation Operating Instructions Before operating the TV please read the Safety Information section of this manual Retain this manual for future reference GB 410303811 00COKEP37XS1 fm Page 1 Monday March 29 2004 4 33 PM ...

Page 2: ...irst Time Operation Switching on the TV and Automatically Tuning 16 TV Functions Selecting Digital or Analogue mode 18 The Programme Index table 18 The Channel Index menu 18 Introducing and Using the Menu System 21 The Picture Adjustment menu 22 The Sound Adjustment menu 24 The Features menu 26 The Timer menu 29 The Set Up menu 30 The Digital INFO menu 33 The Digital Set up menu 35 The Digital Det...

Page 3: ... Viewing pictures from equipment connected to the TV 52 Remote Control Configuration for VCR or DVD 53 Learning functions from other Remote controls 54 Technical Specifications 56 Troubleshooting 57 Television Channel Number Guide for Analogue channels 61 Index 62 How to lift the TV Back cover Table of Contents 01GBKEP37XS1 fm Page 3 Tuesday March 30 2004 8 57 AM ...

Page 4: ...cordance with the following instructions The wires in this mains lead are coloured in accordance with the following code Blue Neutral Brown Live As the colours of the wires in the mains lead of this apparatus may not correspond with the coloured markings identifying the terminals in your plug proceed as follows The wire which is coloured blue must be connected to the terminal which is marked with ...

Page 5: ...ot touch it until you have unplugged the mains lead Otherwise electric shock may result Carrying Carrying the TV requires two or more people If you carry the TV in a manner other than that specified it may drop and a serious injury may be caused Be sure two or more people carry the TV When transporting do not subject the TV set to shocks or excessive vibration The TV may fall and be damaged or cau...

Page 6: ...in fire or electric shock Do not pinch bend or twist the cable excessively The core lines may be bared or cut causing a short circuit which may in fire or electric shock Do not convert or damage the mains lead Do not put anything heavy on the mains lead Do not pull the mains lead Keep the mains lead away from heat sources Be sure to grasp the plug when disconnecting the mains lead If the mains lea...

Page 7: ...to a wall see page 15 for details Do not hang anything on the TV set The TV set may fall from the stand or wall hanging rack unit causing damage or serious injury Servicing Do not open the cabinet or remove the rear cover of the set Refer to qualified service personnel only Ventilation holes Do not insert anything in the ventilation holes If metal or something flammable enters it may result in fir...

Page 8: ... or spill liquid of any kind onto it Do not place the remote control in a location near a heat source or in a place subject to direct sunlight or in a damp room On cleaning the cabinet Be sure to unplug the mains lead before cleaning Clean the cabinet with the supplied cleaning cloth or a soft cloth lightly dampened Do not use any type of abrasive pad alkaline cleaner scouring powder or solvent su...

Page 9: ...as Set top box Cable modem VCR etc The risk of this is higher if the set is in Live mode or has a high contrast setting This image cannot be removed once burnt onto the screen To avoid the risk of image retention do not leave the TV set operating on such a picture or programme for a long time use the Screen Saver function page 28 or lower the contrast setting Repeated extended daily usage of the s...

Page 10: ... Mains Lead Type BF 1 Notes on the Plasma TV book 2 Anchor attachments 4 092 684 01 1 Notes on the Plasma TV 2002 Sony Corporation English 2 English 2 English 2 English 2 English 2 English 2 English 2 English 2 English 2 English 2 English 2 English 2 English 2 English 2 English 2 English 2 English 2 English 2 English 2 English 2 English 2 01GBKEP37XS1 fm Page 10 Tuesday March 30 2004 8 57 AM ...

Page 11: ...etails on different sound effects refer to page 24 8 Selecting picture mode press this button repeatedly to change the picture mode For details on the different picture modes refer to page 22 9 Switching off the picture press this button to switch off the picture Only the picture is switched off the sound remains on Press again to cancel q Selecting input source press this button repeatedly until ...

Page 12: ...al index Once you have pressed OK 1 To select a channel press v or V to select a channel and next press again the OK button to watch the selected channel 2 To select an input signal while watching the channel index press b to display the input signal you can always switch from the channel index to the input signal index and vice versa by pressing B or b Next press v or Vto select an available inpu...

Page 13: ... Selecting Analogue DigitalTV mode button Selecting Input Source button see page 52 Overview of the TV Buttons Overview of the side Connectors Headphones jack Video Input jack S Video Input jack Audio Input jacks Auto Start Up button starts the auto start up sequence see page 16 Overview Installation 01GBKEP37XS1 fm Page 13 Tuesday March 30 2004 8 57 AM ...

Page 14: ...the remote control point it towards this receiver Lights up in blue when you press picture off on the remote control to switch off the picture Only the picture is switched off the sound remains unchanged Lights up in red when the sleep timer is set For more details regardingthesleep timer refer to Timer on page 29 Lights up in green when the TV is switched on Lights up in red when the TV is in sta...

Page 15: ...Secure a wall anchor bracket not supplied to a solid wall or pillar 4 Pass a strong cord or chain through both holes of the anchor attachments and then secure to a wall or pillar etc Use the supplied main lead Type BF see page 10 Use one of the supplied coaxial cable for aerial connection and the other one for digital connection OUT IN or For more details regarding VCR connection refer to Connecti...

Page 16: ... is usually turned on If the TV is off press the on off button on the TV set to turn on the TV 3 A diagram appears showing you how to connect a wide range of equipment to your TV set Follow the instructions and press the OK button to remove the picture and continue the automatic process The connection diagram should be used as a guide only as most equipment can be connected to more than one type o...

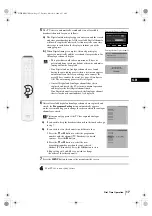
Page 17: ...mber 1 is displayed 6 After all available digital and analogue channels are captured and stored the Programme Sorting menu automatically appears on the screen enabling you to change the order in which the analogue channels are stored This menu only appears if the TV has captured analogue channels a If you wish to keep the broadcast channels in the tuned order go to step 7 b If you wish to store th...

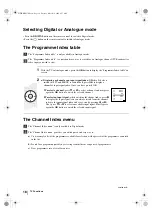
Page 18: ...lect a channel and next press again the OK button to watch the selected channel 2 To select an input signal while watching the channel index press b to display the input signal you can always switch from the channel index to the input signal index and vice versa by pressing B or b Next press v or V to select an available input signal Finally press again the OK button to watch the selected input si...

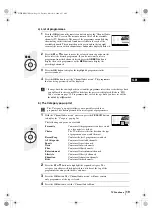
Page 19: ...list The following categories are available Favourite Contains all the programmes you have stored as a favourite see below Choice The TV will create this list based on the type of programmes you watch the most Recent Prog Contains the last 5 programmes watched All Categories Contains all available channels Sports Contains all sport channels News Contains all news channels Film Contains all film ch...

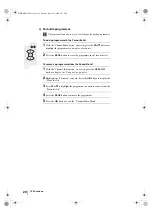
Page 20: ...the favourite list To remove a programme from the Favourite list 1 With the Channel Index menu on screen press the YELLOW button to display the Category pop up list 2 Highlight the Favourite category Press the OK button to display the Favourite list 3 Press V or vto highlight the programme you wish to remove from the Favourite list 4 Press the BLUE button to remove the programme 5 Press the OK but...

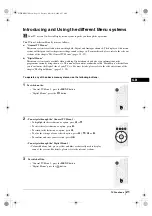
Page 21: ...he Digital side of your TV etc For more details please refer to the relevant sections of the chapter The Digital Menus pages 33 39 To operate any of the above menu systems use the following buttons 1 To switch on the General TV Menus press the MENU button Digital Menus press the button 2 To navigate through the General TV Menus To highlight the desired menu or option press V or v To enter the sele...

Page 22: ...ance picture contrast Next press OK to store Brightness Press B or b to darken or brighten the picture Next press OK to store This option only appears and can only be adjusted if Picture Mode is set to Personal Colour Press B or b to decrease or to increase color intensity Next press OK to store This option only appears and can only be adjusted if Picture Mode is set to Personal Hue Press B or b t...

Page 23: ...igh quality sources i e DVD player satellite receiver This option is set to High Density recommended for moving pictures However it can be modified After selecting this option press b Next press v or V to select Progressive recommended for still images and text This option only appears and can only be adjusted if Picture Mode is set to Personal DRC Palette This option allows you to customise the l...

Page 24: ...or the right speaker Next press OK to store Reset Press OK to reset the sound to the factory preset levels Dual Press b Next Sound For a Stereo broadcast Press v or V to select Stereo or Mono Next press OK to store For a bilingual broadcast Press v or V to select Mono for mono channel if available A for channel 1 or B for channel 2 Next press OK to store Auto Press b Next press v or V to select On...

Page 25: ...rol the volume of the TV s sepakers when an external amplifier is connected to the TV s audio output sockets After selecting this option press b Next press v or V to select Variable if you wish to use the TV s remote control or Fix if you wish to use the external amplifier s remote control Manufactured under license from Dolby Laboratories Dolby and the double D symbol are trademarks of Dolby Labo...

Page 26: ... the following formats SMART Imitation of wide screen effect for 4 3 broadcast 4 3 Conventional 4 3 picture size full picture information 14 9 Compromise between 4 3 and 16 9 picture size ZOOM Widescreen format for letterbox movies WIDE For 16 9 broadcast Full picture information In SMART ZOOM and 14 9 modes parts of the top and bottom of the screen are cut off Press v or V to adjust the position ...

Page 27: ...ich of the Scart connectors you want to support SmartLink To do this Once you have entered the Features menu as it is explained in the previous page and after selecting the option press OK Then press v or V to select AV2 or AV3 Finally press OK to store CONNECTION GUIDE Even you have already connected the external equipment to the TV set it is important for you to follow the instructions of this m...

Page 28: ...a 4 3 video source conventional TV broadcast Video game sources PC images DVD on screen menu displays On screen menus channel numbers etc of connected equipment such as Set Top Box cable modem VCR etc To do this Once you have entered the Features menu as it is explained on page 26 and after selecting the option press OK Next press v or V to select All White Select this option and press OK Next pre...

Page 29: ...standby mode automatically at a specified time After the All White function finishes the off timer functions are resumed and the TV automatically enters the standby mode While watching the TV you can display the time remaining by pressing the button on the remote control The TIMER indicator on front of the TV lights up to indicate that the sleep timer is set AUTO SHUTOFF This option allows you to ...

Page 30: ...tically Tuning on pages 16 and 17 PROGRAMME SORTING This option allows you to change the order in which the channels TV Broadcast appear on the screen To do this After selecting the option press OK and then proceed in the same way as in the step 6 of the section Switching On the TV and Automatically Tuning on page 17 m Picture Adjustment Picture Mode Live Contrast Reset Noise Reduction Auto Colour...

Page 31: ... rear Scarts and AV5 for side connectors Next press OK twice 2 A label automatically appears in the label column a If you want to use one of the predefined labels press vor Vto select the desired label and finally press OK The total predefined labels are VIDEO DVD CABLE GAME CAM camcorder or SAT satellite b If you want to set a different label select Edit and press OK Then with the first element h...

Page 32: ... next press OK When you have finished press v V B or bto select the word End on the screen and finally press OK to turn off the menu from the screen Finally press OK to store To correct a letter select on the screen to go back and press OK For a blank select on the screen and press OK c Fine tune the broadcast reception Normally the automatic fine tuning AFT will give the best possible picture how...

Page 33: ... screen similar to selecting p 888 in analogue Teletext mode To do this With the Digital INFO display on the TV screen press the RED button to access the Subtitles pop up menu Press the V or v button to highlight the language required then press OK to select To remove subtitles from the TV screen access the Subtitles pop up menu and select Off Press the button to exit from this menu AUDIO This fea...

Page 34: ...e TV screen press the YELLOW button to access the REC pop up menu If your VCR does not have SmartLink a message is displayed reminding you to manually set your VCR Press the RED button to continue or press the BLUE button to return to the INFO display If you highlight a future programme the Timer feature allows you to automatically set your VCR to record the selected programme or have the TV switc...

Page 35: ...me you want to register as a favourite press the OK button A tick appears alongside that programme in the display Press the OK button again to cancel your selection Press the YELLOW button if you wish to delete clear all favorite settings 4 Repeat steps 2 and 3 to store other programmes as favourites 5 Press the BLUE button to return to the Main Menu WALLPAPER This option allows you to customise t...

Page 36: ...he instructions below b If you have already set a PIN code 1 Once you have entered into the Main Menu as it is explained in the previous page press the V or v button to highlight Parental Control then press the OK button to display the Parental Control menu 2 Using the numbered buttons on the remote control enter your 4 digit PIN code As you enter each digit it will be represented by a in the PIN ...

Page 37: ...ove the CAM slot cover 3 Insert the CAM into the slot on the side of the TV Take care not to damage the CAM when inserting 4 Insert your viewing card into the CAM 5 After inserting the CAM and the viewing card replace the cover 6 Connect the TV to the mains and switch on 7 With the TV in Digital mode press the button on the remote control to display the Digital INFO display Press the BLUE button t...

Page 38: ... button to make the select search box active 5 Press the V or v button to begin the search process The words Searching Down or Searching Up appear in the select search box to indicate that the TV is searching If no Digital services are found on the channel you have chosen the channel number changes up or down automatically and the search continues When all services allocated to the selected channe...

Page 39: ...h your existing aerial To do this 1 Once you have entered into the Detail Set up menu as it is explained in the previous page press the V or v button to highlight Software Download then press the OK button to display the Software Download menu 2 Press the V or v button to change the Current Setting If you wish to receive downloads the Current Setting should be set to ON If you do not wish to recei...

Page 40: ...buttons If you make a mistake retype the correct page number If the counter on the screen continues searching it is because the page is not available If this is the case input another page number To access the next or preceding page Press PROG or PROG To freeze a teletext page Press Press it again to cancel the freeze To select a sub page A teletext page may consist of several sub pages In this ca...

Page 41: ...ated Digital Teletext channel use the Channel Index menu Please refer to The Channel Index menu section of this instruction manual on page 18 2 Once the Teletext channel is displayed follow the on screen instructions to access the required information On some pages the TV programme is also displayed Instructions on screen will tell you how to change the displayed programme 3 If when viewing the Te...

Page 42: ...K button to obtain a preview in the preview window If you have previously set a viewing age limit in the Parental Control option see page 36 and the programme exceeds that age limit you will be asked to enter your PIN code before the preview is allowed 3 When the programme in the preview screen is the one you wish to watch press the button to exit the EPG menu and view the programme at full size T...

Page 43: ...uttons to select the correct date Press the b button to highlight the start time 4 Press the V or v buttons to select the start time Press the b button to highlight the stop time 5 Press the V or v buttons to select the stop time Press the b button to highlight the programme 6 Press the V or vbuttons to select the programme Press the OK button to store The Timer List menu is displayed The event is...

Page 44: ...Stick and then release the Memory Stick will spring out Remove the Memory Stick Memory Stick precautions continued Do not remove the Memory Stick while it is reading or writing data We recommend that you make a backup copy of important data that you record on the Memory Stick When you set the Memory Stick erasure prevention switch to LOCK data cannot be recorded edited or erased Data may become da...

Page 45: ...select this Slds option and press OK Next press v or V to select Auto Select this option and press OK if you want the slideshow to run automatically Manual Select this option and press OK if you want the slideshow to run manually In that case b or B buttons should be pressed to show the next or previous picture Interval To select the interval between each picture when Advan Slds is set to Auto sel...

Page 46: ...still and moving stored in the Memory Stick Select this option and press OK to display information such as used space available space and total capacity for the Memory Stick Close Select this option and press OK to go back to the previous menu SELECT FOLDER This option allows you to select a specific folder on the Memory Stick To do this While the Memory Stick Home menu is displayed press v or V b...

Page 47: ... Home menu Information Select this option and press OK Next press v or V to select On to display all information about the selected file or Off to remove the information from the screen Finally press Close to store Protect Select this option and press OK Next press v or V to select On to protect the selected thumbnail file from any changes or Off to unprotect the file Press Close to store All the ...

Page 48: ...controls again press B b v or V or OK The TV automatically displays the appropriate image size for each movie on the full screen The quality of the movie when is viewed at full screen depends on the resolution of the MPEG1 file Menu Select this option and press OK A new menu is displayed Next press v or V to select Information Select this option and press OK Next press v or V to select On displays...

Page 49: ...press v or V to select to rotate clockwise or to rotate anticlockwise Next press repeatedly OK to rotate the photo whenever you press OK the image rotates 90 degrees Finally select Close to store Delete This option is only available for unprotected thumbnails files Select this option and press OK if you want to delete the selected movie or photo A message asks you to confirm deletion Press B or b ...

Page 50: ...anual of your SmartLink VCR DVD recorder If you use a VCR or a DVD recorder that supports SmartLink please connect the VCR or the DVD recorder to the TV using a Scart lead to the Scart 2 J or 3 K Both Scart connectors 2 J and 3 K cannot support SmartLink at the same time If you connect a VCR or a DVD recorder to both Scart connectors select which Scart supports SmartLink through the SmartLink opti...

Page 51: ...und Adjustment menu see page 25 The volume of the external speakers can be altered by pressing the volume buttons on the TV remote control The treble and bass setting can also be altered through the Sound Adjustment menu see page 24 For a sub woofer Connect your sub woofer to the 5 W G W G output jack D using a monaural audio cable To enjoy Dolby Virtual sound effect through your audio equipment P...

Page 52: ...e Scart connector K 3 S Video Input signal through the Scart connector K This symbol appears only if an S Video source has been connected 4 Component input signal through the Y PB CB PR CR jacks H and audio input signal through G 5 Video input signal through the phono socket B and Audio input signal through C 5 S Video Input signal through the side S Video input jack A and Audio signal through C T...

Page 53: ...d cursors buttons only for DVDs work If your device is not working or some of the functions do not work please check that you entered the correct code or try the next code listed against the brand Not all brands are covered and not all models of every brand may be covered 4 Always remember to press the T or t button until the green light iluminates according to the equipment you want to operate wi...

Page 54: ...at you wish to use to store a learned function see fig 3 Once the selected button has been pressed the VCR TV DVD and AUX lights illuminate in order see fig 4 4 Press the button on the other remote control that you wish to teach your TV remote control During the data transfer process all the four lights illuminate at the same time see fig 5 As soon as data transfer is finished the AUX green light ...

Page 55: ...utton to return to normal operation Erasing all the learned functions in one time 1 Press and hold the t button for approximately six seconds until the AUX green light flashes see fig 11 2 While pressing the button press t to erase all the learned functions see fig 12 All the four lights illuminate at the same time see fig 13 and as soon as all the learned function are erased the remote control au...

Page 56: ...s Impedance 47 kilo ohms AV MOUSE minijack audio outputs Left Right phono jacks Sub Woofer output phono jack Aerial connector RF In RF In Analogue RF Out Digital CAM Conditional Access Module slot MODEM MODEM connection Right side Memory Stick Slot Left side Terminals AV5 5 S video input 4 pin mini DIN Y 1 Vp p 75 ohms unbalanced sync negative C 0 286 Vp p Burst signal 75 ohms 5 video input phono ...

Page 57: ...tion from equipment connected to the Scart connector Check that the optional equipment is on and press the button repeatedly on the remote control until the correct input symbol is displayed on the screen page 52 Check the connection between the optional equipment and the TV Poor picture Unstable picture Double images or ghosting Check aerial cable connections Check the aerial location and directi...

Page 58: ...ure reception page 32 Using the menu system set the Noise Reduction option in the Picture Adjustment menu to reduce the noise in the picture page 23 Distorted picture when changing programmes or selecting teletext Turn off any equipment connected to the Scart connector on the rear of the TV set In the screen appears an image retention afterimage Using the menu system select the Features menu next ...

Page 59: ...malfunction The TV ticks An electrical circuit inside the TV is activated when the TV is turned on This does not indicate a malfunction The TV buzzes There might be a surge sound when turning on the TV This does not indicate a malfunction Remote Control Remote control does not function The standby or power on indicators on the TV flashes Check that the Media Selector on the remote control is set c...

Page 60: ...4 Images from the Memory Stick can not be displayed or you can view the image but some features are not available and an error message appears on the TV screen This is not a malfunction of the TV This is because you are using a non Sony brand Memory Stick media Cannot delete a file or all materials The write protect switch on the Memory Stick is set to LOCK Release the lock The image file is prote...

Page 61: ...2 Midlands West 19 Ridge Hill 22 28 25 32 20 Sutton Coldfield 46 40 43 50 21 The Wrekin 26 33 23 29 Midlands East 22 Waltham 58 64 61 54 Northern Ireland 23 Brougher Mountain 22 28 25 32 24 Divis 31 27 24 21 25 Limavady 55 62 59 65 North 26 Belmont 22 28 25 32 56 27 Emley Moor 44 51 47 41 37 North West 28 Winter Hill 55 62 59 65 48 North East 29 Bilsdale West Moor 33 26 29 23 30 Caldbeck 30 34 28 ...

Page 62: ... removing 44 precautions 44 adjustting settings 45 viewing photos 47 playing movies 47 Menu systems 21 Mode 14 9 26 Mode 4 3 26 Movie mode 22 N O P Q Naming a programme 31 Noise Reduction 23 On Off switch 13 indicator 14 Optional equipment connecting 50 using 52 changing the sound level input 31 Overview of the remote control 11 of the TV buttons 13 of the TV indicators 14 Parental Control 36 Pict...

Page 63: ...03UNKEP37XS1 fm Page 1 Monday March 29 2004 4 39 PM ...

Page 64: ...http www sony net Sony España S A Printed in Spain This instruction manual has been printed on Ecological Paper Totally Chlorine Free 03UNKEP37XS1 fm Page 2 Monday March 29 2004 4 39 PM ...

Reviews: