Installing and Connecting the LCD Projection TV
35
In
sta
lling
and
Conne
ctin
g the
LCD Pr
o
jec
tion T
V
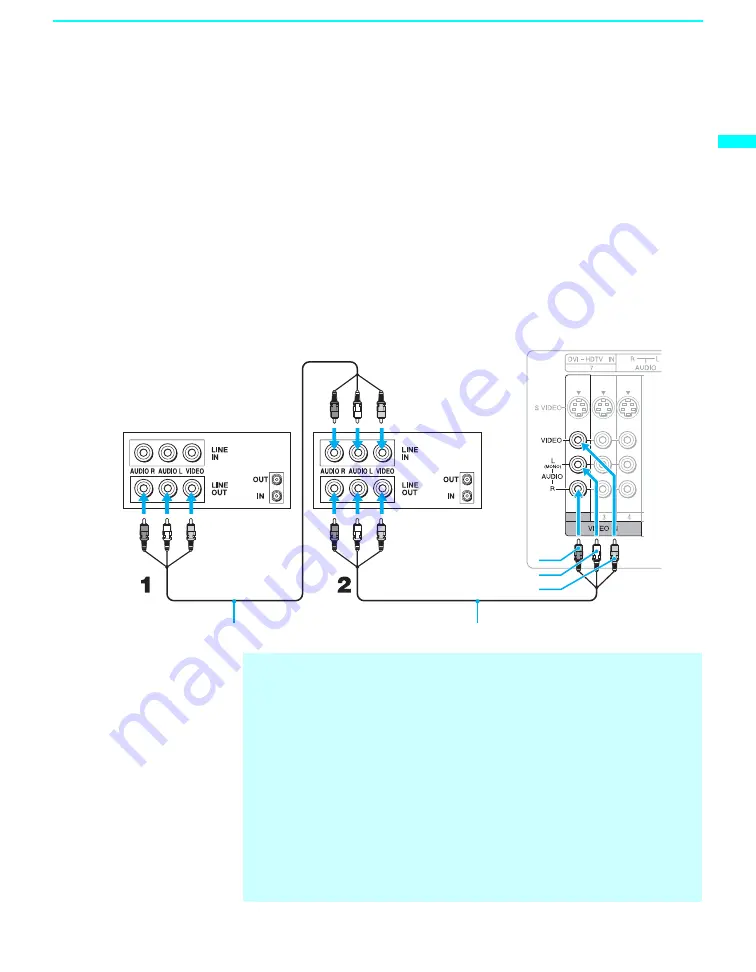
Connecting Two VCRs for Tape Editing
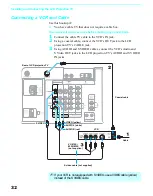
If you connect two VCRs, you can record from one VCR to the other while
using your LCD projection TV to monitor what is being recorded.
Disconnect all power sources before making any connections.
1
Using AUDIO and VIDEO cables, connect the playback VCR’s Audio
and Video OUT jacks to the recording VCR’s Audio and Video IN
jacks.
2
Using AUDIO and VIDEO cables, connect the recording VCR’s Audio
and Video OUT jacks to the LCD projection TV’s AUDIO and VIDEO
IN jacks.
Rear of LCD projection TV
VCR (playback)
VCR (recording)
VC-810S/820S/830S (not supplied)
AUDIO-R (red)
AUDIO-L (white)
VIDEO (yellow)
VC-810S/820S/830S (not supplied)
✍
To perform tape editing, set the LCD projection TV to the video input
intended for playback by pressing TV/VIDEO on the remote control.
✍
You may need to change the video input on your VCR. Consult your
VCR’s operating manual for instructions.
✍
If your VCRs have an S VIDEO jack: For best picture quality, use an
S VIDEO connection instead of the yellow video cable on your combined
A/V cable.
Using an S VIDEO cable, connect the playback VCR’s S VIDEO OUT jack
to the recording VCR’s S VIDEO IN jack. S VIDEO does not provide audio,
so audio cables must be connected to provide sound.
✍
You cannot record signals from equipment connected to the Y, P
B
, P
R
input.

