TVP-21
76
4. Protection Circuits
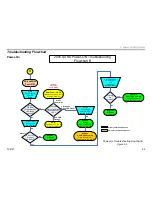
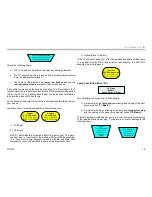
The drive voltages should be 6V each. If both drive voltages are present
replace the non-rotating fan. However, if either of the drive voltages is
missing then there is a defective drive circuit on the ASU-Board. Replace
the ASU/DSU assembly.
Reference Figure 4-1 for fan numbering and CN2301 pin numbering
Check Fan Drive
Voltage Levels at
CN2301/pins 2 & 11
*Befroe Shutdown*
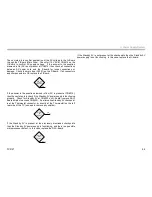
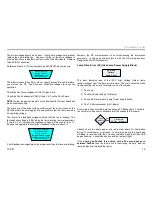
The other two fans (Fans 2 & 3) are not visually accessible, and therefore,
you will use the DC Fan Drive and Feedback voltages to check fan
operation.
Check the Fan Drive voltages at CN2301/pins 6 & 8.
Check the Fan Feedback at CN2301/pins 5 & 7 on the ASU-Board.
NOTE:
Follow the appropriate path on the flowchart for Drive or Feedback
when troubleshooting.
The presence of fan drive voltage confirms that the drive circuits on the
ASU-Board are functioning properly, and confirms that the fan is receiving
its operating voltage.
The level of the feedback voltage confirms that the fan is rotating. The
fan feedback voltage is 0.05V when the fan is rotating (normal operation).
If the fan is not rotating the feedback voltage will be greater than 1V.
Replace the appropriate fan if either feedback voltage is above 1V.
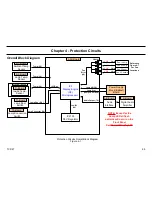
Check Fan Drive (DR)
and Feedback (FB)
Voltage Levels at
CN2301/pins 6 & 8 (DR)
CN2301/pins 5 & 7 (FB)
*Befroe Shutdown*
If both feedback voltages are at the proper level then the fans are rotating,
however, the DE microprocessor is not processoring the information
accurately. In this case, the problem is with the DE microprocessor.
Replace the ASU/DSU assembly.
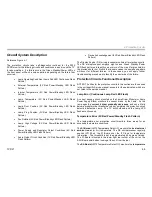
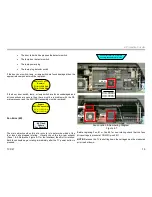
Lamp Drive Error ( 5X) (aka Lamp Power Supply Block)
5X Flash
Pattern
Lamp Driver
This error indicates lose of the 12KV High Voltage Output (lamp
ignition voltage) from the lamp driver board. The main objective when
troubleshooting this error is to isolate to one of four areas.
1) The Lamp
2) The Main Power Supply (G-Board)
3) The Lamp Driver Board (Lamp Power Supply Block)
4) The TV Microprocessor (ASU-Board)
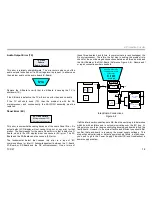
A completely open circuited lamp can cause a 5X flash pattern. Therefore,
the very first component to eliminate form the suspects is the lamp.
Does
Spark Gap
Light?
3 Attempts
20 Sec. Intervals
Yes
Visually check the spark gap on the lamp driver board for illumination
during TV initial power on process. In normal operation the spark gap
will flash ~5 seconds after the on button is pressed and the Green LED
begins flashing. It should flash once and the lamp will light.
If the
spark gap flashes
three times with a 20-second pause in
between flashes
then the lamp drive is functioning properly, and the
lamp is defective (replaced the lamp).
Summary of Contents for KDS-R60XBR1 - 60" Rear Projection TV
Page 1: ...Models KDS R50XBR1 KDS R60XBR1 Diagnostics and Troubleshooting Course TVP 21 Training Manual ...
Page 49: ...TVP 21 46 Disassembly Procedures Wire Routing Diagrams Wire Routing Diagrams ...
Page 50: ...TVP 21 47 Disassembly Procedures Wire Routing Diagrams cont ...
Page 51: ...TVP 21 48 Disassembly Procedures Wire Routing Diagrams cont ...
Page 52: ...TVP 21 49 Disassembly Procedures Wire Routing Diagrams cont ...
Page 53: ...TVP 21 50 Disassembly Procedures Wire Routing Diagrams cont ...
Page 58: ...TVP 21 55 Chapter 2 Initial Contact Analysis ...
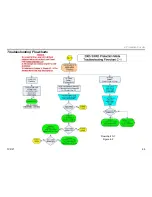
Page 72: ...TVP 21 69 4 Protection Circuits Troubleshooting Flowcharts Flowchart C 1 Figure 4 2 ...
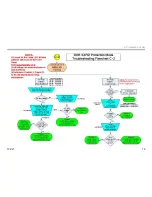
Page 73: ...TVP 21 70 4 Protection Circuits Flowchart C 2 Figure 4 3 ...
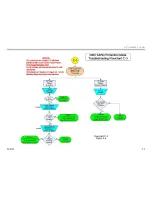
Page 74: ...TVP 21 71 4 Protection Circuits Flowchart C 3 Figure 4 4 ...
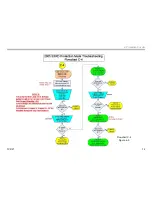
Page 75: ...TVP 21 72 4 Protection Circuits Flowchart C 4 Figure 4 5 ...
Page 88: ...TVP 21 85 5 Video Processing System Video Distortion Flowchart E Figure 5 3 ...
Page 89: ...TVP 21 86 5 Video Processing System Optical Block Flowchart F Figure 5 4 ...
Page 98: ...TVP 21 95 6 Audio Processing System Troubleshooting Flowchart ...
Page 102: ...TVP 21 99 Appendix 2005 SXRD Service Mode Options ...

