background image

3

Safety

Operate the LCD Projection TV only on 120 V AC.

The plug is designed, for safety purposes, to fit into 
the wall outlet only one way. If you are unable to 
insert the plug fully into the outlet, contact your 
dealer.

If any liquid or solid object should fall inside the 
cabinet, unplug the LCD Projection TV immediately 
and have it checked by qualified service personnel 
before operating it further.

If you will not be using the LCD Projection TV for 
several days, disconnect the power by pulling the plug 
itself. Never pull on the cord.
For details concerning safety precautions, see 
“Important Safeguards” on page 4.

Installing

To prevent internal heat buildup, do not block the 
ventilation openings.

Do not install the LCD Projection TV in a hot or 
humid place, or in a place subject to excessive dust or 
mechanical vibration.

Avoid operating the LCD Projection TV at 
temperature below 41°F (5°C).

If the LCD Projection TV is transported directly from 
a cold to a warm location, or if the room temperature 
changes suddenly, the picture may be blurred or show 
poor color. In this case, please wait a few hours to let 
the moisture evaporate before turning on the LCD 
Projection TV.

To obtain the best picture, do not expose the screen to 
direct illumination or direct sunlight. It is 
recommended to use spot lighting directed down from 
the ceiling or to cover the windows that face the 
screen with opaque drapery. It is desirable to install 
the LCD Projection TV in a room where the floor and 
walls are not of a reflective material.

ENERGY STAR

®

 is a U.S. registered mark.

TruSurround and the () symbol are trademarks of SRS 
Labs, Inc.
TruSurround technology is incorporated under license 
from SRS Labs, Inc.
BBE and BBE Symbol are trademarks of BBE Sound, Inc. 
and are licensed by BBE Sound, Inc. under U.S. Patent No. 
4,638,258 and 4,482,866.

ATTENTION

Pour prévenir les chocs électriques, ne pas utiliser cette 
fiche polarisée avec un prolongateur, une prise de courant 
ou une autre sortie de courant, sauf si les lames peuvent tre 
inserées à fond sans en laisser aucune partie à decouvert.

Owner’s Record

The model and serial numbers are located at the rear of the 
LCD Projection TV, below the Sony logo, on the sticker, 
and also on the TV box (white label). Record these 
numbers in the spaces provided below. Refer to them 
whenever you call upon your Sony dealer regarding this 
product.

Model No.

Serial No.

As an ENERGY STAR

®

 Partner, 

Sony Corporation has determined 
that this product meets the 
ENERGY STAR

®

 guidelines for 

energy efficiency.

Summary of Contents for KF-60XBR800 - 60" Xbr Grand Wega™ Rear Projection Television

Page 1: ... MODEL COMMANDER DEST CHASSIS NO MODEL COMMANDER DEST CHASSIS NO KF 50XBR800RM Y912 US KF 50XBR800RM Y912 Canadian KF 60XBR800RM Y912 US KF 60XBR800RM Y912 Canadian 352 7 21 79 RM Y912 RM Y912 KF 50XBR800 KF 60XBR800 ...

Page 2: ...hms unbalanced sync negative C 0 286 Vp p Burst signal 75 ohms Audio IN 6 500 mVrms 100 modulation Impedance 47 kiloohms AUDIO VAR FIX 1 500 mVrms at the maximum volume setting Variable 500 mVrms Fixed Impedance output 2 kiloohms MONITOR OUT 1 Video 1 Vp p 75 ohms unbalanced Sync negative Audio 500 mVrms 100 modulation Impedance output 1 kiloohms CONTROL S IN OUT 1 minijacks Component Video Input ...

Page 3: ...HG Audio Cable RKC 515HG Control S Cable RK G69HG Component Video Cable VMC 10 30 HG AV Receiver STR V555ES or equivalent Memory Stick media 8MB MSA 8A 16MB MSA 16A 32MB MSA 32A 64MB MSA 64A 128MB MSA 128A Design and specifications are subject to change without notice ...

Page 4: ...scribed below 7 67 The AC leakage from any exposed metal part to earth ground and from all exposed metal parts to any exposed metal part having a return to chassis must not exceed 0 5mA 500 microampers Leak age current can be measured by any one of three methods 1 A commercial leakage tester such as the Simpson 229 or RCA WT 540A Follow the manufacturers instructions to usc these instruments 2 A b...

Page 5: ...5 211 7 3 12 2857 5 8 7 5 12 8 78 7 2 48 7 8 12 8 3 8 66 6 0 7 48 33 5 28 8 28 5 21 3 17 685 78 7 2 48 28 8 1 8 78 7 2 48 77 17 21 1 9 7 5 7287 5 648 752 87 21 3529 1 17 81 É66 6 6286 7 16 21 81 75 16 250 7 85 62 0 17 2 7 75 87 6e 256 7287 3 1 1 É66 6 5 37 85 67 5 7 0 17 5 25 e É 0 17 7 21 6 7 85 77 17 21 8 20326 176 5 7 6 É 6e 85 7e 6 20326 176 17 e6 3 5 81 75 0 7 3 5 81 0 348 685 6 6 e0 6 35 1 3...

Page 6: ... 70 Block Diagram 2 71 Block Diagram 3 72 Block Diagram 4 73 Block Diagram 5 74 Block Diagram 6 75 Block Diagram 7 76 Block Diagram 8 77 Block Diagram 9 78 Block Diagram 10 79 4 2 Frame Schematic Diagram 80 4 3 Circuit Boards Location 81 4 4 Schematic Diagrams and Printed Wiring Boards 81 1 Schematic Diagram of A 1 4 Board 82 2 Schematic Diagram of A 2 4 Board 83 3 Schematic Diagram of A 3 4 Board...

Page 7: ...Board 113 33 Schematic Diagram of UD 1 2 Board 114 34 Schematic Diagram of UD 2 2 Board 115 Printed Wiring Boards A Board 116 BB Board 118 BC Board 120 BM 1C Board 120 G Board 122 H1 and T Boards 124 H2 Board 125 H3 Board 126 M Board 127 U Board 128 UD Board 130 4 5 Waveforms 131 4 6 IC Block Diagrams 132 4 7 Semiconductors 134 3 2 9 6 5 1 Screen Mirror Block Section 136 5 2 Cabinet Section 137 5 ...

Page 8: ...e item with the lower blink count blinks first The screen display displays the results regarding all the diagnosis items listed below The display 0 means that no malfunctions occurred Release of STANDBY indicator blinking STAND BY TIMER LAMP Detected symptoms Diagnosis Item Probable Cause Location Power cord is not plugged in Fuse is burned out F1601 G board Power does not come on No power is supp...

Page 9: ...LDJQRVLV 6FUHHQ LVSOD The results display is not automatically cleared In case of repairs and after repairs check the self diagnosis screen and be sure to return the results display to 0 If the results display is not returned to 0 it will not be possible to judge a new malfunction after completing repairs 0HWKRG RI OHDULQJ 5HVXOWV LVSOD 0HWKRG RI QGLQJ 6HOI LDJQRVLV 6FUHHQ When ending the self dia...

Page 10: ...KH ODPS DPS ULYHU KHQ ODPS LV QRW WXUQHG RQ WKHQ SLQ wl RI QJLQH FRP LV KLJK FKHFNV SLQ wk RI QJLQH FRP I SLQ wk LV ORZ LW LV MXGJHG QR LJK 9ROWDJH RZ HWHFW 9 OLQH IDLOXUH XGLR KHQ LV DSSHDUHG E DXGLR DPS IDLOXUH DW VSHDNHU OLQH 7KHQ LW LV GHWHFWHG E 0 1 FRP DQG LW WXUQV RII WKH PDLQ SRZHU 03 DPS HUURU KHQ ODPS LV QRW WXUQHG RQ WKHQ SLQ wl RI QJLQH FRP LV KLJK FKHFNV SLQ wk RI QJLQH FRP I SLQ wk L...

Page 11: ... 5 5 50 50 6 7 21 6 66 0 5 5 29 5 66 0 32 5 2 5 029 28 5 7 5 029 6 59 326 7 21 2 1 1 1 Six screws BVTP 4 x 16 2 OU bracket 3 7 6 4 5 1 2 2 1 3 ...

Page 12: ...2 5 66 0 5 029 237 81 7 2 66 0 5 029 1 Connector 1 Connector 3 2 5 RF antenna switch 4 Two washers Nine screws BVTP 3 x 12 1 3 Screw BVTP 4 x 16 8 Two screws BVTP 3 x 12 Terminal board assembly Bracket M 6 2 7 UD board 9 Claw ...

Page 13: ... 5 5 50 50 2 5 5 029 8 0 2 5 6 5 029 2 3 M board BB board 4 BC board 1 U board 2 1 5 3 4 ...

Page 14: ... 5 5 50 50 2 5 5 029 7 2 5 5 029 2 5 5 029 21752 3 1 2 66 0 5 029 1 Two screws BVTP 3 x 12 3 A board 2 Two claws 1 2 1 5 3 6 4 2 4 5 3 2 1 ...

Page 15: ... 5 5 50 50 2 5 5 029 6 5 1 0 5525 2 66 0 5 029 2 5 5 029 3 1 2 2 5 6 4 2 4 3 1 2 H1 lid 1 Two claws 6 Two screws BVTP 3 X 12 3 Two screws BVTP 4 X 16 4 Fasten tag 5 Three connectors 7 H1 board ...

Page 16: ...TOR ENGINE 6HUYLFH 0RGH GMXVWPHQW 1 The SCREEN displays the item being adjusted 2 Press 1 or 4 on the remote commander to select the adjustment item 3 Press 3 or 6 on the remote commander to change the data 4 Press 2 or 5 ontheremotecommandertoselectthecategory Every time you press 2 Category up Service mode changes in the order as shown below 20 2 6115 0 5 3 2267 0 9 2 0 3 2267 0 20 0 87 3 2267 3...

Page 17: ... QGLFDWRU RPPDQGHU XQFWLRQ XWWRQ 0RGH HVFULSWLRQ MUTING ENTER 5 7 ULWHV GDWD WR 190 ENTER 5 5HDGV GDWD IURP 190 8 ENTER 5 6 7 6HW WKH VKLSSLQJ FRQGLWLRQ 7 ENTER 17 6HUYLFH GDWD LQLWLDOL DWLRQ 1RW VWRUHG H VXUH QRW WR XVH XVXDOO 81 7 21 2 6 21 200 1 5 1 Changes adjustment item item No moves up 4 Changes adjustment item item No moves down 2 Changes adjustment category category moves up 5 Changes adj...

Page 18: ...15 Table 3 4 KILS 2 1 1 9 DYGA DY detection gain Y motion detection gain 0 15 Table 3 10 DCCO DC detection coring level C motion detedtion coring 0 15 Table 3 11 DCGA DC detection gain C motion detection gain 0 15 Table 3 Table 3 12 WSC Amount of noise detection coring 0 3 1 No Item NRMD 0 NRMD 1 NRMD 2 NRMD 3 13 WSS 0 8 DYCO 2 2 2 2 14 VAPG V aperture compensation gain 0 7 Table 4 9 DYGA 10 10 10...

Page 19: ...Others 9 BPF0 Chroma band filter f0 setting 0 3 Table 4 2 SCON 7 9 10 BPFQ Chroma band filter Q setting 0 3 Table 4 3 SCOL 5 6 11 BPSW Chroma band filter on off 0 1 Table 2 4 SHUE 4 6 12 TRAP Y block chroma trap filter on off 0 1 Table 4 5 YDLY 0 0 13 LPF Y Cb Cr output LPF on off 0 1 Table 4 11 BPSW 1 0 14 AFCG AFC loop gain PLL between H sync H VCO 0 1 Table 5 15 CDMD V count down system mode se...

Page 20: ...10 BPFQ 0 0 0 0 12 TRAP 0 0 0 0 13 LPF 1 1 1 1 Table 5 No Item RF Video1 4 Others 14 AFCG 1 0 0 15 CDMD 3 3 3 16 SSMD 0 0 0 Table 6 No Item RF Video1 4 Video5 6 DVI 17 HMSK 0 1 1 0 19 PPHA 7 7 7 7 Table 7 No Item RF 18 HALI 0 Table 8 No Item DVI DVI mild 22 CBO2 38 32 23 CRO2 34 32 Table 9 BLK0 BLK1 BLK2 BLK3 24 ATPD 0 0 1 0 0 25 DCTR 0 0 2 0 0 Twin Single No Item ...

Page 21: ... 11 BPSW Chroma band filter on off Table 3 4 SHUE 5 8 12 TRAP Y block chroma trap filter on off Table 3 5 YDLY 0 0 13 LPF Y Cb Cr output LPF on off Table 3 14 AFCG AFC loop gain PLL between H sync H VCO Table 4 Table 3 15 CDMD V count down system mode selector Table 4 No Item RF C Video S Video 16 SSMD H V sync slide level setting Table 4 6 SHAP 6 6 8 17 HMSK Masking of macrovision signal on off T...

Page 22: ... 0 0 0 0 3 VDC Video dependent coring on off 0 1 Table 1 2 CRNG 0 15 15 12 10 10 10 5 5 5 20 10 10 15 5 15 4 OSP Overrule smart peaking 0 1 Table 1 3 VDC 0 1 1 1 1 1 1 1 1 1 1 1 1 1 1 1 5 BOST Black offset compensation on off 0 1 Table 1 4 OSP 0 0 1 0 0 0 0 0 0 0 0 0 0 0 0 0 6 ABST Adaptive black stretch 0 63 Table 1 5 BOST 0 0 0 0 0 0 0 0 0 0 0 0 0 0 0 0 7 VGAM Variable gamma 0 63 Table 1 6 ABST ...

Page 23: ...Green enhancement width 0 1 0 0 0 0 0 0 0 0 0 13 SGR Green enhancement size 0 1 0 0 0 0 0 0 0 0 0 14 CDLY Chrominance delay 0 7 4 7 7 7 7 4 7 4 4 No Item Function Data range BSET 9 BSET 10 BSET 11 BSET 12 BSET 13 BSET 14 BSET 15 0 CDS Color dependent sharpness on off 0 1 1 1 1 1 1 1 1 1 CTI Color transient improvement on off 0 1 0 0 0 0 0 0 0 2 WPO White point stretch on off 0 1 1 1 1 1 1 1 1 3 DB...

Page 24: ...45 45 6 YOSW Table 2 3 RCUT 31 31 31 31 31 31 31 31 31 31 31 7 TCOF 0 4 GCUT 28 28 28 28 28 28 28 28 28 28 28 8 YOF Table 2 5 BCUT 30 30 30 30 30 30 30 30 30 30 30 9 CBOF Table 1 9 CBOF 33 33 33 33 33 33 40 38 37 33 33 10 CROF Table 1 10 CROF 32 32 32 32 32 32 39 38 37 32 32 11 SBRT 31 12 WBSW 0 13 DCOL Table 3 Table 2 No Item RF V1 V4 DVI OTHER 6 YOSW 1 1 0 8 YOF 0 0 7 Table 3 No Item COOL NEUTRA...

Page 25: ... 31 31 38 36 31 33 38 36 31 31 38 36 13 BLKB 3 7 UBOG 33 35 19 33 33 28 16 28 32 32 31 32 14 RGBL 0 8 UCOF 31 33 31 32 32 34 31 34 31 31 32 30 15 YLMT 3 9 UHOF 31 31 31 31 32 31 31 31 31 30 30 30 16 AGNG Table 4 10 SHOF 27 30 31 37 26 27 31 35 24 26 31 37 17 AKBO 0 18 CLPP 3 Table 2 2 19 CLPG 0 20 CLPS 0 21 PPAD 3 Vivid Standard PRO Mild Vivid Standard PRO Mild Vivid Standard PRO Mild 22 SYNP 0 6 ...

Page 26: ...1 31 31 38 33 31 7 UBOG 36 31 29 31 23 31 31 31 31 8 UCOF 26 29 31 28 28 28 31 28 31 9 UHOF 31 31 31 31 33 33 31 33 31 10 SHOF 31 37 31 24 29 33 31 34 31 Table 3 ON OFF 11 PICO 1 1 0 12 RGBS 0 7 0 Table 4 ON OFF 16 AGNG 2 0 Blanking Power OFF AGING Twin MS1 2 VGA No Item No Item No Item ...

Page 27: ...e 1 4 VMF0 0 0 0 0 0 0 0 0 0 0 0 0 7 PROV Table 1 5 VMDL 0 0 0 0 0 0 0 0 0 0 0 0 8 F1LV Table 1 6 SHF0 1 1 1 1 1 1 1 1 1 1 1 1 9 LTLV Table 1 7 PROV 3 3 3 3 0 0 0 0 3 3 3 3 10 LTMD Table 1 8 F1LV 0 0 0 0 0 0 0 0 0 0 0 0 11 CTLV Table 1 9 LTLV 3 1 0 2 2 1 0 2 2 1 0 2 12 UBOF Table 1 10 LTMD 1 1 0 1 1 1 0 1 1 1 0 1 13 MIDE Table 3 11 CTLV 0 0 0 0 0 0 0 0 1 1 0 0 14 VM Table 2 12 UBOF 0 0 0 0 0 0 0 0...

Page 28: ...0 0 0 0 0 6 SHF0 1 1 1 1 1 1 1 1 1 7 PROV 3 3 3 3 2 2 2 2 3 8 F1LV 0 0 0 0 0 0 0 0 0 9 LTLV 0 0 0 0 2 2 0 0 0 10 LTMD 0 0 0 0 1 1 0 0 0 11 CTLV 0 0 0 0 0 0 0 0 0 12 UBOF 0 0 0 0 0 0 0 0 0 Table 2 No Item Vivid Standard PRO Mild 14 VM 3 0 0 1 15 VMH 15 0 13 13 16 VMM 10 0 8 8 17 VML 6 0 4 4 Table 3 1 Vivid Standard PRO Mild Vivid Standard PRO Mild Vivid Standard PRO Mild 13 MIDE 7 5 0 2 12 11 8 9 1...

Page 29: ... YCON Table 2 0 SCOL 31 31 29 32 30 30 31 31 3 SPIC Table 1 1 SHUE 31 31 30 30 30 31 31 31 4 SPIO 7 3 SPIC 7 8 11 10 11 10 2 10 5 SCLO 7 6 SHUO 7 7 PIC Table 3 8 BRT Table 3 9 RYR Table 4 10 RYB Table 4 11 GYR Table 4 12 GYB Table 4 13 GAMM Table 5 14 GAMS Table 6 15 GAMR Table 6 16 GAMG Table 6 17 GAMB Table 6 18 BLK Table 5 19 DCTR Table 7 20 APED Table 7 21 DSBO Table 7 22 IDSW 0 23 ABLM Table ...

Page 30: ...tandard PRO Mild Vivid Standard PRO Mild 13 GAMM 4 2 4 4 8 2 4 2 8 2 4 2 18 BLK 8 9 0 10 3 4 0 4 3 4 0 4 Table 5 3 Vivid Standard PRO Mild Vivid Standard PRO Mild Vivid Standard PRO Mild 13 GAMM 6 2 4 2 4 2 4 4 8 4 4 4 18 BLK 4 6 0 6 8 9 0 10 3 2 0 2 Table 5 4 Vivid Standard PRO Mild Vivid Standard PRO Mild Vivid Standard PRO Mild 13 GAMM 8 4 4 4 8 4 4 4 8 4 4 4 0 18 BLK 3 2 0 2 3 2 0 2 1 1 0 1 0 ...

Page 31: ... 21 DSBO 7 7 7 7 7 7 7 7 23 ABLM 0 1 0 0 0 0 0 0 26 DPSQ 0 0 0 0 0 0 0 0 Table 7 2 8 9 10 11 12 13 14 15 19 DCTR 8 4 4 8 5 0 0 0 20 APED 2 1 1 1 1 0 0 0 21 DSBO 7 7 7 7 7 7 7 7 23 ABLM 0 0 0 0 0 0 0 0 26 DPSQ 0 0 0 0 0 0 0 0 Table 8 NT SHIFT HD SHIFT Neutral Warm Neutral Warm 28 RROF 10 15 9 15 29 RBOF 8 9 7 9 30 GROF 7 4 7 5 31 GBOF 7 10 7 9 Table 9 No Item SINGLE Others 24 ABLT 0 0 No Item No It...

Page 32: ...LN Table 2 11 ZOOM 0 0 0 Table 5 No Item Wide Zoom Zoom Full HD_FULL VC 1080 Normal 12 APSW 1 1 1 0 0 1 13 ASPT 24 47 47 47 47 47 14 SCRL 31 31 31 31 31 31 2170D 2 KF 50XBR800 No Item Function Data range Data Remarks Table 1 0 HCNT 31 No Item HD_FULL VC_1080I Others 1 HPOS Table 1 1 HPOS 35 27 2 HSIZ Table 2 3 SLIN Table 2 Table 2 4 MPIN Table 2 No Item Wide Zoom Others 5 PIN Table 2 2 HSIZ 49 40 ...

Page 33: ...VDJP Table 6 9 VDST Table 1 Table 3 10 AKBT Table 6 No Item Normal 4 TBLK 8 5 BBLK 13 Table 4 No Item Wide Zoom Zoom Full Normal VC1080I 3 VBLK 0 0 1 1 Table 5 No Item Normal VC 1080I Others 7 JUMP 1 1 Table 6 No Item Wide Zoom Zoom Full Normal HD_Full VC1080I 8 VDJP 1 1 0 1 10 AKBT 15 15 15 10 2170D 4 KF 50XBR800 No Item Function Data range Data Remarks Table 1 0 QPAM Table 1 No Item Normal VC 10...

Page 34: ...Data Remarks Table 1 0 VFRQ 1 No Item Single 720P 1080I Others 1 VON 1 4 HFRQ 80 90 2 EWDC 0 5 HFRX 38 41 3 MS15 0 6 VMPS 0 0 4 HFRQ Table 1 7 INTR 0 1 5 HFRX Table 1 8 VLNL 1 2 6 VMPS Table 1 9 VLNH 70 62 7 INTR Table 1 8 VLNL Table 1 9 VLNH Table 1 10 AGCS 0 ...

Page 35: ...5 45 45 45 45 45 45 45 45 6 YOSW Table 2 3 RCUT 31 31 31 31 31 31 31 31 31 31 31 7 TCOF 0 4 GCUT 28 28 28 28 28 28 28 28 28 28 28 8 YOF Table 2 5 BCUT 30 30 30 30 30 30 30 30 30 30 30 9 CBOF Table 1 9 CBOF 33 33 33 33 33 33 40 38 37 33 33 10 CROF Table 1 10 CROF 32 32 32 32 32 32 39 38 37 32 32 11 SBRT 31 12 WBSW 0 Table 2 13 DCOL Table 3 No Item RF V1 V4 DVI OTHER 6 YOSW 1 1 0 8 YOF 0 0 7 Table 3...

Page 36: ... Table 1 1 UBRG 27 31 31 31 3 UHUE Table 1 2 UCOL 35 31 31 31 4 USHP Table 1 3 UHUE 31 31 31 31 5 UTMP Table 1 4 USHP 35 33 31 25 6 UPOG Table 2 5 UTMP 2 1 1 1 7 UBOG Table 2 8 UCOF Table 2 9 UHOF Table 2 10 SHOF Table 2 11 PICO Table 3 12 RGBS Table 3 13 BLKB 3 14 RGBL 0 15 YLMT 3 16 AGNG Table 4 17 AKBO 0 18 CLPP 3 19 CLPG 0 20 CLPS 0 21 PPAD 3 22 SYNP 0 23 HVBT 0 ...

Page 37: ...8 33 31 31 38 33 7 UBOG 33 32 30 31 22 31 31 31 22 31 31 31 8 UCOF 31 31 31 31 30 30 28 31 28 30 28 31 28 9 UHOF 32 31 31 31 32 33 31 33 32 33 31 33 10 SHOF 31 33 29 31 29 33 31 34 29 33 31 34 Table 2 3 Vivid Standard PRO Mild Vivid Standard PRO Mild 6 UPOG 31 31 38 31 31 31 38 33 31 7 UBOG 36 31 29 31 22 31 31 31 31 8 UCOF 26 29 31 28 28 31 28 31 9 UHOF 31 31 31 31 32 33 31 33 31 10 SHOF 31 37 31...

Page 38: ...ble 1 4 VMF0 0 1 0 0 0 0 0 0 0 0 0 0 7 PROV Table 1 5 VMDL 0 1 0 0 0 0 0 0 0 0 0 0 8 F1LV Table 1 6 SHF0 1 1 1 1 1 1 1 1 1 1 1 1 9 LTLV Table 1 7 PROV 3 3 3 3 0 0 0 0 3 3 3 3 10 LTMD Table 1 8 F1LV 0 0 0 0 0 0 0 0 0 0 0 0 11 CTLV Table 1 9 LTLV 3 1 0 2 2 1 0 2 2 1 0 2 12 UBOF Table 1 10 LTMD 1 1 0 1 1 1 0 1 1 1 0 1 13 MIDE Table 3 11 CTLV 0 0 0 0 0 0 0 0 1 1 0 0 14 VM Table 2 12 UBOF 0 0 0 0 0 0 0...

Page 39: ...0 0 0 0 0 9 LTLV 0 0 0 0 0 0 0 0 0 0 0 0 10 LTMD 0 0 0 0 0 0 0 0 0 0 0 0 11 CTLV 1 1 0 0 1 1 0 0 0 0 0 0 12 UBOF 0 0 0 0 0 0 0 0 0 0 0 0 Table 1 3 Vivid Standard PRO Mild 0 SYSM 2 2 2 2 1 2 VMCR 0 0 0 0 0 3 VMLM 0 0 0 0 0 4 VMF0 0 0 0 0 0 5 VMDL 0 0 0 0 0 6 SHF0 1 1 1 1 1 7 PROV 2 2 2 2 3 8 F1LV 0 0 0 0 0 9 LTLV 2 2 0 0 0 10 LTMD 1 1 0 0 0 11 CTLV 0 0 0 0 0 12 UBOF 0 0 0 0 0 Table 2 No Item Vivid ...

Page 40: ...23 20 Table 3 3 DVI Vivid Standard PRO Mild Vivid Standard PRO Mild Vivid Standard PRO Mild 13 MIDE 17 16 13 14 22 21 18 19 32 31 28 29 Table 3 4 DVI Vivid Standard PRO Mild Vivid Standard PRO Mild Vivid Standard PRO Mild 13 MIDE 27 26 23 20 27 26 23 20 54 54 54 54 Table 3 5 Vivid Standard PRO Mild 13 MIDE 57 56 53 54 1 VIDEO5 6 VIDEO5 6 No Item No Item Twin VGA No Item MS2 480I 480P 720P 1080I No...

Page 41: ...1 10 11 10 2 10 5 SCLO 7 6 SHUO 7 7 PIC Table 3 8 BRT Table 3 9 RYR Table 4 10 RYB Table 4 11 GYR Table 4 12 GYB Table 4 13 GAMM Table 5 14 GAMS Table 6 15 GAMR Table 6 16 GAMG Table 6 17 GAMB Table 6 18 BLK Table 5 19 DCTR Table 7 20 APED Table 7 21 DSBO Table 7 22 IDSW 0 23 ABLM Table 7 24 ABLT Table 9 25 SPOF 0 0 26 DPSQ Table 7 27 LRGB 28 RROF Table 8 29 RBOF Table 8 30 GROF Table 8 31 GBOF Ta...

Page 42: ...8 BLK 11 12 0 12 5 7 0 7 4 6 0 6 Table 5 2 Vivid Standard PRO Mild Vivid Standard PRO Mild Vivid Standard PRO Mild 13 GAMM 4 2 4 4 8 2 4 2 8 2 4 2 18 BLK 8 9 0 10 3 2 0 2 3 2 0 2 Table 5 3 Vivid Standard PRO Mild Vivid Standard PRO Mild Vivid Standard PRO Mild 13 GAMM 4 0 4 0 4 2 4 4 8 2 4 2 18 BLK 4 6 0 6 8 9 0 10 3 2 0 2 Table 5 4 Vivid Standard PRO Mild Vivid Standard PRO Mild Vivid Standard PR...

Page 43: ...4 5 6 7 19 DCTR 0 5 4 8 8 8 5 5 20 APED 0 1 1 2 1 3 1 2 21 DSBO 7 7 7 7 7 7 7 7 23 ABLM 0 1 0 0 0 0 0 0 26 DPSQ 0 0 0 0 0 0 0 0 Table 7 2 8 9 10 11 12 13 14 15 19 DCTR 8 4 4 8 5 0 0 0 20 APED 2 1 1 1 1 0 0 0 21 DSBO 7 7 7 7 7 7 7 7 23 ABLM 0 0 0 0 0 0 0 0 26 DPSQ 0 0 0 0 0 0 0 0 Table 8 Neutral Warm Neutral Warm 28 RROF 10 15 9 15 29 RBOF 8 9 7 9 30 GROF 7 4 7 5 31 GBOF 7 10 7 9 Table 9 No Item SI...

Page 44: ...N 31 3 VLIN 7 7 6 VPIN Table 3 4 VSCO 10 10 7 MVPN 0 15 UVLN 4 4 8 NSCO 31 16 LVLN 4 4 9 HTPZ 15 10 MHTZ 0 Table 3 11 ZOOM Table 4 No Item Normal Others 12 APSW Table 5 6 VPIN 15 15 13 ASPT Table 5 14 SCRL Table 5 Table 4 15 UVLN Table 2 No Item Wide Zoom Zoom Others 16 LVLN Table 2 11 ZOOM 0 0 0 Table 5 No Item Wide Zoom Zoom Full HD_FULL VC 1080 Normal 12 APSW 1 1 1 0 0 1 13 ASPT 24 47 47 47 47 ...

Page 45: ... 2 Table 2 4 MPIN Table 2 No Item Wide Zoom Others 5 PIN Table 2 2 HSIZ 49 40 6 PINO Table 3 3 SLIN 10 5 7 UCP Table 2 4 MPIN 10 7 8 LCP Table 2 5 PIN 40 35 9 UXCG 1 7 UCP 31 35 10 LXCG 1 8 LCP 31 35 11 UXCP 2 14 PPHA 20 20 12 LXCP 2 13 XCPP 0 Table 3 14 PPHA Table 2 No Item Wide Zoom Zoom HD_FULL FULL Normal VC1080I 15 VANG 31 6 PINO 7 7 7 7 7 16 LANG 31 17 VBOW 31 18 LBOW 31 ...

Page 46: ...e 2 9 VDST 1 0 5 BBLK Table 2 6 AFCM Table 1 Table 2 7 JUMP Table 4 No Item Wide Zoom Zoom Full HD_FULL VC 1080 Normal 8 VDJP Table 5 4 TBLK 7 7 4 4 12 8 9 VDST Table 1 5 BBLK 7 7 8 6 13 13 10 AKBT Table 5 Table 3 No Item Wide Zoom Zoom Full Normal VC1080I 3 VBLK 0 0 1 1 Table 4 No Item Normal VC 1080I Others 7 JUMP 1 1 Table 5 No Item Wide Zoom Zoom Full Normal HD_Full VC1080I 8 VDJP 1 1 0 1 10 A...

Page 47: ...4 QPDV Table 1 3 QPDC 20 20 5 QPDP Table 1 4 QPDV 60 60 6 CPY1 0 5 QPDP 7 5 7 DF 31 8 DQP 31 9 DHMT 0 2170D 5 KF 60XBR800 No Item Function Data range Data Remarks Table 1 0 VFRQ 1 No Item Single 720P 1080I Others 1 VON 1 4 HFRQ 80 90 2 EWDC 0 5 HFRX 38 41 3 MS15 0 6 VMPS 0 0 4 HFRQ Table 1 7 INTR 0 1 5 HFRX Table 1 8 VLNL 1 2 6 VMPS Table 1 9 VLNH 70 62 7 INTR Table 1 8 VLNL Table 1 9 VLNH Table 1...

Page 48: ...VS Table 5 6 DYCD 2 0 1 0 0 0 12 MLHP Table 6 13 MLVP Table 6 Table 3 14 SDHP Table 7 15 SDVP Table 7 Table 0 Table 1 Table 2 Table 3 Table 0 Table 1 Table 2 Table 3 16 SDHS Table 7 7 DYSD 7 4 2 1 7 4 2 1 17 SDVS Table 7 18 PDHP Table 8 Table 4 19 PDVP Table 8 20 PDHS Table 8 21 PDVS Table 8 22 DPSW Table 9 Side Panel Other Side Panel Other Side Panel Window SP 23 MDL0 Table 10 8 MDHP 156 0 0 137 ...

Page 49: ...m Favorite 14 SDHP 174 15 SDVP 8 16 SDHS 104 17 SDVS 70 Table 8 No Item case nothing 18 PDHP 99 19 PDVP 55 20 PDHS 117 21 PDVS 60 Table 9 1080I Other 22 DPSW 0 0 Table 10 No Item case nothing 23 MDL0 12 Table 11 Side Panel Other 24 BCOL 1 1 1 0 Table 12 No Item case nothing 25 DYSS 1 26 OSDH 39 27 OSDV 16 No Item No Item No Item Single VGA Other VGA VGA Other Single Single MS Other ...

Page 50: ...le 1 2 Favorite Sub YC DSP 4 3 DSP 16 9 DSP 4 3 DSP 16 9 DSP 4 3 DSP 16 9 0 DRHP 149 150 156 133 137 136 136 143 131 144 1 DRHS 164 164 164 168 165 168 168 168 165 167 2 DRVP 55 55 55 55 57 55 54 55 37 55 3 DRVS 111 111 111 111 110 111 111 111 120 111 Table 1 3 INDEX Sub DSP 4 3 DSP 16 9 DSP 4 3 DSP 16 9 DSP 4 3 DSP 16 9 0 DRHP 135 138 138 138 145 131 144 1 DRHS 168 165 168 168 168 165 167 2 DRVP ...

Page 51: ... 42 41 54 57 27 43 54 3 VDVS 60 60 124 165 110 116 124 165 110 55 123 165 Table 1 3 DSP 4 3 DSP 16 9 0 VDHP 193 74 186 133 167 186 77 116 146 164 161 1 VDHS 219 165 220 222 147 219 165 228 152 228 229 2 VDVE 57 28 42 43 54 57 27 41 54 55 53 3 VDVS 110 55 116 123 165 110 55 124 165 111 111 Table 1 4 Favorite Sub DSP 4 3 DSP 16 9 DSP 4 3 DSP 16 9 DSP 4 3 DSP 16 9 0 VDHP 160 198 115 153 160 184 71 12...

Page 52: ...0 162 2 VDVE 35 45 41 54 45 57 25 3 VDVS 120 110 124 165 116 110 56 Table 2 No Item YC 480I 1080I 720P 480P VGA 4 VDVO 0 0 0 0 0 0 5 VCPO 42 42 72 88 122 122 6 VCWD 1 1 2 2 2 2 7 VYCD 0 0 0 0 0 0 8 VSTP 62 62 137 186 129 129 9 VSTT 0 0 0 0 0 0 10 VHSC 130 11 VFRV 0 0 0 0 0 0 INDEX Main No Item VGA DVI 1080I DVI 720P DVI 480P YC ...

Page 53: ... MHCL Table 2 27 SHCR 0 11 MHCE Table 2 28 SHCL 0 12 MHCO Table 2 29 SHCE 0 13 MVYR Table 2 30 SHCO 0 14 MVYL Table 2 31 SVYR 0 15 MVYE Table 2 32 SVYL 0 16 MVCR Table 2 33 SVYE 0 17 MVCL Table 2 34 SVCR 0 18 MVCE Table 2 35 SVCL 0 19 SHLY Table 1 36 SVCE 0 20 SHLC Table 1 21 SVLY Table 1 22 SVLC Table 1 23 SHYR Table 1 24 SHYL Table 1 25 SHYE Table 1 26 SHYO Table 1 27 SHCR Table 1 28 SHCL Table ...

Page 54: ... 0 1 1 1 1 6 MHYL 0 1 1 1 1 0 1 1 1 0 0 1 2 1 1 7 MHYE 0 7 5 5 3 0 7 7 3 0 0 3 5 4 7 8 MHYO 0 1 1 1 1 1 1 1 1 1 1 1 1 1 1 9 MHCR 0 0 0 0 0 0 0 0 0 0 0 0 3 0 0 10 MHCL 0 0 0 0 0 0 0 0 0 0 0 0 0 0 0 11 MHCE 0 0 0 0 0 0 0 0 0 0 0 0 4 0 0 12 MHCO 0 0 0 0 0 1 0 0 0 1 1 0 1 0 0 13 MVYR 0 1 1 0 0 0 1 1 0 0 0 1 1 0 0 14 MVYL 0 2 1 0 0 0 1 1 0 0 0 2 2 0 0 15 MVYE 0 7 7 0 0 0 5 7 0 0 0 7 7 0 0 16 MVCR 0 0 0...

Page 55: ... 10 MHCL 0 1 1 0 0 0 1 1 0 0 0 0 0 0 0 11 MHCE 0 4 4 0 0 0 4 4 0 0 0 0 0 0 0 12 MHCO 0 1 1 0 0 0 1 1 0 0 0 0 0 0 0 13 MVYR 0 0 0 0 0 0 0 0 0 0 0 0 0 0 0 14 MVYL 1 1 1 0 0 1 1 1 0 0 0 0 0 0 0 15 MVYE 4 4 4 0 0 4 4 4 0 0 0 0 0 0 0 16 MVCR 0 1 1 0 0 0 1 1 0 0 0 0 0 0 0 17 MVCL 0 1 1 0 0 0 1 1 0 0 0 0 0 0 0 18 MVCE 0 4 4 0 0 0 4 4 0 0 0 0 0 0 0 Table 2 5 No Item POP 60 POP 61 POP 62 POP 63 1 MHLY 0 0 ...

Page 56: ...MRHP 0 0 0 0 0 0 0 0 6 MRVS Table 1 4 MRVP 30 11 30 11 30 11 31 12 5 MRHS 174 174 87 87 230 230 230 230 6 MRVS 90 109 90 109 90 109 94 113 Table 1 2 480p ANLFM A FULL NORMAL ZOOM W ZOOM FULL NORMAL ZOOM W ZOOM FULL NORMAL ZOOM W ZOOM 0 MCUT 0 1 1 0 1 1 0 1 1 1 MWHS 175 175 87 87 230 230 2 MWVS 120 120 60 60 120 120 3 MRHP 0 0 0 0 0 0 4 MRVP 30 11 15 6 30 11 5 MRHS 175 175 87 87 230 230 6 MRVS 90 1...

Page 57: ...FRGB Table 3 4 CRGN 9 8 7 HTC Table 4 5 YGN 9 8 8 HWID 1 9 HSEP 2 Table 3 10 HMSK Table 5 No Item Video5 6 DVI Others 2 FIXS 0 0 0 7 FRGB 0 0 0 Table 4 No Item Status tristate 1 Others Status tristate 1 7 HTC 0 1 Table 5 No Item Others Video5 7 1080i 10 HMSK 1 0 3506 No Item Function Data range Data Remarks Table 1 0 MCON Table 1 No Item 480I S VIDEO OTHERS 1 SCOR Table 1 0 MCON 64 64 2 SCOG Table...

Page 58: ...BEP 4 4 4 4 4 SVHI 16 BBEL 1 1 1 1 0 50XBR 17 BB2P 0 0 0 0 1 60XBR 18 BB2L 0 0 0 0 6 MIDL 2 50XBR 3 60XBR 8 SBAS 9 BSFQ 10 STRE 11 TRFQ 12 PSEF 13 AGCL 14 BBE 15 BBEP 16 BBEL 17 BB2P 18 BB2L 19 TRS1 20 TRS2 5 Table 1 Table 1 Table 1 4 5 0 Table 1 Table 1 8 7 5 7 SURR_OFF TRUSURR Data 0 0 2 0 5 7 7 5 SVLO SIMULAT LOFQ No Item ...

Page 59: ...5 63 85 127 180 7 CAPG 8 3SHP 9 NYNR 10 NCNR 11 NYMG 12 NCMG 13 NYLT 14 NYNC 15 NYCO 16 7SHP 17 7YF1 18 7LTI 19 7CTI 20 7VML 21 7VMC 22 MIDD 23 USHS 24 NLMP 25 PKNG 26 CRNG Table 3 Table 3 Table 3 Table 3 Table 3 Table 3 Table 3 Table 3 Table 3 Table 3 Table 3 Table 3 Table 3 Table 3 Table 3 Table 3 Table 3 Table 3 Table 3 Table 3 Table 3 Table 2 Table 3 Table 3 Table 3 Data Table 1 Table 1 ...

Page 60: ...R 0 1 1 1 2 2 2 2 10 NCNR 0 1 1 1 2 2 2 2 11 NYMG 0 0 0 0 0 0 0 0 12 NCMG 0 0 0 0 0 0 0 0 13 NYLT 0 1 1 2 3 4 6 8 14 NYNC 0 1 1 1 2 2 2 2 15 NYCO 0 0 0 0 0 0 0 0 16 7SHP 0 0 0 0 0 0 0 0 17 7YF1 0 0 0 0 0 0 0 0 18 7LTI 0 1 2 3 3 3 3 3 19 7CTI 0 0 0 0 0 0 0 0 20 7VML 0 0 0 0 0 0 0 0 21 7VMC 0 0 0 0 0 0 0 0 22 MIDD 0 0 0 0 0 0 0 0 23 USHS 0 1 2 3 4 5 6 7 24 NLMP 0 1 2 3 4 5 6 7 25 PKNG 0 0 0 0 0 0 0 ...

Page 61: ... Table 2 Table 2 Table 2 Table 1 Table 2 Table 2 Table 2 Table 2 Table 1 Table 1 Table 1 Table 1 Table 1 Table 1 Table 1 Table 1 Table 1 Table 1 Table 1 Table 1 Table 1 Table 1 Table 1 Table 1 Table 1 Table 1 Table 1 Table 1 Table 1 Table 1 Table 1 Table 1 Table 1 Table 1 Table 1 Table 1 Table 1 Table 1 Table 1 Table 1 Table 1 Table 1 Table 1 Data Table 1 Table 1 Table 1 No Item case nothing 0 WHC...

Page 62: ... 6 6 6 6 6 61 YNC 8 8 8 8 8 8 8 8 62 YCO 0 0 0 0 0 0 0 0 Item VIDEO 5 7 480i OTHER No DRCV No Item Function Data range Remarks Table 1 0 MFVR No Item case nothing 1 ISEL 0 MFVR 0 2 ORES 1 ISEL 1 2 LMLV 6 FMAT 0 3 ONCT 8 FSEL 1 4 AINI 9 CDLY 2 5 BINI 10 LMIT 0 6 FMAT 12 LMLV 1 7 FMTH 13 VDLY 1 8 FSEL 14 VDPR 3 9 CDLY 15 WPPL 2 10 LMIT 16 CRCT 0 12 LMLV 13 VDLY 14 VDPR 15 WPPL 16 CRCT 17 NRA 18 NRB ...

Page 63: ...28 128 Table 2 2 Vivid Standard PRO DVI Mild 2 ORES 128 128 128 128 3 ONCT 128 128 128 128 Table 3 No Item Custom1 Custom2 Custom3 4 AINI 0 49 79 5 BINI 24 54 89 Table 4 No Item RF OTHERS 7 FMTH 1 1 Table 5 No Item Vivid Standard PRO Mild 2 LMLV 2 2 2 2 Table 6 0 1 2 3 4 5 6 7 17 NRA 0 0 0 0 0 0 0 0 18 NRB 128 128 128 128 128 128 128 128 Item VIDEO 1 4 VIDEO 5 6 No Item SNNR LEVEL No Item RF No ...

Page 64: ... AACK 8 MSBG 0 10 SLFC 9 AACK 2 11 RAMW 10 SLFC 0 11 RAMW 0 Table 1 Table 1 Table 1 Table 1 Table 1 Table 1 Table 1 Table 1 Table 1 Table 1 Table 1 Data Table 1 ID No Item Function Data range Remarks Table 1 0 ID0 No Item case nothing 1 ID1 0 ID0 89 2 ID2 1 ID1 255 3 ID3 2 ID2 239 4 ID4 3 ID3 107 5 ID5 4 ID4 75 6 ID6 5 ID5 243 7 ID7 6 ID6 126 7 ID7 27 Table 1 Table 1 Table 1 Table 1 Table 1 Table ...

Page 65: ...d repeat the SCOL and SHUE ad justments so that VB1 VB4 and VB2 VB3 Adjustment positions Category tem Left screen 2103 1 3 SCOL 4 SHUE Right screen 2103 2 3 SCOL 4 SHUE 1 9 9 9 9 5 After the adjustment finished return the data set in 2 to origi nal values and write the data by pressing the MUTE EN TER buttons on the remote commander 9LGHR QSXW GMXVWPHQW 1 Enter the Video color bar 100 signal 2 Set...

Page 66: ... 3 7 After the adjustment finished return the data set in 6 to origi nal values and write the data by pressing the MUTE EN TER buttons on the remote commander 8 Enter the Component 480p signal Set same values as those adjusted in 6 and write the data by pressing the MUTE EN TER buttons on the remote commander 9 Enter the Component 720p signal Set same values as those adjusted in 6 and write the da...

Page 67: ...vel and white level is 1 25 Vp p 1 STEP Adjustment positions Category tem Left screen 2103 1 2 SCON Right screen 2103 2 2 SCON 1 25 Vp p 5 After the adjustment finished return the data set in 2 to origi nal values and write the data by pressing the MUTE EN TER buttons on the remote commander 9LGHR QSXW GMXVWPHQW 1 Enter the 1 2 window signal and set the PICTURE MODE to Vivid 2 Set the adjustment c...

Page 68: ... TEST 2 G LUT SW 0 D GM TPN 0 T PATN SW 1 1 T SIG SEL 0 2 PATN DIR 1 3 SIG LV DIR 0 5 B LV 15 6 G LV 15 7 R LV 15 2 Set the test pattern to red color and adjust the EVEN VR so as to minimize vertical stripes difference in brightness of vertical lines every two dots Category Item Data D GM TPN 8 T PATN RGB 1 R LCD DR 2 R ODD VR ADJ LCD DR 3 R EVEN VR ADJ XQGDPHQWDOO WKLV LWHP LV DGMXVWHG ZLWK WKH 9...

Page 69: ...UH QRW WR FDXVH WKH ZKLWH EOXUULQJ 3 If the SUB CON value was changed check the white balance and repeat adjustment to attain best sub brightness sub con trast and white balance 4 After the adjustment finished write the data by pressing the MUTE ENTER buttons on the remote commander 6 5 1 17 5 8670 17 1 Enter the RF monoscope signal 2 Adjust so that the picture is displayed in the center of the sc...

Page 70: ...LPF Q1022 MUTE Q1023 1024 DC DETECT IC1011 12V REG IC1012 12V REG Q1027 POWER OFF DETECT DATA SYS OSD FAN MAIN MS RST P CON TO A 2 2 A 1 2 AUDIO OUT TUNER POWER SUPPLY TO H2 BOARD CN4502 TO H2 BOARD CN4401 TO M BOARD CN9501 TO M BOARD CN9002 B C D 48 SYNC SW 49 BLOCK S 50 BLOCK M CN1016 46 MILD CONT 47 SUBDRC 44 43 CLAMP MUTE 45 YCBCRSWO 42 MODE M FMONI M 41 40 SAP S TU H 39 M TU H 37 ATF S 38 ATF...

Page 71: ...V VDOHS C10 VDOVS C9 C6 A11 A9 C8 DRCH C7 SUBV SUBH SUBOSD A6 CLAMP MUTE A5 YCBCRSWO C5 RESET A4 DRCSUB C4 MILD CONT A3 C2 BLOCK S BLOCK M C3 SYNC SW C1 A1 SDA1 SCL1 SUB C2 SUB Y2 FSC SUB C1 SUB Y1 MAIN V Y V56Y MAIN C V56CB V56CR V7CB V7Y V7CR VDOCB VDOCR VDOY DRCCR DRCCB DRCY DRCV VDOHS VDOVS DRCH SUBV SUBH CLP MUTE YCBCRSWO RST DRCSUB MILD CONT BLOCK S BLOCK M SYNC SW SDA1 SCL1 5V 9V A18 9V 9V ...

Page 72: ...N SDA SCL RESET VDIN CKIN HREFO HDOUT CAS RAS NWE UCAS LCAS RAS WE HDIN IC3003 A D DAT1 CLK1 RST Q3003 IC3001 SDRAM I O 8 I I O 15 I O X I I O XX 5V 5V RBIAS VCOIN PFDOUT RBIAS VCOIN PFDOUT FINA VCOOUT FINB VCOOUT FINB FINA IC3608 WRITE PLL IC3606 WRITE PLL IC8601 A D CONVERTER BA0 I BA7 GA0 I GA7 RA0 I RA7 Q3906 LEVEL SHIFT Q3907 LEVEL SHIFT DAT1 CLK1 DRC RESET DRC DCLK XDR CVS XDR CHS IC3303 DRC...

Page 73: ...CN1018 G 7 OSD V CN2804 9 OSD H 10 SCP 4 OSD G 8 OSD YSYM 2 OSD R 6 OSD B 20 SCL E 30 SDA E 19 9V 16 5V 9V 5V DRCRIN0 I DRCRIN7 DSPY0 I DSPY7 G2 I G9 R2 I R9 B2 I B9 DSPCR0 I DSPCR7 DSPCB0 I DSPCB7 SDADR3 I SDADR12 SDDAT0 I SDDAT31 DQ0 I DQ31 A0 I A12 DRCYIN0 I DRCYIN7 VDOYIN0 I VDOYIN7 VDOCIN0 I VDOCIN7 AUXCIN0 I AUXCIN7 DRCBIN0 I DRCBIN7 DXT1IN DXT1OUT DRCDCLK XDRCVS XDRCHS VDOYCLVL VDOBCLVL VDO...

Page 74: ... 6 11 10 69 73 64 62 59 42 68 53 22 44 13 40 43 14 Q4611 BUFFER D4602 D4603 IC4802 2 5V REG 2 5V 3 3V IC4603 YCT MAIN IC4604 PIC BOOST IC4607 YCT SELECT X4601 3 58MHz X4802 10MHz X4803 10MHz D4804 D4804 D4803 D4822 D4826 IC4803 SUB CCD VCHIP ID1 IC4804 MAIN CCD VCHIP ID1 S YS SUB OSC YM YS BLOCK M SFSC BLOCK S SDAT S 2A 2B 3A 3B SHD MAIN V MAIN H SVD SELH MAIN V MAIN H SEL V HD VD 2T 3Y 2A S 2Y 3Y...

Page 75: ...SER C BLANKING POWER CTL 5V SCK SDT IC9508 IC9508 IC9515 IC9506 SELECT Q9506 IC9502 I O EXPANDER D9501 Q9505 IC9510 IC9509 STBY LED LED SW BINT IHSYNC VSYNC VSYNC VP Q9502 1 2 4 1 2 4 STBY STR LED OSD H OSD V SDA1 SCL1 4 1 2 IC9010 Q9527 OSD R OSD G OSD B OSD YSYM MID H MID V MID H MID V STBY STR LED IC9013 IC9014 IC9017 IC9016 2 1 4 2 1 4 2 1 4 2 1 4 Q9525 Q9526 IC9004 SYSTEM CONTROL D9028 IC9030...

Page 76: ... Q2013 2014 BUFFER Q2018 2019 BUFFER Q2022 2024 BUFFER FL2003 Q2005 BUFFER SUB Y2 FSC SUB C1 SUB Y1 Q2004 2006 BUFFER SUB Y2 COMP V OUT MAIN C OUT MAIN L MAIN R SDA SCL 56 YOUT1 1 32 ADIN CLPO 7 AYO 4 ACO 25 F_IN 58 COUT1 47 COUT2 44 V Y OUT2 45 ROUT2 43 LOUT2 33 SCL 34 SDA MON MUTE VAR MUTE Q2507 2508 BUFFER VAR OUT R VAR OUT L AUDIO DATA IC2002 INPUT SELECT A30 A29 A32 A31 C29 CN2001 MAIN TU R M...

Page 77: ...R AU W L AU W R A12 A0T2 A03 A13 A0T3 A04 A14 ELR I O EPR RST IFD1 IFCK A0T4 X1 LIN1 LIN2 LIN3 LIN4 RIN1 RIN2 RIN3 RIN4 MAIN L V5 L V5 R V6 L V6 R MAIN R IC2502 AUDIO DSP IC2503 AMP IC2504 AMP Q2504 Q2505 D2500 TO U 1 2 U INPUT SELECT 2 2 U2 KEY IN H3 SIRCS POWER SW 2 KEY 1 3 KEY 2 D4505 STANDBY D4503 TIMER S4501 POWER D4510 LAMP G F f g CHANNEL CHANNEL VOLUME VOLUME 7 LAMP LED 8 TIMER 9 STBY STRE...

Page 78: ... 16 18 17 23 24 RX1 5V HPD RXO RXO RXC RXC 52 47 RIN2 52 RIN2 59 RIN2 58 RIN2 61 RXC 62 RXC 31 33 52 35 36 6 RIN2 OSC OUT OSC IN AIN6 IT7 PB6 PA2 SCL PA1 SDA AIN7 IT8 PB7 5 7 RIN2 6 5 1 2 6 5 1 2 8 7 6 5 5 6 2 1 RX2 46 RX2 94 95 10 11 13 14 16 17 1 2 3 1 SDA 2 SCL CN7004 3 UB_BINT 1 2 3 3 4 1 3 4 1 2 3 11 24 28 10 20 22 21 18 8 19 TEST CONNECTOR SRESETN SCL SDA DVI SCL DVI SCA SCL WP SDA 5V 3 3V 2...

Page 79: ... 5 5 50 50 2 5 0 T1605 1606 LINE FILTER 33V RECT 270 E L1 J N I K F TO A BOARD CN1005 TO LAMP DRIVER TO A BOARD CN1006 TO A BOARD CN1004 TO A BOARD CN1007 TO A BOARD CN1024 ...

Page 80: ...P 3P BLK L S MICRO 4P WHT VH 8P BLK S MICRO 9P BLK S MICRO 3P WHT S MICRO 3P VH 1P 1P 34P 3P VH 2P WHT VH B 1P 1P 3P WHT S MICRO 4P RED S MICRO 10P WHT L S MICRO 64P B TO B 34P 34P 4P BLK L S MICRO TAB 3P YEL S MICRO 3P RED S MICRO 50P B TO B 10P 50P B TO B 50P B TO B 50P B TO B 5P WHT S MICRO 64P B TO B 64P B TO B 50P WHT B TO B 60P B TO B 40P WHT B TO B 50P WHT B TO B 40P WHT B TO B 4P WHT S MIC...

Page 81: ...V EXV F 6LJQDO SDWK 6 0 7 5 06 1 35 17 5 1 2 5 6 V V LYLGHG VFKHPDWLF GLDJUDP 6FKHPDWLF GLDJUDPV RI 0 DQG 8 ERDUGV DUH GLYLGHG LQWR VHYHUDO SLHFHV QIRUPDWLRQ WR ZKHUH WKH OLQH LV WR EH FRQQHFWHG LV SULQWHG DW WKH HQG RI HDFK OLQH RU H DPSOH 72 B PHDQV WKH OLQH LV FRQQHFWHG WR 5HI 1R RI DQG VFKHPDWLF GLDJUDPV 72 B 5HI 1R 1DPH RI GLYLGHG VFKHPDWLF GLDJUDP 6 2 3 4 5 6 7 8 9 0 qa qs qf qh qj qk 1 6 ql...

Page 82: ... 5 5 50 50 6FKHPDWLF LDJUDP RI RDUG ...

Page 83: ... 5 5 50 50 6FKHPDWLF LDJUDP RI RDUG ...

Page 84: ... 5 5 50 50 6FKHPDWLF LDJUDP RI RDUG ...

Page 85: ... 5 5 50 50 6FKHPDWLF LDJUDP RI RDUG ...

Page 86: ... 5 5 50 50 6FKHPDWLF LDJUDP RI RDUG ...

Page 87: ... 5 5 50 50 6FKHPDWLF LDJUDP RI RDUG ...

Page 88: ... 5 5 50 50 6FKHPDWLF LDJUDP RI RDUG ...

Page 89: ... 5 5 50 50 6FKHPDWLF LDJUDP RI RDUG ...

Page 90: ... 5 5 50 50 6FKHPDWLF LDJUDP RI RDUG ...

Page 91: ... 5 5 50 50 6FKHPDWLF LDJUDP RI RDUG ...

Page 92: ... 5 5 50 50 6FKHPDWLF LDJUDP RI RDUG ...

Page 93: ... 5 5 50 50 6FKHPDWLF LDJUDP RI RDUG ...

Page 94: ... 5 5 50 50 6FKHPDWLF LDJUDP RI RDUG ...

Page 95: ... 5 5 50 50 6FKHPDWLF LDJUDP RI RDUG ...

Page 96: ... 5 5 50 50 6FKHPDWLF LDJUDP RI RDUG ...

Page 97: ... 5 5 50 50 6FKHPDWLF LDJUDP RI RDUG ...

Page 98: ... 5 5 50 50 6FKHPDWLF LDJUDP RI RDUG ...

Page 99: ... 5 5 50 50 6FKHPDWLF LDJUDPV RI RDUGV ...

Page 100: ... 5 5 50 50 6FKHPDWLF LDJUDP RI RDUG ...

Page 101: ... 5 5 50 50 6FKHPDWLF LDJUDP RI RDUG ...

Page 102: ... 5 5 50 50 6FKHPDWLF LDJUDP RI 0 RDUG ...

Page 103: ... 5 5 50 50 6FKHPDWLF LDJUDP RI 0 RDUG ...

Page 104: ... 5 5 50 50 6FKHPDWLF LDJUDP RI 0 RDUG ...

Page 105: ... 7 6 5 0 7 293 3527 4 9 5 7 6 07 9 5 7 4 9 5 7 6 0 8 9 5 7 6 05 8 9 5 7 6 0 9 5 7 0 7 0 7 0 7 3527 3 6 6 9 5 7 6 9 5 7 0 7 3527 8 8 8 8 8 8 35 3 0 3 35 N 35 N 3 3 N N 3 5 35 35 5 N 3 N 3 N 3 N 3 N 51 N 51 N 51 56 N 51 3 N 3 N 3 35 N 3 35 N 3 5 56 N 3 N 51 3 3 3 N 3 3 N 3 N 3 N 51 3 N 56 N 56 3 6 2 0 79 3 7 9 3 6 0 52 9 P 3 6 0 52 3 6 0 52 3 5 6 0 52 3 7 6 0 52 3 6 0 52 9 16 67 9 5 7 6 0 1 5 7 9 9 ...

Page 106: ... 5 5 50 50 6FKHPDWLF LDJUDP RI DQG 7 RDUG ...

Page 107: ... 5 5 50 50 6FKHPDWLF LDJUDP RI 0 RDUG ...

Page 108: ... 5 5 50 50 6FKHPDWLF LDJUDP RI 0 RDUG ...

Page 109: ... 5 5 50 50 6FKHPDWLF LDJUDP RI 0 RDUG ...

Page 110: ... 5 5 50 50 6FKHPDWLF LDJUDP RI 0 RDUG ...

Page 111: ... 5 5 50 50 6FKHPDWLF LDJUDP RI 8 RDUG ...

Page 112: ... 5 5 50 50 6FKHPDWLF LDJUDPV RI 8 RDUGV ...

Page 113: ... 5 5 50 50 6FKHPDWLF LDJUDP RI 8 RDUG ...

Page 114: ... 5 5 50 50 6FKHPDWLF LDJUDP RI 8 RDUG ...

Page 115: ... 5 5 50 50 6FKHPDWLF LDJUDP RI 8 RDUG ...

Page 116: ...QHQW 6LGH 2 5 6 0 21 8 725 2 7 21 RPSRQHQW 6LGH 75 16 6725 4 2 4 2 4 2 4 2 4 2 4 2 4 2 4 2 4 2 4 2 4 2 2 3 3 3 3 3 9 5HIHU WR 7HUPLQDO QDPH RI VHPLFRQGXFWRUV LQ VLON VFUHHQ SULQWHG FLUFXLW VHH SDJH 8 2 287 781 5 32 5 6833 ...

Page 117: ...H RI VHPLFRQGXFWRUV LQ VLON VFUHHQ SULQWHG FLUFXLW VHH SDJH 2 5 6 0 21 8 725 2 7 21 RQGXFWRU 6LGH 75 16 6725 4 1 4 1 4 1 4 1 4 1 4 1 4 1 4 1 4 1 4 1 4 1 4 1 4 1 4 1 4 1 2 3 3 3 3 3 3 3 3 4 3 3 2 5 RQGXFWRU 6LGH 8 2 287 781 5 32 5 6833 ...

Page 118: ... VHPLFRQGXFWRUV LQ VLON VFUHHQ SULQWHG FLUFXLW VHH SDJH 2 5 6 0 21 8 725 2 7 21 RPSRQHQW 6LGH 75 16 6725 4 2 4 2 4 2 4 2 4 2 4 2 4 2 4 2 4 2 4 2 4 2 4 2 4 2 4 2 4 2 4 2 4 2 4 2 4 2 4 2 4 2 4 2 4 2 4 2 4 2 4 2 4 2 4 2 4 2 4 2 4 2 4 2 4 2 2 3 3 qa 3 5 0 3 0 ...

Page 119: ...HG FLUFXLW VHH SDJH 2 5 6 0 21 8 725 2 7 21 RQGXFWRU 6LGH 75 16 6725 4 2 4 2 4 2 4 2 4 2 4 2 4 2 4 2 4 2 4 2 4 2 4 2 4 2 4 2 4 2 4 2 4 2 4 2 4 2 4 2 4 2 4 2 4 2 4 2 4 2 4 2 4 2 4 2 4 2 4 2 4 2 4 2 4 2 4 2 4 qg 4 qg 4 2 4 2 4 2 4 2 4 2 4 2 4 2 4 qg 4 qg 4 2 4 2 4 2 2 3 6 6 8 0 8 2 2 7 5 0 3 0 ...

Page 120: ...ULQWHG FLUFXLW VHH SDJH 2 5 6 0 21 8 725 2 7 21 RPSRQHQW 6LGH 75 16 6725 4 2 4 2 4 2 4 2 4 2 4 2 4 2 4 2 4 2 4 2 4 2 4 2 4 2 4 2 4 2 4 2 4 2 4 2 4 2 4 2 4 2 4 2 4 2 4 2 4 2 4 2 4 2 4 2 4 2 4 2 4 2 4 2 4 2 4 2 4 2 4 2 4 2 4 2 4 2 4 2 4 2 4 2 4 2 4 2 4 2 4 2 4 2 4 2 4 2 2 9 9 qa qa 9 2 6 7 ...

Page 121: ...HU WR 7HUPLQDO QDPH RI VHPLFRQGXFWRUV LQ VLON VFUHHQ SULQWHG FLUFXLW VHH SDJH 2 5 6 0 21 8 725 2 7 21 RQGXFWRU 6LGH 75 16 6725 4 1 4 1 4 1 4 1 4 1 4 1 4 1 4 1 4 1 4 1 4 1 4 1 4 1 4 1 4 1 4 1 4 1 4 1 4 1 4 1 4 1 4 1 4 1 2 3 3 3 9 2 6 7 ...

Page 122: ... 5 5 50 50 2 5 RPSRQHQW 6LGH 2 5 RQGXFWRU 6LGH 0 025 67 ...

Page 123: ... 5 5 50 50 0 0 2 5 RPSRQHQW 6LGH 0 2 5 RQGXFWRU 6LGH 5 0 ...

Page 124: ... 5 5 50 50 2 5 RPSRQHQW 6LGH 2 5 6 0 21 8 725 2 7 21 RPSRQHQW 6LGH 3 272 283 5 3 75 16 6725 4 4 4 2 32 5 6833 ...

Page 125: ...HIHU WR 7HUPLQDO QDPH RI VHPLFRQGXFWRUV LQ VLON VFUHHQ SULQWHG FLUFXLW VHH SDJH 2 5 6 0 21 8 725 2 7 21 RQGXFWRU 6LGH 3 272 283 5 3 75 16 6725 4 4 1 4 1 4 1 4 1 4 4 2 4 3 4 3 4 3 3 3 3 3 2 5 RQGXFWRU 6LGH 32 5 6833 ...

Page 126: ... 5 5 50 50 2 5 RPSRQHQW 6LGH 2 5 RQGXFWRU 6LGH 7 7 2 5 RPSRQHQW 6LGH 7 2 5 RQGXFWRU 6LGH 9 2 1 03 225 6 7 ...

Page 127: ... 5 5 50 50 2 5 RPSRQHQW 6LGH 2 5 RQGXFWRU 6LGH 1 ...

Page 128: ... 5 5 50 50 2 5 RPSRQHQW 6LGH 2 5 RQGXFWRU 6LGH 6 5 6 32 5 6 7 ...

Page 129: ...Q SULQWHG FLUFXLW VHH SDJH 0 2 5 6 0 21 8 725 2 7 21 75 16 6725 4 1 4 1 4 1 4 4 1 4 1 4 1 4 1 4 1 4 1 4 1 4 1 4 1 4 4 1 4 1 4 4 4 1 4 1 4 1 4 4 4 1 4 4 4 4 1 4 4 4 4 4 4 4 4 4 1 4 4 4 4 1 4 1 4 1 4 1 4 1 4 1 2 9 qa 9 qa 9 3 3 3 3 3 9 9 3 3 3 3 3 3 3 3 3 3 3 3 3 3 3 3 5 3 RPSRQHQW 6LGH RQGXFWRU 6LGH RPSRQHQW 6LGH RQGXFWRU 6LGH 0 1 21752 ...

Page 130: ... QDPH RI VHPLFRQGXFWRUV LQ VLON VFUHHQ SULQWHG FLUFXLW VHH SDJH 8 2 5 6 0 21 8 725 2 7 21 RPSRQHQW 6LGH 75 16 6725 4 2 4 2 4 2 4 2 4 2 4 2 4 2 4 2 4 2 4 2 4 2 4 2 4 2 4 2 4 2 4 2 4 2 4 2 4 2 2 3 3 3 8 8 2 5 RPSRQHQW 6LGH 1387 6 7 ...

Page 131: ...PLQDO QDPH RI VHPLFRQGXFWRUV LQ VLON VFUHHQ SULQWHG FLUFXLW VHH SDJH 8 2 5 6 0 21 8 725 2 7 21 RQGXFWRU 6LGH 75 16 6725 4 1 4 1 4 1 4 1 4 1 4 1 4 1 4 1 4 1 4 1 4 1 4 1 4 1 4 1 4 1 2 3 3 3 3 3 3 3 3 3 3 3 3 3 3 3 3 3 3 3 3 3 3 3 3 3 3 3 3 1387 6 7 ...

Page 132: ... 5 5 50 50 8 8 2 5 RPSRQHQW 6LGH 8 2 5 RQGXFWRU 6LGH 5HIHU WR 7HUPLQDO QDPH RI VHPLFRQGXFWRUV LQ VLON VFUHHQ SULQWHG FLUFXLW VHH SDJH 8 2 5 6 0 21 8 725 2 7 21 RPSRQHQW 6LGH 2 9 3 3 3 3 9 79 9 2 1387 ...

Page 133: ...2 Vp p 0IC4604 0 5 Vp p 0 8 Vp p 0 8 Vp p 0 8 Vp p qa IC4801 qs IC4801 qdIC4801 qf IC4801 qg IC4801 2 0 Vp p 20M Hz H H H H rj pin X1 uh pin CSI id pin ACO if pin AYO ik pin AYI 5 0 Vp p 0 38 Vp p 0 7 Vp p 0 25 Vp p qh IC4803 qj IC4803 qkIC4803 ql IC4804 w IC4804 wa IC4804 3 6Vp p 10M Hz V V H 10M Hz H rs pin yk pin OSD_VS yk pin OSD_VS yl pin OSD_HS rs pin XTAL td pin VIN 3 2 Vp p 3 2 Vp p 3 6 Vp...

Page 134: ... 6HOHF 3 E U E U E U E U E U E U 66 966 3 03 20 1 20 1 021 287 9 1 1 9 1 1 9 1 1 6 287 7 0 6 3 6 1 1 9FF 1 9 7 0 6 6 287 WDO 3 9FF 1 6 56 03 6 9FF 6 1 1 E 1 U 1 5 1 1 1 E U 6 7 7 E 7 U 6 0 7 5 7 7 287 E 287 U 287 2 5 4 86 1 a 1 6 725 3E3U8 E U 3E3U E U 5 E U 0 75 6 725 1B6 G 03 1 1 5 1 0 7B287 6 67 B 6 67 B B B B 6 B B B B 6 B 9 G 67 1 67 1 7 21 17 17 6 1 6 3 6B0 6 B6 1 6 3B6 B7 9B7 67 7 6 1 7 67 ...

Page 135: ... 7 2 5 48 1 6 2 285 352 66 1 6 7 8 6 21752 1387 67 1 2 1 5 7 21 6833 6 785 7 21 255 7 21 80 1 1 352 66 1 785 02 7 7 21 21752 6 6 9 9 80 1 1 9 725 352 66 1 63 75 352 66 1 2 285 9 725 352 66 1 675 7 672 5 0 352 66 1 00 21752 6 1 721 255 7 21 5 1 1 1 0 17 8 675 7 8 9 1 8 1 9 1 12 6 0 685 1 5 7 6 1 67 ...

Page 136: ...01 7 1 0 7 7 8 7 5 83 723 9 SLQV 623 9 7 75 723 9 SLQV 62 6 723 9 SLQV 623 0 3 7 3 5 7 3 5 723 9 SLQV 623 0 0 9 5 1 0 9 7 61 9 6 5 7 9 7 723 9 SLQV 623 0 723 9 SLQV 3 07 0 7 723 9 SLQV 623 1 0 8 7 1 0 8 7 34 9 3 34 5 34 59 34 59 367 003 3 SLQV 3 367 1 367 1 367 1 61 7 9 5 7 6 7 8 7 7 6 7 8 7 7 6 7 8 7 7 6 8 7 6 8 7 7 6 8 7 5 7 6 8 7 5 7 6 8 7 5 SLQV 3 6 3 7 723 9 SLQV 4 3 7 Q 6 0 21 8 7256 ...

Page 137: ...5 6 6 6 7 5 6 6 7 5 6 4 7 7 7 7 7 6 7 7 5 0 7 5 0 7 5 0 5 0 5 0 7 66 7 7 77 0 7 0 7 8 6 7 8 7 8 7 7 2 12 6 0 6 0 6 0 6 05 RU a a a a 1 8 75 6 07 7 2 12 16 7 7 2 12 6 6 a a a a 1 1 8 3 3 8 5 5 6 7 2 12 0 7 6 8 3 7 2 12 6 5 9 7 7 2 12 7 5 7 2 12 ...

Page 138: ...MIRROR BLOCK ASSY IRP 60XBR800 1 A 1603 626 A SCREEN MIRROR BLOCK ASSY IRP 50XBR800 2 X 4040 879 1 COVER 60 ASSY REAR 60XBR800 2 X 4040 882 1 COVER 50 ASSY REAR 50XBR800 3 4 054 709 01 STRIKE 60XBR800 3 4 083 567 01 STRIKE 50XBR800 4 X 4039 925 1 COVER R ASSY FRONT 60XBR800 4 X 4040 046 3 COVER R ASSY FRONT 50XBR800 5 X 4039 924 1 COVER L ASSY FRONT 60XBR800 5 X 4040 045 3 COVER L ASSY FRONT 50XBR...

Page 139: ...ON C 114 4 077 653 01 CUSHION B 115 4 082 940 03 BRACKET OU 50XBR800 116 3 650 537 00 WASHER 117 X 4040 874 1 DOOR ASSY LAMP 118 4 082 951 12 PEDESTAL 50XBR800 118 4 086 252 11 PEDESTAL 60F 60XBR800 119 A 1601 753 A LAMP BLOCK ASSY RP 120 X 4040 876 1 BRACKET ASSY BF 121 X 4038 931 1 PLATE ASSY FOOT 50XBR800 1 7 685 663 79 SCREW BVTP 4X16 TYPE2 IT 3 2 7 685 648 79 SCREW BVTP 3X12 TYPE2 IT 3 4 7 68...

Page 140: ...1300 699 A M BOARD COMPLETE 167 1 769 837 11 CORD POWER WITH NOISE FILTER 168 A 1401 406 A T BOARD COMPLETE 169 4 069 675 01 CAP TERMINAL BOARD 170 4 034 856 01 HOLDER HV CABLE 171 1 419 661 11 COIL CHOKE 4 0MMH 172 4 089 698 01 BRACKET MAIN 173 4 089 700 01 BRACKET M 174 A 1300 650 A BM1C BOARD COMPLETE 1 7 685 663 79 SCREW BVTP 4X16 TYPE2 IT 3 2 7 685 648 79 SCREW BVTP 3X12 TYPE2 IT 3 151 153 15...

Page 141: ...SCREW TAPPINNG 4X12 208 1 900 253 70 CONNECTOR ASSY SMP B 2P 209 1 500 603 11 CLAMP FERRITE 50XBR800 209 1 543 653 11 CORE ASSY BEAD DIVISION TYPE 60XBR800 1 7 685 663 79 SCREW BVTP 4X16 TYPE2 IT 3 2 7 685 648 79 SCREW BVTP 3X12 TYPE2 IT 3 5 7 685 167 19 SCREW WASHER HEAD P 4X35 201 204 206 202 203 207 205 208 209 1 2 2 5 7KH FRPSRQHQWV LGHQWLILHG E VKDGLQJ DQG PDUN DUH FULWLFDO IRU VDIHW 5HSODFH ...

Page 142: ...HQFH QXPEHU RQ RQH ERDUG RYHUODSV RQ WKH RWKHU ERDUG 7KHUHIRUH ZKHQ RUGHULQJ SDUWV E WKH UHIHUHQFH QXPEHU SOHDVH LQFOXGH WKH ERDUG QDPH 7KH FRPSRQHQWV LGHQWLILHG E VKDGLQJ DQG PDUN DUH FULWLFDO IRU VDIHW 5HSODFH RQO ZLWK SDUW QXPEHU VSHFLILHG 7KH PDUN LV VKRZQ DV WKH OHWWHU LQ WKH SDUWV OLVW REF NO PART NO DESCRIPTION REMARK REF NO PART NO DESCRIPTION REMARK HV FRPSRVDQWV LGHQWLIL V SDU XQ WUDP HW...

Page 143: ...16 1 793 495 11 CONNECTOR BOARD TO BOARD 50P CN1017 1 793 495 11 CONNECTOR BOARD TO BOARD 50P CN1018 1 793 494 11 CONNECTOR BOARD TO BOARD 40P CN1019 1 793 922 11 CONNECTOR DIN RECEPTACLE 64P CN1020 1 764 812 11 CONNECTOR BOARD TO BOARD 11P CN1021 1 793 922 11 CONNECTOR DIN RECEPTACLE 64P CN1023 1 564 511 11 PLUG CONNECTOR 8P CN1024 1 564 510 11 PLUG CONNECTOR 7P CN1025 1 764 334 11 PLUG CONNECTOR...

Page 144: ...1 METAL CHIP 22K 0 5 1 10W R1035 1 218 726 11 METAL CHIP 27K 0 5 1 10W R1036 1 218 718 11 METAL CHIP 12K 0 5 1 10W R1039 1 216 821 11 METAL CHIP 1K 5 1 10W R1040 1 218 718 11 METAL CHIP 12K 0 5 1 10W R1041 1 218 722 11 METAL CHIP 18K 0 5 1 10W R1042 1 218 724 11 METAL CHIP 22K 0 5 1 10W R1043 1 218 742 11 METAL CHIP 120K 0 5 1 10W R1045 1 218 697 11 METAL CHIP 1 6K 0 5 1 10W R1046 1 216 864 11 SHO...

Page 145: ...11 SHORT CHIP 0 R1159 1 216 864 11 SHORT CHIP 0 R1906 1 216 393 00 METAL OXIDE 2 2 5 3W R1907 1 216 393 00 METAL OXIDE 2 2 5 3W TUNER TU1001 8 598 594 10 TUNER FSS BTF FA421 TU1002 8 598 593 20 TUNER FSS BTF WA421 A 1300 696 A BB BOARD COMPLETE CAPACITOR 4 080 345 01 SHEET A RADIATION 4 382 854 01 SCREW M3X8 P SW CAPACITOR C2804 1 162 923 11 CERAMIC CHIP 47pF 5 50V C2806 1 125 891 11 CERAMIC CHIP ...

Page 146: ...IP 0 1 F 10 16V C3037 1 107 826 11 CERAMIC CHIP 0 1 F 10 16V C3038 1 162 970 11 CERAMIC CHIP 0 01 F 10 25V C3039 1 164 156 11 CERAMIC CHIP 0 1 F 25V C3040 1 107 826 11 CERAMIC CHIP 0 1 F 10 16V C3041 1 164 156 11 CERAMIC CHIP 0 1 F 25V C3042 1 128 391 11 ELECT CHIP 330 F 20 6 3V C3044 1 164 156 11 CERAMIC CHIP 0 1 F 25V C3046 1 162 970 11 CERAMIC CHIP 0 01 F 10 25V C3047 1 126 204 11 ELECT CHIP 47...

Page 147: ...1 117 681 11 ELECT CHIP 100 F 20 16V C3483 1 117 681 11 ELECT CHIP 100 F 20 16V C3484 1 125 837 91 CERAMIC CHIP 1 F 10 6 3V C3485 1 164 156 11 CERAMIC CHIP 0 1 F 25V C3486 1 164 156 11 CERAMIC CHIP 0 1 F 25V C3487 1 164 156 11 CERAMIC CHIP 0 1 F 25V C3488 1 124 779 00 ELECT CHIP 10 F 20 16V C3489 1 164 156 11 CERAMIC CHIP 0 1 F 25V C3494 1 164 156 11 CERAMIC CHIP 0 1 F 25V C3495 1 124 779 00 ELECT...

Page 148: ...4 8 719 404 50 DIODE MA111 TX D3601 8 719 800 76 DIODE MA153 TX D3603 8 719 083 58 DIODE UDZSTE 173 9B FERRITE BEAD FB3001 1 500 451 11 FERRITE 0 H FB3002 1 216 864 11 SHORT CHIP 0 FB3301 1 414 235 22 FERRITE 0 H FB3302 1 414 235 22 FERRITE 0 H FB3303 1 216 809 11 METAL CHIP 100 5 1 10W FB3304 1 469 110 21 FERRITE 0 H FB3401 1 414 235 22 FERRITE 0 H FB3402 1 414 235 22 FERRITE 0 H FB3403 1 216 864...

Page 149: ...601 1 469 555 21 INDUCTOR 10 H L8602 1 469 553 21 INDUCTOR 4 7 H L8603 1 469 555 21 INDUCTOR 10 H L8604 1 469 555 21 INDUCTOR 10 H TRANSISTOR Q2805 8 729 216 22 TRANSISTOR 2SA1162 G Q2806 8 729 422 33 TRANSISTOR 2SD601A Q TX Q2807 8 729 422 33 TRANSISTOR 2SD601A Q TX Q2808 8 729 900 53 TRANSISTOR DTC114EK Q2809 8 729 900 53 TRANSISTOR DTC114EK Q2822 8 729 422 33 TRANSISTOR 2SD601A Q TX Q2823 8 729...

Page 150: ...METAL CHIP 560 5 1 10W R2831 1 216 826 11 METAL CHIP 2 7K 5 1 10W R2832 1 216 809 11 METAL CHIP 100 5 1 10W R2833 1 216 864 11 SHORT CHIP 0 R2835 1 216 809 11 METAL CHIP 100 5 1 10W R2852 1 216 833 11 METAL CHIP 10K 5 1 10W R2857 1 216 829 11 METAL CHIP 4 7K 5 1 10W R2858 1 216 829 11 METAL CHIP 4 7K 5 1 10W R2859 1 216 829 11 METAL CHIP 4 7K 5 1 10W R2860 1 216 864 11 SHORT CHIP 0 R2863 1 216 864...

Page 151: ...6 864 11 SHORT CHIP 0 R2995 1 218 700 11 METAL CHIP 2 2K 0 5 1 10W R2996 1 216 820 11 METAL CHIP 820 5 1 10W R2997 1 216 820 11 METAL CHIP 820 5 1 10W R2998 1 216 809 11 METAL CHIP 100 5 1 10W R2999 1 216 809 11 METAL CHIP 100 5 1 10W R3001 1 216 833 11 METAL CHIP 10K 5 1 10W R3002 1 216 864 11 SHORT CHIP 0 R3005 1 216 864 11 SHORT CHIP 0 R3013 1 216 809 11 METAL CHIP 100 5 1 10W R3014 1 216 801 1...

Page 152: ...96 1 216 864 11 SHORT CHIP 0 R3400 1 216 864 11 SHORT CHIP 0 R3401 1 216 864 11 SHORT CHIP 0 R3406 1 216 833 11 METAL CHIP 10K 5 1 10W R3407 1 216 864 11 SHORT CHIP 0 R3409 1 216 864 11 SHORT CHIP 0 R3410 1 216 833 11 METAL CHIP 10K 5 1 10W R3411 1 216 797 11 METAL CHIP 10 5 1 10W R3421 1 216 864 11 SHORT CHIP 0 R3422 1 216 864 11 SHORT CHIP 0 R3425 1 216 864 11 SHORT CHIP 0 R3428 1 469 094 21 FER...

Page 153: ...00 5 1 10W R8611 1 216 809 11 METAL CHIP 100 5 1 10W R8612 1 216 820 11 METAL CHIP 820 5 1 10W R8613 1 216 820 11 METAL CHIP 820 5 1 10W R8614 1 216 820 11 METAL CHIP 820 5 1 10W R8615 1 218 668 11 METAL CHIP 100 0 5 1 10W R8616 1 218 668 11 METAL CHIP 100 0 5 1 10W R8617 1 218 668 11 METAL CHIP 100 0 5 1 10W R8618 1 218 679 11 METAL CHIP 300 0 5 1 10W R8619 1 218 679 11 METAL CHIP 300 0 5 1 10W R...

Page 154: ...IC CHIP 0 47 F 10 10V C4621 1 126 935 11 ELECT 470 F 20 10V C4622 1 164 156 11 CERAMIC CHIP 0 1 F 25V C4623 1 164 156 11 CERAMIC CHIP 0 1 F 25V C4624 1 164 156 11 CERAMIC CHIP 0 1 F 25V C4625 1 126 933 11 ELECT 100 F 20 16V C4626 1 164 156 11 CERAMIC CHIP 0 1 F 25V C4627 1 107 826 11 CERAMIC CHIP 0 1 F 10 16V C4628 1 162 916 11 CERAMIC CHIP 12pF 5 50V C4629 1 107 826 11 CERAMIC CHIP 0 1 F 10 16V C...

Page 155: ...1 164 156 11 CERAMIC CHIP 0 1 F 25V C4825 1 164 156 11 CERAMIC CHIP 0 1 F 25V C4826 1 126 933 11 ELECT 100 F 20 16V C4827 1 164 156 11 CERAMIC CHIP 0 1 F 25V C4828 1 164 156 11 CERAMIC CHIP 0 1 F 25V C4829 1 125 837 91 CERAMIC CHIP 1 F 10 6 3V C4830 1 162 917 11 CERAMIC CHIP 15pF 5 50V C4831 1 162 917 11 CERAMIC CHIP 15pF 5 50V C4832 1 115 156 11 CERAMIC CHIP 1 F 10V C4833 1 164 156 11 CERAMIC CHI...

Page 156: ...OR 10 H L4803 1 469 555 21 INDUCTOR 10 H L4804 1 469 555 21 INDUCTOR 10 H L4805 1 469 555 21 INDUCTOR 10 H L4806 1 412 005 11 INDUCTOR 8 2 H L4807 1 469 555 21 INDUCTOR 10 H L4808 1 469 555 21 INDUCTOR 10 H L4809 1 469 555 21 INDUCTOR 10 H L4810 1 469 555 21 INDUCTOR 10 H L4811 1 469 555 21 INDUCTOR 10 H L4812 1 469 555 21 INDUCTOR 10 H TRANSISTOR Q4601 8 729 422 33 TRANSISTOR 2SD601A Q TX Q4602 8...

Page 157: ...2K 5 1 10W R4618 1 216 837 11 METAL CHIP 22K 5 1 10W R4619 1 216 864 11 SHORT CHIP 0 R4620 1 216 808 11 METAL CHIP 82 5 1 10W R4621 1 216 864 11 SHORT CHIP 0 R4622 1 216 814 11 METAL CHIP 270 5 1 10W R4623 1 216 814 11 METAL CHIP 270 5 1 10W R4624 1 216 814 11 METAL CHIP 270 5 1 10W R4625 1 216 821 11 METAL CHIP 1K 5 1 10W R4626 1 216 821 11 METAL CHIP 1K 5 1 10W R4627 1 218 676 11 METAL CHIP 220 ...

Page 158: ... 1 216 842 11 METAL CHIP 56K 5 1 10W R4738 1 216 838 11 METAL CHIP 27K 5 1 10W R4739 1 216 842 11 METAL CHIP 56K 5 1 10W R4740 1 216 838 11 METAL CHIP 27K 5 1 10W R4741 1 216 813 11 METAL CHIP 220 5 1 10W R4742 1 216 835 11 METAL CHIP 15K 5 1 10W R4743 1 216 817 11 METAL CHIP 470 5 1 10W R4744 1 216 817 11 METAL CHIP 470 5 1 10W R4745 1 216 817 11 METAL CHIP 470 5 1 10W R4746 1 216 801 11 METAL CH...

Page 159: ...L CHIP 22 5 1 10W R4870 1 216 801 11 METAL CHIP 22 5 1 10W R4871 1 216 864 11 SHORT CHIP 0 R4872 1 216 864 11 SHORT CHIP 0 R4873 1 216 857 11 METAL CHIP 1M 5 1 10W R4874 1 216 833 11 METAL CHIP 10K 5 1 10W R4875 1 216 833 11 METAL CHIP 10K 5 1 10W R4876 1 216 811 11 METAL CHIP 150 5 1 10W R4877 1 216 811 11 METAL CHIP 150 5 1 10W R4878 1 216 811 11 METAL CHIP 150 5 1 10W R4879 1 218 706 11 METAL C...

Page 160: ...7204 1 414 921 11 FERRITE 0 H IC IC7201 8 759 639 86 IC SN65LVDS32DR IC7202 6 701 763 11 IC DS90LV017ATMX IC7203 8 759 698 08 IC SN74CBTLV1G125DCKR COIL L7201 1 419 370 21 INDUCTOR 0 H L7202 1 419 370 21 INDUCTOR 0 H L7203 1 419 370 21 INDUCTOR 0 H L7204 1 419 370 21 INDUCTOR 0 H L7205 1 419 370 21 INDUCTOR 0 H TRANSISTOR Q7201 8 729 216 22 TRANSISTOR 2SA1162 G Q7202 8 729 422 33 TRANSISTOR 2SD601...

Page 161: ... H FB121 1 414 921 11 FERRITE 0 H FB122 1 414 921 11 FERRITE 0 H FB123 1 414 921 11 FERRITE 0 H FB124 1 414 921 11 FERRITE 0 H FB137 1 414 921 11 FERRITE 0 H FB141 1 414 921 11 FERRITE 0 H FB143 1 414 921 11 FERRITE 0 H FB149 1 414 921 11 FERRITE 0 H IC IC101 6 702 978 01 IC MD2406 IC102 6 802 277 11 IC SST39VF800A70E 11300 T IC104 8 759 460 72 IC BA033FP E2 IC106 8 759 661 55 IC 24LC21AT SN IC107...

Page 162: ...115 1 234 378 21 RES NETWORK 10KX4 1005 RB121 1 234 371 21 RES NETWORK 47X4 1005 RB122 1 234 371 21 RES NETWORK 47X4 1005 RB123 1 234 371 21 RES NETWORK 47X4 1005 RB124 1 234 371 21 RES NETWORK 47X4 1005 RB131 1 234 378 21 RES NETWORK 10KX4 1005 RB132 1 234 378 21 RES NETWORK 10KX4 1005 RB133 1 234 378 21 RES NETWORK 10KX4 1005 RB134 1 234 378 21 RES NETWORK 10KX4 1005 CRYSTAL X101 1 795 725 21 CR...

Page 163: ...5 11 TAB CONTACT CN1611 1 695 915 11 TAB CONTACT CN1613 1 564 512 11 PLUG CONNECTOR 9P CN1614 1 564 506 11 PLUG CONNECTOR 3P CN1616 1 691 960 11 PIN CONNECTOR PC BOARD 3P CN1617 1 564 506 11 PLUG CONNECTOR 3P DIODE D1601 8 719 077 76 DIODE D2SB60A F04 D1602 8 719 022 99 DIODE D6SB60L D1603 8 719 106 89 DIODE RD15M T1B2 D1604 8 719 404 50 DIODE MA111 TX D1605 8 719 948 45 DIODE ERA22 08 D1606 8 719...

Page 164: ...1 METAL CHIP 9 1K 0 5 1 10W R1630 1 216 073 91 RES CHIP 10K 5 1 10W R1631 1 216 073 91 RES CHIP 10K 5 1 10W R1632 1 249 393 11 CARBON 10 5 1 4W R1633 1 216 073 91 RES CHIP 10K 5 1 10W R1634 1 249 393 11 CARBON 10 5 1 4W R1635 1 216 073 91 RES CHIP 10K 5 1 10W R1638 1 202 965 11 METAL 0 02 10 2W R1640 1 216 350 11 METAL OXIDE 1 2 5 1W R1641 1 216 049 11 RES CHIP 1K 5 1 10W R1642 1 216 051 00 RES CH...

Page 165: ...1 692 431 21 SWITCH TACTILE VOLUME S4403 1 692 431 21 SWITCH TACTILE CHANNEL S4404 1 692 431 21 SWITCH TACTILE CHANNEL S4405 1 692 431 21 SWITCH TACTILE TV VIDEO S4406 1 692 431 21 SWITCH TACTILE SELECT S4407 1 692 431 21 SWITCH TACTILE RIGHT S4408 1 692 431 21 SWITCH TACTILE DOWN S4409 1 692 431 21 SWITCH TACTILE UP S4410 1 692 431 21 SWITCH TACTILE LEFT S4411 1 692 431 21 SWITCH TACTILE MENU A 1...

Page 166: ... C9506 1 162 970 11 CERAMIC CHIP 0 01 F 10 25V C9519 1 164 315 11 CERAMIC CHIP 470pF 5 50V C9520 1 164 315 11 CERAMIC CHIP 470pF 5 50V C9521 1 164 315 11 CERAMIC CHIP 470pF 5 50V C9523 1 107 826 11 CERAMIC CHIP 0 1 F 10 16V C9524 1 162 970 11 CERAMIC CHIP 0 01 F 10 25V C9525 1 162 970 11 CERAMIC CHIP 0 01 F 10 25V C9527 1 162 970 11 CERAMIC CHIP 0 01 F 10 25V C9528 1 162 970 11 CERAMIC CHIP 0 01 F...

Page 167: ...020 8 729 027 23 TRANSISTOR DTA114EKA T146 Q9021 1 801 806 11 TRANSISTOR DTC144EKA Q9022 8 729 216 22 TRANSISTOR 2SA1162 G Q9023 8 729 422 33 TRANSISTOR 2SD601A Q TX Q9025 8 729 027 23 TRANSISTOR DTA114EKA T146 Q9026 8 729 422 33 TRANSISTOR 2SD601A Q TX Q9027 8 729 216 22 TRANSISTOR 2SA1162 G Q9028 8 729 422 33 TRANSISTOR 2SD601A Q TX Q9029 8 729 216 22 TRANSISTOR 2SA1162 G Q9502 8 729 900 53 TRAN...

Page 168: ... 10W R9084 1 216 833 11 METAL CHIP 10K 5 1 10W R9085 1 216 845 11 METAL CHIP 100K 5 1 10W R9086 1 216 809 11 METAL CHIP 100 5 1 10W R9087 1 216 809 11 METAL CHIP 100 5 1 10W R9088 1 216 845 11 METAL CHIP 100K 5 1 10W R9089 1 216 845 11 METAL CHIP 100K 5 1 10W R9090 1 216 833 11 METAL CHIP 10K 5 1 10W R9091 1 216 833 11 METAL CHIP 10K 5 1 10W R9092 1 216 833 11 METAL CHIP 10K 5 1 10W R9093 1 216 83...

Page 169: ...METAL CHIP 220 5 1 10W R9540 1 216 833 11 METAL CHIP 10K 5 1 10W R9541 1 216 801 11 METAL CHIP 22 5 1 10W R9542 1 216 825 11 METAL CHIP 2 2K 5 1 10W R9543 1 216 833 11 METAL CHIP 10K 5 1 10W R9546 1 216 841 11 METAL CHIP 47K 5 1 10W R9547 1 216 864 11 SHORT CHIP 0 R9548 1 216 833 11 METAL CHIP 10K 5 1 10W R9549 1 216 801 11 METAL CHIP 22 5 1 10W R9550 1 216 824 11 METAL CHIP 1 8K 5 1 10W R9551 1 2...

Page 170: ...007 1 109 982 11 CERAMIC CHIP 1 F 10 10V C2008 1 109 982 11 CERAMIC CHIP 1 F 10 10V C2009 1 107 826 11 CERAMIC CHIP 0 1 F 10 16V C2010 1 126 960 11 ELECT 1 F 20 50V C2011 1 126 960 11 ELECT 1 F 20 50V C2012 1 126 960 11 ELECT 1 F 20 50V C2013 1 126 960 11 ELECT 1 F 20 50V C2014 1 162 917 11 CERAMIC CHIP 15pF 5 50V C2015 1 126 933 11 ELECT 100 F 20 16V C2016 1 164 156 11 CERAMIC CHIP 0 1 F 25V C201...

Page 171: ...2E 06pF 6 3V C2534 1 135 834 91 CERAMIC CHIP 2 2E 06pF 6 3V C2536 1 126 786 11 ELECT 47 F 20 16V C2537 1 107 826 11 CERAMIC CHIP 0 1 F 10 16V C2538 1 162 915 11 CERAMIC CHIP 10pF 0 50pF 50V C2539 1 162 915 11 CERAMIC CHIP 10pF 0 50pF 50V C2540 1 107 826 11 CERAMIC CHIP 0 1 F 10 16V C2541 1 107 826 11 CERAMIC CHIP 0 1 F 10 16V C2542 1 126 794 11 ELECT 4 7 F 20 25V C2543 1 162 966 11 CERAMIC CHIP 0 ...

Page 172: ...TOR 10 H L2002 1 469 555 21 INDUCTOR 10 H L2003 1 469 555 21 INDUCTOR 10 H L2004 1 469 555 21 INDUCTOR 10 H L2005 1 469 555 21 INDUCTOR 10 H L2006 1 469 555 21 INDUCTOR 10 H L2007 1 469 555 21 INDUCTOR 10 H L2008 1 469 555 21 INDUCTOR 10 H L2009 1 469 555 21 INDUCTOR 10 H L2502 1 412 537 31 INDUCTOR 100 H TRANSISTOR Q2001 8 729 422 33 TRANSISTOR 2SD601A Q TX Q2002 8 729 422 33 TRANSISTOR 2SD601A Q...

Page 173: ...25 11 METAL CHIP 2 2K 5 1 10W R2067 1 216 809 11 METAL CHIP 100 5 1 10W R2068 1 216 809 11 METAL CHIP 100 5 1 10W R2069 1 216 821 11 METAL CHIP 1K 5 1 10W R2070 1 216 830 11 METAL CHIP 5 6K 5 1 10W R2071 1 216 830 11 METAL CHIP 5 6K 5 1 10W R2072 1 216 809 11 METAL CHIP 100 5 1 10W R2073 1 216 830 11 METAL CHIP 5 6K 5 1 10W R2074 1 216 809 11 METAL CHIP 100 5 1 10W R2075 1 216 830 11 METAL CHIP 5 ...

Page 174: ...6 1 216 836 11 METAL CHIP 18K 5 1 10W R2507 1 218 696 11 METAL CHIP 1 5K 0 5 1 10W R2508 1 216 833 11 METAL CHIP 10K 5 1 10W R2509 1 216 833 11 METAL CHIP 10K 5 1 10W R2510 1 218 723 11 METAL CHIP 20K 0 5 1 10W R2511 1 216 836 11 METAL CHIP 18K 5 1 10W R2512 1 218 708 11 METAL CHIP 4 7K 0 5 1 10W R2513 1 218 696 11 METAL CHIP 1 5K 0 5 1 10W R2514 1 218 723 11 METAL CHIP 20K 0 5 1 10W R2516 1 216 8...

Page 175: ...ECT CHIP 10 F 20 16V C7034 1 164 156 11 CERAMIC CHIP 0 1 F 25V C7035 1 164 156 11 CERAMIC CHIP 0 1 F 25V C7036 1 164 156 11 CERAMIC CHIP 0 1 F 25V C7037 1 164 156 11 CERAMIC CHIP 0 1 F 25V C7038 1 164 156 11 CERAMIC CHIP 0 1 F 25V C7039 1 126 395 11 ELECT CHIP 22 F 20 16V C7040 1 162 921 11 CERAMIC CHIP 33pF 5 50V C7041 1 164 156 11 CERAMIC CHIP 0 1 F 25V C7042 1 164 156 11 CERAMIC CHIP 0 1 F 25V ...

Page 176: ...P 4 7K 5 1 10W R7044 1 216 829 11 METAL CHIP 4 7K 5 1 10W R7045 1 216 833 11 METAL CHIP 10K 5 1 10W R7047 1 216 833 11 METAL CHIP 10K 5 1 10W R7051 1 216 864 11 SHORT CHIP 0 R7053 1 216 833 11 METAL CHIP 10K 5 1 10W R7054 1 216 833 11 METAL CHIP 10K 5 1 10W R7056 1 216 833 11 METAL CHIP 10K 5 1 10W R7057 1 216 864 11 SHORT CHIP 0 R7058 1 216 833 11 METAL CHIP 10K 5 1 10W R7059 1 216 864 11 SHORT C...

Page 177: ... IRP 50XBR800 ACCESSORIES PACKING MATERIALS 3 701 910 00 SCREW SPECIAL DIA 3 8X20 4 030 895 01 JOINT 4 042 463 01 SHEET PROTECTION 4 090 860 01 INDIVIDUAL CARTON 60XBR800 4 090 861 01 TRAY 60XBR800 4 090 862 01 BOARD TOP 60XBR800 4 090 863 01 BOARD BOTTOM 60XBR800 4 090 864 01 CUSHION UPPER 60XBR800 4 090 865 01 CUSHION LOWER 60XBR800 4 090 866 01 CUSHION FRONT 60XBR800 4 091 040 01 PAD 50XBR800 4...

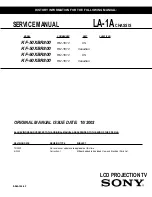
Page 178: ...TORY INFORMATION FOR THE FOLLOWING MANUAL ORIGINAL MANUAL ISSUE DATE 10 2002 ALL REVISIONS AND UPDATES TO THE ORIGINAL MANUAL ARE APPENDED TO THE END OF THE PDF FILE REVISION DATE REVISION TYPE SUBJECT 10 2002 No revisions or updates are applicable at this time 4 2003 Correction 1 M Board added to Exploded View and Electrical Parts List 9 965 350 02 LCD PROJECTIONTV ...

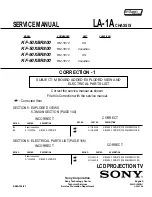
Page 179: ...el INCORRECT CORRECT REF NO PART NO DESCRIPTION REF NO PART NO DESCRIPTION 166 Needs to be added 166 A 1300 699 A M BOARD COMPLETE A 1300 943 B M BOARD COMPLETE FOR KF 50XBR800 ONLY A 1300 699 B M BOARD COMPLETE FOR KF 60XBR800 ONLY SECTION 6 ELECTRICAL PARTS LIST PAGE 166 INCORRECT CORRECT REF NO PART NO DESCRIPTION REF NO PART NO DESCRIPTION Needs to be added A 1300 699 A M BOARD COMPLETE A 1300...

Page 180: ...4 091 169 12 1 2002 Sony Corporation ...

Page 181: ...as been tested and found to comply with the limits for a Class B digital device pursuant to Part 15 of the FCC Rules These limits are designed to provide reasonable protection against harmful interference in a residential installation This equipment generates uses and can radiate radio frequency energy and if not installed and used in accordance with the instructions may cause harmful interference...

Page 182: ... LCD Projection TV To obtain the best picture do not expose the screen to direct illumination or direct sunlight It is recommended to use spot lighting directed down from the ceiling or to cover the windows that face the screen with opaque drapery It is desirable to install the LCD Projection TV in a room where the floor and walls are not of a reflective material ENERGY STAR is a U S registered ma...

Page 183: ...ormally or has been dropped 15 Apparatus shall not be exposed to dripping or splashing and no objects filled with liquids such as vases shall be placed on the apparatus Important Safeguards For your protection please read these instructions completely and keep this manual for future reference Carefully observe and comply with all warnings cautions and instructions placed on the set or described in...

Page 184: ...e of the LCD Projection TV Consult qualified service personnel On contamination on the screen surface The screen surface has a special coating to reduce a picture displayed by reflecting If you clean the screen surface in the wrong way the screen may be damaged To clean the screen do as follows Clean the screen with a soft cloth such as the supplied cleaning cloth or a glass cleaning cloth To remo...

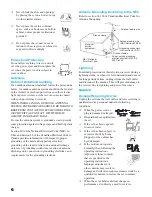
Page 185: ...ctors location of antenna discharge unit connection to grounding electrodes and requirements for the grounding electrode Antenna Grounding According to the NEC Refer to section 54 300 of Canadian Electrical Code for Antenna Grounding Lightning For added protection for this television receiver during a lightning storm or when it is left unattended and unused for long periods of time unplug it from ...

Page 186: ...h the LCD projection TV is made with high precision technology black dots may appear or bright points of light red blue or green may appear constantly on the LCD screen This is a structural property of the LCD panel and is not a malfunction Installation If direct sunlight or other strong illumination shines on the screen part of the screen appears white due to reflections from behind the screen Th...

Page 187: ...ideo Connectors 37 Connecting a DVD Player with A V Connectors 38 Connecting a Digital TV Receiver with component connectors 39 Connecting a Digital TV Receiver with DVI HDTV connector 40 Connecting a Camcorder 41 Connecting Two VCRs for Tape Editing 42 Using the CONTROL S Feature 43 Setting Up the LCD projection TV Automatically 44 Using the Features Using the Remote Control 45 Watching the TV 47...

Page 188: ...chnology the CineMotion feature allows you to obtain a smooth picture movement when playing back movies or other video sources on film Twin View Using Multi Image Driver MID X Twin View allows you to watch two programs side by side with the ability to zoom in on one picture and listen to the program in the selected window You can watch pictures from two different sources 1080i 720p 480p or 480i si...

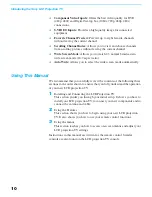
Page 189: ...cally Using This Manual We recommend that you carefully review the contents of the following three sections in the order shown to ensure that you fully understand the operation of your new LCD projection TV 1 Installing and Connecting the LCD Projection TV This section guides you through your initial setup It shows you how to install your LCD projection TV to connect your new components and to con...

Page 190: ...jection lamp Your LCD projection TV uses a projection lamp as its light source Note the following After turning on your LCD projection TV it may take a while before the picture appears 1 minute or less When the projection lamp wears out the screen image becomes dark Replace the lamp with a new Sony XL 2000U replacement lamp not supplied Be sure to attach the lamp cover securely otherwise your LCD ...

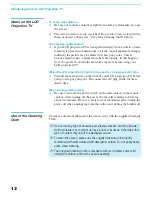
Page 191: ...the front of your LCD projection TV before going to sleep or going out Disconnect the AC plug if idle for more than 7 days When turning off the power Be sure to turn off the power switch on the main unit or on the remote control After turning off the power the fan will continue to blow for about two minutes Be sure to wait for several minutes after turning the power off when unplugging from the ou...

Page 192: ...st 30 minutes after the power has been turned off Do not leave the removed lamp near flammable materials or within the reach of children Do not pour water onto the removed lamp or put any object inside the lamp Doing so may cause the lamp to burst Do not put flammable materials and metal objects inside the lamp receptacle of the LCD projection TV after removing the lamp Doing so may cause fire or ...

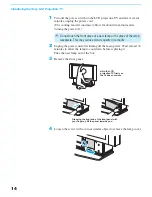
Page 193: ...power Wait at least 30 minutes to allow the lamp to cool down before replacing it Take the new lamp out of the box 3 Remove the front panel 4 Loosen the screw with a coin or similar object to remove the lamp cover Do not touch the front glass of a new lamp or the glass of the lamp receptacle This may reduce picture quality or lamp life Hold the LCD projection TV firmly so that it does not move Gra...

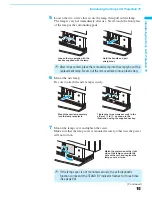
Page 194: ...t has cooled place the removed lamp into the empty box of the replacement lamp Never put the removed lamp into a plastic bag If the lamp cover is not mounted securely the self diagnostic function works and the STAND BY indicator flashes for three times See page 90 Loosen the two screws with the hex key supplied with the lamp Hold the handle and pull straight out Mount the new lamp securely into th...

Page 195: ...hown in the illustration Consult your Sony dealer for a Sony XL 2000U replacement lamp Take great care when replacing the lamp or plugging in unplugging the connecting cords If you handle them roughly the LCD projection TV may fall or be moved and the TV stand or floor surfaces may be scratched ...

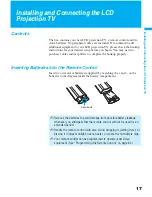
Page 196: ...plete the hookup properly Inserting Batteries into the Remote Control Insert two size AAA batteries supplied by matching the and on the batteries to the diagram inside the battery compartment Remove the batteries to avoid damage from possible battery leakage whenever you anticipate that the remote control will not be used for an extended period Handle the remote control with care Avoid dropping it...

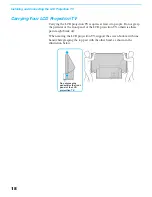
Page 197: ...ople Do not grasp the pedestal or the front panel of the LCD projection TV otherwise these parts might break off When moving the LCD projection TV support the screen bottom with one hand while grasping the top part with the other hand as shown in the illustration below Do not grasp the pedestal or the front panel of the LCD projecttion TV ...

Page 198: ...tion TV as follows Using supplied brackets 1 Mount the two brackets with the screws supplied to the upper rear sides of the LCD projection TV left and right sides 2 Pass a strong cord or chain not supplied through each bracket and then secure it to a wall or a pillar etc Using the LCD projection TV stand with support belts You can also use the LCD projection TV stand SU GW1 not supplied with suppo...

Page 199: ...2 m approx 7 ft for KF 60XBR800 away from your LCD projection TV and within 60 of the vertical viewing area and 130 of the horizontal viewing area Horizontal Viewing Area 65 65 50 60 min X X m approx X ft min X X m approx X ft min 2 2 m approx 7 ft min 2 2 m approx 7 ft min 1 8 m approx 6 ft min 2 2 m approx 7 ft 30 50 60 min 1 8 m approx 6 ft min 1 8 m approx 6 ft min 2 2 m approx 7 ft min 2 2 m ...

Page 200: ...ont Panel Menu Controls The front panel menu controls allow access to the on screen menus without the use of a remote control Pressing MENU brings up the on screen menus The arrow buttons move the on screen cursor in the menus and by pressing the button selects the menu item How to open and close the front panel OPEN To open To close Continued ...

Page 201: ...CK Memory Stick insertion slot For details see Inserting and Removing a Memory Stick on page 60 2 MEMORY STICK ACCESS LED When lit indicates that the Memory Stick is being read Do not remove the Memory Stick when the indicator is lit S VIDEO VIDEO VIDEO 2 IN L MONO AUDIO R Rear of LCD projection TV Left side of LCD projection TV ...

Page 202: ...the side panel of the LCD projection TV 6 HD DVD IN 1080i 720p 480p 480i Connects to your DVD player s or Digital Set top box s component video Y PB PR and audio L R jacks 7 MONITOR OUT Lets you record the program you are watching to a VCR When two VCRs are connected you can use the TV as a monitor for tape to tape editing not available with 480p 720p or 1080i when the input is set to VIDEO 5 7 8 ...

Page 203: ...ure quality Audio Video cable Video Yellow Audio Left White Audio Right Red Some DVD Players are equipped with the following three video connectors Y Green PB CB Cb or B Y Blue PR CR Cr or R Y Red CONTROL S cable CONTROL S connections are exclusive to Sony products and allow greater control of all Sony equipment Plug Type Screw on Type Push into connection Screw into connection Align guides and pu...

Page 204: ...ly or VHF UHF C VHF and UHF It is highly recommended to connect the antenna using a 75 ohm coaxial cable to get optimum picture quality A 300 ohm twin lead cable can be easily affected by radio noise and the like resulting in signal deterioration If you use a 300 ohm twin lead cable keep it away as far as possible from the LCD projection TV Do not use an indoor antenna because it is especially sus...

Page 205: ...nal is not scrambled Your LCD projection TV s tuner provides a better signal than the cable box Use the Twin View feature When all channels are routed through your cable box only one channel is sent to the LCD projection TV so you can not use the Twin View or Channel Index features for your cable box 1 Connect the Cable TV cable to the LCD projection TV s VHF UHF jack 2 Using a coaxial cable conne...

Page 206: ...x s OUT jack to the LCD projection TV s AUX jack Pressing ANT on the remote control switches between the channels coming in through the cable box scrambled and those coming directly to the TV unscrambled Rear of LCD projection TV TO CONVERTER VHF UHF AUX Cable box OUT IN Signal 75 ohm coaxial cable not supplied CATV cable unscrambled channels ...

Page 207: ...le box s IN jack 2 Using a coaxial cable connect the cable box s OUT jack to the LCD projection TV s VHF UHF jack Also set Cable to ON in the Channel menu see page 73 Setting the Channel Fix feature in the Channel menu see Using the Channel Menu on page 73 ensures that you do not accidentally switch the channels using your LCD projection TV Your Sony remote control can be programmed to operate you...

Page 208: ...to the VCR s IN jack 2 Using a coaxial cable connect the VCR s OUT jack to the LCD projection TV s VHF UHF jack 3 Using AUDIO and S VIDEO cables connect the VCR s Audio and S Video OUT jacks to the LCD projection TV s AUDIO and S VIDEO IN jacks Coaxial cable Rear of LCD projection TV VIDEO yellow AUDIO L white AUDIO R red Cable VCR VMC 810S 820S not supplied S VIDEO YC 15V 30V not supplied If your...

Page 209: ...box only one signal is sent to the LCD projection TV so you cannot use the Twin View feature Disconnect all power sources before making any connections 1 Connect the Cable TV cable to the LCD projection TV s VHF UHF jack 2 Using a coaxial cable connect the LCD projection TV s TO CONVERTER jack to the cable box s IN jack The LCD projection TV s internal converter allows you to switch between unscra...

Page 210: ...DEO VIDEO yellow AUDIO L white AUDIO R red S VIDEO If your VCR is not equipped with S VIDEO use a VIDEO cable yellow instead of the S VIDEO cable You will not be able to change channels on the VCR Set your LCD projection TV and VCR to channel 3 or 4 depending on your cable box channel output Pressing ANT on the remote control switches between the channels coming in through the cable box scrambled ...

Page 211: ...of LCD projection TV VCR playback VCR recording VMC 810S 820S not supplied AUDIO R red AUDIO L white VIDEO yellow To perform tape editing set the LCD projection TV to the video input intended for playback by pressing TV VIDEO on the remote control You may need to change the video input on your VCR Consult your VCR s operating manual for instructions If your VCRs have an S VIDEO jack For best pictu...

Page 212: ...bles connect the satellite receiver s AUDIO and S VIDEO OUT jacks to the LCD projection TV s AUDIO and S VIDEO IN jacks 3 Connect a coaxial cable from your cable or antenna to the LCD projection TV s VHF UHF jack If your satellite receiver is not equipped with S VIDEO use a VIDEO cable yellow instead of the S VIDEO cable Coaxial cable Satellite receiver VMC 810S 820S not supplied Rear of LCD proje...

Page 213: ... the LCD projection TV s VHF UHF jack 4 Using AUDIO and S VIDEO cables connect the satellite receiver s AUDIO and S VIDEO OUT jacks to the VCR s AUDIO and S VIDEO IN jacks 5 Using AUDIO and S VIDEO cables connect the VCR s AUDIO and S VIDEO OUT jacks to the LCD projection TV s AUDIO and S VIDEO IN jacks Coaxial cable Rear of LCD projection TV S VIDEO AUDIO R red AUDIO L white Satellite receiver VC...

Page 214: ...s video input is set correctly Consult your VCR s operating manual for instructions Use TV VIDEO to select VIDEO 1 to watch satellite TV or the VCR your VCR must be turned on VHF UHF to watch cable TV If your VCR or satellite receiver is not equipped with S VIDEO use a VIDEO cable yellow instead of the S VIDEO cable ...

Page 215: ...o Receiver Disconnect all power sources before making any connections Using audio cables connect the LCD projection TV s AUDIO OUT VAR FIX jacks to the audio receiver s audio LINE IN jacks Rear of LCD projection TV AUDIO R red AUDIO L white Line input RK 74A not supplied ...

Page 216: ... HD DVD IN 5 or 6 connections 2 Using an audio cable connect the DVD player s Audio OUT jacks to the LCD projection TV s AUDIO IN jacks Be sure to use the same row of inputs that you used for the video connection HD DVD IN 5 or 6 The Y B Y and R Y jacks on your DVD player are sometimes labeled Y CB and CR or Y PB and PR If so connect the cables to like colors VMC 10HG not supplied Rear of LCD proj...

Page 217: ... TV s S VIDEO jack If your DVD player has video component output connectors for best picture quality use the connection described on page 37 Rear of LCD projection TV YC 15V 30V not supplied DVD player RK 74A not supplied AUDIO R red AUDIO L white S VIDEO To take advantage of the Wide Screen modes set the TV s aspect ratio to 16 9 on your DVD player For details refer to the operating instructions ...

Page 218: ...ion TV s AUDIO IN jacks The Y PB and PR jacks do not provide audio so audio cables must be connected to provide sound Component video connection is necessary to view 480i 480p 720p and 1080i formats You may also use the S VIDEO or Composite Video connections however component video Y PB PR will provide the best picture quality for all format types z VMC 10HG not supplied Digital TV Set top box RK ...

Page 219: ...cable connect the Digital TV Set top box s Audio OUT jacks to the LCD projection TV s DVI HDTV AUDIO jacks The DVI HDTV VIDEO connector does not provide audio so audio cables must be connected to provide sound z VIDEO OUT 480i VIDEO OUT 1080i 720p 480p AUTHORIZED SERVICES ONLY RGB OUT DVI HDTV OUT TYPE 1 L1 L2 Y PB PR R1 AUDIO OUT S VIDEO OPTICAL OPTICAL AUDIO OUT R2 2 1080i 720p 480p 1080i 720p 4...

Page 220: ...ar Audio and Video IN jacks Using AUDIO and S VIDEO cables connect the camcorder s Audio and S VIDEO OUT jacks to the LCD projection TV s AUDIO and S VIDEO IN jacks If you have a mono camcorder connect its left audio output to the LCD projection TV s AUDIO L MONO jack If your camcorder is not equipped with S VIDEO use a VIDEO cable yellow instead of the S VIDEO cable S VIDEO VIDEO VIDEO 2 IN L AUD...

Page 221: ...e AUDIO and VIDEO cable connect the AUDIO and VIDEO IN jacks to the playback VCR s AUDIO and VIDEO OUT jacks 2 Using the AUDIO and VIDEO cable connect the MONITOR OUT jacks to the recording VCR s AUDIO and VIDEO IN jacks Playback VCR A V cable Rear of LCD projection TV A V cable VIDEO AUDIO L AUDIO R Recording VCR When the playback VCR is equipped with the S VIDEO OUT jack connect the S VIDEO jack...

Page 222: ...jection TV system and other Sony equipment with one remote control In addition to allowing you to control multiple devices with one remote control the CONTROL S feature allows you to always point your remote control at your LCD projection TV instead of having to point it at the other equipment which might be hidden or out of direct line of sight Rear of LCD projection TV ...

Page 223: ... the Channel menu see page 73 Using Auto Setup 1 Press POWER on the front panel of your LCD projection TV or on the remote control to turn on the LCD projection TV 2 Press FUNCTION on the remote control until the TV indicator lights up 3 Press CH on your LCD projection TV to run Auto Setup or press CH to exit If you use the channel buttons on your remote control be sure to use The Auto Setup featu...

Page 224: ...VD VCR that you want to operate The indicator lights up momentarily when pushed to show which device the remote control is operating 6 PICTURE MODE Press repeatedly to step through the available video picture modes Vivid Standard Pro and Mild Also available in the Video menu For details see Selecting Video Options on page 67 7 WIDE MODE Press to step through the wide screen modes Wide Zoom Normal ...

Page 225: ...ct immediately qh z REC RESET Record Press when in a menu to reset the settings to the factory defaults qj FAVORITES Displays the Favorite Channels list For details see Using Favorite Channels on page 50 qk FREEZE Freezes the window picture Press again to restore the picture ql MEMORY STICK Press to display the Memory Stick Menu For details see Using the Memory Stick Picture Viewer on page 58 w MT...

Page 226: ...ection Press 0 9 to select a channel for example to select channel 10 press 1 and 0 The channel will change after 2 seconds or you can press ENTER for immediate selection 5 CH Press to scan through the channels up or down 6 VOL Press to adjust the volume up or down 7 JUMP Press to alternate or jump back and forth between two channels The LCD projection TV will jump between the current channel and ...

Page 227: ...ptions see MTS on page 69 qd PICTURE MODE Press PICTURE MODE repeatedly to directly choose one of four different video modes that best suits the program you are watching Vivid Select for enhanced picture contrast and sharpness Standard Select to display a standard picture for normal viewing environments Pro Select to display a picture with minimum enhancements Mild Select to smooth the outline of ...

Page 228: ...ng the 1080i 720p 480p and 480i digital TV formats To view a digital TV program 1 Connect the DTV receiver to HD DVD IN 5 or 6 on the LCD projection TV for details see page 39 2 Press TV VIDEO to select HD DVD IN 5 or 6 3 Select a digital channel on the DTV receiver For details see the Operating Manual of the DTV receiver 4 Adjust the volume of the LCD projection TV as necessary ...

Page 229: ...tes list repeat steps 4 5 To clear a Favorite Channel press V or v to highlight the channel you want to clear Press and then press RESET 7 Press MENU to exit the Menu For details on using the Channel Menu see page 73 Displaying a List of Favorite Channels 1 Press FAVORITES The Favorite Channel options appear 2 Press V or v to highlight the channel you want to watch The program of that channel appe...

Page 230: ...d to a working channel 2 Press To cancel twin pictures Press again or press Activating the Picture Although two pictures appear on the screen at the same time only one picture is active Change the picture size by using the V or v button For an active picture you can Change channels Adjust the volume Switch the input sources from VHF UHF to cable by pressing ANT or TV VIDEO to switch the video inpu...

Page 231: ...ide by side the 4 3 source appears larger Twin View does not display channels that are blocked by parental settings see page 75 Hookups that affect your ability to use Twin View If you are viewing all channels through the cable box the Twin View feature will not work The cable box only unscrambles one signal at a time so the right picture will be the same as the left picture You can watch a scramb...

Page 232: ...picture if not already activated 2 Press V to enlarge the picture and v to reduce the picture To enlarge the right picture reduce the left 1 Press b to activate the right picture if not already activated 2 Press V to enlarge the picture and v to reduce the picture When you adjust the twin screen sizes the LCD projection TV memorizes the change The next time you use the Twin View function the memor...

Page 233: ...program information you want to capture is displayed press FREEZE 2 The LCD projection TV switches to Twin View mode and displays the frozen picture on the right while the current program continues on the left 3 To cancel and return to normal viewing press FREEZE Freeze feature is not available if you are already in Favorite Channel see page 50 Twin View see page 51 or Channel Index see page 55 mo...

Page 234: ...he screen then frozen It scrolls up and the next channel appears on the bottom right and the process is repeated with the other channels 2 Press V and v so that the channel you wish to view is displayed in the cyan frame and press To return to scrolling press V and v again To change the direction of scrolling press V or v once To increase scrolling speed hold pressing V or v 3 To enlarge the selec...

Page 235: ...Using the Features 56 4 Press The selected channel will be enlarged for normal viewing To cancel Scrolling Channel Index Press again to resume normal viewing ...

Page 236: ...screen keeping the original image as much as possible Normal returns the 4 3 picture to its original size Full Mode stretches the 4 3 picture horizontally only to fill the 16 9 screen Zoom Mode enlarges the 4 3 picture horizontally and vertically to an equal aspect ratio that fills the 16 9 screen Useful for watching Letterbox movies When you change channels or inputs the Screen Mode settings reve...

Page 237: ...of time that each image is displayed toggling the display of file information and rotating each image For more information about the using Memory Stick media see Notes on Using Memory Stick Media on page 86 Supported Image Types This LCD projection TV s Memory Stick viewer can display only still images that have been recorded on Memory Stick media by Sony brand digital still and video cameras Reco...

Page 238: ...t DCF compliant including the following Sony products Images stored on a Memory Stick that has a capacity that exceeds 128MB Images stored in TIFF or any other non JPEG compression format Images in directories that were modified or renamed on a computer Images with less than 16 horizontal and or vertical lines per dot Images with more than 4096 horizontal and or vertical lines per dot Movie clips ...

Page 239: ...tance and click into place To remove a Memory Stick 1 Check that the Memory Stick indicator is off When the light is on this indicates that the LCD projection TV is reading data from the Memory Stick Be sure to insert the Memory Stick in the correct direction If the Memory Stick is forced in the wrong way it may become damaged Insert only Memory Stick media into the Memory Stick slot Attempting to...

Page 240: ...splaying the Memory Stick Menu 1 Insert a Memory Stick that contains the images you want to view For details see page 60 To protect small children from injury from Memory Stick Media remove all Memory Stick media from the LCD projection TV s Memory Stick slot and store it in a safe location when it is not in use z When the remote control mode is set to other than TV mode you can display the Memory...

Page 241: ...page 60 2 Press MEMORY STICK on the remote control The Memory Stick Menu appears Option Description Index Displays an index of thumbnail images that are on the Memory Stick For details see Using the Memory Stick Index on page 62 Slideshow Displays a slideshow of images that are on the Memory Stick For details see Using the Memory Stick Slideshow on page 64 Setup Allows you to change slideshow opti...

Page 242: ... This Display the previous image Press B Display the next image Press b If you press b while viewing the last image the first image is displayed If you press B while viewing the first image the last image is displayed Display the Memory Stick Index Press If a blank square appears instead of a thumbnail image this indicates that the image does not support a thumbnail view Selecting the icon however...

Page 243: ...etup and press The Memory Stick Setup Menu appears 3 Press the arrow button to highlight an option and press Option Description Menu Returns to the Memory Stick Menu Slideshow Interval Decrease or increase the length of time that each image is displayed 5 seconds 10 seconds 1 minute 5 minutes or 15 minutes Slideshow Repeat Select On to set the slideshow to repeat after displaying all the images re...

Page 244: ...contains more images or folders than can be displayed on one screen 2 Press V v B b to highlight an image that you want to rotate 3 Press to rotate an image 90 degrees in a clockwise direction 4 To return to the Memory Stick Setup Menu press the arrow button to highlight Menu and press You cannot rotate images if the LOCK switch on the Memory Stick is on To rotate the images first set the LOCK swi...

Page 245: ...res Menu Icon Description Page Allows you to make adjustments to your picture settings It also allows you to customize the Picture Mode based on the type of program you are viewing 67 Offers enhanced audio options such as listening to second audio programming SAP or customizing the Effect of the sound on your LCD projection TV 69 Allows you to set the wide screen mode adjust the vertical center in...

Page 246: ...rpness Standard Recommended for Normal viewing conditions Pro Select to display a picture with minimum enhancements Mild Select to smooth the outline of digital image You can alter the Video menu settings Picture Brightness Color etc for each Mode To quickly and easily change from one Video Mode to another use PICTURE MODE on the remote control Picture Adjust to increase picture contrast and deepe...

Page 247: ... to optimize your cable input s picture and create another to optimize your DVD player s picture You can switch among the three Custom settings 1 Press the arrow button to highlight Custom 1 Custom 2 or Custom 3 and then press The DRC palette appears 2 Press the arrow button to adjust the position of the marker z As you move the z higher along the Reality axis the picture becomes more detailed As ...

Page 248: ...just to increase or decrease higher pitched sounds Bass Adjust to increase or decrease lower pitched sounds Balance Adjust to emphasize left or right speaker balance Steady Sound Auto Select to stabilize the volume Off Select to turn off Steady Sound Effect TruSurround Select for surround sound for stereo programs only Simulated Adds a surround like effect to mono programs Off Normal stereo or mon...

Page 249: ... Easy control of volume adjustments Variable The LCD projection TV s speakers are turned off but the volume output from your audio system can still be controlled by the LCD projection TV s remote control Fixed The LCD projection TV s speakers are turned off and the volume bass and treble output of the LCD projection TV is fixed Use your audio receiver s volume control to adjust the volume through ...

Page 250: ... use WIDE MODE on the remote control Option Description Wide Mode Select a Screen Mode to use for 4 3 sources Wide Zoom Select to enlarge the 4 3 picture to fill the 16 9 screen keeping the original image as much as possible Normal Select to return the 4 3 picture to normal mode Full Select to enlarge the 4 3 picture horizontally only to fill the wide screen Zoom Select to enlarge the 4 3 picture ...

Page 251: ...continue using the current Screen Mode setting when the channel or input is changed The 4 3 Default functions only when the LCD projection TV receives 480i and 480p signals If 4 3 Default is set to anything but Off the Wide Mode setting changes only for the current channel When you change channels or inputs Wide Mode is automatically replaced with the 4 3 Default setting To retain the current Wide...

Page 252: ...rite Channels on page 50 Cable On Select if you are receiving cable channels with a CATV cable Off Select if you are using an antenna You should run Auto Program after changing the Cable setting Channel Fix Useful when you have a cable box or satellite receiver connected 2 6 Fix your LCD projection TV s channel setting to 3 or 4 and use the cable box VCR or satellite receiver to change channels Se...

Page 253: ...to 20 channels 1 Press the arrow button to highlight Channel and press 2 Press V or v to scroll through the channel numbers 1 125 Then press to select the channel number that you want to assign a label 3 Press the arrow button to highlight Label and press 4 Press V or v to scroll through the label characters A Z 0 9 etc Then press to select the highlighted character 5 Repeat to add up to 5 charact...

Page 254: ...lect the changed setting 6 Press MENU to exit the Menu Selecting Parent Options The Parent Menu includes the following options You need your password for any future access into the Parent Menu If you lose your password see Lost password on page 88 Option Description Parental Lock Turn ratings on off and select a rating system Off Parental lock is off No programs are blocked from viewing Child Maxi...

Page 255: ...ng the password 1 Press ENTER when tuned to a blocked program 2 Enter your password using the 0 9 buttons Parental Control will be canceled temporarily until you turn your LCD projection TV off If you are not familiar with the Parental Guideline rating system you should select Child Youth or Young Adult to help simplify the rating selection To set more restrictive ratings select Custom For descrip...

Page 256: ...ted to older children TV G General Audience TV PG Parental Guidance suggested TV 14 Parents Strongly cautioned TV MA Mature Audience only Content Based Options FV Fantasy Violence D Suggestive Dialogue L Strong Language S Sexual situations V Violence Unrated Block programs or movies that are broadcastwithout a rating Block Blocks all programs and movies that are broadcast without a rating Allow Al...

Page 257: ... Description English Rating C All children C8 Children 8 years and older G General programming PG Parental Guidance 14 Viewers 14 and older 18 Adult programming French Rating G General programming 8 ans Not recommended for young children 13 ans Not recommended for ages under 13 16 ans Not recommended for ages under 16 18 ans Programming restricted to adults USA Rating See TV Rating on page 77 for ...

Page 258: ... options Option Description Caption Vision Allows you to select from three closed caption modes for programs that are broadcast with closed captioning CC1 CC2 CC3 CC4 Displays a printed version of the dialog or sound effects of a program Should be set to CC1 for most programs Text1 Text2 Text3 Text4 Displays network station information presented using either half or the whole screen if available F...

Page 259: ... of the input jacks on the back of your LCD projection TV Select Skip if you do not have a component connected to a particular set of input jacks Video 1 2 3 4 VHS DVD Receiver Satellite Cable Box 8mm DTV Game LD Web Beta Skip Video 5 6 7 DVD Satellite Cable Box DTV HD Skip If you select Skip your LCD projection TV skips this connection when you press TV VIDEO When you select Receiver on Video Lab...

Page 260: ... 2 press V and v to set the day s hour minute duration and channel number Press or press b to confirm each setting and move to the next setting Press B to go back to the previous setting 4 Press MENU to exit the Menu An LED on the front panel will light indicating the timer has been set To go directly to programming Timer 1 or 2 press instead of pressing b Current Time 1 Press to select Current Ti...

Page 261: ... for five seconds The indicator of the selected input flashes 3 Input the three digit manufacturer s code number Tips If more than one code number is listed try entering them one by one until you come to the correct code for your component If you enter a new code number the code number you previously entered at that setting is erased In some rare cases you may not be able to operate your component...

Page 262: ...309 308 Optimus 327 Panasonic 308 309 306 307 Pentax 305 304 Philco 308 309 Philips 308 309 310 Pioneer 308 Quasar 308 309 306 RCA PROSCAN 304 305 308 309 311 312 313 310 329 Realistic 309 330 328 335 324 338 Sansui 314 Samsung 322 313 321 Sanyo 330 335 Scott 312 313 321 335 323 324 325 326 Sharp 327 328 Shintom 315 Signature 2000 M Ward 338 327 SV2000 338 Sylvania 308 309 338 310 Symphonic 338 Ta...

Page 263: ...Record N and REC simultaneously Play N Stop x Fast forward M Rewind the tape m Pause X press again to resume normal playback Search the picture forward or backward M or m during playback release to resume normal playback To Do This Press Turn on off SAT CABLE POWER Play N Stop x Pause X press again to resume normal playback Step through different tracks of an audio disc M to step forward or m to s...

Page 264: ...To Do This Press Turn on off SAT CABLE POWER Select Cable Box SAT CABLE FUNCTION Select a channel 0 9 buttons ENTER Change channels CH Back to previous channel JUMP To Do This Press Turn on off SAT CABLE POWER Select Satellite Receiver SAT CABLE FUNCTION Select a channel 0 9 buttons ENTER Change channels CH Back to previous channel JUMP Display channel number DISPLAY Display DBS menu MENU Select i...

Page 265: ...object Do not drop bend or submit Memory Stick media to external shock Do not disassemble or modify Memory Stick media Avoid getting liquid on Memory Stick media Apply labels only within the designated label area To avoid permanent damage to still image data do not use or store Memory Stick media in a location subject to High temperature such as near a heater or inside a hot car High humidity Dire...

Page 266: ...D projection TV Make sure the LCD projection TV s power cord is connected securely to the wall outlet Locate the LCD projection TV at least 3 4 feet away from fluorescent lights Check the orientation of the batteries Dark poor or no picture screen lit good sound Adjust the Picture setting in the Video menu see page 67 Adjust the Brightness setting in the Video menu see page 67 Check antenna cable ...

Page 267: ...Check your cable settings Make sure Cable is set to ON in the Channel menu see page 73 Cannot gain enough volume when using a cable box Increase the volume of the cable box using the cable box s remote control Then press FUNCTION until the TV indicator lights up and adjust the LCD projection TV s volume Channel Index does not display all available channels Make sure Cable is set to ON in the Chann...

Page 268: ...es an unscrambled signal You cannot get anything but TV channels in your second picture Be sure the video label has not been set to skip your video inputs See the Setup menu on page 80 Some video sources do not appear when you press TV VIDEO Ensure that Video Label is not set to Skip see Video Label on page 80 Image does not display Make sure the image is supported by the LCD projection TV see pag...

Page 269: ...light source is ready to turn on The STAND BY indicator flashes three times The lamp cover is not attached securely When you correct the STAND BY indicator goes out and the LCD projection TV enters the standby mode see page 13 The LAMP indicator flashes The lamp for the light source burns out Replace it with new one see page 13 If the LCD projection TV is not recovered after correcting the problem...

Page 270: ...d for use with personal computers Video IN 4 1 Vp p 75 ohms unbalanced sync negative S Video IN 3 Y 1 Vp p 75 ohms unbalanced sync negative C 0 286 Vp p Burst signal 75 ohms Audio IN 6 500 mVrms 100 modulation Impedance 47 kiloohms AUDIO VAR FIX 1 500 mVrms at the maximum volume setting Variable 500 mVrms Fixed Impedance output 2 kiloohms MONITOR OUT 1 Video 1 Vp p 75 ohms unbalanced Sync negative...

Page 271: ...supplied for remote control Cleaning Cloth 1 Hex key wrench 1 Brackets with screws 2 Optional Accessories TV Stand SU GW1 Lamp XL 2000U AV Cable VMC 810 820 830 HG Audio Cable RKC 515HG Control S Cable RK G69HG Component Video Cable VMC 10 30 HG AV Receiver STR V555ES or equivalent Memory Stick media 8MB MSA 8A 16MB MSA 16A 32MB MSA 32A 64MB MSA 64A 128MB MSA 128A ...

Page 272: ...nels Auto Program 73 creating labels 74 setting up 44 CineMotion 68 Cleaning Cloth 12 Closed caption modes 79 Color temperature adjusting 68 Color adjusting 67 Connecting Audio receiver 36 Cable box 26 28 30 31 Cable or antenna 25 Camcorder 41 Digital TV Receiver 39 DVD player 37 38 Satellite receiver 33 35 VCR 30 32 34 Connector Types 24 Contents of box 17 CONTROL S 43 D Digital TV connecting 39 ...

Page 273: ...adjusting in Twin View 53 POWER buttons GREEN 46 Presetting channels 44 Problems troubleshooting 87 90 R Ratings setting 76 viewing blocked programs 76 Rear panel controls and connections 23 Remote control Function of buttons 47 inserting batteries 17 programming 82 83 Remote control operating other components with Cable box 85 DVD player 84 Satellite receiver 85 VCR 84 Removing channels from the ...

Page 274: ...9 using 51 V VCR using with TV remote control 84 with cable box connecting 30 with cable connecting 29 with satellite receiver connecting 34 Video inputs labeling 80 Video menu 66 67 Video Modes selecting 67 Viewing area recommended 20 VOL button 46 W WIDE MODE button 45 Z Zoom feature with Twin View 53 ...

Page 275: ...he use of your Sony projection TV please call one of the following numbers English only Customers in the continental United States contact the Direct Response Center at 1 800 222 SONY 7669 Customers in Canada contact the Customer Relations Center at 416 499 SONY 7669 Printed in U S A ...

Reviews: