background image

4

Installation

1. Connect the TV plug to the mains socket (220-240V AC, 50Hz) and switch on.

2. Push in the on/off button 

 on the front of the TV.

4. Switching on the TV

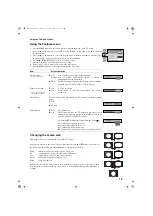
5. Using the joystick

To select an item in a menu press
the OK button down in the middle.

To move around the menus press
the relevant arrow button.

Moving the joystick

Pressing the joystick

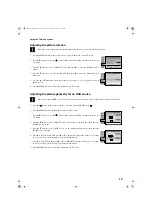
If the standby mode indicator on the front of the TV is lit, press the TV 
button on the remote control to switch on the TV set. Please be patient as the
picture may take a few moments to appear on the TV screen.

/

420556364(GB) Pages 1-15.fm  Page 4  Tuesday, May 22, 2001  10:02 AM

Summary of Contents for KV-28FQ75U

Page 1: ...Instruction Manual KV 28FQ75 U KV 32FQ75 U 4 205 563 64 R Trinitron Colour Television 2000 by Sony Corporation Printed in UK 420556364 KV 28FQ75Ucover fm Page 0 Tuesday May 22 2001 10 01 AM ...

Page 2: ...in accordance with the following instructions The wires in this mains lead are coloured in accordance with the following code Blue Neutral Brown Live As the colours of the wires in the mains lead of this apparatus may not correspond with the coloured markings identifying the terminals in your plug proceed as follows The wire which is coloured blue must be connected to the terminal which is marked ...

Page 3: ...420556364 GB Pages 1 15 fm Page 1 Tuesday May 22 2001 10 02 AM ...

Page 4: ...st 10cm all around the set Never place the TV in hot humid or excessively dusty places Do not install the TV where it may be exposed to mechanical vibrations To prevent fire keep inflammable objects or naked lights eg candles away from the TV Clean the TV with a soft lightly dampened cloth Do not use benzine thinner or any other chemicals to clean the TV Do not scratch the TV screen As a safety pr...

Page 5: ... Tuning your TV 7 Finding your video channel 2 2 3 4 4 5 5 Operation Overview of the TV set buttons Overview of the remote control buttons NexTView Teletext Using Multi PIP Operating PAP Picture and Picture Using the TV menu system Adjusting the picture and sound Using the Features menu Changing the screen size Re arranging the TV channels Manually tuning the TV Naming a channel Skipping programme...

Page 6: ...ntrol Remote control Batteries Always observe the correct polarity when inserting batteries Always remember to dispose of used batteries in an environmentally friendly way Follow steps 1 7 to install the TV and view TV programmes 420556364 GB Pages 1 15 fm Page 2 Tuesday May 22 2001 10 02 AM ...

Page 7: ... the mains and switch on 5 Insert a pre recorded tape into the VCR and press the PLAY button This enables the TV set to locate and store the video channel during the Tuning your TV procedure on page 5 If you are not connecting your TV to a VCR please connect the aerial lead as shown left and proceed to section 4 Switching on the TV If you are connecting your TV to a VCR please refer to the section...

Page 8: ... press the OK button down in the middle To move around the menus press the relevant arrow button Moving the joystick Pressing the joystick If the standby mode indicator on the front of the TV is lit press the TV button on the remote control to switch on the TV set Please be patient as the picture may take a few moments to appear on the TV screen 420556364 GB Pages 1 15 fm Page 4 Tuesday May 22 200...

Page 9: ... you to change the order of the channels on your TV If you wish to change the channel order press the v or V buttons to select the channel you want to move then press B Press the v or V buttons to select the new programme number position for your selected channel then press the OK button to confirm The selected channel now moves to its new programme position and the other channels move accordingly...

Page 10: ...ls Master Reset button Press to return the picture and sound levels to factory settings The Sony logo will appear on the screen followed by the Autotune screen If you do not wish to retune your TV then press the b button on your remote control Push up on the control panel as shown to access the front input sockets and TV buttons The control panel drops down 420556364 GB Pages 1 15 fm Page 6 Tuesda...

Page 11: ...n to TV mode Press to return to the normal operation from teletext mode or standby mode To select Teletext Press to switch Teletext on and off To select Electronic Programme Guide EPG Press to switch EPG on and off To freeze the picture Press if you wish to make a note of some information on the TV screen eg a telephone number Press again to return to normal TV mode To select channels Press the nu...

Page 12: ...ff In some cases you may also need to press the b button to display the Sony electronic programme guide 2 Press the v V b or B buttons to move the cursor around the screen 3 Press the OK button to confirm a selection a If you press the OK button in the date time or icon themes columns you change the programme list according to the selection b If you press the OK button in the programme list you di...

Page 13: ...3 To set up the VCR VPS PDC Press b to select VPS PDC then press the OK button repeatedly to select On or Off With this setting on you have the guaranteed recording of the whole broadcast should there be a change in the TV programme This only works if the selected channel broadcasts a VPS PDC signal Speed Press V to select Speed the press the OK button repeatedly to select between SP for standard ...

Page 14: ...isplayed showing the number of subpages Select the sub page by pressing v or V To freeze a Teletext page Press the button to freeze the page Press again to cancel the freeze Revealing the index page Press the button to reveal the index page normally page 100 Using colour buttons to access pages Fastext only available if the TV station broadcasts Fastext signals When the colour coded menu appears a...

Page 15: ...he MENU button to display the Teletext menu 3 Press v or V to highlight Text Clear and press B to select 4 The current TV channel is displayed Once the text page has been found a blue symbol will appear in the top left hand corner of the screen 5 Press the button on the remote control to view the page 1 In text mode press the MENU button on the remote control to access the Teletext menu 2 Press v ...

Page 16: ...programme positions 3 Press the v V b or B buttons to move within the 13 displayed channels 4 Press the OK button to select the framed channel This channel now moves to the centre 5 Press the OK button again to display the selected channel or press to remove Multi PIP mode from the TV screen Switching PAP on and off Press once to display the screens and twice to switch PAP off Selecting sound for ...

Page 17: ...ation Picture Mode V Live for live broadcasts Personal for individual settings Movie for movie broadcasts v Game for computer games Contrast Less b B More Brightness Darker b B Brighter Colour Less b B More Hue Reddish b B Greenish Sharpness Softer b B Sharper Only available if Personal is selected in Picture Mode Only available for NTSC colour signal eg US video tapes Reset Resets picture to the ...

Page 18: ...er modes Vocal Jazz Rock Pop store only until the next mode change Balance b More left B More right Loudness V Off Normal v On For music broadcasts Space V Off Normal v On Special acoustic effect Auto Vol Control V On Volume level of the channels will stay the same independent of the broadcast signal eg in the case of advertisements v Off Volume level changes according to the broadcast signal Dual...

Page 19: ...ons when the set is in standby mode It is only possible to switch the set back on by pressing a button on the remote control AV2 OutputVTV audio video signal from the aerial AV1 audio video signal from scart 1 AV2 audio video signal from scart 2 AV3 audio video signal from scart 3 vAV4 audio video signal from connectors on front of the TV Smart Wide Zoom 14 9 4 3 Features Auto Format Format Correc...

Page 20: ...ttons to select the TV broadcast system or EXT for a video input source AV1 AV2 then press B to confirm 8 Press the v or V buttons to select C for terrestrial channels S for cable channels or F for direct frequency inputs then press B to confirm 9 Select the first number digit of CH channel then the second number digit of CH with the number buttons on the remote control OR press the V button to se...

Page 21: ... remote control to display the menu on the TV screen 2 Press the V button to select the symbol on the menu screen then press B to enter the Set Up menu 3 Press the V button to select Manual Set Up then press B to enter the Manual Set Up menu 4 Press the V button to select Manual Programme Preset then press B to enter the Manual Programme Preset menu 5 Press the v or V buttons to select the program...

Page 22: ... of the other channels b VOL Volume Offset Press the v or V buttons to adjust the volume level range 7 to 7 of the channel Store by pressing the OK button Repeat steps 5 and 6b if you wish to adjust the volume level of the other channels c AFT Automatic Fine Tuning Press the v or V buttons to fine tune the channel frequency over a range of 15 to 15 Press the OK button to confirm Repeat steps 5 and...

Page 23: ...ton 8 Press the MENU button to remove the menu from the TV screen 1 Adjusting the picture rotation Due to the earth s magnetism the picture might slant In this case you can readjust the picture 1 Press the MENU button on the remote control to display the menu on the TV screen 2 Press the V button to select the symbol on the menu screen then press B to enter the Set Up menu 3 Press the V button to ...

Page 24: ...gnals Using this feature you can label input sources 1 Press the MENU button on the remote control to display the menu on the TV screen 2 Press the V button to select the symbol on the menu screen then press B to enter the Set Up menu 3 Press the V button to select AV Preset on the menu screen then press B to enter the AV Preset menu 4 Press the v or V buttons to select the desired AV input AV1 2 ...

Page 25: ...te To avoid picture distortion do not connect equipment to the F and G sockets at the same time Symbol on the TV screen Input signals from connector Audio video input signal through scart connector A or RGB through scart connector A Audio video input signal through scart connector B or S video through scart connector B Audio video input signal through scart connector C or S video through scart con...

Page 26: ...aded from the TV set to the VCR With NexTView you can programme your VCR easily Direct TV recording while watching TV you need to press just one button on the VCR to record this programme For more information on Smartlink please refer to your VCR instruction manual Smartlink 2 s 2 Using the buttons underneath the cover of the remote control you can control other Sony equipment 1 Open the cover of ...

Page 27: ...puts phono jacks S video input 4 pin DIN Headphones jack minijack stereo 1 1 2 s 2 3 s 3 4 4 s 4 Sound output Left Right 2x20W Music Power 2x10W RMS Sub woofer 30W Music Power 15W RMS Power consumption KV 28FQ75 152W KV 32FQ75 160W Dimensions wxhxd KV 28FQ75 Approx 788x571x563mm KV 32FQ75 Approx 886x620x592mm Weight KV 28FQ75 Approx 46 0kg KV 32FQ75 Approx 74 0kg Accessories supplied RM 893 remote...

Page 28: ...he factory settings Good picture no sound Press the button on the remote control If is displayed on the screen press the button on the remote control No colour on colour programmes Using the MENU system select the Picture Adjustment display and adjust the colour setting From the Picture Adjustment display select RESET to return to the factory settings Distorted picture when changing programmes or ...

Page 29: ...KV 28FQ75Ucover fm Page 2 Tuesday May 22 2001 10 01 AM ...

Page 30: ...KV 28FQ75Ucover fm Page 3 Tuesday May 22 2001 10 01 AM ...

Reviews: