O
p
er
at
io
n
Useful Functions
26
3
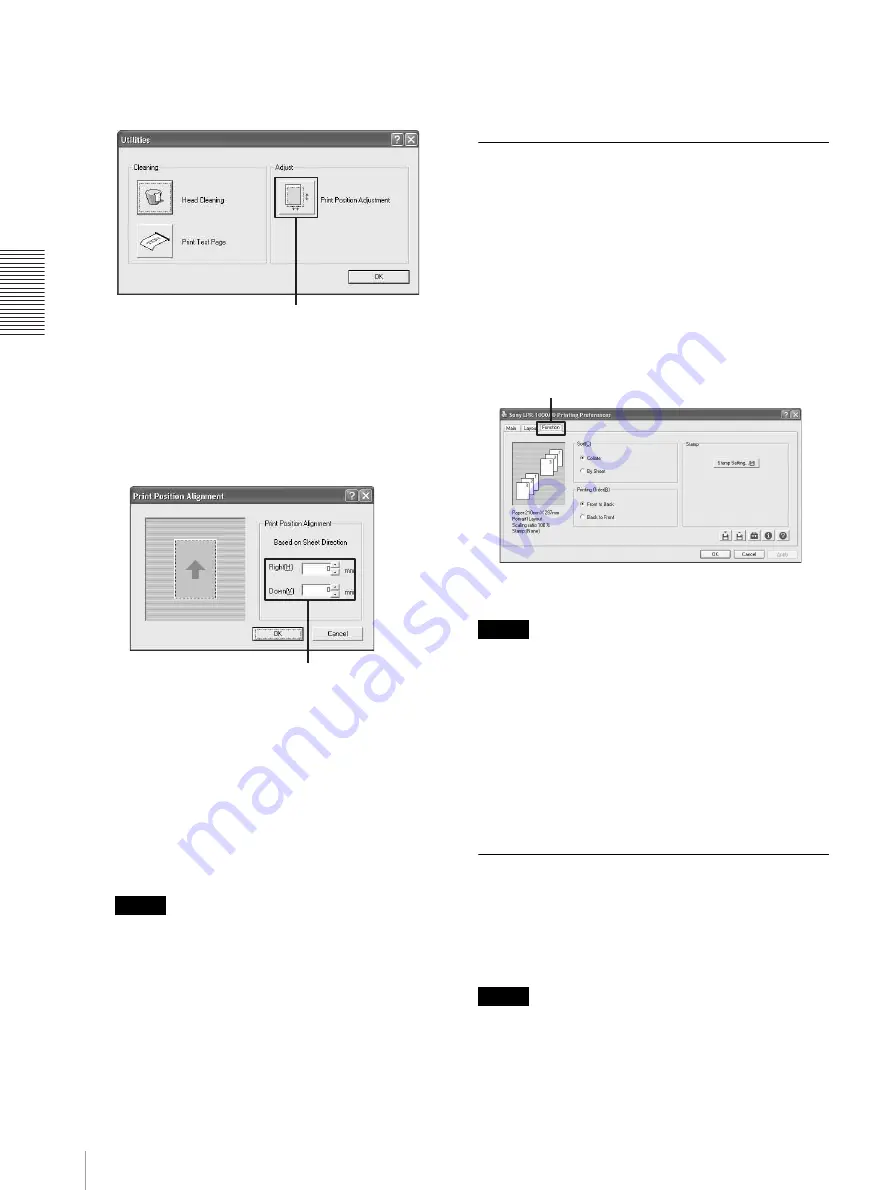
Click the [Print Position Adjustment] button on the
Adjust group.
The Print Position Alignment window appears.
4
Enter the numerical value of the amount by which
you want to move the position.
[Right]: Enter the numerical value of the amount by
which you want to move towards the right in
printers of mm. To move towards the left, attach a –
(minus) before the numerical value.
[Down]: Enter the numerical value of the amount
by which you want to move downward in printers of
mm. To move upward, attach a – (minus) before the
numerical value.
Note
The alignment range to the right is between –100
mm and + 100mm and the alignment range
downward is between –100 mm and +100 mm.
5
Click the [OK] button on the Print Position
Alignment window, and then click the [OK] button
on the Ultilities dialog box.
The Utilities dialog box disappears, and the
window returns to the Printing Preferences dialog
box.
6
Click the [OK] button on the Printing Preferences
dialog box.
The print position alignment setting is saved.
Advanced Functions
The Function tab allows you to set the following
advanced functions.
• Embedding stamps
You can embed stamps on the printout.
• Sort printing
You can print by volume or by sheet.
• Printing order
You can print from first page to last, or last page to
first.
Note
When print settings are performed on a software
application such as word processing or image
processing software, it is recommended that you do not
use advanced functions. The printer may not be able to
print correctly if the settings on the Function tab of the
printer and the settings of the software application
interfere each other. For example, if “Back to Front” is
selected on the print setup window of both application
software and the printer, the two settings will cancel
each other out, and the printing order is first page to last.
Embedding Stamps on the
Printouts
You can embed character strings such as “Confidential”
or bitmap images on the printouts without processing
the printing data. This is called a stamp.
Note
The density of the part of the stamp which lays on the
characters and images printed may be dark.
[Print Position Adjustment] button
Enter the dimensions.
Function tab


