15
GB
G:\_Upload\4082180131\4082180131SDMM81AEP\02GB-SDMM81AEP\01GB02BAS-AEP.fm
masterpage:Right
SDM-M81
4-082-180-13(1)
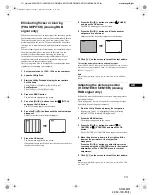
Changing the picture size
according to the signal (ZOOM)
The monitor is set to display the picture on the screen in full,
irrespective of the picture’s mode or resolution in the default
setting. You can also view the picture at its actual aspect ratio or
resolution.
1
Press the MENU button.
The main menu appears on the screen.
2
Press the
M
(+)/
m
(–) buttons to select
(ZOOM) and
press the OK button.
The ZOOM menu appears on the screen.
3
Press the
M
(+)/
m
(–) buttons to select the desired
mode.
1280
×
1024 resolution signals fill the entire screen and
ZOOM is not possible regardless of these settings.
•
FULL2
: The input signal is displayed on the screen in full,
irrespective of the picture’s mode or resolution.
•
FULL1
: The input signal is displayed on the screen at its
actual aspect ratio. Therefore, black bands may appear at
the top and bottom of the picture depending on the signal.
•
REAL
: The input signal is displayed on the screen at its
actual resolution. Sub-SXGA signals are displayed at the
center of the screen surrounded by a black frame.
To restore the default setting (displayed on the screen in full)
Select “FULL2” in step 3.
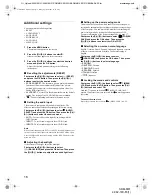
Smoothing the picture
(SMOOTHING)
If the picture displayed at the FULL2 or FULL1 mode of ZOOM
is not smooth, use the picture smoothing function. Note that 1280
×
1024 resolution signals are shown only in REAL mode and
SMOOTHING is not possible.
1
Press the MENU button.
The main menu appears on the screen.
2
Press the
M
(+)/
m
(–) buttons to select
(SMOOTHING), and press the OK button.
The SMOOTHING menu appears on the screen.
3
Press the
M
(+)/
m
(–) buttons to select the desired
mode.
The smoothing effect becomes stronger in the order of
TEXT
t
STANDARD
t
GRAPHICS.
•
TEXT
: To make the characters appear clear. (This mode is
suited for text-based applications.)
•
STANDARD
: Standard smoothing effect (factory preset
smoothing effect)
•
GRAPHICS
: To make the pictures appear clean. (This
mode is suited for CD-ROM software such as photo
images or illustrations.)
Note
When you set the ZOOM menu to REAL, the SMOOTHING menu is not
available.
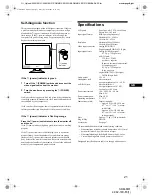
Changing the menu’s position
(MENU POSITION)
You can change the menu position if it is blocking an image on
the screen.
1
Press the MENU button.
The main menu appears on the screen.
2
Press the
M
(+)/
m
(–) buttons to select
(MENU
POSITION) and press the OK button.
The MENU POSITION menu appears on the screen.
3
Press the
M
(+)/
m
(–) buttons to select the desired
position.
There are three positions each for the top of the screen and the
bottom of the screen, and one for the screen center.
01GB01COV-AEP.book Page 15 Friday, April 20, 2001 10:55 AM


