9
GB
D:\SDM\n80\N80GB\001009\3868361251\386836125SDMN50AEP\02GB-
SDMN50AEP\01GB02BAS-AEP.fm
masterpage:Right
SDM-N80
4-082-671-12(1)
The installation of the monitor is complete. If necessary, use the
monitor’s controls to adjust the picture.
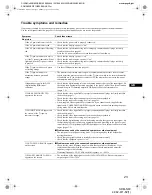
If no picture appears on your screen
• Check that the monitor is correctly connected to the computer.
• Check that the media engine is on.
• If NO INPUT SIGNAL appears on the screen:
– The computer is in the power saving mode. Try pressing any
key on the keyboard or moving the mouse.
– Check that the input select setting is correct.
– Check that the digital/analog select switch setting is correct.
• If CABLE DISCONNECTED appears on the screen:
– Check that the video signal cable is properly connected.
– Check that the input select setting is correct.
• If OUT OF SCAN RANGE appears on the screen, reconnect
the old monitor. Then adjust the settings of the computer’s
graphics board so that the horizontal frequency is between 28 –
92 kHz and the vertical frequency is between 48 – 85 Hz.
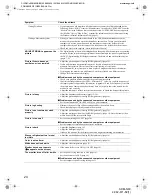
For more information about on-screen messages, see “Trouble
symptoms and remedies” on page 23.
No need for specific drivers
The monitor complies with the “DDC” Plug & Play standard and
automatically detects all the monitor’s information. No specific driver
needs to be installed to the computer.
The first time you turn on your computer after connecting the monitor, the
setup Wizard may appear on the screen. In this case, follow the on-screen
instructions. The Plug & Play monitor is automatically selected so that
you can use this monitor.
The vertical frequency turns to 60 Hz.
Since flickers are unobtrusive on the monitor, you can use it as it is. You
do not need to set the vertical frequency to any particular high value.
If your computer or graphics board has difficulty communicating with this
monitor, install the information file for this monitor using the Windows
Monitor Information Disk. For details on installing, refer to the ReadMe
file on the disk.
Connecting Universal Serial Bus
(USB) compliant peripherals
The monitor has two upstream and two downstream USB
connectors. They provide a fast and easy way to connect USB
compliant peripheral devices (such as keyboards, mice, printers
and scanners) to your computer using a standardized USB cable.
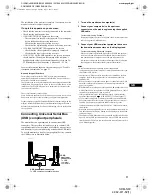
To use the monitor as a hub for your peripheral devices, connect
the USB devices as illustrated below.
1
Turn on the monitor and computer(s).
2
Connect your computer(s) to the upstream
connectors on the media engine using the supplied
USB cable.
For customers using Windows
If a message appears on your screen, follow the on-screen instructions
and select a generic USB hub driver.
3
Connect your USB compliant peripheral devices to
the downstream connectors on the display stand.
For customers using Macintosh computer
When you connect a Macintosh keyboard to the USB downstream
connector, the power button on the keyboard does not function. To
turn your Macintosh computer on, use the power button on the
computer or connect the keyboard to the computer directly and turn
the computer on, then connect the keyboard to the monitor.
Notes
• Not all computers and/or operating systems support USB
configurations. Check your computer’s instruction manual to see if you
can connect USB devices.
• In most cases, USB driver software needs to be installed on the host
computer. Refer to the peripheral device’s instruction manual for
further details.
• When you connect a computer whose power is connected to the USB
upstream connector on the monitor, the monitor will not enter the
power saving mode.
• When the monitor is in the power saving mode, USB peripheral devices
will not function. To resume the use of USB peripheral devices, cancel
the mode by pressing the
1
(power) switch.
• If the peripheral devices do not function properly, confirm that the
upstream input setting in
(USB SELECT) is correct (page 17).
• If you connect a keyboard or mouse to the USB connectors and then
boot your computer for the first time, the peripheral devices may not
function. First connect the keyboard and mouse directly to the
computer and set up the USB compliant devices. Then connect them to
this monitor.
• When you connect peripheral devices to the downstream connectors, be
sure not to lean on the display. Otherwise, the display may incline and
catch your fingers.
• The number of USB hubs that can be connected together is defined as
up to six tiers by USB specifications. Two tiers of a USB hub are built
into the monitor. Therefore, you are allowed to connect four more tiers
of a USB hub together.
USB downstream connectors
To USB compliant peripheral devices
USB
upstream
connectors
To USB
compliant
computers
01GB01COV-AEP.book Page 9 Monday, July 16, 2001 2:22 PM


