background image

Trinitron

 Color Computer Display

3-858-485-31 (1)

 1996 by Sony Corporation

MODEL:

 CPD-300SFT5

Operating Instructions

Mode d’emploi

Bedienungsanleitung

Manual de instrucciones

Istruzioni per l’uso

F

I

D

EN

ES

Multiscan

300

sf

Summary of Contents for Multiscan300sf CPD-300SFT5

Page 1: ... Color Computer Display 3 858 485 31 1 1996 by Sony Corporation MODEL CPD 300SFT5 Operating Instructions Mode d emploi Bedienungsanleitung Manual de instrucciones Istruzioni per l uso F I D EN ES Multiscan300sf ...

Page 2: ... a particular installation If this equipment does cause harmful interference to radio or television reception which can be determined by turning the equipment off and on the user is encouraged to try to correct the interference by one or more of the following measures Reorient or relocate the receiving antenna Increase the separation between the equipment and receiver Connect the equipment into an...

Page 3: ...ons Installation Prevent internal heat build up by allowing adequate air circulation Do not place the unit on surfaces rugs blankets etc nor near materials curtains draperies that may block the ventilation holes Do not install the unit near heat sources such as radiators or air ducts nor in a place subject to direct sunlight excessive dust mechanical vibration or shock Do not place the unit near e...

Page 4: ... Some PC systems which are not compatible with either DDC2AB or DDC2B may not accept the No 9 pin If you are not sure whether your PC system accepts the No 9 pin or not use the HD15 Female HD15 Male without the No 9 pin adapter supplied Make sure that the male side without the No 9 pin is connected to the computer Step 2 With the monitor switched off attach the power cord to the monitor and the ot...

Page 5: ...tiscan Technology will perform all of the complex adjustments necessary to ensure a high quality picture for any timing between 30 and 86 kHz However due to the wide variety of video boards on the market it may be necessary for the user to fine tune the vertical horizontal size and centering Note For Windows users check your video board manual or the utility program which comes with your graphic b...

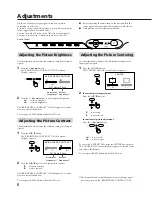
Page 6: ...nt data becomes the common setting for all input signals 1 Press the button The BRIGHTNESS CONTRAST OSD On Screen Display appears 2 Press the buttons to adjust picture brightness for less brightness for more brightness The BRIGHTNESS CONTRAST OSD disappears 3 seconds after you release the buttons To reset press RESET button while the OSD is on When one of the preset type signals is input no pictur...

Page 7: ...tically disappears 10 seconds after you release the buttons To reset press RESET button while the OSD is on GEOM GEOMETRY 0 23 Adjusting the Picture Size The adjustment data becomes the individual setting for each input signal received 1 Press the SIZE button The SIZE OSD On Screen Display appears 2 For vertical picture adjustment Press the buttons to enlarge to diminish For horizontal picture adj...

Page 8: ...d color temperature between 5000K and 9300K 1 Press the buttons to select user mode 2 Press the buttons for lower temperature to be reddish for higher temperature to be blueish Your most recent adjusted color temperature will be recalled by pressing the button The factory presetting is 6500K for the user adjustable mode of color temperature To erase the COLOR TEMPERATURE OSD press the COLOR button...

Page 9: ...ly disappears 30 seconds after you release the buttons If two computers are connected to the monitor one to each input when one of the computers is turned on or restarted or the monitor goes into power saving mode the monitor may switch to the other input because the signal is temporarily interrupted Select the input which you use following the above steps Resetting the Adjustment Data to Factory ...

Page 10: ...t Signaling DPMS By sensing the absence of the sync signal coming from the computer it will reduce the power consumption as follows CAUTION The Power Saving function will automatically put the monitor into Active off state if the power switch is turned on without any video signal input Once the horizontal and vertical syncs are sensed the monitor will automatically return to its Normal operation s...

Page 11: ...monitor failure If you do the above procedures and the monitor does not recover Unplug the video cable then press and hold the button for 2 seconds to display the color bars If the color bars appear the monitor is in the normal condition Then turn the monitor off and on by pressing the u power switch to return the monitor to the normal condition If the color bars do not appear there is a potential...

Page 12: ...hat have an excessive video output level which creates a fuzzy picture at max contrast Trip the u power switch once to activate the Auto degauss cycle If red or blue shades are found at the edge of images adjust convergence using the OSD page 8 Picture bounces or has wavy oscillations Isolate and eliminate any potential sources of electric or magnetic fields Common causes for this symptom are elec...

Page 13: ...la lumière directe du soleil à des poussières excessives à des vibrations ou à des chocs mécaniques N installez pas l appareil à proximité d un équipement qui génère un champ magnétique comme un convertisseur ou des lignes à haute tension Avertissement raccordement électrique Entretien Nettoyez le châssis le panneau de verre et les commandes à l aide d un chiffon doux légèrement imprégné d une sol...

Page 14: ...tallation de votre moniteur est terminée Nous vous souhaitons beaucoup de plaisir avec votre moniteur Notice Pour satisfaire aux normes de FCC Class B et IC Class B pour les appareils numériques raccordez le câble de signal vidéo fourni pour l entrée HD15 ou SMF 400 vendu séparément pour l entrée BNC Par ailleurs chaque câble est composé d âmes en ferrite vers la sortie vidéo Ordinateur IBM ou com...

Page 15: ... régénération le plus élevé de manière à maximiser les performances du moniteur Conditions de synchronisation horizontale préconisées Largeur de synchronisation horizontale 4 8 de la durée horizontale totale Largeur de neutralisation horizontale 3 0 µs Fréquence horizontale 31 5 kHz 31 5 kHz 43 3 kHz 49 7 kHz 53 7 kHz 60 0 kHz 64 0 kHz 68 7 kHz 68 7 kHz 80 0 kHz Mode graphique VGA Graphic 1 VGA Te...

Page 16: ...les paramètres à l aide des menus d affichage OSD Le paramètre en cours de réglage est affiché en blanc dans le menu Panneau de commande p Avant d ajuster les différents paramètres mettez l appareil sous tension et transmettez le signal vidéo de l ordinateur poste de travail connecté p Les réglages sont mémorisés automatiquement POWER SAVING RESET COLOR GEOM SIZE CENTER CONV BRIGHTNESS CONTRAST 80...

Page 17: ...montre Pour désactiver le menu GEOMETRY appuyez à nouveau sur la touche GEOM Le menu GEOMETRY disparaît 10 secondes après que vous avez relâché les touches Pour réinitialiser le réglage appuyez sur la touche RESET pendant que le menu est affiché Réglage de la rotation de l image La valeur introduite devient le réglage commun à tous les signaux d entrée 1 Appuyez sur la touche GEOM Le menu GEOMETRY...

Page 18: ... OSD On Screen Display de sélection COLOR TEMPERATURE INPUT apparaît 2 Appuyez sur la touche L écran COLOR TEMPERATURE OSD apparaît 3 Sélectionnez la valeur de réglage à l aide des touches et Pour sélectionner une température de 9300K 6500K ou 5000K Appuyez sur les touches La température de couleur sélectionnée est indiquée en jaune Pour obtenir la température de couleur voulue entre 5000K et 9300...

Page 19: ... effectué 1 Appuyez sur la touche COLOR L écran OSD On Screen Display de sélection COLOR TEMPERATURE INPUT apparaît 2 Appuyez sur les touches pour sélectionner INPUT puis sur les touches pour sélectionner HD15 ou BNC Lorsque vous passez d une source dentrée à l autre l écran du moniteur se met un instant en sourdine Mute ensuite le signal passant par l entrée sélectionnée s affiche Si l entrée sél...

Page 20: ...e la consommation d énergie s il est utilisé avec un ordinateur équipé du Display Power Management Signaling DPMS S il détecte l absence du signal de synchronisation provenant de l ordinateur il réduit la consommation électrique de la façon suivante ATTENTION La fonction d économie d énergie met automatiquement le moniteur en mode inactif si l interrupteur d alimentation est actionné sans qu il y ...

Page 21: ...fications ci dessus et si le moniteur n affiche toujours rien Débranchez le câble vidéo et maintenez la touche enfoncée pendant 2 secondes de manière à afficher les barres de couleur Si les barres de couleur s affichent c est que le moniteur est en bon état de marche Mettez ensuite le moniteur hors tension et puis à nouveau sous tension en appuyant sur l interrupteur d alimentation u pour ramener ...

Page 22: ...essif qui crée une image floue lorsque le contraste est au maximum Actionnez l interrupteur d alimentation u une fois pour activer le cycle Auto degauss Si des tons rouges ou bleus apparaissent au bord des images réglez la convergence dans l écran OSD page 18 L image sautille ou oscille fortement Isolez et éliminez toute source potentielle de champ électrique ou magnétique Ces champs sont souvent ...

Page 23: ...l wie Alkohol oder Benzin Berühren Sie den Bildschirm nicht mit harten oder spitzen Gegenständen wie Kugelschreibern oder Schraubenziehern Andernfalls könnte die Scheibe zerkratzt werden Aufstellung Sorgen Sie für ausreichende Belüftung des Geräts um einen internen Hitzestau zu vermeiden Stellen Sie das Gerät nicht auf Oberflächen wie Teppichen Decken u ä oder nahe bei Materialien wie Vorhängen u ...

Page 24: ...gitalgeräte entspricht verwenden Sie zum Anschließen des Monitors über den HD15 Eingang das mitgelieferte Videosignalkabel bzw zum Anschließen an die BNC Eingänge das Kabel SMF 400 als Sonderzubehör erhältlich Die Kabel sind mit Ferritkernen ausgestattet Vorbereitungen Der Monitor eignet sich für alle IBM Rechner oder Kompatible die mit VGA oder höherer Grafikleistung ausgestattet sind Dieser Moni...

Page 25: ... ist und wählen Sie diese aus um die Leistung des Geräts zu optimieren Empfohlene Werte für das horizontale Timing Horizontales Synchronbreitenverhältnis 4 8 der gesamten horizontalen Ablenkzeit Horizontale Austastbreite 3 0 µsek Horizontale 31 5 kHz 31 5 kHz 43 3 kHz 49 7 kHz 53 7 kHz 60 0 kHz 64 0 kHz 68 7 kHz 68 7 kHz 80 0 kHz Grafikmodus VGA Grafik1 VGA Text1 VESA2 Macintosh 16 Zoll Farbe3 VES...

Page 26: ...kzusetzen drücken Sie RESET solange die Bildschirmanzeige zu sehen ist Einstellen der Bildhelligkeit Der eingestellte Wert gilt für alle Eingangssignale 1 Drücken Sie die Taste Das Menü BRIGHTNESS CONTRAST erscheint 2 Stellen Sie die Bildhelligkeit mit den Tasten ein Mit stellen Sie das Bild dunkler ein Mit stellen Sie das Bild heller ein Drei Sekunden nachdem Sie die Tasten wieder losgelassen hab...

Page 27: ...ler ein Mit stellen Sie das Bild breiter ein Wenn Sie die Taste SIZE noch einmal drücken verschwindet das Menü SIZE Es wird jedoch auch automatisch ausgeblendet und zwar 10 Sekunden nachdem Sie die Tasten wieder losgelassen haben Um den Wert zurückzusetzen drücken Sie RESET solange die Bildschirmanzeige zu sehen ist Einstellen der Bildrotation Der eingestellte Wert gilt für alle Eingangssignale 1 ...

Page 28: ...E 9300K 6500K 5000K SELECT 50 Einstellen der Konvergenz Der eingestellte Wert gilt für alle Eingangssignale 1 Drücken Sie die Taste CONV Das Menü CONVERGENCE erscheint 2 Die vertikale Konvergenz Stellen Sie mit den Tasten ein Mit verschieben Sie die Rotkomponente nach oben und die Blaukomponente nach unten Mit verschieben Sie die Rotkomponente nach unten und die Blaukomponente nach oben Die horizo...

Page 29: ...Auswählen von Farbtemperatur bzw Eingangssignal erscheint RESET RESET COLOR TEMPERATURE INPUT SET SELECT HD1 5 BNC COLOR 2 Wählen Sie mit den Tasten die Option INPUT aus und wählen Sie dann mit die Option HD15 oder BNC Wenn Sie von einer Videoquelle zu einer anderen umschalten ist der Monitorbildschirm einen Moment lang leer Mute Status Dann erscheint das Anzeigebild der Videoquelle die an den neu...

Page 30: ...5 Anzeige POWER SAVING leuchtet nicht leuchtet orange leuchtet orange leuchtet orange leuchtet nicht Zeit für Reaktivierung ca 3 Sekunden ca 3 Sekunden ca 10 Sekunden Status Normalbetrieb Bereitschaftsmodus 1 Stufe der Energiesparfunktion Unterbrechungsmodus 2 Stufe der Energiesparfunktion Deaktivierter Modus 3 Stufe der Energiesparfunktion Ausgeschaltet Leistungs aufnahme 100 ca 70 ca 10 ca 4 0 P...

Page 31: ...karte korrekt in den richtigen Bus Steckplatz eingesetzt wurde Überprüfen Sie ob die Videofrequenz innerhalb des für das Gerät angegebenen Bereichs liegt Wenn Sie mit einem Macintosh System arbeiten überprüfen Sie ob der Macintosh Adapter und das Videosignalkabel richtig angeschlossen sind Wenn Sie mit Windows 95 arbeiten Auch wenn Sie auf dem Geräteauswahlbildschirm als Hersteller SONY auswählen ...

Page 32: ...el der bei maximalem Kontrast ein verschwommenes Bild erzeugt Betätigen Sie einmal den Netzschalter u um den automatischen Entmagnetisierungszyklus zu starten Sind an den Bildrändern rote oder blaue Schatten zu sehen stellen Sie über die Bildschirmanzeige die Konvergenz ein Seite 28 Bild springt oder oszilliert Stellen Sie Geräte die aufgrund elektrischer oder magnetischer Felder Interferenzen mit...

Page 33: ...ear la superficie de la pantalla con objetos puntiagudos o abrasivos como un bolígrafo o un destornillador De lo contrario este tipo de contacto puede causar que el tubo de imagen se arañe Advertencia sobre la conexión de la alimentación Tras apagar el monitor espere al menos 30 segundos antes de desconectar el cable de alimentación para permitir la descarga de la electricidad estática acumulada e...

Page 34: ...ción del monitor ha finalizado Disfrútelo Nota Para cumplir con los límites de clase B de la FCC y de la IC relativos a dispositivos digitales fije el cable de señal de vídeo suministrado para la entrada HD15 o el SMF 400 vendido por separado para la entrada BNC Además cada cable está provisto de núcleos de ferrita Ordenador IBM o compatible Cable de señal de vídeo suministrado Ordenador Apple a V...

Page 35: ...eración de imagen disponible con el fin de obtener un rendimiento óptimo del monitor Condiciones recomendadas de sincronización horizontal El ancho de sincronización horizontal debe ser 4 8 del tiempo horizontal total El ancho de supresión horizontal debe ser 3 0 µseg Modo de gráficos VGA Graphic 1 VGA Text 1 VESA 2 Macintosh 16 Color 3 VESA 2 Macintosh 19 Color 3 VESA 2 VESA 2 Macintosh 21 Color ...

Page 36: ...tón RESET mientras la función OSD esté activada Ajustes Al introducir una de las señales programadas no es necesario ajustar la imagen No obstante puede ajustar la imagen según sus preferencias Para ello realice el procedimiento que se describe a continuación Es posible ajustar todas las opciones en OSD indicación de pantalla La opción seleccionada aparecerá en OSD en color blanco Panel de control...

Page 37: ...n GEOMETRY OSD desaparece automáticamente 10 segundos después de soltar los botones Para reajustar pulse el botón RESET mientras la función OSD esté activada Ajuste de la rotación de la imagen Los datos de ajuste se convierten en el ajuste común para todas las señales de entrada 1 Pulse el botón GEOM Aparece la indicación GEOMETRY OSD indicación pantalla Ajuste de la distorsión de imagen Los datos...

Page 38: ...n en el ajuste común para todas las señales de entrada El ajuste de fábrica es 9300K 1 Pulse el botón COLOR COLOR TEMPERATURE INPUT aparece en OSD indicación en pantalla 2 Pulse el botón En OSD aparece COLOR TEMPERATURE 3 Realice el ajuste con los botones y Para seleccionar 9300K 6500K o 5000K Pulse los botones Para obtener la temperatura de color que desee comprendida entre 5000K y 9300K 1 Pulse ...

Page 39: ...T SELECT HD15 BNC COLOR Al conmutar entre fuentes de entrada la pantalla del monitor se desactiva momentáneamente Mute y a continuación aparece la señal de la entrada seleccionada Si dicha entrada no recibe ninguna señal de vídeo el monitor vuelve de forma automática a la otra entrada después de aparecer Mute y COLOR TEMPERATURE INPUT en OSD Si desea borrar la indicación COLOR TEMPERATURE INPUT vu...

Page 40: ...agen según sus preferencias Para ello basta ajustar el monitor siguiendo las instrucciones anteriormente descritas Los ajustes se almacenarán automáticamente y se restaurarán siempre que utilice dicho modo Es posible almacenar en memoria un total de 15 modos definidos por el usuario Si se introduce un decimosexto modo éste sustituirá al primero Función de ahorro de energía El monitor cumple las di...

Page 41: ... en la posición on El monitor se recuperá al pulsar cualquier tecla del teclado del ordenador Compruebe que el cable de señal de vídeo está correctamente conectado si el ordenador es un sistema Macintosh se requiere el adaptador Macintosh no suministrado Compruebe que los 5 BNC estén conectados en el orden correcto desde el lado del cable de alimentación rojo verde azul HD VD Compruebe que el cone...

Page 42: ...ideo excesivo el cual da origen a imágenes borrosas en el nivel de contraste máximo Pulse el interruptor de alimentación u para iniciar el ciclo de desmagnetización Si en los bordes de la imagen aparecen sombras rojas o azules ajuste la convergencia mediante OSD página 38 La imagen salta o sufre oscilaciones Aísle y elimine cualquier fuente que pueda generar campos eléctricos o magnéticos Las caus...

Page 43: ...l sole eccessivamente polverosi o soggetti a vibrazioni meccaniche o scosse Non collocare l apparecchio in prossimità di dispositivi che generano campi magnetici come ad esempio adattatori o linee di alta tensione Manutenzione Pulire il rivestimento il pannello di vetro ed i comandi con un panno morbido leggermente inumidito con una blanda soluzione detergente Non usare alcun tipo di straccio graf...

Page 44: ...po di adattatore più conforme alle proprie esigenze Punto 1 con il computer spento collegare il cavo del segnale video al monitor HD15 5 di BNC e l altro capo alla scheda video Punto 2 con il monitor spento collegare il cavo di alimentazione al monitor e l altro capo alla presa di rete Cavo del segnale video in dotazione a HD 15 all uscita video all uscita video Computer IBM o compatibile Adattato...

Page 45: ...uzione 640 480 720 400 640 480 832 624 800 600 1024 768 1280 1024 1024 768 1152 870 1280 1024 punti righe orizzontale verticale Uso del monitor Modi preimpostati e modi utente Il Multiscan 300sf dispone di modi preimpostati dalla fabbrica relativi ai 10 standard industriali che consentono l uso immediato dell apparecchio Per quanto riguarda i modi meno comuni la tecnologia Digital Multiscan del Mu...

Page 46: ...utte le regolazioni vengono memorizzate automaticamente Pannello di controllo Regolazione della luminosità dell immagine I dati della regolazione diventano l impostazione comune di tutti i segnali d ingresso 1 Premere il tasto Il controllo BRIGHTNESS CONTRAST OSD appare 2 Premere i tasti Per regolare la luminosità dell immagine per ridurre la luminosità per aumentare la luminosità Il controllo BRI...

Page 47: ...il tasto GEOM Il controllo GEOMETRY OSD appare 2 Premere i tasti per restringere i bordi dell immagine per espandere i bordi dell immagine Per eliminare il controllo GEOMETRY OSD premere di nuovo il tasto GEOM Il controllo GEOMETRY OSD scompare automaticamente 10 secondi dopo il rilascio dei tasti Per reimpostare premere il tasto RESET mentre il controllo a schermo è attivo 2 Premere i tasti per u...

Page 48: ... temperatura di colore selezionata diventa l impostazione comune per tutti i segnali di ingresso L impostazione di fabbrica è 9300K 1 Premere il tasto COLOR Appare il controllo a schermo OSD On Screen Display COLOR TEMPERATURE INPUT Regolazioni Regolazione della convergenza I dati della regolazione diventano l impostazione commune per tutti i segnali 1 Premere il tasto CONV Sullo schermo compare i...

Page 49: ...gamento 1 Premere il tasto COLOR Appare il controllo a schermo OSD On Screen Display COLOR TEMPERATURE INPUT RESET RESET COLOR TEMPERATURE INPUT SET SELECT HD15 BNC COLOR 2 Premere i tasti per selezionare INPUT e quindi premere i tasti per selezionare HD15 o BNC Durante il passaggio da una fonte d ingresso ad un altra lo schermo del monitor viene disattivato per un momento quindi tramite l ingress...

Page 50: ... di risparmio energetico spento acceso arancione acceso arancione acceso arancione spento Tempi di ripresa necessari circa 3 sec circa 3 sec circa 10 sec Consumo 100 circa 70 circa 10 circa 4 0 Stato Funzionamento normale Modo attesa 1a fase del risparmio energetico Modo sospensione 2a fase del risparmio energetico Modo attivo spento 3a fase del risparmio energetico Spegnimento Modo 1 2 3 4 5 Uso ...

Page 51: ...a Macintosh è necessario l adattatore per Macintosh non in dotazione Controllare che i 5 connettori BNC siano stati collegati nel giusto ordine Dal lato del cavo di alimentazione Rosso Verde Blu HD VD Controllare che nel connettore HD15 del cavo non vi siano terminali piegati Controllare che la scheda video sia posizionata nella giusta fessura bus Controllare che il campo di frequenza video corris...

Page 52: ...chermo pag 48 L immagine è sfocata Regolare il contrasto e la luminosità usando le indicazioni a schermo pag 46 Ci sono varie marche di schede SVGA che determinano un eccessivo livello di uscita che crea immagini sfocate con il massimo contrasto Far scattare una volta l interruttore di accensione u per attivare il ciclo di smagnetizzazione automatica Se l immagine presenta delle sfumature rosse o ...

Reviews: