USO
RESTRITO
426
Control of VTRs, Extended VTRs, and Disk Recorders
Ch
a
p
te
r 12
E
x
te
rn
a
l De
v
ic
e
s
3
Enter the number of the register to be recalled with the
numeric keypad buttons.
To search for an empty register, instead of entering a
number, press the [.] (period) button.
The display shows the register number. A letter “e” or
“E” after the number indicates the register status, as
follows:
e:
This register is empty in the selected region.
E:
This register is empty in all selectable regions.
4
Press the [ENTER] button.
This recalls the register you selected in step
3
.
5
When using the device control block (trackball) or
device control block (joystick), press the [DEV]
button in the device control block, turning it on.
Notes
Check that the [MENU] button is not lit. If it is lit,
press to turn it off.
6
With the device selection buttons in the device control
block, select the VTR, Extended VTR, or disk recorder
for which you want to make the setting.
You can select more than one button.
The first button pressed lights green to indicate the
reference region, and the subsequent buttons light
amber.
7
Set the start point.
•
Using the [START TC] button:
Play the VTR, Extended VTR or disk recorder by
control from the device control block. Find the
desired start point, and press the [START TC]
button at that position.
If using the [START TC] button, each time you
press the button the start point timecode is
overwritten.
•
Using the [SET START TC]:
Press the [SET START TC] button in the device
control block (search dial).
The display in the numeric keypad control block
shows “START TC.” Enter the desired timecode
from the numeric keypad control block, and press
[ENTER].
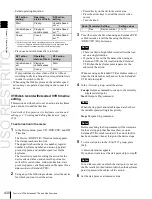
For details of timecode entry, see “Setting the start
point and stop point with the [SET XX] buttons”
(page 427).
•
Setting with the Cueup & Play menu:
Set the start point, stop point, and start delay
duration
8
Set the stop point or duration.
When two of the start point, stop point and duration are
set, the remaining one is automatically determined.
For example, if you set the stop point in the following
procedure, you do not need to enter the value of the
duration.
•
Using the [STOP TC] button:
Play the VTR, Extended VTR or disk recorder by
control from the device control block. Find the
desired stop point, and press the [STOP TC] button
at that point.
If using the [STOP TC] button, each time you press
the button the stop point timecode is overwritten.
•
Using the [SET STOP TC] button of the device
control block (search dial):
Press the [SET STOP TC] button in the device
control block (search dial). The display in the
numeric keypad control block shows “STOP TC.”
Enter the desired timecode from the numeric keypad
control block, and press [ENTER].
•
Using the [SET DUR] button of the device control
block (search dial):
Press the [SET DUR] button in the device control
block (search dial). The display in the numeric
keypad control block shows “DUR” and the current
setting. Enter the desired duration from the numeric
keypad control block, and press [ENTER].
For details of timecode entry, see “Setting the start
point and stop point with the [SET XX] buttons”
(page 427).
•
Setting with the Cueup & Play menu:
Set the start point, stop point, and start delay
duration
9
To set a start delay time, press the [DELAY] button in the
device control block, and enter a value in the numeric
keypad control block. Alternatively, make the setting in
the Device >DDR/VTR >Cueup & Play menu.
If no setting is required, continue to step
10
.
10
Press the [STORE] button, turning it on, in the
numeric keypad control block.
11
Enter the number of the register in which to save the
settings.
When overwriting the settings in the register recalled
in step
3
, continue to step
12
without changing the
displayed register number.
12
Press the [ENTER] button.
Automatically cueing up and playing VTR/
Extended VTR/disk recorder
By recalling a register in which you have saved setting data
for Cueup & Play, you can control the VTR/Extended
Summary of Contents for MVS-8000X SystemMVS-7000X System
Page 358: ...USO RESTRITO 358 Wipe Pattern List Appendix Volume 1 Enhanced Wipes Rotary Wipes ...
Page 360: ...USO RESTRITO Random Diamond DustWipes 360 1 w pe PaternLO ...
Page 362: ...USO RESTRITO 362 DME Wipe Pattern List Appendix Volume 1 Door 2D trans 3D trans ...
Page 364: ...USO RESTRITO 364 DME Wipe Pattern List Appendix Volume 1 Page turn Page roll ...
Page 377: ...USO RESTRITO Menu Tree 377 Appendix Volume 1 AUX Menu AUX button CCR Menu CCR button ...
Page 379: ...USO RESTRITO Menu Tree 379 Appendix Volume 1 DME Menu DME button ...
Page 381: ...USO RESTRITO Menu Tree 381 Appendix Volume 1 Macro Menu MCRO button ...
Page 382: ...USO RESTRITO 382 Menu Tree Appendix Volume 1 Key Frame Menu KEY FRAME button ...
Page 383: ...USO RESTRITO Menu Tree 383 Appendix Volume 1 Effect Menu EFF button ...
Page 384: ...USO RESTRITO 384 Menu Tree Appendix Volume 1 Snapshot Menu SNAPSHOT button ...
Page 385: ...USO RESTRITO Menu Tree 385 Appendix Volume 1 Shotbox Menu SHOTBOX button ...
Page 386: ...USO RESTRITO 386 Menu Tree Appendix Volume 1 File Menu FILE button ...
Page 391: ...USO RESTRITO Menu Tree 391 Appendix Volume 1 ENG SETUP button to previous pages ...
Page 413: ...USO RESTRITO MVS 8000X System MVS 7000X System SY 4 470 637 01 1 Sony Corporation 2013 ...
Page 706: ...USO RESTRITO MVS 8000X System MVS 7000X System SY 4 470 637 01 1 Sony Corporation 2013 ...


