background image

22

MZ-B100

[Temperature Correction]

• Adjustment Method of temperature correction

1. Select the manual mode of test mode, and set the mode num-

ber 014. (See page 13)

2. Measure the ambient temperature.
3. Adjust with 

[EASY ]

[EASY SEARCH --]

 key so

that the adjusted value (hexadecimal value) becomes the am-
bient temperature.
(Initial value: 14h = 20 

°

C, Adjusting range: 80h to 7fh (–128

°

C to +127 

°

C)

4. Press the

X

key to write the adjusted value.

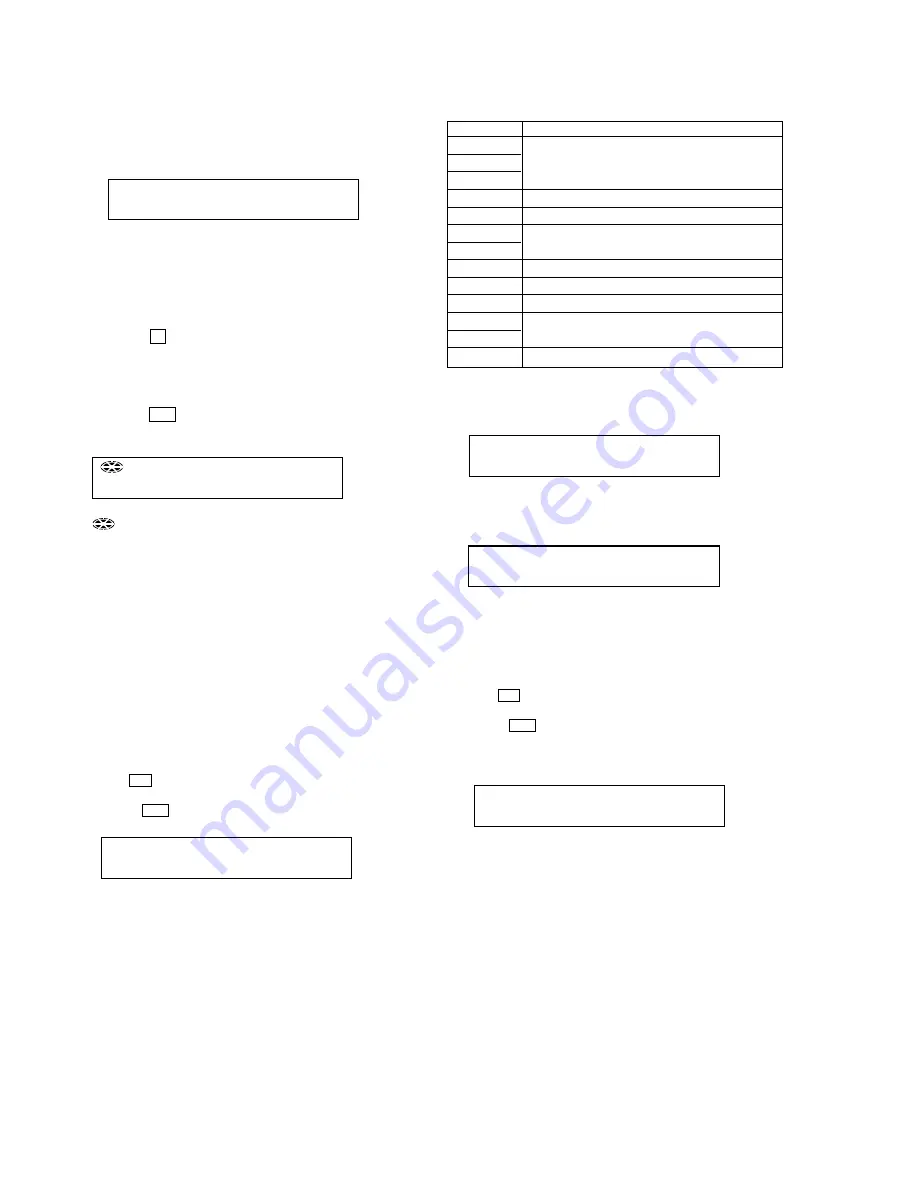
[Overall Adjustment Mode]

• Adjustment Method of Overall Adjustment Mode

1. Setting the test mode. (See page 12)
2. Press the

.

or 

[EASY SEARCH  --]

 key activates the over-

all adjustment mode where the LCD display as shown below.

3. Insert the CD test disc TDYS-1 (Parts No.4-963-646-01) or an

available SONY CD disc.

4. Press

N

key.  The system discriminates between CD and MO

and performs automatic adjustment for CD.
Also, if

.

key is pressed, CD is adjusted automatically.

: (DISC MARK) When power adjustment “H” finished; 

Outward ON
When power adjustment “L” finished; 
Inward ON

Power supply is not yet adjusted unless both outward 
and inward disc marks are ON.
Note: Disc mark is displayed on the remote commander 

LCD only.

* *

: Left side = MO auto adjustment information


F

*

 : Auto adjustment finished


1

*

 : Manual adjustment remains 


*

: Not adjusted yet

Right side = CD auto adjustment information


*

F: CD auto adjustment finished


*

1: Manual adjustment remains (not auto adjustment)


*

0: Not adjusted yet

LCD display

A S S Y * *

000

S e t T m p

014

LCD display

CD Automatic Adjustment item

Mode No.

Description

312

313

CD electrical offset adjustment

314

328

CD TWPP gain adjustment

321

CD tracking error gain adjustment

323

CD tracking error offset adjustment

332

336

CD ABCD level adjustment

344

CD focus gain adjustment

345

CD tracking gain adjustment

521

CD two-axis sensibility adjustment

522

341

CD focus bias adjustment

5. If the result of automatic adjustment is OK, the following dis-

play appears in the LCD:

6. If the result of automatic adjustment is NG, the following dis-

play appears in the LCD:

7. If NG, set the manual mode.  Perform automatic adjustment

for the items not accepted. (See page 13)

8. If CD adjustment is OK, insert an available SONY MO disc

(recorded).
At this time, be sure to turn OFF the disc protect switch.

9. Press

N

key.  The system discriminates between CD and MO

and performs automatic adjustment for the MO disc.
Also, if

>

key is pressed, MO is adjusted automatically.

However, when CD adjustment is not finished, “SetCD!” is
blinking on the LCD and MO adjustment is not executed.

LCD display

C D   O K

341

LCD display

# # #

: Overall adjustment. NG mode number

# # #   N G

LCD display

%%%

 : Manual mode number being executed

M O   R U N

%%%

LCD display

C D   R U N

%%%

%%%

 : Manual mode number being executed

Summary of Contents for MZ-B100 - Minidisc Business Product Recorder

Page 1: ...e optical pick up block with 7 mm aperture Recording and playback time When using MDW 80 Maximum 160 min in monaural Maximum 320 min in stereo Revolutions 350 rpm to 2 800 rpm CLV Error correction ACIRC Advanced Cross Interleave Reed Solomon Code Sampling frequency 44 1 kHz Sampling rate converter Input 32 kHz 44 1 kHz 48 kHz Coding ATRAC Adaptive TRansform Acoustic Coding ATRAC3 LP2 LP4 Modulatio...

Page 2: ...Schematic Diagram Main Section 3 4 37 6 10 Schematic Diagram Main Section 4 4 38 7 EXPLODED VIEW 7 1 Panel Lower Section 42 7 2 Panel Upper Lid Section 43 7 3 Cabinet Belt Section 44 7 4 Mechanism Deck Section MT MZB100 171 45 8 ELECTRICAL PARTS LIST 46 TABLE OF CONTENTS General Power requirements DC 3V LR6 size AA alkaline dry battery world model only Battery operation time Battery life1 When rec...

Page 3: ... device stopping by fasten ing the hook of the open close detect switch S804 This set is designed to perform automatic adjustment for each adjustment and write its value to EEPROM Therefore when EEPROM IC802 has been replaced in service be sure to per form automatic adjustment and write resultant values to the new EEPROM Refer to Section 5 Electrical Adjustment page 19 Replacement of CXD 2671 209G...

Page 4: ... tactile dot qa X PAUSE button qs z REC button qd REC indicator 1 Battery compartment 2 CLOCK SET button 3 SOUND button 4 LINE IN OPTICAL jack 1 2 9q qaqsqdqfqg qh w wa ws wd wf wgwh 3456 78 qj qk ql How to attach the hand strap 2 1 3 4 5 6 qf TRACK MARK button qg REC MODE switch qh GROUP button qj Speaker qk DC IN 3V jack ql Microphones w i headphones jack wa OPEN switch ws HOLD switch wd VOL con...

Page 5: ...4 HOLD switch Slide to lock the controls of the remote control 5 X pause button The display window The remote control 1 2 4 5 6 7 qd qs qa q 9 8 3 A B C D E G F H I J 6 Battery level indication 7 SYNC synchro recording indication 8 Playback level meter 9 V UP indication 0 STEREO stereo LP2 LP2 stereo LP4 LP4 stereo MONO monaural indication qa Pause indication qs SOUND indication qd REC indication ...

Page 6: ...p down M603 Set Main board Cabinet belt section Key board unit Mechanism deck 2 Screws ES lock 2 Screws ES lock 1 Screws B1 7x4 S301 S809 Panel upper lid ASSY 3 MIC SENS knob SYNCHRO REC knob Panel lower ASSY z Caution during assembly Position the SYNCHRO REC knob and the S809 position the MIC SENS knob and the S301 respectively 3 Remove solder 4 places 1 Screws 1 Screws 6 CN501 2 CN801 4 CN701 Pa...

Page 7: ...ock 2 Open 1 Screws ES lock Panel upper lid ASSY 3 Cabinet belt section 6 Remove solder 4 places 8 Remove solder 2 places 7 Remove solder 2 places 9 Claws 5 Screws 3 Screws B2 0 5 Screw 1 Screws 2 Cover REC 4 Speaker Panel upper lid ASSY MIC101 MIC201 Key board unit 0 ...

Page 8: ...Z B100 3 5 MECHANISM DECK 4 Screws ES lock 3 Screws ES lock 5 Screw ES lock 1 Screws ES lock Mechanism deck MT MZB100 171 9 8 Screws ES lock 2 6 7 Screws ES lock Cabinet front Set chassis ASSY Cabinet belt ...

Page 9: ...rew M1 4 6 spring thrust detent 8 Pull off screw lead 7 over write head section Optical pick up block LCX 4R 9 Opening the over write head toward the direction A remove the optical pick up block LCX 4R toward the direction B A B Note Do not open the entire assy forcibly when opening the over write head ...

Page 10: ...erect uprightly 3 Remove the concave portion in the direction of arrow C 5 Remove the holder assy in the direction of arrow D D C B A 1 Open the holder assy 4 boss 5 motor DC sled M602 4 two screws M1 4 1 Remove six solders of motor flexible board 2 washer 0 8 2 5 3 gear SA 3 7 HOLDER ASSY 3 8 MOTOR DC SLED M602 ...

Page 11: ...crews M1 4 qs chassis assy gear 9 screw M1 2 0 gear HA gear HA chassis assy gear 2 65 mm motor DC over write head up down M603 8 gear HB 7 washer 0 8 2 5 2 washer 0 8 2 5 3 gear HC Note Press fit the gear HA up to the position of the motor DC over write head up down M603 as shown below 3 9 MOTOR DC SPINDLE M601 MOTOR DC OVER WRITE HEAD UP DOWN M603 ...

Page 12: ... always start in the test mode The set cannot start in nor mal mode SECTION 4 TEST MODE Outline This set provides the Overall adjustment mode Assy mode that allows CD and MO disc to be automatically adjusted when in the test mode In this overall adjustment mode the protect switch is detected to judge the disc CD or MO and each adjustment is automatically executed in order If a fault is found the s...

Page 13: ...e Display Check Mode Press the x key Press the x key Press the x key Press the x key Press the or EASY SEARCH key Press the N or REC key on the set Press the DISPLAY key Press the TRACK MARK key on the remote commander for several seconds Quit the key check or open the upper panel Sound Skip Check Result Display Mode LCD display M a n u a l EASY SEARCH key 100th place of mode number increase EASY ...

Page 14: ... OK MO overall adjusting MO overall adjustment OK CD overall adjustment NG MO overall adjustment NG N key protect switch ON All item OK protect switch OFF NG item exists or x key NG item exists or x key x key x key x key x key Test mode display check mode Address Adjusted Value Display LCD display Jitter Value Adjusted Value Display LCD display Block Error Value Adjusted Value Display LCD display ...

Page 15: ...d the total of error count is displayed on the LCD and each time the key is pressed the error count descents one by one as shown below Also when key is pressed the error count ascends by one If N key is pressed the error count during play is dis played Sound skip check items counter hexadecimal 6 digit address hexadecimal where a sound skipped last Error code Cause of error Description of error EI...

Page 16: ...s display mode to find when an error occurred Clear both total recording time and the time in self diagnosis display mode when the optical pick up was replaced 1 Setting the test mode See page 12 2 Press the DISPLAY key activates the self diagnosis display mode where the LCD display as shown below 3 Then each time key is pressed LCD display descends by one as shown below Also the LCD display ascen...

Page 17: ...iagnosis display mode 3 Press the X key or REC key on the set during display of self diagnosis data when clearing the self diagnosis data or during display of total recording time when clearing the total recording time Thus ClrOK will be displayed on the LCD and press the same key again and when self diagnosis data is cleared ErrCLR is displayed and the data is cleared Also when total recording ti...

Page 18: ...not checked unless it is reciprocated The key pressed to enter the key check mode was already checked at that time Set key Key Indication N PLAY FF FR X PAUSE EASY SEARCH EASY EASY SEARCH EASY x STOP REC REC TRACK MARK T MARK HOLD hold HLDon HOLD off HLDoff SYNCHRO REC on SYCon SYNCHRO REC off SYCoff PLAY MODE P MODE DISPLAY DISP EDIT ENTER MENU VOR VOR ERASE ERASE REC MODE R MODE GROUP GROUP Remo...

Page 19: ...2501 046 A Digital voltmeter 3 Unless specified otherwise supply DC 3V from the DC IN 3V jack 4 Switch position HOLD switch OFF Adjustment Sequence Adjustment must be done with the following steps 1 NV Reset Memory clear r 2 Power Supply Manual Adjustment Manual Mode r 3 Temperature correction r 4 CD Overall Adjustment r Overall Mode 5 MO Overall Adjustment NV Reset Setting method of NV reset 1 Se...

Page 20: ...M 762 LCD display V r h V c l 763 LCD display 15 56 14 10 5 1 C912 C913 C915 C9 R919 R920 C924 C925 C926 R501 D903 C502 AP912 VL AP909 GND AP913 VC digital voltmeter AP913 VC AP909 GND MAIN BOARD SIDE A 3 Press the X key to write the adjusted value Adjustment method of VREM PWM Duty L mode number 764 1 Select the manual mode of the test mode and set the mode number 764 See page 13 2 Connect a digi...

Page 21: ...2 C913 C915 C9 R919 R920 C924 C925 C926 R501 D903 C502 AP912 VL AP909 GND AP913 VC digital voltmeter AP913 VC AP909 GND MAIN BOARD SIDE A V r l V c h 767 LCD display V r h V c h 766 LCD display 45 50 25 20 15 56 14 10 5 1 IC901 C912 C902 C913 C915 C9 C922 R919 R920 R92 19 C924 C925 C926 R5 D903 AP912 VL AP909 GND MAIN BOARD digital voltmeter AP912 VL AP909 GND SIDE A 45 50 25 20 15 56 14 10 5 1 IC...

Page 22: ...justed yet Right side CD auto adjustment information F CD auto adjustment finished 1 Manual adjustment remains not auto adjustment 0 Not adjusted yet LCD display A S S Y 000 S e t T m p 014 LCD display CD Automatic Adjustment item Mode No Description 312 313 CD electrical offset adjustment 314 328 CD TWPP gain adjustment 321 CD tracking error gain adjustment 323 CD tracking error offset adjustment...

Page 23: ...evel adjustment 445 MO write tracking gain adjustment 411 MO normal speed read TWPP offset adjustment 412 448 32 cluster full recording 141 MO focus bias adjustment LCD display M O O K 141 LCD display Overall adjustment NG mode number N G R e s u m e 043 LCD display R e s C l r 043 Laser Power Check Connection Check Method 1 Select the manual mode of test mode and set the laser power adjusting mod...

Page 24: ...inal 21 ADFG O ADIP duplex FM signal 22 05 kHz 1 kHz output to IC801 22 DVDD Power supply terminal 2 4V digital system 23 SBUS I O Two way SSB serial data bus with the system controller IC801 24 SCK I SSB serial clock signal input from the system controller IC801 25 XRST I Reset signal input from the system controller IC801 L reset 26 OFTRK I Off track signal input from IC801 27 DGND Ground termin...

Page 25: ...ell 27 DAVDD Power supply terminal for the built in D A converter 2 4V 28 VREFL I Reference voltage input terminal for the internal D A converter L CH 29 AOUTL O Built in D A converter L CH output terminal 30 AOUTR O Built in D A converter R CH output terminal 31 VREFR I Reference voltage input terminal for the built in D A converter R CH 32 DAVSS Ground terminal for the built in D A converter 33 ...

Page 26: ...0CNT O Filter cut off control signal output terminal Not used open 76 DIFVDD0 Power supply terminal for DSP I F 2 3V 77 DIFVSS0 Ground terminal for DSP I F 78 APCREF O Reference PWM signal output for the laser automatic power control to RF amp IC501 79 LDDR O PWM signal output for the laser automatic power control Not used open 80 TRDR O Tracking servo drive PWM signal output to the motor driver I...

Page 27: ... supply terminal for I F to TSB slave communication 144 TSB SLVI I TSB slave signal input from the remote commander attached headphone 145 TSB SLVO O TSB slave signal output to the remote commander attached headphone 146 TDI I Data input terminal for JTAG Not used open 147 TMS I Test mode control input terminal for JTAG Not used open 148 TCK I Clock input terminal for JTAG Not used open 149 XTRST ...

Page 28: ...IN plug detection signal input terminal 192 XJACK DET I LINE IN plug detection signal input terminal 193 XMIC DET I Microphone plug detection signal input terminal 194 195 PD S0 PD S1 O PD IC mode changeover signal output to the optical pick up 196 MIFVDD2 Power supply terminal for the microcomputer I F block 2 3V 197 to 199 MODE1 to 3 O Power supply control signal output for the over write head d...

Page 29: ...or safety Replace only with part number specified Pin No Pin name I O Description 220 XRST MTR DRV O Reset control signal output to the motor driver IC701 221 XRF RST O Reset control signal output to RF amp IC501 222 MCUVDD3 Power supply terminal for the microcomputer block 1 5V 223 SPDL MON I Spindle servo monitor signal input from the motor driver IC701 224 XAVLS I Input terminal for AVLS switch...

Page 30: ... CONTROL 1 2 NA NB OUTA OUTB VREF C1H C1L C2H C2L VRECIN2 CLK EFM VRECIN1 VRECO B SW RECON OE RI FI MODE3 MODE2 MODE1 HD_CON_2 HD_CON1_ EFMO OVER WRITE HEAD DRIVE IC601 1 2 RFI PEAK BOTM ABCD FE TE ADFG VC VREF_MON OFTRK XRF_RST S MON SSB CLK PD S0 PD S1 SSB DATA APCREF SYSTEM CONTROL DIGITAL SIGNAL PROCESSOR 16M D RAM IC801 1 3 SIGNAL PATH PLAYBACK REC ANALOG IN REC DIGITAL IN A B C D DIN1 ADDT A...

Page 31: ...0 SDI0 SCK0 XCS SK DI DO B A C G BEEP V RET 2 XHP_DET EEPROM IC804 2 4 1 3 10 15 14 13 9 GAIN AMP CLOCK DIVIDER AUDIO I F CONTROL CONTROL REGISTER I F A D CONVERTER HPF RIN1 RIN2 LIN1 LIN2 A D CONVERTER IC301 SDTO CCLK CSN CDTI 12 LRCK BCLK 16 PDN 11 MCLK LRCK XBCK PDN FS256 69 LRCK 204 XPD_ADA 71 FS256 XBCK LRCK PDN FS256 3 V_UP 203 XCS_ADA Page 32 Page 30 Page 30 Page 32 Page 30 13 1 1 1 7 5 1 3...

Page 32: ...EY FS4 CLK_SEL FFCLR SLEEP VLON WK_DET REC_KEY HALF_LOCK_SW OPEN S803 HALF LOCK CS_RTC VIF B VB B XCS_LCD LCD_STB LCD_RS_AUX F D G SDO0 SDI0 SCK0 SD0 SI0 SCK RESET STB XCS_LED CS_RTC REC PAUSE REC_LED SET_KEY_1 SET_KEY_2 DVDD UNREG XWK1 HOLD S801 OFF HOLD VIF B VB B SWITCH LCD MUDULE SL801 TEST S802 PROTECT DETECT S804 OPEN CLOSE DETECT OPEN_CLOSE_SW XGUM_ON PROTECT XTEST HIDC_MON GND_SW VB_MON PA...

Page 33: ... R153 R252 R253 R251 R250 R249 R149 R150 R148 R248 R126 C118 R129 R604 R801 R819 R820 R825 R827 R829 R608 R609 R903 R907 R912 R922 R921 R917 R918 R916 R919 R506 R920 R307 R305 C216 R226 R225 C218 R338 R202 R102 R229 C202 R304 R231 R306 R117 R214 R301 R302 R303 R213 R113 R114 R218 R216 R313 R116 R118 R330 R318 R321 R212 R223 R123 R112 R217 R802 C823 R828 R811 R810 R835 R833 R137 R143 R141 R241 R243...

Page 34: ...154 R333 R336 R254 R258 R332 R208 R107 R209 R222 R210 R110 R207 R105 R813 R308 R109 R108 R323 R315 R219 C621 C832 C815 C814 C707 C706 C705 C703 C702 C701 C831 C236 C234 C136 C134 C825 C208 C214 C108 C114 C313 C828 C827 C105 C207 C205 C241 C204 C141 C104 C240 C203 C140 C103 C336 C319 D801 D101 D201 Q305 BCE Q322 ECB Q321 ECB Q319 ECB Q318 ECB D304 Q313 BCE Q304 ECB Q303 ECB FB302 FB304 FB303 FB301 ...

Page 35: ...0p 0 033 22k 100k 150p 150p 0 047 10 6 3V 100 0 1 MAZS 1M 1M 0 1 1000p 10 6 3V 47k 470k 47k 1 10V 100k 1000p 1 10V 100k 47k 10 6 3V 47k 470k 47k 10k 1 10V 100k 100p 47k 10k 100p 100k 1 10V 100k 10 6 3V 10 6 3V 47k 47k 470k 0 1 0 1 47k 47k 470k 10 6 3V 0 1 10k 0 1 47k 470k 10k 470 3 3k 470k 4 7k 4 7k 1 0 01 2SC4116 2SA1586 100 100 10 6 3V 47 6 3V UN9114 100 100 100 0 1 0 1 1 100p 22k 47k 1 47k 22k ...

Page 36: ...TRA 1 REC CLK VC XRST VA XWK1 AVDD VD VLO VG GND HD DRV HD DRV VIF VB HALF LOCK RMC KEY REC KEY WK DET VLON CLK SEL FFCLR SLEEP SLD PWM SLD MON U SLD MON V SLD MON W CLV MON W CLV MON V CLV MON U CLV PWM CLV CON U CLV CON V CLV CON W FCS FCS TRK TRK XRST MTR DRV SLD CON W SLD CON V SLD CON U FR1 FF1 TF1 TR1 VL PWN VC PWN NC VD VC2 XRST CRST RSTREF VREF YB GND CLKSEL VAIFOM FFCLR SLEEP CLK U12 PWM2...

Page 37: ...2YD1500LS 0 1 1 20P 1 10 6 3V 10 6 3V 0 1 100p SI2302DS FZT1788TC TS8K1TB HAT2050T EL MA2YD1700LS MA2YD1700LS TRA 1 VC CLK VLO VG GND HD DRV HD DRV VIF VB EFM RF1 SSB DATA SSB CLK XRF RST VREF MON TE ABCD FE PEAK BOTM ADIP APCREF PO SI PO SO MODE1 MODE2 MODE3 HIDC MON GND SW HD CON 2 HD CON 1 FCS FCS TRK TRK S MON 1 2 3 4 5 6 7 8 9 10 1 2 3 4 5 6 7 8 9 10 DC IN 3V VB BATM CHGSW RS INP2 INM2 RF2 DC...

Page 38: ... XBCK LRCK SET KEY 2 SET KEY 3 OR GATE CSP Chip Size Package MICAMP XHP DET V UP SP AMP XMONO MODE MICVDD MIFVSS XRST S MON VD MON CHG MON VREF MON SET KEY 3 SET KEY 2 SET KEY 1 HIDC MON WK DET REC KEY HALF LOCK SW RMC KEY AVDD AVSS VDIOSC OSCI OSCO VSIOSC OAVDD VREFL AOUTL AOUTR VREFR OAVSS AVD1 ASY 1 ASY 0 BIAS RF1 AVS1 PCO POO FIL1 FIL0 CLTV PEAK BOTM ABCD FE AUX1 VC ADIO ADRT AVD2 AVS2 ADRB SE...

Page 39: ...x Jx Jy A A C B ADIP IN FE ABCD OFC C1 OFC C2 PS LP EQ AGND RF CCSL2 VC RESET SCK SBUS VREF075 PEAK BOTM DGND OFTRK S MON TON C CIG CDN ADFG DVDD PD NI PD I PD O 43 44 TWpp PK BTM Aw CSLO VREF075 A C D C Malfa Mij AwBPF Dw DwBPF 42 39 AVCC 38 37 36 35 34 31 30 29 28 27 26 25 24 23 40 41 2 3 4 5 6 7 8 9 10 11 12 13 14 15 16 17 18 19 20 21 22 A B C D I J NPP TON CSL Aw Dw TON Peak TON Botm ADIP TE T...

Page 40: ...VC VG DC IN DC IN DC IN DC IN DC IN VIO VIO VC VC VC VC VC2 VC2 VG VC VG VG2 SW VGC VG3 VG3 VG2 VG VC VG3 IC901 XPC18A32FCR2 IC601 XPC18A22FCR2 42 41 40 39 38 36 35 34 33 32 31 30 29 37 28 27 26 25 24 23 22 21 20 19 18 17 16 15 14 13 12 11 10 9 8 7 6 5 4 3 2 1 56 55 54 53 52 51 50 49 48 47 46 45 44 43 CLK SLEEP FFCLR VAIFON CLKSEL GND VB VREF RSTREF CRST XRST VC2 VD NC PGND2 PGND2 L2 VL VLO VL GND...

Page 41: ...1 CPVI1 22 21 20 CPWI1 GND2 NC BIAS VC ROE VC 3Phase control ch1 3Phase control ch2 3Phase Pre driver ch1 H BRIDGE PRE DRIVER CH1 H BRIDGE CONTROL CH1 VC VC VG VC VG VC VC OE VG VG VCVG VCVG GND VG VC VG VC VG VC VG VC VC VC U V W U V W H BRIDGE CONTROL CH2 VC VG 3Phase Pre driver ch2 H BRIDGE PRE DRIVER CH2 26 27 28 CPVO1 53 54 IC302 TA2131FL EL V REF MT SW BST SW BEEP 19 20 21 22 23 24 18 17 16 ...

Page 42: ...are not supplied Hardware mark list are given in the last of this parts list Ref No Part No Description Remark Ref No Part No Description Remark 7 1 PANEL LOWER SECTION The components identified by mark 0 or dotted line with mark 0 are critical for safety Replace only with part number specified 1 X 3381 334 1 PANEL LOWER ASSY 2 3 049 923 01 FOOT 3 3 318 203 61 SCREW B1 7X4 TAPPING 4 3 225 873 25 S...

Page 43: ...3 375 114 41 SCREW 61 X 3381 105 1 LEVER REC ASSY 62 3 235 182 01 BUTTON REC 63 3 235 170 01 BUTTON B 64 A 3052 943 A PANEL UPPER LID SUB ASSY 65 3 669 481 05 PIN DIA 1X15 PARALLEL 66 1 682 981 11 PLUNGER FLEXIBLE BOARD 67 3 235 171 01 BUTTON C 68 3 235 169 01 BUTTON A 69 3 237 416 01 SHEET MIC 71 3 346 280 01 CUSHON B 73 3 237 415 01 SHEET SOLENOID ADHESIVE MIC101 1 542 228 11 MICROPHONE L CH MIC...

Page 44: ...108 3 235 159 01 COVER MD 109 3 235 155 01 SPRING UP TENSION 110 3 235 149 01 SPRING LOCK TENSION COIL 111 3 238 525 01 SPRING OPEN TENSION 112 3 225 873 07 SCREW ES LOCK 113 3 235 158 01 TERMINAL BATTERY 114 X 3381 102 1 TERMINAL ASSY BATTERY 115 3 704 197 81 NYLOCK M1 4X5 116 3 225 873 25 SCREW ES LOCK L 2 5 117 3 237 417 01 CUSHION DC IN 118 3 238 099 01 PLATE DETECTION SUPPORT not supplied 116...

Page 45: ...215 01 GEAR HC 164 4 997 677 11 WASHER 165 3 225 996 06 SCREW M1 4 EG PRECISION PAN 166 3 235 144 01 GEAR SA 167 4 222 208 01 GEAR SB 168 3 043 237 02 BEARING N 169 4 222 203 01 SCREW LEAD 0171 X 3379 508 1 OPTICAL PICK UP LCX 4R 172 4 222 205 11 SPRING RACK 173 3 222 544 01 GEAR HA M601 8 835 744 01 MOTOR DC SSM18B SPINDLE INCLUDING TURN TABLE M602 1 763 727 31 MOTOR DC SLED INCLUDING GEAR M603 1...

Page 46: ... METAL OXIDE Metal oxide film resistor F nonflammable Items marked are not stocked since they are seldom required for routine service Some delay should be anticipated when order ing these items SEMICONDUCTORS In each case u µ for example uA µA uPA µPA uPB µPB uPC µPC uPD µPD CAPACITORS uF µF COILS uH µH The components identified by mark 0 or dotted line with mark 0 are critical for safety Replace ...

Page 47: ...IP 0 0022uF 10 50V C516 1 125 837 11 CERAMIC CHIP 1uF 10 6 3V C517 1 125 777 11 CERAMIC CHIP 0 1uF 10 10V C518 1 164 940 11 CERAMIC CHIP 0 0033uF 10 16V C519 1 107 819 11 CERAMIC CHIP 0 022uF 10 16V C520 1 125 777 11 CERAMIC CHIP 0 1uF 10 10V C521 1 164 850 11 CERAMIC CHIP 10PF 0 50PF 50V C522 1 164 850 11 CERAMIC CHIP 10PF 0 50PF 50V C523 1 164 850 11 CERAMIC CHIP 10PF 0 50PF 50V C524 1 119 923 1...

Page 48: ...158 21 CONNECTOR FFC FPC ZIF 10P CN801 1 778 178 21 CONNECTOR FFC FPC ZIF 30P DIODE D101 8 719 056 72 DIODE UDZ TE 17 2 4B D201 8 719 056 72 DIODE UDZ TE 17 2 4B D301 8 719 975 43 DIODE RB420D D304 8 719 066 17 DIODE FTZ6 8E T148 D601 8 719 081 33 DIODE MA2YD15LS0 D602 8 719 081 33 DIODE MA2YD15LS0 D603 8 719 081 33 DIODE MA2YD15LS0 D604 8 719 081 33 DIODE MA2YD15LS0 D605 8 719 081 33 DIODE MA2YD1...

Page 49: ...218 990 11 SHORT 0 R117 1 208 635 11 RES CHIP 10 5 1 16W R118 1 218 961 11 RES CHIP 4 7K 5 1 16W R119 1 218 990 11 SHORT 0 R120 1 218 990 11 SHORT 0 R121 1 218 977 11 RES CHIP 100K 5 1 16W R122 1 218 977 11 RES CHIP 100K 5 1 16W R123 1 218 977 11 RES CHIP 100K 5 1 16W R124 1 208 715 11 METAL CHIP 22K 1 1 16W R126 1 208 715 11 METAL CHIP 22K 1 1 16W R127 1 208 935 11 METAL CHIP 100K 1 1 16W R128 1 ...

Page 50: ...100K 5 1 16W R320 1 218 949 11 RES CHIP 470 5 1 16W R321 1 218 973 11 RES CHIP 47K 5 1 16W R322 1 218 446 11 METAL CHIP 1 5 1 16W R323 1 218 446 11 METAL CHIP 1 5 1 16W R324 1 218 989 11 RES CHIP 1M 5 1 16W R325 1 218 941 11 METAL CHIP 100 1 1 16W R326 1 218 941 11 RES CHIP 100 5 1 16W R327 1 218 989 11 RES CHIP 1M 5 1 16W R328 1 218 989 11 RES CHIP 1M 5 1 16W R329 1 218 941 11 METAL CHIP 100 1 1 ...

Page 51: ... 21 RES NETWORK CHIP TYPE 3 3K RB702 1 233 967 11 RES NETWORK CHIP TYPE 10K RB801 1 233 973 11 RES NETWORK CHIP TYPE 100K VALIABLE RESISTOR RV301 1 223 874 11 RES VAR CARBON 10K 10K w VOL SWITCH S301 1 572 922 11 SWITCH SLIDE MIC SENS S801 1 572 922 11 SWITCH SLIDE HOLD S802 1 771 860 21 SWITCH PUSH 1KEY PROTECT S803 1 771 483 61 SWITCH PUSH 1KEY HALF LOCK S804 1 762 805 21 SWITCH PUSH 1KEY OPEN C...

Page 52: ...STORY Clicking the version allows you to jump to the revised page Also clicking the version at the upper right on the revised page allows you to jump to the next revised page Ver Date Description of Revision 1 0 2001 10 New ...

Reviews: