background image

Se
tu

ps

Setting a Camera

25

Setting the Camera Properties

After registration of the camera in the 

Camera 

Manager

 window, set the properties of the camera.

To start the setting, select the camera from the camera 
tree or the camera list. Then set the parameters on the 

Camera Properties

 dialog. The 

Camera Properties


dialog has four tabs.

Note

It will take about 30 seconds maximum to apply the 
modified settings on the 

Camera Properties

 dialog to 

the camera.

General tab

Displays the basic information on the camera.

Name

Displays the camera name. To change the camera name, 
enter a new name in this box.

Type

Displays the camera model name.

Network

Displays 

TCP/IP

.

Network edit button

To change the network settings, click this button.  The 

Network Settings

 dialog appears.

For details, see “Network Settings dialog” below.

Network Settings dialog

Use this dialog to modify the network settings made 
when the camera has been registered.
The 

Network Settings 

dialog has two tabs.

Network Settings – General tab

Displays the port name in the 

Name

 box.

Network Settings – TCP/IP tab

IP Address

Enter the IP address or host name of the camera.

Port

Enter the port number of the camera.

Proxy Server

If you access the camera via a proxy server, select the 

Use a proxy server for this port

 checkbox and enter the 

IP address or host name of the proxy server and the port 
number.

To save the settings, click 

OK

.

Summary of Contents for Network Camera Recorder V 1.0

Page 1: ...3 869 357 11 1 Network Camera Recorder 2004 Sony Corporation User s Guide Software Version 1 0 ...

Page 2: ... MANUAL OR SUCH INFORMATION IN NO EVENT SHALL SONY CORPORATION BE LIABLE FOR ANY INCIDENTAL CONSEQUENTIAL OR SPECIAL DAMAGES WHETHER BASED ON TORT CONTRACT OR OTHERWISE ARISING OUT OF OR IN CONNECTION WITH THIS MANUAL OR INFORMATION CONTAINED HEREIN OR THE USE THEREOF Sony Corporation reserves the right to make any modification to this manual or the information contained herein at any time without...

Page 3: ...ng Using the Preset Function of the Camera SNC M3 M3W only 15 Recording the Camera Image Manual Recording 17 Recording Using the Recorder Toolbar 17 Playing Back Recorded Images 17 Searching for Recordings 17 Displaying a Preview Image 20 Playing Back the Located Recording 20 Deleting Recordings 21 Exporting to an AVI File 22 Setups Setting a Camera 24 Camera Manager Window 24 Registering a Camera...

Page 4: ...g of the image as well as audio from the camera A recording schedule can be set by day or by week at preset times on each camera Playback of recorded data This application allows various playback modes of the recorded data such as fast forward rewind frame playback slow playback and cue to the point where playback started System Configuration Cameras are connected to a network and controlled by a ...

Page 5: ...tion line etc The above are reference values Installing Network Camera Recorder To install Network Camera Recorder open the software package and perform the following procedure For installation you should log in the computer as the Power User or Administrator 1 Double click NCR_Setup exe of the package The installation wizard appears on the screen 2 Click Next The User Interface Languages dialog a...

Page 6: ...C Sony Network Camera Recorder To change to another location click Browse navigate to a folder in which to install the program and click OK Then click Next to display the Select Program Folder dialog 5 Click Next The Select Program Folder dialog appears The default folder is set to Network Camera Recorder To change to another folder name enter your preferred name in the text box 6 Click Next Insta...

Page 7: ...ep by step for a user using the software for the first time after installation For detailed operations read the Operations and Setups chapters on pages 12 and after Operation procedures 1 Start the program To view the image of the camera 2 Register the camera 3 Assign a camera to the monitor window After the image of the camera is displayed 4 Control the camera 5 Record the camera image 6 Play the...

Page 8: ...rs 2 Click Add Camera If the icon is not green click Cameras The Add Camera icon turns green and is enabled The Add Camera dialog appears 3 Select or enter the parameters in the Add Camera dialog Enter the same IP address as that used for monitoring the camera using Web brower The port number is 80 by default For details on the port number refer to the User s Guide of the Network Camera For detail...

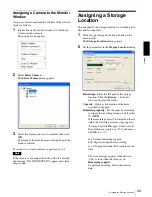
Page 9: ...a to the Monitor Window As the second step for monitoring you need to assign the registered camera to the monitor window As no camera has been assigned by default NO CAMERA is displayed on the monitor screen 1 Right click on the monitor window of the main window A pop up menu appears 2 Click Select Camera in the pop up menu The Select Camera dialog appears 3 Click on the name of the camera you wan...

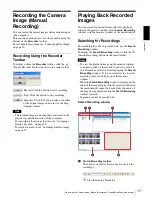
Page 10: ...You can record the image of the camera you are monitoring For recording use the buttons on the Recorder toolbar Tips You can preset a recording schedule such as the date or the days of the week and perform the recording automatically according to the schedule For details see Scheduling Recordings in the Setups chapter page 30 The default storage location of recordings is set to C Program Files Son...

Page 11: ...r window 4 Click N Play on the Playback toolbar Playback starts By clicking x Cue to Begin the display goes back to the image at the beginning of the recording and playback stops 5 To return to monitoring the camera image click Return to Camera s on the Playback toolbar Tips The buttons on the Playback toolbar allow various playback modes such as fast forward rewind frame playback slow playback an...

Page 12: ...age 24 Storage Location page 29 Select Layout box page 28 Schedule Editor page 30 Search Recording page 17 Toggle Recorder Toolbar page 17 Toggle Playback Toolbar page 20 Toggle Pan Tilt Toolbar page 15 Toggle Pan Tilt Presets Toolbar page 15 Audio Mute page 14 3 Functional Toolbars Allows control of the camera The display of each functional toolbar is enabled or disabled by the specific toggle bu...

Page 13: ...to the selected camera you can monitor the audio together with the camera image If you are monitoring multiple cameras click on the monitor window showing the image of the camera whose you want to monitor The audio of the selected camera is heard Using the Pop up Menu in the Monitor Window Right clicking in the monitor window with a camera image displays a pop up menu The pop up menu allows you to...

Page 14: ...ain to clear the checkmark Display in the monitor window To scale the monitoring image to fit the monitor window You can scale the image in the monitor window using Scale to Window and Keep Aspect in the pop up menu Scale to Window Click on this item to make the checkmark visible to enable scaling of the camera image according to the size of the monitor window Click on it again to clear the checkm...

Page 15: ...ra does not operate properly The camera only pans and tilts within the 1 image area using the pan and tilt direction buttons Panning Tilting Using the Preset Function of the Camera SNC M3 M3W only The SNC M3 M3W is equipped with the preset function to store up to 8 camera positions You can move the camera to the preset position specified in the camera using the buttons on the Pan Tilt Presets tool...

Page 16: ...n on the Pan Tilt Presets toolbar The Pan Tilt Presets dialog appears 2 Select the camera from the drop down list of the Select Camera box 3 Select the preset position you want to change or delete and click the Move Camera to Selected Preset button The camera moves to the selected preset position 4 Change the required item s a To change the preset name Enter a new name in the Preset Name box then ...

Page 17: ... see Searching for Recordings on page 17 Playing Back Recorded Images You can search for recorded data and view playback either in the preview window of the Search Recording window or in the monitor window of the main window Searching for Recordings For searching for a file of recorded data use the Search Recording window To display the Search Recording window click the Search Recording button on ...

Page 18: ...ed camera s are shown on the list view or timeline in the Search Recording window To search by date and time To search for a recording made on a specified date and time select the date and time with the calendar or date picker The data recorded on the specified date and time are shown on the list view or timeline in the Search Recording window To specify the date and time with the calendar Click o...

Page 19: ...he file name of the recording Files Displays the number of files into which the recording is separated Start Available The available playback start time is displayed here because some files at the beginning of the recording may have been overwritten by the Old file overwriting function and the start time has changed For details on the Old file overwriting function see Assigning a Storage Location ...

Page 20: ...or Recordings on page 17 Playback toolbar To display the Playback toolbar click the Toggle Playback Toolbar button on the main toolbar To return to monitoring the camera image Click the Return to Camera s button on the Playback toolbar Date time and timeline The date and time of the recording is displayed on the upper part of the timeline The header M indicates manual recording and S indicates sch...

Page 21: ...dings reverse playback is disabled Images will be distorted if you perform reverse playback using the shuttle slider To play the previous or next recording If more than one recording is located it is possible to play between recordings Click the Previous Recording button on the Playback toolbar to start play at the beginning of the recording previously made on the timeline Click the Next Recording...

Page 22: ...olbar The arrows are displayed at the recording start and end points by default 5 Click the Export Recording button on the search recording toolbar The Export Recording dialog appears 6 Set the parameters in the Export Recording dialog For details on each parameter see Export Recording dialog on page 22 7 Click Export File conversion starts Watch the progress bar to monitor the conversion 8 When t...

Page 23: ...erties of video codec Show all available codecs By selecting this checkbox a wide choice of video codecs among from all the ones available for your computer is possible Output File Enter the path of the destination of export Click the Browse button to browse and select the destination folder Note You cannot play back the exported AVI file if your computer is not equipped with the codec used for ex...

Page 24: ...red 1 Click the Add Camera button on the Camera Manager toolbar The Add New Camera dialog appears Note If the button is grayed out click on Cameras in the camera tree The button turns green and is enabled 2 Set the parameters in the Add New Camera dialog Select a camera type Select the model name of the camera from the drop down list Name Enter the name of the camera IP address Enter the IP addres...

Page 25: ...his box Type Displays the camera model name Network Displays TCP IP Network edit button To change the network settings click this button The Network Settings dialog appears For details see Network Settings dialog below Network Settings dialog Use this dialog to modify the network settings made when the camera has been registered The Network Settings dialog has two tabs Network Settings General tab...

Page 26: ... JPEG images 1 2 3 and 4 ftp cannot be set via the Web browser because these parameters are included in the Network Camera Even if you select 30 ftp when 1 to 4 ftp has been set on the Network Camera the setting in Network Camera Recorder does not change from 1 to 4 ftp when it is restarted Setting a value other than 30 ftp via the Web browser allows change in the setting in Network Camera Recorde...

Page 27: ...e camera whose properties you want to change from the camera tree or the camera list in the Camera Manager window The Camera Properties dialog appears 2 Change the parameters in the Camera Properties dialog For details on each parameter see Setting the Camera Properties on page 25 3 Click the Apply button in the Camera Properties dialog to save the changed settings Note The camera properties canno...

Page 28: ...nitor and assign the camera s to the monitor window Selecting a Layout Click on the Select Layout box on the main toolbar and select a layout from the drop down list The monitor window changes to the selected layout Layout types The following eight layouts are available Layout A 1 camera Layout B 2 cameras Layout C 2 cameras Layout D 3 cameras Layout F 3 cameras Layout G 4 cameras Layout H 4 camer...

Page 29: ...files and for snapshots 1 Click the Storage Locations button on the main toolbar The Storage Location dialog appears 2 Set the parameters in the Storage Location dialog Recordings Enter the full path of the storage location Click the Browse button to browse and select the folder Capacity Displays information of the drive specified in the path Remaining capacity Set the capacity remaining to trigge...

Page 30: ...ction is activated for the path currently specified If you change the path data in the old path cannot be overwritten If overwriting of an old file failed the following error message appears Storage Location Manager Cannot overwrite the oldest file cannot access the oldest file Recording will be stopped file name After file name the path and the file name are displayed This error message appears w...

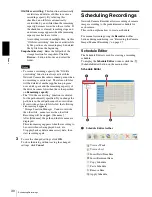
Page 31: ...of the week view appears in the right window 3 Click the Insert Recurrent Item on the Schedule Editor toolbar A dummy event is displayed as a green square on the timeline and the Schedule Properties dialog is enabled To create a date time event use the list view 4 Set the parameters of the schedule in the Schedule Properties dialog For details of the setting see To set the schedule parameters on p...

Page 32: ...y hours minutes or seconds Weekdays Displays the abbreviations of the days of the week for a recurrent event To save the schedule Click the Apply Schedule button on the Schedule Editor toolbar Then click OK in the confirmation dialog To change the schedule Select the event you want to change in the list view or week view and change the parameters in the Schedule Properties dialog To delete the sch...

Page 33: ... synchronized This is not a failure Exported data cannot be viewed on another computer The codec used for export must be installed on the computer No sound is heard during playback of the data exported to an AVI file Audio data cannot be exported to the AVI file Network Camera Recorder operates normally but an error message is displayed at the bottom of the window The display of the last error mes...

Page 34: ...PEG Abbreviation for Joint Photographic Expert Group The still image compression technology or standards of the ISO International Organization for Standardization and ITU T Popularly used as image compression format on the Internet etc MPEG4 Abbreviation for Moving Picture Experts Group4 One of the MPEG standards for image compression format aiming to transmit images at a high compression rate wit...

Page 35: ...Manual Recording 17 Mark In for Exporting 22 Mark Out for Exporting 22 Mic Volume 27 Microphone 27 Monitor window 12 Monitoring 13 Mount Angle 26 N Name 25 Network 25 Network Settings dialog 25 Next Date 19 O Old file overwriting 30 P Pan Tilt Presets toolbar 15 16 Pan Tilt toolbar 10 15 Panning 15 Path of the storage location 29 Pause 21 Picture tab 26 Play the Recorded Image 10 Playback 21 Playb...

Page 36: ...lting 15 Timeline 19 timeline 19 To create a date time event 32 To create a recurrent event 31 To edit or delete a preset position 16 To mute the sound 14 To scale the monitoring image 14 To store new preset positions 16 Troubleshooting 33 Type 25 U Uninstall Network Camera Recorder 7 V Various speed playback 21 Video Codec 23 26 View 14 W Week view 31 Z Zoom In Date Time 18 Zoom Out Date Time 18 ...

Page 37: ...Sony Corporation ...

Reviews: