NSP 100
Op
er
at
io
n
Preparations
9
Operation
Preparations
This section describes the preparations for operating the
NSP-100 with the supplied remote controller, after
making the required connections (see page 24).
For details of preparations to operate the NSP-100 from
a computer or through a network, refer to the Help
information for the BZNP-100 Software.
Remote Controller Preparations
The remote controller is supplied with a CR2025 lithium
battery and insulating film installed. Removing the
insulating film allows the battery to be used.
Replacing the Battery
On the back of the remote controller, pull out the battery
holder. Insert the CR2025 lithium battery with the
positive side up, then return the battery holder to its
original position.
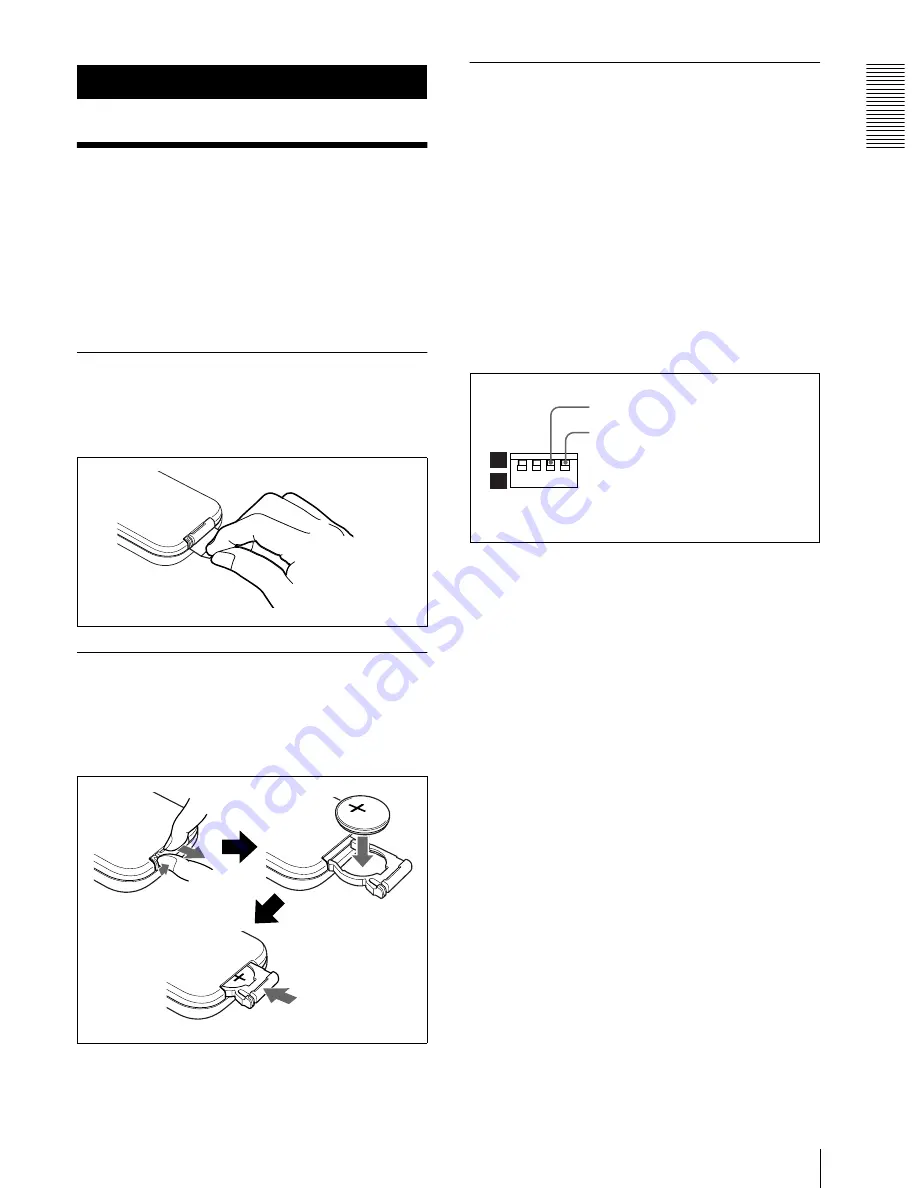
Main Unit DIP Switch and Remote
Controller Settings
To operate the NSP-100 with the remote controller, in
the DIP switches on the rear panel of the main unit, set
the third switch from the left to the 1 position (ON).
Then set the remote controller to correspond with the
code number setting of the rightmost switch as follows.
When the code number is 1 (the switch is in the “1”
position): Hold down the STOP and PAUSE
buttons on the remote controller, then press numeric
button 1.
When the code number is 2 (the switch is in the “2”
position): Hold down the STOP and PAUSE
buttons on the remote controller, then press numeric
button 2.
When operating two NSP-100 units with a
single remote controller
Set the code number to 1 on one of the NSP-100 units,
and set the code number to 2 on the other unit. To switch
the remote controller from one unit to the other, use the
same method as above.
1
2
Set to the “1” position (ON).
To correspond with the setting of this
switch, press numeric button 1 or 2 on
the remote controller while holding
down the STOP and PAUSE buttons.


