– 8 –
6
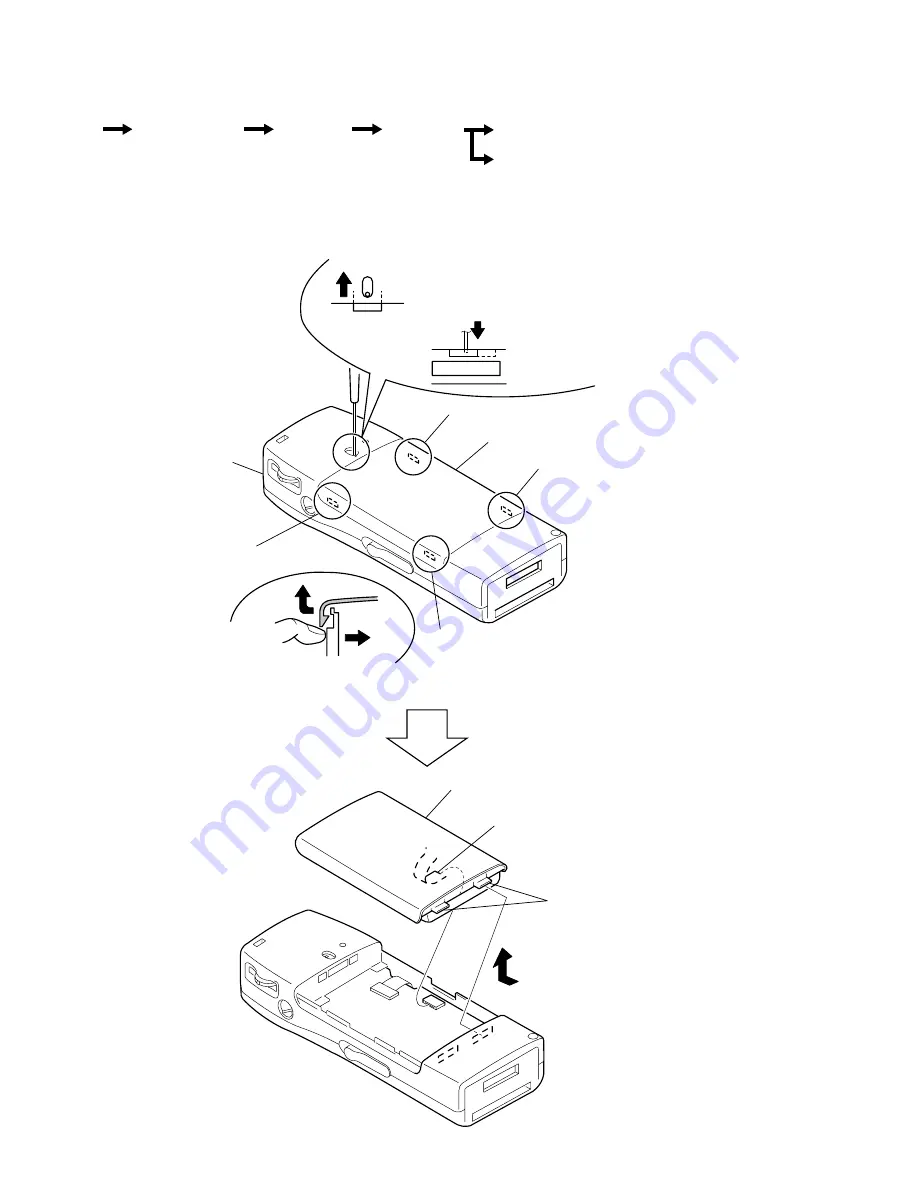
claws
8
lid, battery case
7
CN501
5
claw
3
claw
LCD unit
2
claw
case
2
–
5
1
Move the stopper in the direction of
the arrow with a screwdriver or other means,
then push in the claw.
4
claw
Use your fingernail to push the “lid, battery case” up.
lid, battery case
Note:Do not push the stopper downward.
The LCD unit may be damaged.
Note : This set can be disassemble according to the following sequence.
SECTION 2
DISASSEMBLY
Note : Follow the disassembly procedure in the numerical order given.
2-1. LID, BATTERY CASE
Set
Lid, Battery Case
Case Assy
Main Board
LCD Block
HP Board, CN Board


