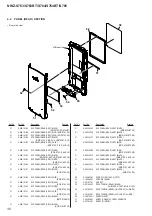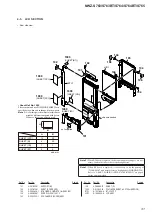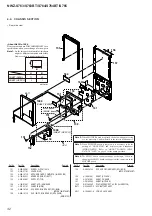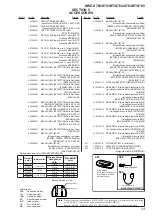
background image

NWZ-S763/S763BT/S764/S764BT/S765

24

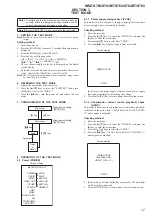
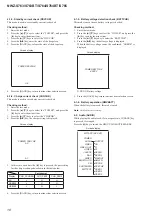
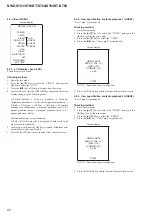
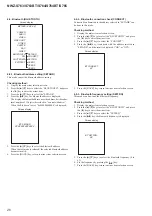
4-5-2.  Key check (KEY)

The operation of the key is con

fi

 rmed.

Checking method:

1.  Enter the test mode.
2.  Press the [

v

]/[

V

] keys to select the “OTHER”, and press the 

[

B

] key to enter the minor item.

3.  Press the [

v

]/[

V

] keys to select the “KEY”.

4.  Press the [

u

] key, all keys are displayed.


Screen display

OTHER KEY

                       UP             VOL+

REW        PLAY    FF    VOL–

                    DOWN     OPTION

HOLD                               BACK

BT

START

5.  The character corresponding to the key is selected every time 

the key is pressed. Con

fi

 rm the character colors other than 

“BT” changed.

6.  Slide the [HOLD] key from ON to OFF, return to minor item 

selection screen.

4-5-3.  Frequency check that presses key (KEYNUM)

The frequency to which the key is pressed, insert/pull out frequen-
cy of cradle and insert/pull out frequency of the headphone are 
displayed.

Note:

 Not used for the servicing.

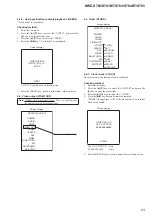
4-5-4. Format (FORMAT)

The user’s area is formatted, and ICV for the video and ICV for 
audio are initialized. 

Note:

 Not used for the servicing.


Format the set from “Settings” 

 “Common settings” 

 “Reset/

Format” 



“Format” when it home menu in usually operates when 

the set should format it. 

4-5-5.  Destination setting (DEST)

The destination setting, language information, and sound pressure 
regulation information are written in the NAND 

fl

 ash memory.

Note:

 Not used for the servicing.

4-5-6.  Sound pressure regulation setting (SPSET)

ON/OFF of sound pressure regulation is con

fi

 rmed.

Note:

 Not used for the servicing.

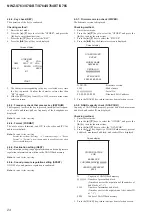
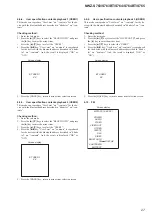
4-5-7.  Firmware version check (FWVER)

The 

fi

 rmware version is displayed.

Checking method:

1.  Enter the test mode.
2. Press the [

v

]/[

V

] keys to select the “OTHER” and press the 

[

B

] key to enter the minor item.

3.  Press the [

v

]/[

V

] keys to select the “FWVER”.

4.  Press the [

u

] key, the 

fi

 rmware version is displayed.


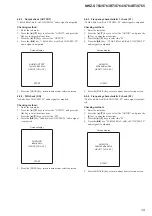
Screen display

OTHER FWVER

X.XX.XX

MODEL NAME

NWZ-####

SERIAL NO

@@@@@@@

BT MAC ADR

$$-$$-$$-$$-$$-$$

    X.XX.XX 

: Firmware version

    #### 

: Model name

    @@@@@@@ 

: Serial No.

    $$-$$-$$-$$-$$-$$ 

: Bluetooth MAC address

5.  Press the [BACK] key, return to minor item selection screen.

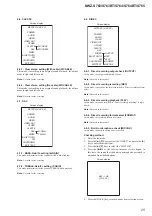
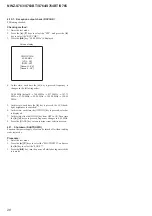
4-5-8.  NAND capacity check (NCAPCHK)

Capacity of NAND 

fl

 ash memory, present bad block, maximum 

bad block, and vender ID are displayed. 

Checking method:

1.  Enter the test mode.
2. Press the [

v

]/[

V

] keys to select the “OTHER”, and press the 

[

B

] key to enter the minor item.

3.  Press the [

v

]/[

V

] keys to select the “NCAPCHK”.

4. Press the [

u

] key, capacity of NAND 

fl

 ash memory, present 

bad block, maximum bad block, and vender ID are displayed.


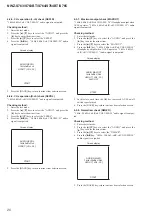
Screen display

OTHER NCAPCHK

X GB

BADBLOCK

CUR (####)/MAX (@@@@)

VENDOR (XXXXXXXX)

$$$$

    X 

: Capacity of NAND 

fl

 ash memory

    @@@@  : Number of present bad block
     

  (It makes an error the acquisition of the number of 

bad blocks at “–1”)

    #### 

:  Number of maximum bud block


  (It makes an error the acquisition of the vender ID 

at “–1”)

    $$$$ 

: Vender of NAND 

fl

 ash memory

5.  Press the [BACK] key, return to minor item selection screen.

Summary of Contents for NWZ-S76

Page 1: ...rofile Baseline Profile Number of pixels Max 4 096 4 096 pixels 16 000 000 pixels r e d l o f s e l i f 0 0 0 1 x a M s e l i f f o r e b m u n e h T Voice Recording Audio Format Codec MP3 Bit rate 64 128 256 kbps Sampling Frequency 44 1 kHz 1 The maximum recordable number of podcasts is 20 000 2 Sampling frequency may not correspond to all encoders 3 Copyright protected AAC LC files cannot be pla...

Page 2: ...2001 2002 2003 2004 2005 2006 Expat maintainers Permission is hereby granted free of charge to any person obtaining a copy of this software and associated documentation files the Software to deal in the Software without restriction including without limitation the rights to use copy modify merge publish distribute sublicense and or sell copies of the Software and to permit persons to whom the Soft...

Page 3: ...15 2 14 MOTHER Board 16 3 TEST MODE 17 4 EXPLODED VIEWS 4 1 Cabinet Front Section 29 4 2 Panel Rear Section 30 4 3 LCD Section 31 4 4 Chassis Section 32 5 ACCESSORIES 33 TABLE OF CONTENTS SAFETY RELATED COMPONENT WARNING COMPONENTS IDENTIFIED BY MARK 0 OR DOTTED LINE WITH MARK 0 ON THE SCHEMATIC DIAGRAMS AND IN THE PARTS LIST ARE CRITICAL TO SAFE OPERATION REPLACE THESE COMPONENTS WITH SONY PARTS ...

Page 4: ...me Edition 2 Service Pack 3 or later Windows XP Professional 2 Service Pack 3 or later Windows Vista Home Basic Service Pack 1 or later Windows Vista Home Premium Service Pack 1 or later Windows Vista Business Service Pack 1 or later Windows Vista Ultimate Service Pack 1 or later Windows 7 Starter Windows 7 Home Basic Windows 7 Home Premium Windows 7 Professional Windows 7 Ultimate Not supported b...

Page 5: ...attery assy BAT1 wire wire Wrap by the tape etc and insulate the end of wire COLOR VARIATION Model Destination Color Black White Violet Blue Gold Pink NWZ S763 East European z z z NWZ S763BT East European z NWZ S764 AEP UK z z z East European z z E Australian Tourist z z z Mexican z Indian z z Chinese z z z NWZ S764BT US z z Canadian z z z z AEP UK z E Tourist z NWZ S765 AEP UK z z East European z...

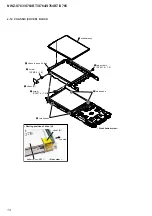
Page 6: ... HP JACK ASSY HPJ1 Page 12 2 13 LCD ASSY LCD1 Page 15 2 11 BATTERY ASSY BAT1 Page 13 2 12 CHASSIS COVER ASSY Page 14 2 14 MOTHER BOARD Page 16 SET 2 3 OPEN THE SHORT LAND Page 8 2 7 BT VOL FPC BTV1 Page 10 2 5 PANEL REAR ASSY Page 9 2 4 CAP Page 8 2 6 EMMC BOARD Page 9 2 9 BT BOARD Page 12 2 8 SUPPORT M Page 11 2 2 CABINET FRONT BLOCK Page 7 ...

Page 7: ...w Front bottom view Front bottom view JIG When disassembling the set use the following jig Part No 9 913 402 33 Tool for Disassembly 8 cabinet front block Right side knob hold switch 4 Note 5 When installing cabinet front block the position of switch and knob hold is set and installed Note 2 Take care because the plate bends outside if the cabinet front block is rotated Note 2 Take care because th...

Page 8: ...he short land after all wirings are connected when you exchanged some mounted board 2 4 CAP 1 Remove the solder of short land 1 screw M1 4 u 2 5 2 Push the part A A 3 Move the panel rear assy in the direction of the arrow B a little 4 Remove the claw after moving the cap in the direction of the arrow C 4 Remove the claw after moving the cap in the direction of the arrow C B C 1 screw M1 4 u 2 5 5 ...

Page 9: ...hanging the EMMC board exchange it at the same time as the MOTHER board 2 5 PANEL REAR ASSY 3 4 1 screw M1 4 u 2 5 2 boss 2 boss 5 panel rear assy 1 screw M1 4 u 2 5 Front bottom view 3 1 cushion NAND 4 EMMC board 2 connector Note 2 Lift vertically the EMMC board when you remove the connector Rear bottom view ...

Page 10: ...BT BT board MOTHER board MOTHER board EMMC board 3DVWLQJ SRVLWLRQ RI VKHHWV 3DVWLQJ SRVLWLRQ RI VKHHW 1 top side top side top side top side bottom side bottom side sheet FPC Insert is straight to the interior connector Insert is incline flexible cable flexible cable connector OK 1 Note When you install the flexible cable please install them correctly There is a possibility that this machine damage...

Page 11: ...ery wires not in slot 3 boss 3 boss 6 support M 5 BT allignment label support M support M LUH SURFHVVLQJ RI EDWWHU DVV 7 wire of battery assy BAT1 2 Lift wires of battery assy BAT1 bottom side bottom side bottom side 5HDU ERWWRP YLHZ battery assy BAT1 MOTHER board OK NG 3DVWLQJ SRVLWLRQ RI VKHHW 0 ...

Page 12: ...HHW 7 top side 3 two screws P2 M1 4 u 1 4 Note 3 When you install the flexible cable please install them correctly There is a possibility that this machine damages when not correctly installing it Insert is straight to the interior connector Insert is incline flexible cable flexible cable connector OK NG 1 two claws 3 flexible board 8 3pin HP jack assy HPJ1 7 holder HP 2 escutcheon rear 6 5 three ...

Page 13: ...H SURFHVVLQJ RI EDWWHU DVV 7 OK NG 1 Remove the LCD assy flexible board in the direction of arrow A 3DVWLQJ SRVLWLRQ RI VKHH 5HDU ERWWRP YLHZ 5HDU YLHZ A two ditches two ribs Note 1 There is a possibility of damaging LCD assy flexible board when removing excluding the direction of arrow A Note 2 Please match the position of two ditches and two ribs when you install LCD assy flexible board If putti...

Page 14: ...SIS COVER BLOCK 5 chassis cover block 4 two bosses 4 two bosses 1 window assy 3 screw P2 M1 4 u 1 4 2 sheet D 3 two screws P2 M1 4 u 1 4 Front bottom view battery assy BAT1 3DVtinJ SoVition oI VKee 5eDr view sheet D top side 3 screw P2 M1 4 u 1 4 ...

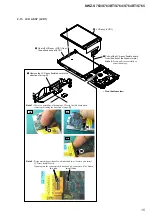
Page 15: ...le board in the direction of arrow A A two ditches two ribs Note 1 There is a possibility of damaging LCD assy flexible board when removing excluding the direction of arrow A Note 2 Please match the position of two ditches and two ribs when you install LCD assy flexible board If putting into the connector shift ditch and rib connector will be broken OK NG NG Front bottom view 2 Peel off LCD assy L...

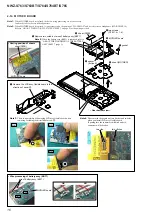
Page 16: ...refer to ABOUT THE HANDLING OF THE BATTERY ASSY BAT1 page 5 6 sheet MOTHER 8 spacer button E 7 gusket 9 MOTHER board wire of battery assy BAT1 MOTHER board sheet PWB MOTHER board red gap black LUH SURFHVVLQJ RI EDWWHU DVV 7 OK NG 3DVWLQJ SRVLWLRQ RI VKHHWV 4 two screws P2 M1 4 u 1 4 5HDU ERWWRP YLHZ 1 Remove the LCD assy flexible board in the direction of arrow A A two ditches two ribs Note 3 Ther...

Page 17: ... RMVBATT 4 1 1 Power supply voltage check VCHK This mode is used in case power supply voltage in the state where all power supply lines are starting is checked Checking method 1 Enter the test mode 2 Press the v V keys to select the POWER and press the B key to enter the minor item 3 Press the v V keys to select the VCHK 4 Press the u key all power supply lines are started Screen display POWER VCH...

Page 18: ...own in the table below Port control Display CHG_XCHGEN CHG_PEN1 CHG_PEN2 AC L H H USB500 L H H USB100 L H L 6 Press the BACK key return to minor item selection screen 4 1 5 Battery voltage detection check BATTCHK This mode is used in case battery voltage is checked Checking method 1 Enter the test mode 2 Press the v V keys to select the POWER and press the B key to enter the minor item 3 Press the...

Page 19: ... Infinity Zero HPOUT VOL 25 START 5 Press the BACK key return to minor item selection screen 4 2 3 Frequency characteristic 1 check F1 20 Hz 0 dBs L ch R ch VOLUME 25 audio signal is outputted Checking method 1 Enter the test mode 2 Press the v V keys to select the AUDIO and press the B key to enter the minor item 3 Press the v V keys to select the F1 4 Press the u key 20 Hz 0 dBs L ch R ch VOLUME...

Page 20: ...2 7 Maximum output check MAXOUT 1 kHz 0 dBs L ch R ch VOLUME 30 Headphone output when AVLS operates 1 kHz 0 dBs L ch R ch VOLUME 13 audio signal is outputted Checking method 1 Enter the test mode 2 Press the v V keys to select the AUDIO and press the B key to enter the minor item 3 Press the v V keys to select the MAXOUT 4 Press the u key 1 kHz 0 dBs L ch R ch VOLUME 30 Headphone output when AVLS ...

Page 21: ...ER1 4 Press the u key User1 oma is reproduced Screen display AUDIO USER1 HPOUT VOL 15 XX XX START XX XX Repetition expert totaling time 5 Press the BACK key return to minor item selection screen 4 2 12 User specification contents playback 2 USER2 User2 oma is reproduced Checking method 1 Enter the test mode 2 Press the v V keys to select the AUDIO and press the B key to enter the minor item 3 Pres...

Page 22: ...ides is seen is confirmed 5 In this state each time the B key is pressed brightness min max middle switch is performed 6 Press the BACK key return to minor item selection screen 4 3 2 User specification contents playback 1 USER1 User1 mp4 is reproduced Checking method 1 Enter the test mode 2 Press the v V keys to select the VIDEO and press the B key to enter the minor item 3 Press the v V keys to ...

Page 23: ...Screen display MPTAPP X XX XX POWER AUDIO VIDEO VIDEO OUT OTHER CLESTE BLUETOOTH DIREC DAC FM SHUTDOWN EXITTEST Do not select VIDEO OUT 4 5 Other OTHER Screen display MPTAPP X XX XX POWER AUDIO VIDEO VIDEO OUT OTHER CLESTE BLUETOOTH DIREC DAC FM SHUTDOWN EXITTEST CLOCK KEY KEYNUM TOUCH FORMAT DEST SPSET FWVER NCAPCHK 4 5 1 Clock check CLOCK The movement of an internal clock is confirmed Checking m...

Page 24: ... memory Note Not used for the servicing 4 5 6 Sound pressure regulation setting SPSET ON OFF of sound pressure regulation is confirmed Note Not used for the servicing 4 5 7 Firmware version check FWVER The firmware version is displayed Checking method 1 Enter the test mode 2 Press the v V keys to select the OTHER and press the B key to enter the minor item 3 Press the v V keys to select the FWVER ...

Page 25: ... X XX XX OUTPUT REC PLAY FORMAT MICCHK POWER AUDIO VIDEO VIDEO OUT OTHER CLESTE BLUETOOTH DIREC DAC FM SHUTDOWN EXITTEST 4 8 1 Direct recording output check OUTPUT In this mode the output confirmation is done Note Not used in this model 4 8 2 Direct recording recording REC In this mode it records by the format specified in Direct recording format select Note Not used in this model 4 8 3 Direct rec...

Page 26: ... 6 Press the BACK key return to minor item selection screen 4 9 2 Bluetooth connection check CONNECT Connected confirmation to the address selected in SETADR can be done in this mode Checking method 1 Display the major item selection screen 2 Press the v V keys to select the BLUETOOTH and press the B key to enter the minor item 3 Press the v V keys to select the CONNECT 4 Press the u key it connec...

Page 27: ... the BLUETOOTH and press the B key to enter the minor item 3 Press the v V keys to select the USER2 4 Press the u key User2 wav on contents is reproduced for the device with the bluetooth address described in bdadr txt on contents And the result is displayed OK or NG BT USER 2 Screen display XX 5 Press the BACK key return to minor item selection screen 4 9 6 User specification contents playback 3 ...

Page 28: ... MHz 98 00 MHz 108 00 MHz 100 00 MHz 5 In this state each time the B key is pressed the LCD back light brightness is switched 6 In this state each time the OPTION key is pressed color bar is displayed 7 In this state slide the HOLD key from OFF to ON Each time the B b keys are pressed frequency changes in 0 05 MHz 8 Press the BACK key return to minor item selection screen 4 11 Shutdown SHUTDOWN Fu...

Page 29: ...r BLACK VIOLET BLUE GOLD 5 4 289 930 01 SCREW 0 Z M1 4X2 5 3DOT 6 4 282 528 01 SHEET CAP ADHESIVE 7 4 293 221 01 SPACER BUTTON E Ref No Part No Description Remark Ref No Part No Description Remark Note XX and X mean standardized parts so they may have some difference from the original one Items marked are not stocked since they are seldom required for routine ser vice Some delay should be anticipa...

Page 30: ... CH 51 9 885 162 02 SVX PANEL REAR ASSY BLACK NWZ S764 MX 51 9 885 162 04 SVX PANEL REAR ASSY BLACK NWZ S764BT US 51 9 885 162 05 SVX PANEL REAR ASSY WHITE NWZ S764BT US 51 9 885 162 06 SVX PANEL REAR ASSY BLACK NWZ S764BT CND 51 9 885 162 07 SVX PANEL REAR ASSY WHITE NWZ S764BT CND 51 9 885 162 08 SVX PANEL REAR ASSY BLUE NWZ S764BT CND 51 9 885 162 09 SVX PANEL REAR ASSY PINK NWZ S764BT CND 51 9...

Page 31: ... etc are nec essary Confirm details to the service headquarters Note 3 When BT board is replaced it is necessary to do the pairing of WALKMAN and wireless stereo headphones MDR NWBT10 Refer to ABOUT PAIRING NWZ S763BT S764BT on page 4 for the pairing method LCD1 BTV1 105 103 104 chassis section B B A A 13 22 unit mm SHEET FPC 6 20 SHEET M 7 7 SHEET CN 5 5 SHEET BT 1000 SHEET FPC 1000 SHEET M 1000 ...

Page 32: ... Part No Description Remark Ref No Part No Description Remark Note 4 The EMMC board cannot exchange with single When ex changing the EMMC board exchange it at the same time as the MOTHER board HPJ1 159 152 155 157 151 151 156 BAT1 153 154 160 161 1000 SHEET PWB 1000 SHEET HP FPC B B A A 11 6 5 unit mm SHEET PWB 3 7 SHEET HP FPC AERXW 5HI 1R Please cut out and use POLYIMIDE SHEET for a specified si...

Page 33: ...64BT US CND AEP UK 4 288 589 21 MANUAL QSG BT HP Wireless Stereo Headphones User Guide DANISH FINNISH ITALIAN SWEDISH NWZ S764BT AEP UK 4 288 589 31 MANUAL QSG BT HP Wireless Stereo Headphones User Guide GREEK DUTCH NORWEGIAN PORTUGUESE NWZ S764BT AEP UK 4 288 589 41 MANUAL QSG BT HP Wireless Stereo Headphones User Guide CZECH HUNGARIAN POLISH SLOVAKIAN NWZ S764BT AEP UK 4 288 589 51 MANUAL QSG BT...

Page 34: ...765 REVISION HISTORY Checking the version allows you to jump to the revised page Also clicking the version at the top of the revised page allows you to jump to the next revised page Ver Date Description of Revision 1 0 2011 07 New ...

Reviews: