background image

VAIO® Computer Quick Start

78

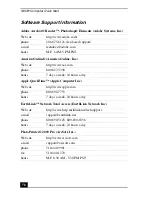
Software Support Information

Adobe Acrobat® Reader™, Photoshop® Elements (Adobe Systems, Inc.)

America Online® (America Online, Inc.)

Apple QuickTime™ (Apple Computer Inc.)

EarthLink™ Network Total Access (EarthLink Network Inc.)

PhotoPrinter® 2000 Pro (ArcSoft, Inc.)

Web site

http://www.adobe.com/

phone

206-675-6126 (fee-based support)

e-mail

techdocs@adobe.com

hours

M-F, 6 AM-5 PM PST

Web site

http://www.aol.com

phone

800-827-3338

hours

7 days a week, 24 hours a day

Web site

http://www.apple.com

phone

800-692-7753

hours

7 days a week, 24 hours a day

Web site

http://www.help.earthlink.net/techsupport

e-mail

support@earthlink.net

phone

800-890-5128, 800-890-6356

hours

7 days a week, 24 hours a day

Web site

http://www.arcsoft.com

e-mail

support@arcsoft.com

phone

510-440-9901

fax

510-440-1270

hours

M-F 8:30 AM - 5:30 PM PST

Summary of Contents for PCG-C1MV

Page 1: ...VAIO C1 PictureBook Computer Quick Start PCG C1MV PCG C1MV M PCG C1MVP PCG C1MVP M ...

Page 2: ......

Page 3: ...puter 13 Locating the Controls and Ports 14 Connecting a Power Source 19 Starting Your Computer 25 Shutting Down Your Computer 27 Setting Your Location for Your Modem 28 Using Power Saving Modes 30 Adding Memory 33 Precautions and Procedures 34 Removing a Memory Module 35 Installing a Memory Module 37 Confirming Added Memory Capacity 39 ...

Page 4: ...r Computer 58 Troubleshooting the LCD Screen 62 Troubleshooting the Mouse and Pointing Device 63 Troubleshooting Drives PC Cards and Peripheral Devices 65 Troubleshooting i LINK devices 67 Troubleshooting Software 68 Troubleshooting the Modem 70 Troubleshooting Audio 71 Troubleshooting Memory Stick Media 73 Getting Help 75 Support Options 76 Software Support Information 78 Sony Service Center 80 I...

Page 5: ...ife during mobile computer use Windows reported actual CPU speed may not reflect the maximum speed Portability The rechargeable battery pack provides hours of use without AC power Sony audio and video quality A high resolution LCD screen enables you to take advantage of today s advanced multimedia applications games and entertainment software Microsoft Windows operating system Your system includes...

Page 6: ...deo clips Unpacking Your Computer Remove the following hardware items from the box For a complete description of the specifications of your VAIO C1 PictureBook computer see the VAIO Computer Specifications flyer supplied with your computer Main Unit Power Cord AC Adapter Audio Video Cable Rechargeable Battery Pack Port Replicator Spare Pointing Device Covers ...

Page 7: ...IO Computer Specifications flyer Details the hardware specifications for your notebook Software CD Microsoft Word Enables you to reinstall Microsoft Word to the VAIO computer you purchased if the application becomes corrupted or is erased Recovery CDs Application Recovery CD s Enables you to reinstall individual applications if they become corrupted or erased Driver Recovery CD s Enables you to re...

Page 8: ...rt Talk to a Support Representative to troubleshoot problems you may be having with your notebook Limited Warranty Protect your investment See the Warranty Card for more details You are prompted to register your computer the first time you turn on the unit Follow the on screen instructions to complete the registration process If you are not able to register your computer during the first session y...

Page 9: ...ng to the Internet and then choosing an Internet Service Provider ISP or setting up an existing account Setting up your Internet connection 1 Click Start point to All Programs Accessories Communications and then click New Connection Wizard The Location Information screen appears Location Information screen 2 Follow the instructions onscreen and then click OK to continue The Phone and Modem Options...

Page 10: ...VAIO Computer Quick Start 10 Phone and Modem Options screen 3 Select the location from where you are dialing and then click OK The New Connection Wizard appears ...

Page 11: ...Setting up your dial up connection 11 New Connection Wizard 4 Follow the onscreen instructions to finish setting up your Internet connection ...

Page 12: ...VAIO Computer Quick Start 12 ...

Page 13: ... Computer This section describes the following topics Locating the Controls and Ports Connecting a Power Source Starting Your Computer Shutting Down Your Computer Setting Your Location for Your Modem Using Power Saving Modes ...

Page 14: ...VAIO Computer Quick Start 14 Locating the Controls and Ports Front 16 17 18 1 4 6 3 5 2 7 5 15 14 13 12 11 10 9 8 ...

Page 15: ...croll Lock indicator 3 Keyboard 12 Power button 4 Pointing device 13 Jog Dial control 5 Speakers 14 CAPTURE button 6 Left Center Right buttons 15 Microphone 7 Memory Stick media slot 16 Power indicator 8 Memory Stick indicator 17 Battery indicator 9 Num Lock indicator 18 Hard disk drive indicator ...

Page 16: ...1394 S400 port 3 PC Card slot 2 Peripheral device DC Out port Compatible with certain optical disc drives 4 Ventilation duct There is a ventilation duct located near the PC Card slot Do not cover the ventilation duct while your computer is on 1 2 3 4 ...

Page 17: ...Locating the Controls and Ports 17 Right 1 Headphone jack 4 USB port 2 Microphone jack 5 DC In port 3 I O port replicator connector cover 6 Phone line jack 1 4 6 3 5 2 ...

Page 18: ...VAIO Computer Quick Start 18 Bottom 1 Battery lock unlock lever 3 Battery unlock lever 2 Battery connector 1 3 2 ...

Page 19: ...rt on the computer 2 Plug one end of the power cord into the AC adapter 3 Plug the other end of the power cord into an AC outlet Connecting Computer to AC Outlet Use your notebook only with the supplied AC adapter To disconnect your notebook completely from the main power source unplug the AC adapter Make sure that the electrical outlet is easily accessible Notebook computer DC In AC adapter suppl...

Page 20: ...u will not be using the computer for a long time When the AC adapter is not in use unplug it from the AC outlet Use only the AC adapter supplied Do not use any other AC adapter Using battery power You can use a battery pack as a source of power The battery pack that comes with your computer is not fully charged at the time of purchase Follow the steps below to insert and charge the battery pack To...

Page 21: ...ouble blink pattern as the battery charges When the battery is 85 percent full the battery indicator light turns off This process takes several hours It takes longer to recharge the battery when the notebook is turned on than when it is turned off The battery indicator indicates the status of the battery pack Inserting Battery Pack You can charge the battery pack with an optional battery charger S...

Page 22: ...computer is using AC power Both the battery and power indicators blink when the battery is running out of power For some software applications and some peripheral devices your computer may not enter Hibernate mode when the battery life is low To avoid loss of data when using battery power you should save your data frequently and manually activate a power management mode such as Standby or Hibernat...

Page 23: ... This is normal and is not cause for concern Keep the battery pack away from all sources of heat Keep the battery pack dry Do not open or try to disassemble the battery pack Do not expose the battery pack to any mechanical shock If you are not using the computer for an extended period of time remove the battery pack from the computer to prevent damage to the battery If after fully charging the bat...

Page 24: ...k supplied with your computer is a lithium ion battery and can be recharged at any time Charging a partially discharged battery does not affect battery life The battery indicator light is on while you use the battery pack as a power source When battery life is nearly depleted the battery indicator starts flashing To insert the optional high capacity battery pack Insert the battery pack with the VA...

Page 25: ...e holding the bottom of the computer firmly Do not grasp the camera lens when opening the cover as this may damage the unit Opening Your Computer Turn the built in camera toward you before closing the cover Do not turn the built in camera while the cover is closed Camera ...

Page 26: ...the brightness controls for the LCD display To decrease the brightness press Fn F5 and then the down or left arrow key To increase the brightness press Fn F5 and then the up or right arrow key Turning on Your Computer If you press the power button for at least four seconds the computer turns off Power button Power indicator ...

Page 27: ...s follows Close all applications Remove the PC Cards Disconnect all USB devices 2 Restart the notebook You can restart your notebook by pressing the Ctrl Alt Delete keys simultaneously To avoid potential loss of data follow these steps to shut down your computer Respond to any prompts warning you to save documents During a period of inactivity you can conserve battery life by using Standby mode Se...

Page 28: ...nce dialing prefix The second entry controls how your modem interacts with the local phone network To set the Telephony Application Program Interface TAPI Country region 1 Click Start in the Windows taskbar click Control Panel and click the Printers and Other Hardware category icon The Printers and Other Hardware panel appears 2 Click the Phone and Modem Options control panel icon Phone and Modem ...

Page 29: ... Phone and Modem Options control panel icon Phone and Modem Options appears 3 Click the Modems tab 4 Select your modem from the Modem list 5 Click Properties The Modem Properties dialog box appears 6 Click the Advanced tab 7 Under Country Region Select select your country or region from the list 8 Click OK The Modem Properties dialog box closes saving your location selection 9 In Phone and Modem O...

Page 30: ... is in use The power indicator displays green when your notebook is in this mode To save power you can turn off a specific device such as the LCD or the hard disk Standby mode In Standby mode the computer saves the current state of the system in RAM and switches off power to the CPU The amber power indicator flashes in this mode To activate Standby mode 1 Press the key combination Fn Esc You can a...

Page 31: ... enters Hibernate mode 2 Press the power button to return to normal mode Notes on power saving modes When returning from Hibernate mode by pressing the power button momentarily the system status stored on the hard disk is erased and the computer starts normally Standby uses more power than Hibernate Standby requires less time than Hibernate to return to normal mode Do not move the computer until i...

Page 32: ...VAIO Computer Quick Start 32 ...

Page 33: ...ur computer for the amount of memory preinstalled on your computer Expansion memory modules are available as options For memory upgrades use only PCGA MM128T modules This section provides you with information on removing and replacing a memory module Precautions and Procedures Removing a Memory Module Installing a Memory Module Confirming Added Memory Capacity ...

Page 34: ...nd do not handle materials that produce or hold static electricity cellophane wrappers for example Ground yourself by maintaining contact with an unpainted metal portion of the chassis while performing the procedure Do not open the memory module package until you are ready to install the module The package protects the module from ESD Use the special protective package to store a memory module and...

Page 35: ...rewdriver to loosen and remove the screw that fastens the memory module cover plate on the bottom of the computer 4 Remove the memory module cover plate The interior of the computer becomes extremely hot during operation Wait at least one hour for the computer to cool down before you remove the screws To avoid damaging the computer do not remove or loosen any other screws Removing Cover Plate Scre...

Page 36: ...ect such as the connector panel on the back of your computer to discharge static electricity then remove the memory module pulling it out in the direction of the arrows 6 Close the cover panel and replace the fastening screw Removing a Memory Module ...

Page 37: ... on the back of your computer to discharge any static electricity accumulated on your body then remove the module from its protective package 3 Install the memory module by holding the module edge connector pointing down with the notch on the right and then insert it diagonally into the empty slot To avoid damaging the computer do not remove or loosen any other screws A Memory Module Notch Edge Co...

Page 38: ... the memory module until it clicks into place on both ends 5 Close the cover panel and replace the fastening screw Installing a Memory Module Do not touch any part of the motherboard or the other components inside the computer Empty Slot ...

Page 39: ... Notebook Setup 3 Click the About This Notebook tab Verify that the System Memory displayed in the left panel matches the amount of memory installed If the amount of memory is not correct shut down the computer and reinstall the memory module See Removing a Memory Module on page 35 and Installing a Memory Module on page 37 for instructions Sony Notebook Setup Dialog Box ...

Page 40: ...VAIO Computer Quick Start 40 ...

Page 41: ...u work play learn and communicate as soon as you turn it on This section gives you the following An overview of the various software that come with your computer and the activities you can perform with your software Details on your Sony application driver and system recovery CDs ...

Page 42: ...ur artistic ability and create digital images for print e mail and posting to the Web The versatile image capturing options allow you to start working with digital and traditional photos immediately Explore endless creative possibilities for your personal images with Adobe Photoshop Elements America Online America Online Inc America Online is a popular Internet online service Stay in touch with fa...

Page 43: ... your own video clips and still images You can edit the clips from your video add others and combine clips into new movie segments You can also save your images in a variety of popular file formats EarthLink Network Total Access EarthLink Network Inc An Internet Service Provider that supplies access information and assistance to its customers introducing them to the Internet Member benefits includ...

Page 44: ...ransitions background music and text Just import your video clips and shake with a click of the mouse Your personal movies are easy to create and fun to share with family and friends PC Cillin 2000 Trend Micro Inc PC Cillin provides portable easy to use real time antivirus security at your computer s entry point beaming synchronization Internet access to defend against potential threats hidden ins...

Page 45: ...ergence If you are using an external CD ROM drive connected with a PC Card be sure to connect your external CD ROM drive before starting RealJukebox Additionally do not remove your CD ROM drive while using RealJukebox Either of these actions may cause RealJukebox to shut down improperly Sony recommends using the preinstalled SonicStage software s Record function to create any CDs on your VAIO comp...

Page 46: ...ox application adds a host of new features to its predecessor OpenMG Jukebox Continuing to take advantage of Sony s copyright protected ATRAC3 format for high quality digital audio storage SonicStage sports a new Music Visualizer a sleek new player skin design audio CD burning capability and a parametric equalizer for fine tuning audio playback Sony on Yahoo Yahoo Inc Personalize your own web port...

Page 47: ... visually pleasing artistic manner VisualFlow software not only plays a selected movie or sound file but also enables playback of files by other applications such as PictureGear Memory Stick Slideshow and Windows Explorer WinDVD InterVideo Inc WinDVD is a simple to use DVD player including all the features you would expect to find in a standard consumer DVD player while also offering advanced disp...

Page 48: ...k the resolution click the Setup button in the DVgate Motion Monitor window Point to Settings and then select Low Resolution The settings you change in this menu affect the images in the monitor window only Movie data imported to your hard drive and images recorded to DV devices will not be affected Hard disk drive partition In order to improve the performance of your computer s DVgate motion soft...

Page 49: ...ies System Tools and then click Disk Defragmenter The Disk Defragmenter window appears Select the drive you want to defragment from the list and click the Defragment button See Windows Help for more information on defragmenting Before you begin to defragment a partition make sure you back up all files that you want to save ...

Page 50: ... corrupted or are erased Driver Recovery CD s Sony Electronics Inc This CD enables you to reinstall individual device drivers if they become corrupted or are erased System Recovery CD s Sony Electronics Inc This CD enables you to format the C partition of the hard disk drive then reinstall the operating system and software titles that shipped with your computer if they become corrupted or are eras...

Page 51: ...mputer use the System Recovery CD s See To use the System Recovery CD s on page 54 for more information 1 Turn on your computer If your computer is already on close all applications 2 When the Windows desktop appears insert the Sony Application Recovery CD in the optical drive The Application Recovery utility loads automatically 3 When the Application Recovery menu appears select the icon for the ...

Page 52: ...g specific drivers with the Driver Recovery CD 1 Turn on your computer If your computer is already on close all applications 2 When the Windows desktop appears insert the Driver Recovery CD into the optical disc drive 3 Click Start in the Windows taskbar then Control Panel The Control Panel window appears 4 Click Performance and Maintenance then System The System Properties dialog box appears 5 Fr...

Page 53: ...e Update Wizard appears 9 Click Next The wizard will search for the correct driver on your Driver Recovery CD 10 When the recovery process is complete click Finish Some drivers will require that you reboot the computer to complete installation Properties dialog box ...

Page 54: ...e System Recovery utility will perform a Full Restore with Format It formats the hard disk drive then restores all the original software 1 Insert the Sony System Recovery CD in the optical drive 2 Shut down your computer as described in Shutting Down Your Computer on page 27 3 Wait four seconds and turn on your computer 4 Select OK to signify you have read and accept the Microsoft End User License...

Page 55: ...he Enter key The computer restarts from the Recovery CD After recovering your system using the System Recovery CD s you may be prompted to insert your Application Recovery CD s after restarting Windows Insert the Application Recovery CD to automatically complete recovery of your system Recovering Microsoft Word If you recover your operating system using the System Recovery CD Microsoft Word will n...

Page 56: ...VAIO Computer Quick Start 56 ...

Page 57: ...ns before you contact Sony Computing Support http www sony com pcsupport Troubleshooting Your Computer Troubleshooting the LCD Screen Troubleshooting the Mouse and Pointing Device Troubleshooting Drives PC Cards and Peripheral Devices Troubleshooting i LINK devices Troubleshooting Software Troubleshooting the Modem Troubleshooting Audio Troubleshooting Memory Stick Media ...

Page 58: ...e using an external display check that it is plugged into a power source and turned on Check that the brightness and contrast controls are adjusted correctly See the manual supplied with your display for details Condensation may cause the computer to malfunction If this occurs do not use the computer for at least one hour Take the battery pack off the computer unplug the power cord and plug it in ...

Page 59: ...ter and confirm that Windows starts properly If Windows still does not start follow the steps below to initialize the BIOS 1 Remove any disk from the floppy disk drive 2 Remove any peripheral devices connected to the computer 3 Turn off the computer and then turn it on 4 Press the F2 key when the Sony logo appears The BIOS setup menu screen appears 5 Press the directional arrow keys to select the ...

Page 60: ...aying a CD or DVD stop the CD DVD and restart the computer by pressing the Ctrl Alt Delete keys at the same time Unplug the computer from the AC adapter and remove the battery pack from your computer The Power Management setting is not responding Your computer s operating system may become unstable if it is interrupted or if you attempt to make changes before the computer completely enters a lower...

Page 61: ...iet This setting slows down the CPU speed See PowerPanel Help for more information Why does the System Properties dialog box display a slower CPU speed than advertised This is normal Because your computer s CPU utilizes a type of CPU speed controlling technology System Properties may display the CPU s current speed instead of the maximum advertised speed ...

Page 62: ...ized properly Use the controls on your external display to adjust the image See the manual supplied with your display for more information I cannot simultaneously display movies DVD video or the Smart Capture Finder window on the LCD display and an external display Images cannot be displayed on both the LCD display and an external display at the same time Select only one display option I want to c...

Page 63: ...evice without a mouse being connected to the computer You must restart the computer to make the pointing device work again If your pointing device is interpreting a single tap as a double click you must adjust the button assignments Follow these steps 1 Click Start point to Control Panel point to Printers and Other Hardware and then click on the Mouse icon 2 Change the button assignments in the Mo...

Page 64: ...mputer as described in the step above press and hold the power button for at least four seconds to turn off the computer If the pointer does not move while playing a disc press the Ctrl Alt Delete keys at the same time to stop playback and restart the computer ...

Page 65: ...lled according to the manufacturer s instructions A dirty or damaged disc may cause the computer to stop responding while it tries to read the disc If necessary restart the computer remove the disc and then check it for dirt or damage If you see video but can not hear audio check all of the following Check that your optical drive does not have the mute setting enabled Check the volume setting in t...

Page 66: ...sation may cause the computer to malfunction If this occurs do not use the computer for at least one hour My optical disc drive tray does not open Make sure the computer is turned on Press the Eject button on the optical drive If the Eject button does not work you can open the tray by inserting a long thin object such as a straightened paper clip into the hole to the right of the Eject button I ca...

Page 67: ...y depending on the software applications operating system and compatible i LINK devices All products with an i LINK connection may not communicate with each other Refer to the documentation that came with your compatible i LINK device for information on operating conditions and proper connection Before con necting compatible i LINK PC peripherals to your system such as a CD RW or hard disk drive c...

Page 68: ...r computer is using the Ultimate Battery Life profile for its power saving mode you cannot use DVgate or Smart Connect software Please select another profile My computer s start up time seems longer after I have installed AOL What can I do On some computers installing America Online AOL may increase boot time by up to a minute If you experience this on your system and would like to speed up the ti...

Page 69: ...apture Premium software 2 Click Start on the Windows taskbar select All Programs and click Windows Media Player The Windows Media Player window appears 3 Select File and click Open When the Open dialog box appears click My Documents in the left menu 4 Double click Smart Capture Premium If you created a folder to save the image open the folder you created 5 Double click the folder you want to play ...

Page 70: ...ion is slow Your computer is equipped with a V 90 K56flex compatible modem Many factors may influence modem connection speed including telephone line noise or compatibility with telephone equipment such as fax machines or other modems If you think your modem is not connecting properly to other PC based modems fax machines or your Internet Service Provider check the following Have your phone compan...

Page 71: ...he volume is not on the lowest setting You can choose advanced options to customize audio settings If your computer is battery powered check that the battery pack is inserted properly and that it is charged If you are using an application that has its own volume control check that the volume is turned up Check the volume controls in Windows If you connect external speakers check that the speakers ...

Page 72: ...Battery Life is the default selection when your computer runs on battery power 3 In the right portion of the window double click CPU Control The list of CPU control options appears 4 Click Performance 5 Click the File menu and select Save 6 Close the Profile Editor window My microphone does not work If you are using an external microphone check that the microphone is plugged into the Microphone ja...

Page 73: ... displayed the format type of the Memory Stick media can be different Copy the data from the Memory Stick media onto the hard disk drive of your computer and then format the Memory Stick media using Memory Stick Formatter software preinstalled on your computer Memory Stick media does not work I cannot access the removable drive If you cannot find the Memory Stick icon in My Computer click the View...

Page 74: ...VAIO Computer Quick Start 74 ...

Page 75: ...75 Getting Help Sony provides you with several support options to answer questions about your VAIO computer or the preinstalled software Refer to these resources in the order they are listed ...

Page 76: ...come with a printed manual 3 Operating System Online Support Your computer comes preinstalled with Microsoft Windows For operating system support access Sony Computing Support at http www sony com pcsupport 4 VAIO Support Agent You can find VAIO Support Agent by clicking Start and then selecting Help and Support Using advanced diagnostic technology Sony s VAIO Support Agent runs scheduled protecti...

Page 77: ...t of available topics then select the topics that you want to receive To contact the Sony fax on demand service call 1 888 4 SONY PC 1 888 476 6972 7 Sony Customer Support Software support is available free of charge for 90 days after the original date of purchase You can call and speak with a Sony Customer Support Representative without using your computer by calling 1 888 4 SONY PC 1 888 476 697...

Page 78: ...06 675 6126 fee based support e mail techdocs adobe com hours M F 6 AM 5 PM PST Web site http www aol com phone 800 827 3338 hours 7 days a week 24 hours a day Web site http www apple com phone 800 692 7753 hours 7 days a week 24 hours a day Web site http www help earthlink net techsupport e mail support earthlink net phone 800 890 5128 800 890 6356 hours 7 days a week 24 hours a day Web site http...

Page 79: ...rt phone 800 644 3193 hours 7 days a week 24 hours a day Web site http service real com rjoptions html e mail http service real com help call html Web site http www sony com pcsupport phone 888 4 SONY PC 888 476 6972 Support from 1 888 4 SONY PC is free of charge for 90 days after the original date of purchase hours 7 days a week 24 hours a day Web site http www sony com pcsupport phone 888 4 SONY...

Page 80: ...VAIO Computer Quick Start 80 Sony Service Center For the Sony Service Center nearest you call 1 888 4 SONY PC 1 888 476 6972 or find Sony Computing Service on the Web at http www sony com pcsupport ...

Page 81: ...Start Windows 27 C charge status indicator light 21 charging battery pack 21 choosing power source 20 computer features 5 registering 8 setting up 13 14 starting 25 unpacking 6 connecting Internet 28 power source 19 D DC In 19 Driver Recovery CD 50 52 drives troubleshooting 65 DVD ROM drive tray troubleshooting 66 DVgate applications 48 F features 5 H hardware online support 76 help getting 75 Hib...

Page 82: ...19 power sources 20 connecting 19 R rechargeable battery pack 19 20 recharging battery pack 21 recovery CD 51 registering your computer 8 removing battery pack 23 memory module 35 restoring data 51 S selecting power source 20 setting up 13 setting up your PC support 76 software descriptions 42 DVgate 48 troubleshooting 68 Sony Fax on Demand service 77 Sony Service Center 79 speakers troubleshootin...

Page 83: ...Index 83 startup 27 Turn Off Computer dialog box 27 shutting down 27 turning on computer 25 U unpacking 6 USB 17 W Windows Start button 27 taskbar 27 60 ...

Page 84: ...ut written permission is prohibited All rights reserved Sony VAIO the VAIO logo VAIO Smart DVgate Handycam Media Bar MovieShaker PictureGear and i LINK are trademarks of Sony All other trademarks are trademarks or registered trademarks of their respective owners Printed in Japan 4 659 022 01 ...

Reviews: