background image

3-859-278-11(1)

Additional Information

29

EN

Precautions

On safety

• Do not disassemble the cabinet as this may result in an

electric shock.  Refer servicing to qualified personnel only.

• Should any solid object or liquid fall into the cabinet,

unplug the AC power cord before operating the unit any
further.

On power sources

• Before operating the unit, check that its operating voltage

is identical with your local power supply.  The operating
voltage is indicated on the nameplate at the rear of the
unit.

• If you are not going to use the unit for a long time, be sure

to disconnect the AC power cord (mains lead) from the
wall outlet.  To disconnect the cord, grasp the plug itself;
never pull the cord.

On operation

If the unit is brought directly from a cold place to a warm
place, or is placed in a very damp room, moisture may
condense on the lenses inside the unit, “CAUTION” may
appear in the display, and the unit may not operate.  If this
happens, remove the cassette and leave the unit turned on
for about an hour until the moisture evaporates.

On placement

• Place the unit in a location with adequate ventilation to

prevent heat build-up.

• Do not place the unit:

— on a soft surface such as a rug that might block the

ventilation holes on the bottom.

— near heat sources.
— in direct sunlight.
— in an inclined position.
— in a place subject to excessive dust or mechanical

shock.

On the DAT tapes

• After using a DAT tape, put it into its case and keep it

where it will not be subject to sunlight, high temperature,
moisture or dust.

• The DAT cassette shell is designed to keep out dust. Do

not open the case to expose the tape.

• The hole at the back of the cassette is the detector slot. Do

not cover this slot.

Regarding tapes of over 120 minutes

Do not use thin-tape cassettes (with a playing time of over
120 minutes) to record important materials since such
cassettes are subject to the following problems:
— Inproper threading of the tape after repeated AMS,

rewinding, fast-forwarding, or cueing operations.

— Incorrect writing and erasing of start IDs.
— Sound distortion.

If you have any questions or problems concerning your
unit, please consult your nearest Sony dealer.

Cleaning

Cleaning the cabinet, panel and controls

Use a soft cloth slightly moistened with a mild detergent
solution.  Do not use any type of abrasive pad, scouring
powder or solvent such as alcohol or benzine.

Cleaning the head and tape path

• Prolonged operation will cause contamination of the head.

To obtain the best possible recording and playback sound,
we recommend that you use the Sony DT-10CL cleaning
cassette (not supplied) to clean the head after every ten
hours or so of operation.

• Clean the head with the cleaning cassette when the deck

has not been used for a long period of time.
Contamination of the head may cause sound drop-out
during playback.

Using the cleaning cassette

1

Insert the cleaning cassette as you would a normal DAT
cassette.

2

Press PLAY 

(

.  After 10 seconds, press STOP 

p

.

Do not press the REC 

r

 or FF 

)

 button  for cleaning.

3

Remove the cleaning cassette without rewinding it.  You
should rewind the cleaning cassette only when it has
reached the end.

Notes on cleaning

• After 10 hours of operation, “CLEANING” appears in the

display for about ten seconds when you turn on the deck.
It is recommended that you clean the head and tape path
periodically, using this message as a guide.

• Due to the shortness of the cleaning cassette, the counter

will not show the actual running time and remaining time
of the cassette.

Summary of Contents for PCM-R500 - Dat Recorder

Page 1: ...3 859 278 12 1 3 859 278 12 1 Digital Audio Tape Deck 1996 by Sony Corporation EN PCM R500 PCM R700 D Operating Instructions Mode d emploi Bedienungsanleitung F ...

Page 2: ...Sony Corporation Printed in Japan 3 859 278 12 1 ...

Page 3: ...xpose the unit to rain or moisture To avoid electrical shock do not open the cabinet Refer servicing to qualified personnel only For the customers in the United States Voor de klanten in Nederland Bij dit produkt zijn batterijen geleverd Wanneer deze leeg zijn moet u ze niet weggooien maar inleveren als KCA VARNING Explosionsfara vid felaktigt batteribyte Använd samma batterityp eller en ekvivalen...

Page 4: ...R700 Only 28 Precautions 29 Cleaning 29 Display Messages 30 Troubleshooting 30 Specifications 32 Index 33 Welcome Thank you for purchasing the Sony Digital Audio Tape Deck Before operating the unit please read this manual thoroughly and retain it for future reference The PCM R500 and PCM R700 have the following common and distinguishing features Common features 4DD Direct Drive motor mechanism SBM...

Page 5: ...ck Decorative washer Screw M5 12 Note Do not reattach the screws directly after removing the four feet Put the screws and the feet in a safe place for reattachment in the future Using longer or shorter screws may damage the internal circuit board OFF WIRED WIRELESS REMOTE z When to replace the batteries With normal use batteries should last for about 6 months When the remote no longer operates the...

Page 6: ...3 2 1 GND 2 HOT 3 COLD The analog input output reference level adjustment The analog input output reference level during recording or playback is factory set to 4 dBs within a range of 20 dB to the full bit level for both input and output To lower the reference level use a screwdriver to adjust the ANALOG BALANCE IN OUT LEVEL controls on the rear panel for both CH 1 L and CH 2 R You can adjust the...

Page 7: ...IEC 958 for broadcasting studio use DIGITAL AES EBU DIGITAL COAXIAL IEC 958 for consumer use AES EBU format Input connector Signal format Copy information carried by digital signal Recording capability on this deck Copy information recorded on tape DIGITAL AES EBU AES EBU None Possible Possible None IEC 958 for broadcasting studio use Determined by menu setting pages 24 and 25 Determined by menu s...

Page 8: ... a If the input level remains under the level set in the L SY TH menu longer than the time set in the L SY BK menu see page 24 the deck writes a start ID when the input level rises above that level b DAT skip IDs are automatically written in the same way c Only when connected to the PCM 2600 PCM 2800 PCM R500 or PCM R700 When the connected decks consist of a PCM R500 or PCM R700 select on in the A...

Page 9: ...s 4 Turn DATA to decrease or increase the displayed year then press SET The year indication stops flashing and the month indication begins to flash 5 Repeat step 4 until all items have been set After setting the seconds press SET to start the clock The day of the week is set automatically and is displayed as follows Sunday SU Monday MO Tuesday TU Wednesday WE Thursday TH Friday FR Saturday SA To d...

Page 10: ... Press POWER Make sure that the KEY PROTECT switch is set to OFF PCM R700 only see page 28 3 Press OPEN CLOSE 6 and insert a cassette To Stop playing Pause playing Go to the next track or the preceding track Fast forward or rewind Fast forward or rewind while monitoring the sound Take out the cassette Press STOP p PAUSE P Press the button again or press PLAY to resume play NEXT or PREVIOUS FF or R...

Page 11: ...p information 1 Turn on the amplifier and play the program source you want to record 2 Press POWER Make sure that the KEY PROTECT switch is set to OFF PCM R700 only see page 28 3 Press OPEN CLOSE 6 and insert a cassette Window side up b OPEN CLOSE 6 OPEN CLOSE 6 Insert the cassette until it clicks b Do not close the cassette holder without pressing OPEN CLOSE 6 4 Use INPUT ANALOG INPUT and DIGITAL...

Page 12: ...topping recording z If UNLOCK appears in the display The program source is not connected to the deck properly or is not turned on Make sure that the program source is properly connected or turned on z To adjust the recording level more accurately While monitoring the sound turn REC LEVEL CH 1 L 2 R so that the recording level on the peak level meters is at maximum level without entering the OVER r...

Page 13: ...es between two kinds of silent sections which are respectively called a blank section or sound muted section Blank section This is a section on which no signal has ever been recorded R R R R T T T T B l a n k s e c t i o n R R e c o r d i n g T T r a c k Sound muted section This is a section on which a signal has been recorded but at a level that is not audible R T T T T S o u n d m u t e d s e c ...

Page 14: ...48kHz STANDARD 44 1k Standard play 48kHz STANDARD 48k Standard play 48kHz The recording time in long play mode the REC MODE switch set to LONG is twice as long as standard play mode z The counter in long play mode The displayed tape running time absolute time and remaining time on the tape are for standard play mode Double the time to obtain the corresponding times for long play mode Note Do not c...

Page 15: ... fast forwards to the end of the tape if the tape is blank z When you press the REC r button while in a blank section The deck rewinds the tape to the beginning of the blank section and changes to recording pause BLANK and WAIT appear in the display while the deck is searching for the beginning of the blank section Note End Search does not operate if you press the FF button while in a blank sectio...

Page 16: ...listen to the program source even when not recording Press INPUT MONITOR to turn on INPUT in the display The program source is output when the deck is stopped the cassette is ejected The program source is not output when INPUT is turned off Note If you do any of the following operations while listening to the program source INPUT turns off and output of the program source stops and INPUT will not ...

Page 17: ... with emphasis in the higher frequencies The deck however plays the signal while automatically deemphasizing it with attenuation proportional to the degree of emphasis ERR appears in the display for 5 seconds or more The head is dirty Clean the head with the DAT cleaning cassette see page 29 The cassette is defective or damaged COUNTER RESET MODE AUTO MIN MAX OFF WIRED WIRELESS REMOTE POWER Ø ON ø...

Page 18: ...rogram number with the number buttons on the remote 2 Press PLAY AMS Automatic Music Sensor z If you enter the wrong program number during Direct Access If you haven t pressed the PLAY button turn the DATA dial on the deck or press the CLEAR button then enter the correct number on the remote z If the deck detects a blank section of 9 seconds or more end ID or the end of the tape The deck rewinds t...

Page 19: ...the deck detects either of the following during Repeat Play it will rewind the tape to its beginning and start playing again A blank section of 9 seconds or more The end of the tape or the end ID To stop playing all tracks repeatedly Press REPEAT repeatedly until REPEAT disappears Note Repeat Play of all tracks is canceled when you take out the cassette Playing a track repeatedly Press REPEAT repe...

Page 20: ...umbers Program numbers serve as track numbers Occupying the same position as start IDs a program numbers allow you to locate specific tracks or play tracks in a specific order Skip IDs Skip IDs indicate tracks or recorded portions that are to be skipped while playing Skip IDs are 1 second in length 2 seconds in long play mode End ID when the optional remote is used An end ID indicates the end of a...

Page 21: ...ogram number to be assigned 1 Pause recording 2 Press the number button s on the supplied remote or turn DATA to input the first program number The number appears in the display To cancel the number press the CLEAR button on the supplied remote 3 Start recording A start ID and the assigned program number are written simultaneously Note During automatic start ID writing the positioning of some star...

Page 22: ...osition The repeated portion plays back 8 times with the remaining number of times appearing to the right of the REHRSL After 8 times the deck stops In the case of a start ID the 3 second repeated portion starts from the point where you pressed the REHEARSAL button In the case of a skip ID the 3 second repeated portion ends at the point where you pressed the REHEARSAL button 2 Press REW 0 or FF to...

Page 23: ...deck rewinds to the beginning of start ID and the Rehearsal function repeats a 3 second portion 2 Do the steps 2 and 3 of Accurate positioning of sub codes on pages 21 and 22 You can move the start ID to a maximum extent of about 2 seconds 4 seconds in long play mode in either direction from its original position Notes Start IDs written within 10 seconds from the end of the tape may be difficult o...

Page 24: ...automatically to its beginning then stops z You can specify any number as the starting number for the renumbering of programs For details see FIRST PGM No on page 25 Note The Renumbering function may not function correctly when A blank section exists on the tape The interval between two start IDs is less than 18 seconds 36 seconds in long play mode A start ID exists within 10 seconds from the end ...

Page 25: ...ng range 0 5 to 9 5 seconds in units of 0 5 second Factory setting 4 seconds Reference page 14 L SY TH Level SYnc THreshold Sets the reference input level for automatic writing of start IDs Setting range 12 to 60 dB in units of 1 dB Factory setting 45 dB Reference page 20 L SY BK Level SYnc BlanK time Sets the length of time that the input signal must remain below the reference level before automa...

Page 26: ...DE IN time PCM R700 only Specifies the fade in time for fade in recording and playback Setting range 0 5 to 9 5 seconds in units of 0 5 second Factory setting 5 0 seconds Reference pages 15 and 19 FADE OUT FADE OUT time PCM R700 only Specifies the fade out time for fade out recording and playback Setting range 0 5 to 9 5 seconds in units of 0 5 second Factory setting 5 0 seconds Reference pages 15...

Page 27: ...MS disappears Locating a track by scanning each track Music Scan You can locate a track by scanning the first 8 seconds of each track 1 Press M SCAN while the deck is stopped 2 Press The deck plays the first 8 seconds of each track in succession 3 When you find the track you want press M SCAN The track continues playing z You can use Music Scan while playing a track If you press the M SCAN button ...

Page 28: ...backwards or forwards by 0 3 second up to a maximum extent of about 2 seconds 4 seconds in long play mode in either direction The display shows the amount the starting position has shifted from the time the END ID REHEARSAL button was pressed 3 After repositioning the beginning of the end ID press END ID WRITE ID WRITE appears for a few seconds and the end ID is written on the tape after a duratio...

Page 29: ...WRITE 4 L PLAY L PLAY 5 L REW L PAUSE 6 L FF L REC Status output 7 H STOP H REC PAUSE 8 H PLAY H REC Case GND Case Pin No L STOP GND Command inputs H OPEN off impedance 30 kilohms or more L GND short on impedance 100 ohms or less Status output H approx 2V I 15mA L OPEN High impedance Connection diagram MODE 1 Case Command input switch Status output display LED Notes When using MODE 2 use pin numbe...

Page 30: ...te is the detector slot Do not cover this slot Regarding tapes of over 120 minutes Do not use thin tape cassettes with a playing time of over 120 minutes to record important materials since such cassettes are subject to the following problems Inproper threading of the tape after repeated AMS rewinding fast forwarding or cueing operations Incorrect writing and erasing of start IDs Sound distortion ...

Page 31: ...l only during analog recording s The OPEN CLOSE 6button does not work The OPEN CLOSE 6 button does not function during recording Press STOP p or PAUSE P to stop recording first then press OPEN CLOSE 6 CAUTION appears and the deck cannot be operated A safety mechanism is operating because of condensation Remove the cassette and leave the deck turned on for about an hour Then turn the deck off then ...

Page 32: ...il the writing or erasing the start skip or end ID finishes before operation Absolute time codes writing is not possible Recording began within a blank section Rewind the tape to its beginning or locate the end of the recorded portion with End Search before starting recording Tape transport is excessively loud during fast forwarding or rewinding The noise is caused by the cassette and is not a mec...

Page 33: ... EBU COAXIAL XLR 3 FEMALE Phono plug jack 75 ohms 0 5 Vp p Output connectors Analog Output ANALOG BALANCE Connector Load impedance 32 ohms Digital Output Connector Load impedance Output impedance Type AES EBU 110 ohms COAXIAL 75 ohms 75 ohms Phono plug jack XLR 3 MALE 35 ohms balanced Rated output level 0 5 Vp p Variable range of analog BALANCE input output reference levela 4 dBs to 12 dBs Maximum...

Page 34: ...igned 20 Q Q code 7 24 25 R Rack mounting 4 Recording on a tape 10 11 Record Monitoring 15 Record Muting 14 Record protect tab 11 Rehearsal Function 21 22 Remote control function 28 Renumbering Function 23 Repeat Play 18 Playing a track repeatedly 18 Playing all tracks repeatedly 18 RMS Random Music Sensor Play 26 Index Names of controls Buttons CLEAR 20 26 COUNTER RESET 16 END ID ERASE 27 END ID ...

Page 35: ...REMOTE 4 26 31 SBM 13 31 33 Connectors ANALOG BALANCE IN OUT 5 6 10 24 32 ANALOG UNBALANCE IN OUT 5 6 10 24 32 DIGITAL AES EBU IN OUT 5 6 10 24 25 32 DIGITAL COAXIAL IN OUT 5 6 10 24 25 32 REMOTE 1 2 5 6 26 28 Contorols ANALOG BALANCE IN OUT LEVEL 5 DATA 8 17 20 24 PHONE LEVEL 9 REC LEVEL CH 1 2 5 11 30 SHUTTLE 8 17 24 Jacks PHONES 9 32 ...

Page 36: ...35EN 3 859 278 11 1 Index ...

Page 37: ...nalogiques symétriques Interface numérique AES EBU à usage professionnel Connecteurs pour télécommande parallèle et série Opérations de menu simples avec les bagues SHUTTLE et DATA Fonction Mark Locate Commandes REC LEVEL indépendantes pour les canaux droit et gauche pour les signaux analogiques PCM R700 Quatre têtes pour permettre le contrôle du son enregistré pendant l enregistrement Fonctions d...

Page 38: ...e Play Mark Locate 17 Répétition de plages lecture répétée 18 Lecture des plages avec omission de certains passages lecture à saut 18 Lecture avec ouverture fermeture en fondu Fader 19 Inscription de sous codes Utilisation des sous codes 19 Inscription d identifiants de début pendant l enregistrement 20 Inscription d identifiants de saut pendant l enregistrement 21 Inscription de sous codes pendan...

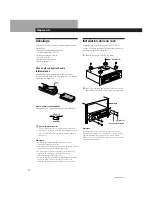
Page 39: ... oubliez pas de déconnecter la platine de la prise murale avant de l installer 1 Retirez les quatre pieds de la platine 2 Insérez la platine dans le rack et fixez la avec les rondelles décoratives et les vis M5 12 fournies Avant d utiliser la télécommande Réglez REMOTE sur le panneau avant à WIRELESS OFF WIRED WIRELESS REMOTE z Quand remplacer les piles Le piles durent environ six mois dans des co...

Page 40: ...lisez des cordons de raccordement audio à fiche phono Raccordements numériques Utilisez le commutateur DIGITAL IN OUT sur le panneau arrière pour sélectionner les connecteurs d entrée sortie pour les signaux numériques Réglez le sélecteur à AES EBU pour sélectionner les connecteurs DIGITAL AES EBU IN OUT ou à COAXIAL pour sélectionner les connecteurs DIGITAL COAXIAL IN OUT Pour les raccordements v...

Page 41: ...autorisée et copie interdite Serial Copy Management System Information sur la copie enregistrée sur la bande Déterminée par un réglage de menu pages 24 et 25 Déterminée par un réglage de menu pages 24 et 25 DIGITAL COAXIAL Autorisée ID 6 00 Interdite ID 6 10 Interdite ID 6 10 Connecteur d entrée DIGITAL AES EBU ANALOG BALANCE UNBALANCE Format du signal AES EBU Information sur la copie dans le sign...

Page 42: ...que le temps posé au menu L SY BK voir la page 24 la platine inscrit un identifiant de début quand le niveau d entrée dépasse ce niveau b Des identifiants de saut DAT sont automatiquement inscrits de la même manière c Seulement quand raccordé au PCM 2600 PCM 2800 PCM R500 ou PCM R700 Quand les platines raccordées comprennent un PCM R500 ou PCM R700 sélectionnez on au menu AES S ID de la platine de...

Page 43: ...T PREVIOUS AMS OPEN CLOSE 6 NEXT STOP p REW 0 PLAY FF PAUSE P REC MUTE R REC r MENU DATA SHUTTLE CH 1 L r SET MARK 0 10 ANALOG DIGITAL INPUT REC LEVEL OFF ON SBM UNBALANCE BALANCE ANALOG INPUT STANDARD 48k 44 1k LONG REC MODE CH 2 R 0 10 START ID SKIP ID 1 La platine à l arrêt appuyer sur MENU Le menu s affiche 2 Tournez SHUTTLE pour afficher le menu CLK SET 3 Tournez DATA pour afficher on puis ap...

Page 44: ...eur KEY PROTECT est réglé à OFF PCM R700 seulement voir la page 28 3 Appuyez sur OPEN CLOSE 6 et insérez une cassette Insérez la cassette jusqu au déclic Appuyez sur OPEN CLOSE 6 pour refermer le logement de cassette 4 Appuyez sur PLAY La lecture commence sur la platine Réglez le volume sur l amplificateur Côté avec fenêtre vers le haut Pour Arrêter la lecture Faire une pause de lecture Passer à l...

Page 45: ...c b 4 Utilisez INPUT ANALOG INPUT et DIGITAL IN OUT pour sélectionner les connecteurs d entrée correspondants Position des sélecteurs DIGITAL COAXIAL IN ANALOG BALANCE ANALOG UNBALANCE DIGITAL AES EBU DIGITAL COAXIAL Le commutateur DIGITAL IN OUT est situé sur le panneau arrière voir la page 5 1 Mettez l amplificateur sous tension et démarrez la lecture du programme que vous souhaitez enregistrer ...

Page 46: ...IN changeant à chaque signal plus puissant indique la marge entre la puissance du signal et 0 dB Si le niveau dépasse 0 dB Les segments sous OVER s allument et 0 0dB clignote dans l affichage Si ces segments restent allumés il peut y avoir des déformations sonores Pour éviter cela maintenir le niveau d enregistrement entre 12 dB et 0 dB Pour remettre l indication de marge à zéro Appuyez sur MARGIN...

Page 47: ...ser la fin de l enregistrement précédent afin d éviter de laisser un passage vierge Zone d amorçage Si vous insérez une nouvelle cassette la platine détecte l amorce de la bande et crée automatiquement une zone d amorçage conformément au réglage du menu comme indiqué dans la figure ci dessous A ce moment là BB apparaît dans l affichage environ 1 seconde La zone d amorçage risque d être effacée par...

Page 48: ...2 R 0 10 START ID SKIP ID Le temps d enregistrement en mode longue durée sélecteur REC MODE sur LONG est deux fois plus long qu en mode standard z Compteur en mode longue durée Le temps de défilement le temps absolu et le temps restant affichés représentent les valeurs du mode standard Multipliez les valeurs par deux pour obtenir les temps correspondants en mode longue durée Remarque Ne changez pa...

Page 49: ...le silencieux d enregistrement pour insérer un espace d environ 0 5 à 9 5 secondes entre les plages pendant l enregistrement ou en pause d enregistrement Pour les détails sur le réglage de la durée de l espace vierge voir REC MUTE à la page 24 PLAY REC MUTE R REC r AUTO MIN MAX OFF WIRED WIRELESS REMOTE POWER Ø ON ø OFF PHONE LEVEL PHONES RENUMBER REHEARSAL REHEARSAL WRITE WRITE ERASE ERASE REPEAT...

Page 50: ... et INPUT ne s allume pas même si vous appuyez sur la touche INPUT MONITOR Vous démarrez la lecture en appuyant sur la touche PLAY Vous interrompez la lecture en appuyant sur la touche PAUSE P Vous appuyez sur la touche REW 0 Vous appuyez sur la touche FF Contrôle du son enregistré Contrôle d enregistrement PCM R700 seulement Vous pouvez comparer le son enregistré avec le son de la source pendant ...

Page 51: ...en le désaccentuant automatiquement l atténuation est proportionnelle au degré d accentuation ERR apparaît dans l affichage 5 secondes ou plus La tête est sale Nettoyez la tête avec une cassette de nettoyage DAT voir la page 29 La cassette est défectueuse ou endommagée A propos de l affichage Vous pouvez utiliser l affichage pour indiquer le temps de défilement de la bande le temps absolu le temps...

Page 52: ... sur LOCATE La platine localise le point et s arrête z Vitesse de lecture en Shuttle Play Pendant la lecture en Shuttle Play il est possible de faire varier la vitesse de lecture de 0 5 à 8 fois la vitesse de lecture normale ou 1 à 8 fois la vitesse normale pour les matériaux enregistrés en mode de lecture longue selon l angle et la direction de la bague SHUTTLE Tournez la bague dans le sens horai...

Page 53: ... éjectez la cassette Répétition d une plage Appuyez plusieurs fois sur REPEAT pendant la lecture de la plage à répéter jusqu à ce que REPEAT 1 apparaisse sur l affichage La platine reproduit la plage 5 fois puis s arrête Si la platine détecte une des conditions suivantes pendant la lecture répétée elle rebobine la bande jusqu au code ID de départ de la plage courante et recommence la lecture à par...

Page 54: ...arrête et la platine rebobine la bande jusqu à son début Si un identifiant de fin est détecté pendant l enregistrement la bande s arrête à ce point et la platine est prête à enregistrer à partir de ce point Vous pouvez inscrire et effacer un identifiant de fin seulement avec la télécommande RM D750 en option Pour les détails voir Inscription et effacement d un identifiant de fin à la page 27 Remar...

Page 55: ...ns de menu aux pages 24 et 25 Inscription de numéros de programme pendant l enregistrement Les numéros de programme occupent la même position que les identifiants de début et sont déterminés en fonction des conditions suivantes Quand un numéro de programme est affiché Le numéro de programme suivant est augmenté d une unité à l inscription de l identifiant de début suivant Quand aucun numéro de pro...

Page 56: ...OPEN CLOSE 6 NEXT STOP p REW 0 PLAY FF PAUSE P REC MUTE R REC r MENU DATA SHUTTLE CH 1 L r SET MARK 0 10 ANALOG DIGITAL INPUT REC LEVEL OFF ON SBM UNBALANCE BALANCE ANALOG INPUT STANDARD 48k 44 1k LONG REC MODE CH 2 R 0 10 START ID SKIP ID Appuyez sur START ID WRITE ou sur SKIP ID WRITE ID WRITE apparaît sur l affichage pendant quelques secondes et l identifiant spécifié est inscrit sur la bande P...

Page 57: ...s 0 3 sec Passage répété 0 3 sec Mouvement à chaque pression sur FF 3 secondes Position où vous avez appuyé sur la touche REHEARSAL à l étape 1 Passage répété 9 secondes 1 seconde Identifiant de début Identifiant de saut Mouvement à chaque pression sur REW 0 Sens de défilement de la bande n START ID REHEARSAL AUTO MIN MAX OFF WIRED WIRELESS REMOTE POWER Ø ON ø OFF PHONE LEVEL PHONES RENUMBER REHEA...

Page 58: ...ffacer un identifiant de début Il faut 1 seconde pour effacer un identifiant de saut Les numéros de programme sont effacés en même temps que les identifiants de début z Vous pouvez effacer un code même s il n est pas affiché Appuyez sur la touche START ID SKIP ID ERASE La bande est rebobinée et le premier identifiant détecté est effacé Remarque Si un identifiant de saut se trouve à la même positio...

Page 59: ...AES EBU IN et si les identifiants de début ou de saut sont sortis via le connecteur DIGITAL AES EBU OUT Réglages on des identifiants de début ou de saut sont automatiquement détectés et inscrits les identifiants de début ou de saut sont sortis l inscription des identifiants de début ou de saut est déterminée par les réglages des menus L SY TH et L SY BK les identifiants de début ou de saut ne sont...

Page 60: ...s par incréments de 0 5 secondes Réglage usine 5 0 secondes Page de référence 15 et 19 Inscription automatique des identifiants de début et réglages de menus pendant l enregistrement numérique La détection et l inscription automatiques des identifiants de début sont effectuées selon le connecteur auquel la source de programme est raccordée le format du signal et le code de catégorie du signal comm...

Page 61: ...commencée Pour annuler un programme entier Appuyez sur pde manière répétée jusqu à ce que RMS disparaisse Localisation d une plage par balayage de chaque plage Music Scan Vous pouvez localiser une plage en balayant les 8 premières secondes de chaque plage RMS ST EP 1 5 Numéro de programme 1 Entrer le numéro de programme 1 à 99 de la plage à lire Si vous avez entré un mauvais numéro Appuyez sur CLE...

Page 62: ...K ENTER LOCATE MARK RMS COUNTER DATE AMS 6 Inscription d un identifiant de fin pendant l enregistrement 1 Alors que l enregistrement de la source de programme touche à sa fin appuyez sur P R ou FADER L appareil passe en pause d enregistrement 2 Appuyez sur END ID WRITE ID WRITE et EE s affichent pendant l inscription de l identifiant de fin L inscription terminée le mode pause d enregistrement est...

Page 63: ...u L détermine si les broches numéro 2 à 8 sont en MODE 1 lecture ou MODE 2 enregistrement En MODE 1 la broche numéro 2 peut servir pour commander un fondu à l ouverture Pour les broches numéro 2 à 6 l entrée vers le plus petit numéro a priorité Prenez des mesures pour éviter des vibrations au niveau des commutateurs d entrée de commande Le statut de sortie broches numéro 7 et 8 est prévu pour alim...

Page 64: ...fice à l arrière de la cassette est une fente de détection Ne pas la recouvrir A propos des cassettes de 120 minutes N utilisez pas de cassettes à durée de lecture de plus de 120 minutes pour enregistrer des matériaux importants parce qu elles sont sujettes aux problèmes suivants Bobinage incorrect de la bande après des opérations d AMS de rebobinage d avance rapide ou de repérage répétées Inscrip...

Page 65: ...ter le niveau d enregistrement uniquement pour l enregistrement d un signal analogique La touche OPEN CLOSE 6 ne fonctionne pas La touche OPEN CLOSE 6 ne fonctionne pas pendant l enregistrement Appuyez d abord sur la touche STOP p ou PAUSE P pour arrêter l enregistrement puis sur la touche OPEN CLOSE 6 Signification La platine est en pause d enregistrement depuis 10 minutes environ ou bien vous av...

Page 66: ...ntifiant de début ou de fin 18 secondes en mode lecture longue ou pendant la 1 seconde d inscription ou effacement de l identifiant de saut 2 secondes en mode lecture longue Attendez la fin de l inscription ou l effacement de l identifiant de début ou de saut pour remettre en marche Impossible d inscrire les codes de temps absolu L enregistrement a commencé sur un passage vierge Rebobinez la bande...

Page 67: ...mprises Prises d entrée Entrée analogique Prise Type Impédance Niveau d entrée d entrée nominalea ANALOG UNBALANCE ANALOG BALANCE fiche phono XLR 3 FEMALE 47 kohms 12 dBs 4 dBs réglage usine 10 kilohms ou plus symétrique Prises de sortie Sortie analogique Prise Niveau de sortie nominalea Impédance de sortie Impédance de charge Type 10 kilohms ou plus XLR 3 MALE 1 kilohm 12 dBs 10 kilohms ou plus f...

Page 68: ...méros de programme pendant l enregistrement 20 Identifiant de saut 19 21 23 Inscription d identifiants de saut pendant l enregistrement 21 Information sur la copie pendant l enregistrement 6 Insertion des batteries dans la télécommande 4 Inscription et effacement d un identifiant de fin 27 Installation dans un rack 4 Interface numérique 6 7 Invalidation des opérations aux touches 28 L Lecture d un...

Page 69: ...15 21 22 27 29 31 RMS CHECK vérification de programme 26 RMS ENTER programmation 26 SET set 8 24 SKIP ID ERASE effacement de code ID de saut 23 SKIP ID REHEARSAL lecture d essai de code ID de saut 21 22 SKIP ID WRITE inscription de code ID de saut 21 22 SKIP PLAY lecture à saut 18 31 START ID AUTO inscription automatique de code ID de départ 20 START ID ERASE effacement de code ID de départ 23 STA...

Page 70: ...35F 3 859 278 11 1 Index ...

Page 71: ...stelle Anschlüsse für parallele und serielle Fernsteuerung Einfache Menü Bedienung über SHUTTLE und DATA Scheiben Mark Locate Funktion Kanalgetrennte Aufnahmepegelregler für Analogsignal PCM R700 Vierkopfbestückung für Hinterbandkontrolle zum Überwachen des aufgenommenen Signals bei laufender Aufnahme Ein Ausblend Funktion für Aufnahme und Wiedergabe Tastensperre Funktion Weitere Funktionen nur mi...

Page 72: ...olspielbetrieb Repeat Funktion 18 Überspringen von markierten Bandteilen Skip Play Funktion 18 Ein und Ausblenden der Wiedergabe Fader nur PCM R700 19 Setzen von Subcodes Die verschiedenen Subcodes 19 Setzen von Startcodes während der Aufnahme 20 Setzen von Sprungcodes während der Aufnahme 21 Setzen von Subcodes während der Wiedergabe 21 Feinkorrektur der Position eines existierenden Startcodes 22...

Page 73: ...r zu ziehen 1 Entfernen Sie die vier Gerätefüße 2 Setzen Sie das Deck in das Gestell ein und schrauben Sie es mit den beiliegenden M5 12 Schrauben mit untergelegten Zierscheiben fest Schraube M3x10 Schraube M5x12 OFF WIRED WIRELESS REMOTE Vor Benutzung der Fernbedienung Stellen Sie den frontseitigen REMOTE Schalter auf WIRELESS z Zur Lebensdauer der Batterien Bei normalem Betrieb halten die Batter...

Page 74: ... vollen Bit Pegel für Aufnahme und Wiedergabe voreingestellt Zum Senken des Referenzpegels den rückseitigen ANALOG BALANCE IN OUT LEVEL Regler mit einem Schraubenzieher passend einstellen Der Referenzpegel ist im Bereich von 4 dBs bis 12 dBs regelbar Vor dieser Einstellung unbedingt den frontseitigen REC LEVEL CH 1 L 2 R Regler auf Mitte stellen Bei Anschluß über die ANALOG UNBALANCE IN OUT Buchse...

Page 75: ...en Kopieren möglich erste Kopiergeneration zulässig und Kopieren untersagt Serial Copy Management System Aufgezeich nete Kopier schutz Information Vorgegeben durch Menü Einstellung S 24 und 25 Vorgegeben durch Menü Einstellung S 24 und 25 DIGITAL COAXIAL Zulässig ID 6 00 Untersagt ID 6 10 Untersagt ID 6 10 Eingangs buchse DIGITAL AES EBU ANALOG BALANCE UNBALANCE Signalformat AES EBU Kopierschutz I...

Page 76: ...r L SY BK eingestellte Zeit unter dem unter L SY TH eingestellten Pegel siehe S 24 bleibt setzt das Deck einen Startcode wenn der Eingangspegel diesen Pegel überschreitet b DAT Sprungcodes werden automatisch in gleicher Weise gesetzt c Nur bei Anschluß an das PCM 2600 PCM 2800 PCM R500 oder PCM R700 Bei Anschluß eines PCM R500 oder PCM R700 wählen Sie im AES S ID Menü des Zuspielgeräts on d Nur be...

Page 77: ...EVEL PHONES RENUMBER REHEARSAL REHEARSAL WRITE WRITE ERASE ERASE REPEAT SKIP PLAY LOCATE MODE COUNTER RESET MARGIN RESET PREVIOUS AMS OPEN CLOSE 6 NEXT STOP p REW 0 PLAY FF PAUSE P REC MUTE R REC r MENU DATA SHUTTLE CH 1 L r SET MARK 0 10 ANALOG DIGITAL INPUT REC LEVEL OFF ON SBM UNBALANCE BALANCE ANALOG INPUT STANDARD 48k 44 1k LONG REC MODE CH 2 R 0 10 START ID SKIP ID 1 Drücken Sie bei gestoppt...

Page 78: ...R700 siehe Seite 28 3 Drücken Sie OPEN CLOSE 6 und setzen Sie die Cassette ein z Anschluß eines Kopfhörers Den Kopfhörer an die PHONES Buchse anschließen Die Kopfhörer Lautstärke kann am PHONE LEVEL Regler eingestellt werden b OPEN CLOSE 6 OPEN CLOSE 6 b Bis zum Klicken einschieben Den Cassettenhalter nur durch Drücken von OPEN CLOSE 6 schließen Mit dem Fenster nach oben 4 Drücken Sie PLAY Die Cas...

Page 79: ...4 Stellen Sie INPUT ANALOG INPUT und DIGITAL IN OUT entsprechend der verwendeten Eingangsbuchse ein Schalter Einstellungen DIGITAL COAXIAL IN ANALOG BALANCE ANALOG UNBALANCE DIGITAL AES EBU DIGITAL COAXIAL Der DIGITAL IN OUT Schalter befindet sich auf der Geräterückseite siehe Seite 5 1 Schalten Sie den Verstärker ein und geben Sie die aufzunehmende Signalquelle wieder 2 Drücken Sie POWER Überzeug...

Page 80: ... der Taste PAUSE P oder PLAY kann die Aufnahme fortgesetzt werden Entnehmen der Cassette OPEN CLOSE 6 nach Stoppen der Aufnahme Zum Schutz vor versehentlichem Löschen Schieben Sie die Löschschutzlamelle wie in der nachstehenden Abbildung gezeigt nach links z Falls UNLOCK im Display angezeigt wird In diesem Falle ist die Signalquelle nicht richtig an das Deck angeschlossen oder nicht eingeschaltet ...

Page 81: ... Aufnahme Unbespielte Stellen und Stummstellen Bei DAT Cassetten ist zwischen unbespielten Stellen und Stummstellen zu unterscheiden Unbespielte Stellen Auf diesen Stellen wurde noch nie aufgenommen A A A A T T T T Stummstellen Auf Stummstellen wurde eine Aufnahme bereits ausgeführt das Aufnahmesignal jedoch stummgeschaltet A T T T T A A u f n a h m e T T i t e l S t u m m s t e l l e n A A u f n ...

Page 82: ... die PGM TIME Anzeige nicht mehr stimmt Verwendung der Super Bit Mapping Funktion SBM Die SBM Funktion berücksichtigt die Empfindlichkeitscharakteristik des menschlichen Ohrs und nutzt die Noise Shaping Technologie zur Reduzierung des Quantisierungsrauschens innerhalb des Frequenzbands Ein Analogsignal kann nur dann mit aktivierter SBM Funktion aufgenommen werden wenn der INPUT Schalter auf ANALOG...

Page 83: ...ährend das Deck den Anfang des unbespielten Bandteils sucht erscheinen BLANK und WAIT im Display Hinweis Die Ende Suchfunktion arbeitet nicht wenn innerhalb eines unbespielten Bandteils die FF Taste gedrückt wird FF AUTO MIN MAX OFF WIRED WIRELESS REMOTE POWER Ø ON ø OFF PHONE LEVEL PHONES RENUMBER REHEARSAL REHEARSAL WRITE WRITE ERASE ERASE REPEAT SKIP PLAY LOCATE MODE COUNTER RESET MARGIN RESET ...

Page 84: ...L INPUT REC LEVEL OFF ON SBM UNBALANCE BALANCE ANALOG INPUT STANDARD 48k 44 1k LONG REC MODE CH 2 R 0 10 START ID SKIP ID INPUT MONITOR FADER OFF ON KEY PROTECT E r l ö s c h e n Um das Eingangssignal zu hören Drücken Sie INPUT MONITOR so daß INPUT im Display erscheint z Um im Stoppzustand und in der Aufnahme Pause das Eingangssignal abzuhören Drücken Sie INPUT MONITOR so daß INPUT im Display ange...

Page 85: ...it kann je nach Band mit einer gewissen Abweichung behaftet sein Wenn EMPHASIS im Display angezeigt wird In diesem Fall enthält die Aufzeichnung eine Emphasis Höhenanhebung Das Deck nimmt in diesem Fall automatisch eine De Emphasis Höhenabsenkung vor Wenn ERR für 5 Sekunden oder länger im Display erscheint Der Tonkopf ist verschmutzt Reinigen Sie den Kopf mit einer DAT Reinigungscassette siehe Sei...

Page 86: ...altet an dieser auf Stopp z Wiedergabegeschwindigkeit bei Shuttle Play Mit Shuttle Play kann die Wiedergabegeschwindigkeit im Bereich des 0 5 bis 8fachen der Normalgeschwindigkeit variiert werden bzw innerhalb der 1 bis 8fachen Normalgeschwindigkeit wenn die Aufnahme im Langspielmodus erfolgt ist Die Steuerung erfolgt durch entsprechendes Drehen der SHUTTLE Scheibe in die gewünschte Richtung Auf D...

Page 87: ...tartcode des momentanen Titels zurückgekehrt und der Titel erneut wiedergegeben am nächsten Startcode an einer unbespielten Stelle von mehr als 9 Sekunden am Bandende bzw am Endcode an einem Sprungcode bei aktivierter Sprungfunktion Zum Abschalten des Wiederholspielbetriebs Drücken Sie REPEAT wiederholt bis REPEAT 1 erlischt Hinweis Beim Herausnehmen der Cassette wird der Wiederholspielbetrieb abg...

Page 88: ... Sprungcodes Skip ID Die Sprungcodes markieren den Anfang einer zu überspringenden Passage oder eines zu überspringenden Titels Die Sprungcodes besitzen eine Länge von 1 Sekunde bzw 2 Sekunden im Longplay Modus Endcode END ID bei Verwendung der optionalen Fernbedienung Ein Endcode markiert das Ende einer Aufnahme Die Länge des Endcodes beträgt 9 Sekunden bzw 18 Sek im Longplay Modus Wenn bei Wiede...

Page 89: ...und Menü Steuerung auf Seite 24 und 25 Aufzeichnung von Programmnummern während der Aufnahme Programmnummern werden an der gleichen Stelle wie die Startcodes aufgezeichnet Für Programmnummern gelten folgende Bedingungen Wenn eine Programmnummer angezeigt ist Beim Setzen des nächsten Startcodes erhöht sich die nächste Programmnummer um 1 Wenn noch keine Programmnummer angezeigt ist Anzeige von Es w...

Page 90: ... ID bzw SKIP ID Das Deck gibt nun die betreffende dreisekündige Bandpassage achtmal wiederholt wieder wobei die Zahl rechts neben der Anzeige REHRSL angibt wie viele Durchgänge noch ausstehen Nach acht Wiederholdurchgängen stoppt das Band Im Falle des Startcodes beginnt die dreisekündige Wiederholpassage am Drückzeitpunkt der REHEARSAL Taste Im Falle des Sprungcodes endet die dreisekündige Wiederh...

Page 91: ...es existierenden Startcodes Bereits auf dem Band aufgezeichnete Startcodes können nachträglich noch geringfügig vor oder zurückverschoben werden 1 Drücken Sie während der Wiedergabe bei Erreichen des zu korrigierenden Startcodes die START ID REHEARSAL Taste Das Deck spult dann zum Anfang des Startcodes zurück und eine dreisekündige Passage wird von der Rehearsal Funktion wiederholt wiedergegeben 2...

Page 92: ...RED WIRELESS REMOTE POWER Ø ON ø OFF PHONE LEVEL PHONES RENUMBER REHEARSAL REHEARSAL WRITE WRITE ERASE ERASE REPEAT SKIP PLAY LOCATE MODE COUNTER RESET MARGIN RESET PREVIOUS AMS OPEN CLOSE 6 NEXT STOP p REW 0 PLAY FF PAUSE P REC MUTE R REC r MENU DATA SHUTTLE CH 1 L r SET MARK 0 10 ANALOG DIGITAL INPUT REC LEVEL OFF ON SBM UNBALANCE BALANCE ANALOG INPUT STANDARD 48k 44 1k LONG REC MODE CH 2 R 0 10...

Page 93: ...TAL AES EBU OUT Buchse ausgegeben werden Einstellbereich on Start und Sprungcodes werden erfaßt und automatisch aufgezeichnet Startcodes werden ausgegeben Start und Sprungcodes werden in Abhängigkeit von den Menü Einstellungen unter L SY TH und L SY BK gesetzt Start und Sprungcodes werden nicht ausgegeben Werkseinstellung Referenzseite 7 Menü Steuerung Durch Aufrufen von Menüs ist eine Reihe versc...

Page 94: ...des Signals bei Aufnahme und Wiedergabe Einstellbereich 0 5 bis 9 5 Sek in 0 5 Sek Schritten Werkseinstellung 5 0 Sek Referenzseite 15 und 19 Automatisches Setzen von Startcodes und Menü Einstellungen bei digitaler Aufnahme Wie aus der nachstehenden Tabelle ersichtlich erfolgt die Erfassung und das Setzen der Startcodes automatisch in Abhängigkeit vom mit der Signalquelle belegten Eingang vom Sign...

Page 95: ...ert werden Mit jedem Drücken der Taste erscheint der jeweils nächste Titel im Programm Hinweis Es ist nicht möglich beim Überprüfen der Titelfolge mit der CLEAR Taste einzelne Titel aus dem Programm zu löschen Anfügen weiterer Titel Wiederholen Sie bei gestopptem Deck die Schritte 1 und 2 Hinweis Bei laufender Wiedergabe des Programms können keine weiteren Titel angefügt werden Löschen des gesamte...

Page 96: ... jeweils 0 3 Sek zurück bzw vorverschoben In beiden Richtungen ist maximal eine Verschiebung um ca 2 Sek 4 Sek im Longplay Modus möglich Die zeitliche Verschiebung der Startposition gegenüber der Stelle an der die END ID REHEARSAL Taste gedrückt wurde wird im Display angezeigt 3 Drücken Sie END ID WRITE wenn der Endcode Anfang wunschgemäß positioniert ist Im Display erscheint einige Sekunden lang ...

Page 97: ...rennter Stromversorgung erforderlich Ändern Sie den Pegel von Stift Nr 1 durch den zwischen Mode 1 und 2 umgeschaltet wird nicht während der Wiedergabe oder Aufnahme da es sonst zu Betriebsstörungen kommen kann Zusatzinformationen Fernbedienung über eine parallele Fernbedienungsbuchse Sie können das Deck auch durch parallele Fernbedienung mit Hilfe einer an die REMOTE 1 Buchse angeschlossenen Scha...

Page 98: ...nd geschützt ist und kein Staub eindringen kann Öffnen Sie die Bandabdeckung nicht An der Öffnung an der Rückseite der Cassette erkennt das Deck den Bandtyp Überkleben Sie die Vertiefung nicht Hinweise zu Cassetten mit mehr als 120 Minuten Länge Das Band solcher Cassetten ist besonders dünn Vermeiden Sie die Verwendung solcher Cassetten zur Aufnahme wichtiger Daten weil folgende Probleme auftreten...

Page 99: ...ING ab bevor Sie das Deck in Betrieb nehmen Die PAUSE P Taste ist eingeschaltet Die Pause durch erneutes Drücken von PAUSE P abschalten Das Band ist am Ende angelangt Das Band durch Drücken von REW 0 zurückspulen Kein Ton Das Deck ist nicht richtig angeschlossen Das Deck richtig anschließen Siehe Seite 5 bis 6 Der angeschlossene Verstärker arbeitet nicht einwandfrei Den Verstärker richtig einstell...

Page 100: ...ekunde 2 Sek im Longplay Modus in der ein Sprungcode gesetzt bzw gelöscht wird sind sämtliche Tasten außer Funktion Warten Sie bis das Setzen bzw Löschen beendet ist Die Absolutzeitcodes können nicht aufgezeichnet werden Es wurde innerhalb eines unbespielten Bandteils mit der Aufnahme begonnen Das Band zum Anfang zurückspulen oder das Ende der existierenden Aufzeichnung mit der Ende Suchfunktion a...

Page 101: ...nke XLR 3 Steckbuchse 47 kOhm 10 kOhm oder höher symmetr 12 dBs 4 dBs Werks einstellung Digital Bezeichnung Typ Impedanz Nennpegel AES EBU COAXIAL 0 5 Vss XLR 3 Buchse Klinke 110 Ohm symmetr 75 Ohm Digitalausgang Last impedanz Bezeichnung Nenn pegel Impedanz Typ AES EBU COAXIAL 75 Ohm XLR 3 Steckbuchse Klinke 35 Ohm symmetr 75 Ohm 0 5 Vss 110 Ohm Regelbereich des analogen BALANCE Ein Ausgangs Refe...

Page 102: ...öschschutzlamelle 11 M Mark Locate Funktion 17 Menü Beschreibungen 24 25 Menü Einstellungen 24 Mithören des gerade aufgenommenen Signals Aufnahme Monitorbetrieb 15 Music Scan 26 N O Neunumerierung 23 P Programmnummern 20 Aufzeichnen von Programmnummern während der Aufnahme 20 Festlegen der ersten zuzuweisenden Programmnummer 20 Programm Wiedergabe RMS 26 Anfügen weiterer Titel 26 Löschen des gesam...

Page 103: ... 27 29 31 RMS CHECK 26 RMS ENTER 26 SET 8 24 SKIP ID ERASE 23 SKIP ID REHEARSAL 21 22 SKIP ID WRITE 21 22 SKIP PLAY 18 31 START ID AUTO 20 START ID ERASE 23 START ID REHEARSAL 21 22 START ID WRITE 20 22 STOP p 9 11 19 26 29 30 Schalter ANALOG INPUT 10 30 DIGITAL IN OUT 5 10 30 INPUT 10 13 30 KEY PROTECT 9 10 28 POWER 9 10 REC MODE 7 13 REMOTE 4 26 31 SBM 13 31 33 Regler ANALOG BALANCE IN OUT 5 6 1...

Page 104: ...35D 3 859 278 11 1 Stichwortverzeichnis ...

Reviews: