Network Function
15
Network Function
The following actions can be controlled
using a web browser by connecting the unit
to a PC, tablet, or other device using a LAN
cable.
• Basic operations on the list screen.
• Change menu settings (excluding
network-related items)
• File playback operations
Connecting
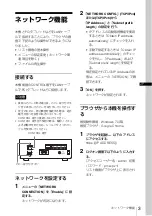
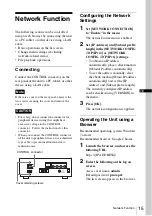
Connect the CONTROL connector on the
rear panel of the unit to a PC, tablet, or other
device using a LAN cable.
If there is a cover on the rear panel, unscrew the
two screws securing the cover and remove the
cover.
• For safety, do not connect the connector for
peripheral device wiring that might have
excessive voltage to the CONTROL
connector. Follow the instructions for this
connector.
• When you connect the CONTROL connector
of the unit to peripheral device, use a shielded-
type cable to prevent malfunction due to
radiation noise.
Configuring the Network
Settings
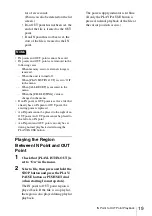
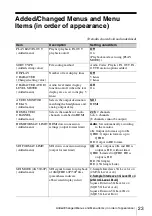
1
Set [NETWORK CONNECTION]
to “Enable” in the menu.
The network connection is enabled.
2
Set [IP Address] and [Subnet prefix
length] in the [NETWORK CONFIG
(TCP/IPv4)] or [NETWORK
CONFIG (TCP/IPv6)] settings.
• To obtain an IP address
automatically, place a check mark in
[Obtain IP address automatically].
• To set the address manually, clear
the check mark in [Obtain IP address
automatically] and set the [IP
address] and [Subnet prefix length].
The currently configured IP address
can be checked using [VERSION] in
the menu.
3
Press [OK].
The network configuration is applied.
Operating the Unit using a
Browser
Recommended operating system: Windows
7 or later
Recommended browser: Google Chrome
1
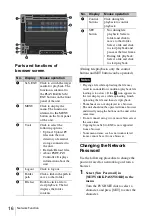
Launch the browser, and access the
following URL.
https://[IP ADDRESS]/
2
Enter the following on the log on
screen.
Access user name:
admin
Default password:
pmw-pz1
The list screen appears in the browser.
Note
CAUTION
CONTROL connector
Cover retaining screws
GB
Summary of Contents for PMW-PZ1
Page 127: ......


