background image

E

nglish

8188

♦♦♦

1

English

TABLE OF CONTENTS

SAFETY INSTRUCTIONS ................................................................. 2
INTRODUCTION ............................................................................ 4

Package Contents .................................................................... 4
Installing or Removing  the Tilt/Swivel Base........................... 5
Feature Highlights ................................................................... 5

Maximum Compatibility .................................................. 5

Latest Screen Technology ................................................ 5

Ergonomics concerned ..................................................... 6

Instant Power Saving Solution ......................................... 6

Specifications .......................................................................... 6
Recommended Use of the Monitor ......................................... 7

CONTROLS AND ADJUSTMENTS .................................................. 8

Front User Controls. ................................................................ 8
"Picture" Menu ........................................................................ 9
"Status" Menu ........................................................................ 10
"Color" Menu ........................................................................ 11
Contrast and brightness control ............................................ 11
Exit Switch ............................................................................. 11
Energy Declaration ................................................................ 12

TECHNICAL INFORMATION ........................................................ 12

Compatibility ......................................................................... 12

Pin Assignment Table .................................................... 12

Preset Timing Chart ....................................................... 13

TROUBLESHOOTING ................................................................... 14
DIMENSION/ABMESSUNGEN/DIMENSION ................................ 43
PLUG & PLAY: DISPLAY DATA CHANNEL (DDC) ...................... 44
MANUFACTURER'S LIMITED WARRANTY. ................................. 45

Summary of Contents for PR711

Page 1: ...er Saving Solution 6 Specifications 6 Recommended Use of the Monitor 7 CONTROLS AND ADJUSTMENTS 8 Front User Controls 8 Picture Menu 9 Status Menu 10 Color Menu 11 Contrast and brightness control 11 Exit Switch 11 Energy Declaration 12 TECHNICAL INFORMATION 12 Compatibility 12 Pin Assignment Table 12 Preset Timing Chart 13 TROUBLESHOOTING 14 DIMENSION ABMESSUNGEN DIMENSION 43 PLUG PLAY DISPLAY DAT...

Page 2: ...laced near or over a radiator or a heat register nor should the product be placed in a built in installation unless proper ventilation is provided 8 This product is equipped with a 3 wire grounding type plug This plug will only fit into a grounding type power outlet This is a safety feature If you are unable to insert the plug into the outlet contact your electrician to replace your obsolete outle...

Page 3: ...ny kind on the product 11 Do not attempt to service this product yourself as opening or removing covers may expose you to dangerous voltage points or other risk Refer all servicing to service personnel 12 Unplug this product from the wall outlet and refer servicing to qualified service personnel under the following conditions A When the power cord or plug is damaged or frayed B If liquid has been ...

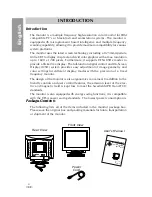
Page 4: ...stem provides easy adjustment of image geometry and color settings for different display modes with the precision of a fixed frequency monitor The design of the monitor is also ergonomics concerned In addition to the friendly controls and user comfort features the emission level of the elec tric and magnetic field is kept low to meet the Swedish MPR II and TCO standards The monitor is also equippe...

Page 5: ...e operating platforms such as IBM compatible PC s or Macintosh computers with optional adapter Multiple graphic standards with high refresh rates 640 x 480 160Hz 800 x 600 147Hz 1024 x 768 117Hz 1280 x 1024 85Hz 1600 x 1200 75Hz Supports wide range of graphics standards including VGA Super VGA 8514 A XGA Mac II 13 640 x 480 Mac 16 832 x 624 Mac 21 1152 x 870 as well as all VESA standards Latest Sc...

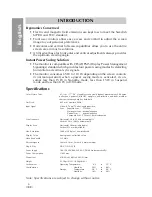
Page 6: ...e Specifications are subject to change without notice Color Picture Tube 43 1 cm 17 16 viewable screen size diagonal measurement 90 degree deflection Aperture Grille CRT anti glare anti reflection anti static medium short persistence phosphor dark bulb Dot Pitch 0 25 mm Aperture Grille Input Signal Video 0 7 Vp p 75 ohm analog positive Sync Separate Sync TTL Level Horizontal Sync positive negative...

Page 7: ...where the overall background area just begins to disappear Allow adequate ventilation around the monitor so that the heat from the monitor can properly dissipate Neither the monitor itself nor any other heavy objects should rest on the power cord Damage to the power cord can cause fire or electrical shock Keep the monitor away from high capacity transformers electrical motors or other strong magne...

Page 8: ...f the selected function To adjust the contrast level or brightness of the screen 6 Status Key To display and select the Mode Off time Power save Recall Language and Location functions Mode shows horizontal vertical frequency and polarity Off time sets OSD window display time Power save enables or disable the power saving function Recall recalls the factory settings of the Picture Color and Converg...

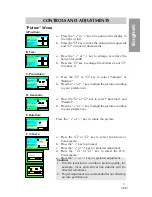
Page 9: ...educe the horizontal width b Press the key to enlarge the vertical size or to reduce it a Press the or key to reposition the display to the right or left b Press the key to move the entire picture upwards and to move it downwards Caution 1 If moire reduction is overdone picture quality for example focus and vertical line stability will be effected sametimes 2 Proper adjustment is recommanded for n...

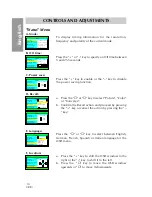
Page 10: ...the OSD window to the right or the key to shift it to the left b Press the key to move the OSD window upwards or to move it downwards B Off time A Mode Mode Status Off time Power save Recall H 63 8 KHz V SYNC H SYNC V 59 8 Hz 1280 x1024 Language Location OSD OFF After 58 SEC Mode Status Off time Power save Recall Language Location OSD OFF After 58 SEC Mode Status Off time Power save Recall Languag...

Page 11: ... decrease the respective color intensity When the OSD menu is switched off proceed as follows to adjust the contrast or brightness a Press the or key to increase or decrease the contrast level of the screen b Press the or key to increase or decrease the brightness level You can turn off the OSD window by pressing this key 50 100 Mode 1 Color 93 0 0 K 62 68 62 Mode 2 Mode 3 Mode 4 Mode 1 Color 750 ...

Page 12: ...easured when brightness and contrast are adjusted to their center position Compatibility This color monitor supports multiple operating platforms such as IBM compatible and Macintosh family computers This section provides you with detailed information on pin assignment of the D Sub connector and the preset timing chart of the prevailing video standards Pin Assignment 5 10 15 11 6 1 Male Mini D 15 ...

Page 13: ...9 309 9 481 8 127 Eµ s Front Porch 0 636 1 555 0 601 0 559 0 569 0 308 0 593 0 508 0 100 0 119 0 406 V Frequency Hz 59 940 70 087 85 008 119 868 74 552 85 062 120 039 75 000 84 997 99 836 75 024 85 024 V Sync Polarity Oms Period 16 683 14 268 11 763 8 343 13 413 11 756 8 330 13 333 11 765 10 016 13 329 11 761 Pms Pulse Width 0 064 0 069 0 094 0 060 0 056 0 039 0 044 0 044 0 037 0 038 0 033 Qms Bac...

Page 14: ...equency are out of range Maximize the Brightness and Contrast controls No Signal Input is displayed on the screen The video card should be completely seated in its slot The computer power switch should be in the ON position The signal cable should be completely connected to the video card computer Display image is not centered too small or too large Change the Position and Size controls to adjust ...

Reviews: