000
1. Overview: Screen Display
19
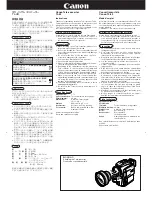
Lens Supplied with the PXW-X400KF
The PXW-X400KF is supplied with a lens.
10
11
12
13
14
1
2
3
4
5
6
7
8
9
1.
PUSH AF (auto focus) button
Reserved for use in a future upgrade.
2.
FOCUS (adjustment mode) switch
A (auto): Reserved for use in a future upgrade.
M (manual): Selects manual mode for focus
adjustment with the focus ring.
3.
MACRO switch
When this switch is in the ON position, macro
mode is enabled, allowing focusing over the
whole range (5 cm
1)
to ∞) including the macro
range (from 5 cm
1)
to 90 cm from the front of the
lens).
This operation is independent of whether the
focus adjustment mode is auto or manual.
1) At the wide-angle setting
4.
Iris ring
For manual iris adjustment, set the IRIS switch to
the M (manual) position, then turn this ring.
5.
Zoom ring
For manual zoom adjustment, set the ZOOM
switch to the MANUAL position, then turn this ring.
6.
Focus ring
Turn this ring to adjust the focus.
When the ring is set to AF/MF mode, the faster
you turn ring the faster the focusing mechanism
operates, minimizing the amount of turning
required for focusing.
When you slide the focus ring back (toward the
camcorder), the focus mode is set to Full MF
mode, in which all focus adjustments are manual
(page 40).
7.
Flange focal length adjustment button
Press this to adjust the flange focal length (the
distance from the lens mounting flange plane to
the focusing plane) (page 25).
8.
Zoom control connector (8-pin)
Connect to an optional zoom servo controller to
enable remote control of zooming.
9.
ZOOM switch
SERVO: Selects power zoom. Operate the zoom
with the power zoom lever.
MANUAL (manual): Selects manual zoom. Operate
the zoom with the zoom ring.
10.
PUSH AUTO (instant auto iris) button
When the IRIS switch is in the M position for
manual adjustment, press this button for
instantaneous auto adjustment. The iris is
automatically adjusted while the button is held
down.
11.
IRIS (adjustment mode) switch
A (auto): The iris is adjusted automatically.
M (manual): Adjust the iris with the iris ring.
12.
Power zoom lever
This is enabled when the ZOOM switch is in the
SERVO position. Set to the W (wide angle) position
when you want wide-angle, and set to the T
(telephoto) side when you want telephoto.
Press the lever harder for a faster zoom action, or
softer for slower zoom action.
13.
RET (return video) button
You can assign a function and use this as an
assignable switch (page 106).
When “Lens RET” is assigned to this button (factory
default setting), press this after recording stops
to review the last few seconds recorded on the
viewfinder screen (Rec Review) (page 45).
Press this button (single click) during recording or
playback to record a Shot Mark 1 mark, or double-
click to record a Shot Mark 2 mark (page 47).
14.
VTR button
Use this to start and stop recording. Press once to
start recording, then press once more to stop.
Viewfinder
1
2
3
4
5
6
7
8
9
10
11
15
16
14 13 12
1.
Connector
Connect to the VF connector (26-pin) on the
camcorder.
2.
Viewfinder cable
3.
Slide stopper
Prevents the viewfinder from coming off the
camcorder when it is slid from side to side.
4.
Eyecup
5.
Diopter adjustment ring
Turn this ring to adjust the image until it is in
sharpest focus.
6.
Eyepiece
You can raise this up when required by the
situation.
7.
Viewfinder barrel
You can raise this up or rotate when required by
the situation.


