1-8
35
Ho
ok
u
p
s an
d Sett
ings
Enjoying Digital Broadcasts
You can enjoy digital broadcasts. Digital
broadcasts are better quality, more varied, and
more controllable than analog broadcasts. By
using digital functions such as rating, closed
caption, or audio setting, you can make various
adjustments to enjoy a digital broadcast.
To use the digital rating
Digital Rating is controlled by the Rating Region
Table (RRT). The RRT is decided by the
broadcaster. This table can be used as parental
ratings. For details, see “Digital Rating” of
“Parental” in “Options” setup (page 85).
Note
This recorder cannot receive the program guide table,
therefore, you cannot set the rating in advance. But as the
dimension that was set once is memorized, the future
program will be able to refer this setting.
To use digital closed captions
Digital Closed Caption supports programs that
have the caption service. If the support service
number is selected, closed captions appear on
screen. For details, see “Caption Service” in
“Options” setup (page 87).
Note
Digital closed captions cannot be recorded.
To select digital audio settings
You can adjust audio settings using the OPTIONS
menu.
1
Press OPTIONS.
2
Press
M
/
m
to select “Audio.”
3
Press
<
/
,
to select the stream you want to
listen to, then press ENTER.
The contents of a stream depends on the
program.
Depending on the program, you can switch
the left and right sound using the AUDIO
button.
Notes
• Only the selected audio can be recorded. When
recording with the timer, “Stream 1” is usually
recorded.
• Dolby Digital (5.1ch) signals will be automatically
converted to Downmix (2ch) signal and recorded.
• The HDMI OUT jack cannot output Dolby Digital
signals for digital broadcasts. To hear Dolby Digital,
use the DIGITAL AUDIO OUT jacks.
• HD (High Definition) signal through this recorder is
converted to SD (Standard Definition) signal. You
cannot record in HD (High Definition).
36
Playback
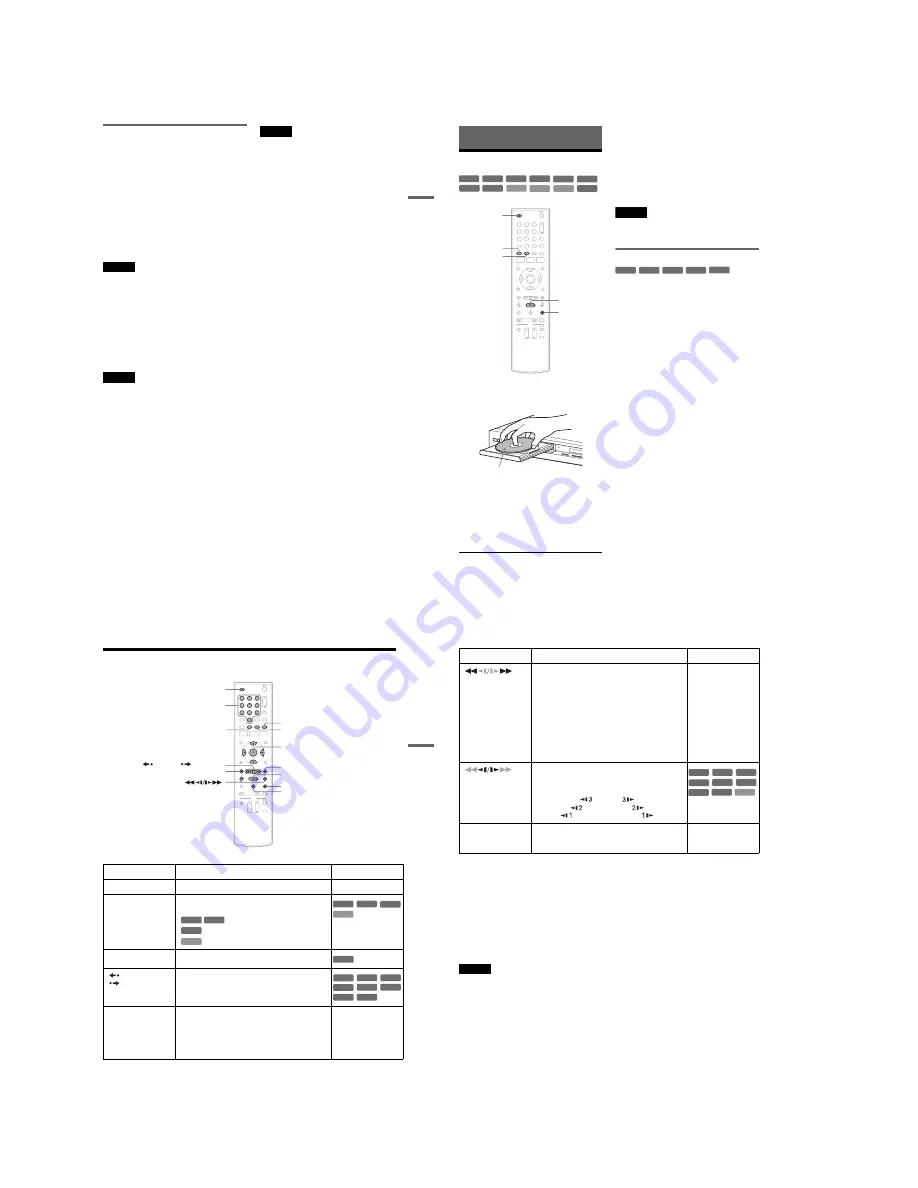
Playing Discs
1
Press
Z
OPEN/CLOSE, and place a disc on
the disc tray.
2
Press
Z
OPEN/CLOSE to close the disc
tray.
Wait until “LOAD” disappears from the front
panel display.
3
Press
H
PLAY.
Playback starts.
To stop playback
Press
x
STOP.
z
Hints
• You can play DATA CDs or DATA DVDs with MP3
audio tracks or JPEG image files (pages 42 or 43).
• If you insert a DVD VIDEO, VIDEO CD, or CD,
playback starts automatically depending on the disc.
• When playing a DVD+RW, DVD-RW, DVD+R,
DVD-R, and DVD-RAM, you can select the title from
the Title List menu (page 40).
• When using a DVD-RAM with a cartridge, remove the
disc from the cartridge.
Note
To play a disc recorded with other equipment on this
recorder, finalize the disc on the recording equipment
first.
Using the DVD’s Menu
When you play a DVD VIDEO, or a finalized
DVD+RW, DVD-RW (Video mode), DVD+R, or
DVD-R (Video mode), you can display the disc’s
menu by pressing TOP MENU or MENU.
+
RW
+
R
DVD
VCD
CD
-RW
VR
-RW
Video
DATA DVD
DATA CD
-R
VR
-R
Video
RAM
1
1
2
2
3
3
4
4
5
5
6
6
7
7
8
8
0
0
9
9
x
STOP
Z
OPEN/
CLOSE
H
PLAY
TOP MENU
MENU
DV IN
L(MONO) A
UDIO R
VIDEO
S VIDEO
LINE-2 IN
ONE-TOUCH D
UBBING
Playback side facing down
+
RW
+
R
DVD
-RW
Video
+
R
-R
Video
37
Pl
ay
ba
ck
Playback Options
Button
Operation
Disc
Z
OPEN/CLOSE
Stops playing and opens the disc tray.
All discs
AUDIO
Selects one of the audio tracks recorded on the disc
when pressed repeatedly.
: Selects the main or sub sound.
: Selects the audio source.
: Selects stereo or monaural audio tracks.
SUBTITLE
Selects a subtitle language when pressed repeatedly.
.
REPLAY/
ADVANCE
• Replays or briefly fast forwards a scene when
pressed during playback.
• Goes to the previous or next frame when pressed
during pause mode.
.
PREV/
NEXT
>
• Goes to the beginning of the current or next title/
chapter/scene/track and starts playback when
pressed during playback.
• Goes to the beginning of the previous title/chapter/
scene/track when
.
PREV is pressed within three
seconds after starting a title/chapter/scene/track.
All discs
1
1
2
2
3
3
4
4
5
5
6
6
7
7
8
8
0
0
9
9
Z
OPEN/CLOSE
X
PAUSE
.
PREV
REPLAY/
ADVANCE
x
STOP
H
PLAY
M
/
m
/
<
/
,
,
ENTER
Number buttons
>
NEXT
MENU
AUDIO
SUBTITLE
-RW
VR
-R
VR
DVD
VCD
DVD
VCD
-RW
VR
-R
VR
DVD
+
RW
+
R
DVD
-R
Video
RAM
RAM
-RW
VR
-RW
Video
-R
VR
,
continued
38
To resume normal playback after playing at various speeds, press
H
PLAY.
z
Hints
• You can change playback options, such as subtitle,
audio track, etc., using the OPTIONS menu (page 11).
• During playback or pause mode, the recorder’s
m
/
M
buttons and the remote’s
.
PREV/
>
NEXT
buttons work the same way (page 37). Hold the buttons
down during playback to fast forward or fast reverse. In
pause mode, you can play in slow motion. Three speeds
are available, depending on the duration of the press.
• See “DVD Audio/Subtitle Language” on page 102 for
the meaning of the language abbreviation.
Notes
• If you pause playback of a CD, or DATA CD/DATA
DVD containing MP3 audio tracks, playback will not
start until you press
H
PLAY or
X
PAUSE.
• Sound will be interrupted during Scan Audio
(page 39).
Notes on playing DTS soundtracks on a CD
When playing DTS-encoded CDs, excessive noise
will be heard from the analog stereo jacks. To
avoid possible damage to the audio system, the
consumer should take proper precautions when
the analog stereo jacks of the recorder are
connected to an amplification system. To enjoy
DTS Digital Surround™ playback, an external
5.1-channel decoder system must be connected to
the digital jack of the recorder.
Notes on playing DVDs with a DTS soundtrack
DTS audio signals are output only through the
DIGITAL AUDIO OUT (COAXIAL or
OPTICAL)/HDMI OUT jacks.
When you play a DVD with DTS soundtracks, set
“Digital Out” – “DTS” to “On” of “Audio” in the
“Setup” display (page 81).
If you connect the recorder to audio equipment
without a DTS decoder, do not set “DTS” to “On”
in “Audio” setup. A loud noise (or no sound) may
come out from the speakers, which might disturb
your ears or cause damage to the speakers.
(fast reverse/fast
forward)
Fast reverses or fast forwards the disc when pressed
during playback.
Search speed changes with each press:
fast reverse
fast forward
FR1
T
t
FF1
*1
FR2
*2
T
T
t
t
FF2
*2
FR3
*3
T
T
T
t
t
t
FF3
*3
All discs
*1
FF1 with sound
(Scan Audio) is
available for DVDs
with Dolby Digital
soundtracks.
*2
FR2 and FF2 are not
available for MP3.
*3
FR3 and FF3 are only
available for DVDs
and VIDEO CDs.
(slow)
Plays in slow motion when pressed in pause mode.
Playback speed changes with each press:
reverse slow motion
forward slow motion
T
t
T
T
t
t
T
T
T
t
t
t
* Playback direction
only
X
PAUSE
Pauses playback.
If you pause playback for more than five minutes,
playback starts automatically.
All discs
Button
Operation
Disc
VCD
+
RW
+
R
-RW
VR
-RW
Video
DVD
-R
VR
-R
Video
RAM
*
Summary of Contents for RDR-GX255
Page 36: ...1 26E MEMO ...
Page 40: ...2 4E MEMO ...
Page 42: ...3 4E MEMO ...
Page 44: ...4 1 DVD Main PCB 4 4 4 3 COMPONENT SIDE ...
Page 45: ...4 6 4 5 CONDUCTOR SIDE ...
Page 46: ...4 8 4 7 4 2 Front Main PCB COMPONENT SIDE ...
Page 47: ...4 10 4 9 CONDUCTOR SIDE ...
Page 48: ...4 12E 4 11 4 3 Function Timer PCB COMPONENT SIDE CONDUCTOR SIDE ...
Page 50: ...5 4 5 3 5 1 S M P S Front Main PCB ...
Page 51: ...5 6 5 5 5 2 Power Front Main PCB ...
Page 52: ...5 8 5 7 5 3 Logic Front Main PCB ...
Page 53: ...5 10 5 9 5 4 Function Jack VCR Front Main PCB ...
Page 54: ...5 12 5 11 5 5 MPEG Decoder DVD Main PCB ...
Page 55: ...5 14 5 13 5 6 A V Decoder DVD Main PCB ...
Page 56: ...5 16 5 15 5 7 In Out DVD Main PCB ...
Page 57: ...5 18 5 17 5 8 ATSC DVD Main PCB ...
Page 58: ...5 20 5 19 5 9 Tuner DVD Main PCB ...
Page 59: ...5 22 5 21 5 10 DV HDMI DVD Main PCB ...
Page 60: ...5 24E 5 23 5 11 Front Panel Function Timer PCB ...
Page 77: ...7 1 RDR GXD455 7 REPAIR PARTS LIST 7 1 Exploded Views 7 2 7 2 Electrical Parts List 7 3 ...


