1-16
66
Basic Editing
To list all of the titles to be erased, select “List.”
To clear all the check marks, select “Reset All.”
e
Repeat step 4 to select all the titles you want
to erase.
◆
When the selected title is protected
The display asks for confirmation.
• To continue the procedure, press
,
to select
“Change.”
The protection display appears. Select “Off” by
pressing
<
/
,
, then press ENTER.
• To cancel the procedure, select “Close” by pressing
<
/
,
, then press ENTER.
◆
When the selected title is referred to by a
Playlist
Select “Close” as you are unable to delete an original
title that is referred to by a Playlist.
If you want to delete the original title, first delete the
Playlist title. Then, delete the original title.
f
Press
<
/
,
to select “OK,” then press
ENTER.
The display asks for confirmation.
To return to the display for selecting titles, select
“View All.”
g
Press
<
/
,
to select “OK,” then press
ENTER.
z
Hint
If you are using a DVD-RW (Video mode) or DVD+RW, you can erase
a title using the Disc Map (page 38).
Erasing a section of a title (A-B Erase)
You can erase a section of a title using the sub-menu.
◆
For original titles in a DVD-RW (VR mode):
Note that you are unable to erase the original title if there is a
Playlist title derived from the original title.
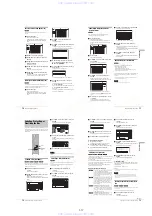
a
Press TITLE LIST.
The Title List menu appears. If you are using a DVD-
RW (VR mode), press TOOLS and select either
“Original” or “Playlist” from the TOOLS menu to
change the Title List, if necessary.
b
Press
M
/
m
to select the title, then press
ENTER.
The sub-menu appears.
c
Press
M
/
m
to select “A-B Erase,” then press
ENTER.
The display for setting point A appears.
The selected title plays in the background. The slider
indicates the current playback point.
◆
When the selected title is protected
The display asks for confirmation.
• To continue the procedure, press
<
/
,
to select
“Change.”
The protection display appears. Select “Off” by
pressing
<
/
,
, then press ENTER.
• To cancel the procedure, select “Close” by pressing
<
/
,
, then press ENTER.
◆
When the selected title is referred to by a
Playlist
Select “Close” as you are unable to delete an original
title that is referred to by a Playlist.
If you want to delete a section of the original title,
first delete the Playlist title. Then, delete the section.
d
While watching the playback picture, set
point A using
H
PLAY,
X
PAUSE, and
m
/
M
, then press ENTER.
The display for setting point B appears, and the title
continues to play in the background.
e
While watching the playback picture, set
point B using
H
PLAY,
X
PAUSE, and
m
/
M
, then press ENTER.
The display asks for confirmation.
To preview, select “Preview.”
To reset either point A or B, select “Change A” or
“Change B.”
Sort
Date
Number
Title
My Movies
TITLE LIST
ORIGINAL
-RW.VR
1.5/4.7GB
1 2ch 1:00PM - 2:00PM
2 5ch 8:00PM - 9:00PM
3 12ch 9:00AM - 9:30AM
4 3ch 8:00PM - 8:30PM
5 25ch 8:00PM - 8:30PM
6 L2 9:00PM - 9:30PM
7 8ch 9:00PM - 9:30PM
8 125ch 10:00AM - 10:30AM
9/15
9/17
9/25
9/25
10/15
10/19
10/26
10/28
A-B Erase (Set point A)
A 0:12:34
B : :
– – – – –
2 5ch 8:00PM - 9:00PM
Playback point
A-B Erase (Set point B)
A 0:12:34
B 0:23:45
A
2 5ch 8:00PM - 9:00PM
A-B Erase
Erase the scene
between A 0:12:34 and B 0:23:45?
OK
Cancel
Preview
Change A
Change B
67
Advanced Editing (Playlist Edit)
Editing a
D
V
D
f
Press
<
/
M
/
m
/
,
to select “OK,” then press
ENTER.
The scene is erased, and the display asks whether to
erase another scene.
g
To exit, press
<
/
,
to select “No,” then
press ENTER.
The display returns to the Title List menu.
To continue, select “Yes” and repeat the steps above.
Notes
• Images or sound may be momentarily interrupted at the point where
you erase a section of a title.
• Sections shorter than five seconds may not be erased.
Creating chapters manually
You can manually insert a chapter mark at any point you like.
Press CHAPTER MARK during playback at the
point where you want to divide the title into
chapters.
Each time you press the button, “Marking…” appears on the
screen and the scene to the left and right of the mark becomes a
chapter.
To erase chapter marks
You can combine two chapters by erasing a chapter mark during
playback.
1
Press
.
PREV or
>
NEXT to search for a
chapter number.
2
Press CHAPTER ERASE while displaying the
chapter you want to erase.
The current playing chapter combines with the
previous chapter.
Notes
• Playback may momentarily stop when inserting a chapter mark.
• A message will appear when no more chapter marks can be added. In
this case, you may not be able to record or edit the disc.
Advanced Editing (Playlist
Edit)
This section explains how to create a Playlist, and then covers
available edit functions for the created Playlist.
Playlist titles can be created from scenes that are selected
original titles or other Playlist titles.
Since edits to the Playlist does not affect the original title, you
can redo editing as many times as you like.
To create a Playlist title, you will do the following.
m
m
m
m
Creating a Playlist title from other
titles
Collect your favourite scenes from original titles or other Playlist
titles to create a new Playlist title. You can rearrange the order of
the scenes, delete scenes, or edit the scenes as well.
a
Press TITLE LIST.
The Title List (Original) menu or the Title List
(Playlist) menu appears.
Example: The Title List (Original) menu.
Marking...
1.Select a title or titles for editing
2.
“
Capture
”
multiple scenes from the selected title(s)
3.Confirm the scenes on the Scene List
4.If necessary, edit the scenes on the Scene List
5.Connect scenes to create a
“
Playlist
”
title
<
/
M
/
m
/
,
,
ENTER
TOOLS
H
PLAY
TITLE LIST
m
/
M
X
PAUSE
,
continued
68
Advanced Editing (Playlist Edit)
b
Press TOOLS.
The TOOLS menu appears.
c
Press
M
/
m
to select “Create Playlist,” then
press ENTER.
The display for selecting titles appears.
to select the title you want to
include in the Playlist title, then press
ENTER.
To select all of the titles, select “Select All.”
e
Repeat step 4 when adding more titles.
To go to the next page, press
m
.
To clear all the check marks, select “Reset All.”
f
Press
<
/
,
to select “OK,” then press
ENTER.
The list of selected titles appears.
To add another title, select “Add Title.”
g
Press
M
/
m
to select one of the titles, then press
ENTER.
The sub-menu appears.
◆
To add the entire title as one scene to the
Playlist title
Select “Capture All” and go to step 14.
h
Press
M
/
m
to select “Capture,” then press
ENTER.
The display for setting the start point (IN) appears.
The selected title starts to play in the background.
While watching the playback picture, select
the start of the scene using
H
PLAY,
X
m
/
M
, then press ENTER.
The display for setting the end point (OUT) appears,
and the title continues to play in the background.
While watching the playback picture, select
the end point of the scene using
H
PLAY,
m
/
M
, then press ENTER.
The display asks for confirmation.
To view the selected scene, select “Preview.”
To reset either the IN or OUT point, select “Change
IN” or “Change OUT.”
k
Press
<
/
,
to select “OK,” then press
ENTER.
The selected portion is captured as a scene, and the
display asks whether to continue scene capture.
Sort
Date
Number
Title
My Movies
TITLE LIST
ORIGINAL
-RW.VR
1.5/4.7GB
1 2ch 1:00PM - 2:00PM
2 5ch 8:00PM - 9:00PM
3 12ch 9:00AM - 9:30AM
4 3ch 8:00PM - 8:30PM
5 25ch 8:00PM - 8:30PM
6 L2 9:00PM - 9:30PM
7 8ch 9:00PM - 9:30PM
8 125ch 10:00AM - 10:30AM
9/15
9/17
9/25
9/25
10/15
10/19
10/26
10/28
Select the titles you want to capture.
Select the titles you want to capture.
Create Playlist - Selected Titles
Select a title to start capturing.
Cancel
Add Title
1 2ch 1:00PM - 2:00PM
2 5ch 8:00PM - 9:00PM
9/15
9/17
Capture (Set IN point)
IN0:10:26
OUT- : - - : - -
2 5ch 8:00PM - 9:00PM
IN0:10:26
OUT0:23:45
IN
2 5ch 8:00PM - 9:00PM
Do you want to capture the scene
between IN 0:10:26 and OUT 0:23:45?
OK
Cancel
Preview
Change IN
Change OUT
Capture
Do you want to select another scene?
More
No More
New Title
69
Advanced Editing (Playlist Edit)
Editing a
D
V
D
l
Press
<
/
,
to select an option on the screen,
then press ENTER.
To capture a scene from the same title, select
“More,” and repeat the steps above.
To capture a scene from another title, select “New
Title,” and repeat the steps above.
m
To end scene capture, press
<
/
,
to select
“No More” and press ENTER.
The display returns to the list of selected titles.
◆
To check the captured scenes in a single title
A
Press
M
/
m
to select a title from the list of
selected titles, then press ENTER.
The sub-menu appears.
B
Press
M
/
m
to select “Check Scenes,” then press
ENTER.
The thumbnail pictures of the captured scenes
within the title appear.
n
Press
<
/
M
/
m
/
,
to select “Scene List,” then
press ENTER.
The Scene List menu appears with all of the selected
scenes.
◆
To change the scene order (Move)
A
Press
M
/
m
to select the scene you want to
move, then press ENTER.
The sub-menu appears.
B
Press
M
/
m
to select “Move,” then press
ENTER.
The display for selecting the insertion point
appears.
C
Press
M
/
m
to select the insertion point, then
press ENTER.
The scene moves to its new position, and the
display returns to the Scene List menu.
◆
To erase the scene (Erase)
A
Press
M
/
m
to select the scene you want to
erase, then press ENTER.
The sub-menu appears.
B
Press
M
/
m
to select “Erase,” then press
ENTER.
C
When the display asks for confirmation, press
<
/
,
to select “OK,” then press ENTER.
◆
To change the scene contents (Change IN/
Change OUT)
A
Press
M
/
m
to select the scene you want to
change, then press ENTER.
The sub-menu appears.
B
Press
M
/
m
to select “Change IN,” then press
ENTER.
The display for setting the IN point appears.
C
Repeat steps 9 to 14.
To reset the OUT point, select “Change OUT,”
then repeat steps 10 to 14.
The display returns to the Scene List menu.
◆
To add another scene
Press
<
/
M
/
m
/
,
to select “Add,” then press
ENTER. Repeat steps above.
◆
To preview the entire Playlist title
Press
<
/
M
/
m
/
,
to select “Preview,” then press
ENTER. The captured scenes start to play in the
listed order. When the playback is finished, the
display returns to the Scene List menu.
o
Press
<
/
,
to select “OK,” then press
ENTER.
The scenes are connected to create a new Playlist
title, and the display for entering the title name
appears.
◆
To enter a new name
Select “Enter” and follow the explanations on
page 34.
◆
To use the default name
Press
<
/
,
to select “OK,” then press ENTER.
A new Title List menu appears with the title of the
entered name.
z
Hint
When a Playlist title is created, the “IN” point and “OUT” point will
become chapter marks, and each scene will become a chapter.
Notes
• You can capture, move, or change the IN and OUT points for a
maximum of 50 scenes per title.
• The picture may pause when the edited scene is played.
Check Scenes
Close
1
2
2 5ch 8:00PM - 9:00PM
Scene List
Total 0:33:28
Scenes 2
OK
Quit
Add
Preview
5ch 8:00PM - 9:00PM -1
0:10:26 - 0:23:45
1
2
5ch 8:00PM - 9:00PM -2
0:25:00 - 0:45:08
Total number of scenes
Total duration of the selected scene
Move
Cancel
5ch 8:00PM - 9:00PM -1
0:10:26 - 0:23:45
Where do you want to move this scene to?
1
2
5ch 8:00PM - 9:00PM -2
0:25:00 - 0:45:08
Capture (Set IN point)
IN0:10:26
OUT0:23:45
2 5ch 8:00PM - 9:00PM
,
continued
www. xiaoyu163. com
QQ 376315150
9
9
2
8
9
4
2
9
8
TEL 13942296513
9
9
2
8
9
4
2
9
8
0
5
1
5
1
3
6
7
3
Q
Q
TEL 13942296513 QQ 376315150 892498299
TEL 13942296513 QQ 376315150 892498299

