1-2
10
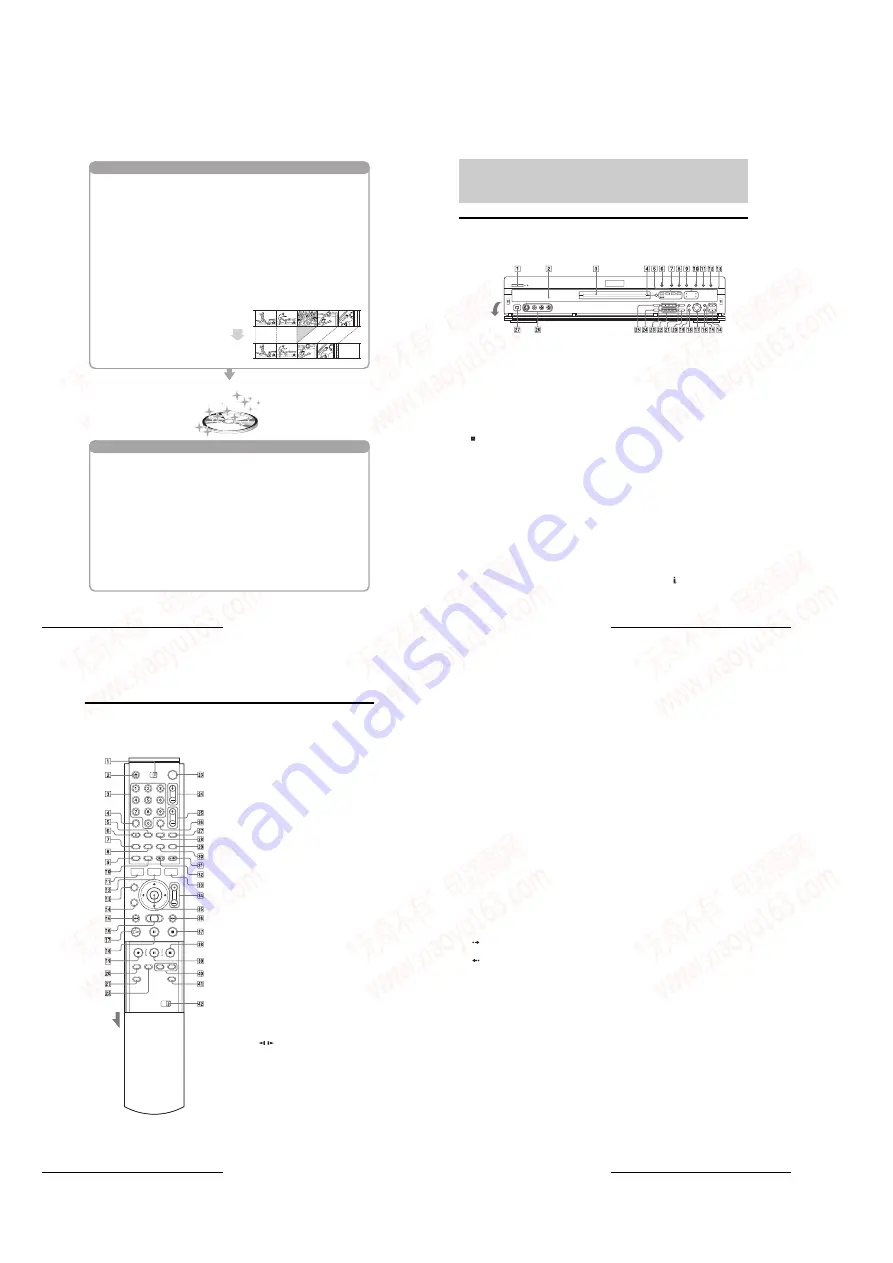
DVD Recorder Basics
Step 5: Editing the recorded disc
Playing on other DVD equipment
You will find editing discs a lot easier than a
conventional tape, and the recorder offers
numerous edit functions, possible only with
DVDs.
With this recorder, you can create
a Playlist (playback information) on the same
disc, and edit the Playlist without changing the
original recording(s). A Playlist does not take up
much disc space, and all you need is one
recorder and one disc.
Example: You have recorded a few football
games on a DVD-RW in VR mode. You want to
save the original recording, but you also want to
create a digest by putting the goal scenes
together. In this case, you can create a Playlist
by selecting just the goal scenes, leaving the
original recording as it is.
Quick and easy edits on the displayed menu
Editing is performed by simply selecting titles
and scenes from the displayed menus.
Protection of individual titles
With conventional VCRs, you had to protect an
entire tape to save the recordings from erasure
or alteration. This recorder allows you to
individually protect recorded titles (except for
Playlist titles).
Edit and save on a single disc
–
Playlist edit (DVD-RWs in VR mode only)
To edit a conventional tape without affecting the
original recording, you had to connect another
VCR, copy the master tape using the two VCRs
and one more tape, and start editing the copied
tape.
When using a DVD-RW in Video mode
The disc needs to be finalized first to enable
playback on anything other than this recorder.
No more editing or recording can be made on
the disc once it has been finalized. To enable
recording on the disc again, you will need to
format it again. (Reformatting will erase all
previous contents.)
When using a DVD-R
You will need to finalize the disc to play it on
equipment other than this recorder. You cannot
edit or record on the disc once it has been
finalized.
For your DVD to play on other equipment,
finalizing may be necessary in some cases. If so,
finish up all your editing and recording first, and
then finalize the disc.
When using a DVD-RW in VR mode
Although finalizing is generally unnecessary
when playing the disc on VR mode compatible
equipment, playback on some equipment requires
a finalized disc. You can still edit and record on
the disc even after finalizing.
When using a DVD+RW
The recorder automatically finalizes a disc before
ejecting it. Finalizing in this case still allows you
to further edit or record on the disc.
Original
You
’
ve got your own DVD!
Playlist
11
Guide to Parts and Controls
Guide to Parts and Controls
For more information, see the pages in parentheses.
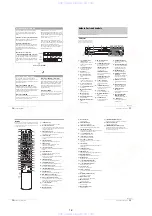
Front panel
Buttons on the recorder have the same
function as the buttons on the remote if
they have the same or similar names.
A
@
/
1
(on/standby) button/
indicator
(22, 38)
Turns the recorder on and off.
Lights up in green when the
power is on.
B
Front panel display
(14, 57)
Displays the playing status,
title/chapter/time, etc.
C
Disc tray
(38)
Opens to accept a disc.
D
(remote sensor)
(22)
Accepts the remote control
signal.
E
Disc type indicators
Lights up to indicate the disc/
format type of the current disc.
F
A
(open/close) button
(38)
Opens or closes the disc tray.
G
H
(play) button/indicator
(50)
Plays a disc.
H
X
(pause) button/indicator
(52)
Pauses playing a disc.
I
x
(stop) button
(51)
Stops playing a disc.
J
z
REC button/indicator
(38)
Starts recording.
K
X
REC PAUSE button/indicator
(39)
Pauses recording.
L
x
REC STOP button
(39)
Stops recording.
M
SYNCHRO REC indicator
(47)
Lights up when the Synchro
Rec function is set to on.
TIMER REC indicator
(40)
Lights up when a timer
recording is set.
FINALIZED indicator
(73)
Lights up if an inserted disc has
been finalized.
PROGRESSIVE indicator
(51)
Lights up when outputting
progressive signals.
N
ZOOM +/
–
buttons
(32)
Switches the information
displayed in the Title List
menu.
O
CURSOR MODE button
(32)
Switches the cursor/page mode
in the Title List, etc.
P
TOOLS button
(32)
Displays the TOOLS menu.
Q
<
/
M
/
m
/
,
/ENTER button
(33)
Selects items or settings.
R
RETURN button
(33)
Returns to the previously
selected display, etc.
S
SYSTEM MENU button
(31)
Displays the System Menu on
the TV screen.
T
ONE TOUCH DUB button
(78)
Records the contents of a DV/
Digital8 format tape with a
single touch of the button.
U
REC MODE button
(38)
Selects the recording mode.
V
.
/
>
(previous/next)
buttons
(52)
Goes to the next title/chapter/
track, or goes back to the
previous title/chapter/track.
W
C/
–
buttons
(38)
Selects the channel or input
line.
X
PROGRESSIVE button
(51)
Switches the output signal,
progressive or interlace.
Y
INPUT SELECT button
(38, 75, 88)
Selects equipment connected to
the line inputs.
Z
LINE 2 IN (S VIDEO/VIDEO/
AUDIO L/R) jacks
(88)
Connects external equipment.
wj
DV IN jack
(76)
Connects digital equipment
with a DV jack.
Open the
panel.
,
continued
12
Guide to Parts and Controls
Remote
Buttons on the remote have the same function as the buttons on
the recorder if they have the same or similar names. Buttons with
an orange dot next to them can be used with your TV when the
TV/DVD switch is set to TV.
A
TV/DVD switch
(26)
Switches the remote control to TV or DVD.
B
Z
OPEN/CLOSE button
(38)
Opens or closes the disc tray. Note that it may take a
few seconds for the disc tray to open after you have
recorded or edited a disc.
C
Number buttons
(38, 44)
Select a number such as a channel or a title number.
The number 5 button has a tactile dot.*
D
CLEAR button
(44)
Cancels an entered number when used with this
recorder.
SUBTITLE button
(60)
Changes the subtitles while playing a disc.
AUDIO button
(57)
Changes the sound while playing a disc.
The button has a tactile dot.*
button
(40, 44)
Displays the Timer programming menu on the TV
screen.
TOP MENU button
(51)
Displays the disc’s menu on the TV screen.
DISPLAY button
(40, 56)
Displays disc information or playing/recording
status on the TV screen.
TIME/TEXT button
(56)
Displays the time information of the disc.
SYSTEM MENU button
(31)
Displays the System Menu on the TV screen.
TITLE LIST button
(32, 53, 64)
Displays the Title List menu on the TV screen.
CURSOR MODE button
(32)
Switches the cursor/page mode in the Title List, etc.
RETURN button
(33)
Returns to the previously selected display, etc.
O
.
PREV (previous) button
(52)
Goes back to the previous title/chapter/track.
P
m
/
M
(search) Jog Stick
(52)
Searches fast-forward or reverses a scene (while
playing a disc), or plays a disc in slow motion or
frame by frame (in the pause mode).
Q
H
PLAY button
(50)
Plays a disc.
The button has a tactile dot.*
R
X
PAUSE button
(52)
Pauses playing a disc.
Slide the
cover.
13
Guide to Parts and Controls
S
z
REC button
(38)
Starts recording.
T
REC MODE button
(38)
Selects the recording mode.
U
INPUT SELECT button
(38, 75, 88)
Selects equipment connected to the line inputs.
V
SYNCHRO REC button
(47)
Synchronizes the recorder and the timer recording set
on the connected external equipment.
W
[
/
1
(on/standby) button
(38)
Turns the recorder on and off.
X
CH (channel) +/
–
buttons
(38)
Selects the channel or input line.
Y
VOL (volume) +/
–
buttons
(26)
Adjusts the volume of your TV or AV amplifier
(receiver).
Z
SET button
(34)
Use to enter the number selected with the number
buttons
3
.
wj
TV/VIDEO button
(26)
Switches your TV’s input source.
wk
ANGLE button
(59)
Changes the angles when playing a DVD VIDEO.
wl
WIDE MODE button
(26)
Changes the wide mode settings of your TV.
e;
MENU button
(51)
Displays the disc’s menu on the TV screen.
ea
INSTANT SEARCH button
(52)
Briefly fast forwards the current scene.
es
INSTANT REPLAY button
(52)
Replays the current scene.
ed
TOOLS button
(32)
Displays the TOOLS menu.
ef
ZOOM +/
–
buttons
(32)
Switches the information displayed in the Title List
menu.
eg
<
/
M
/
m
/
,
/(ENTER) button
(33)
Selects items or settings.
eh
>
NEXT button
(52)
Goes to the next title/chapter/track.
ej
x
STOP button
(51)
Stops playing a disc.
ek
x
REC STOP button
(39)
Stops recording.
el
X
REC PAUSE button
(39)
Pauses recording.
r;
CHAPTER MARK/ERASE buttons
(67)
Inserts/erases a chapter mark in the recorded title.
ra
SUR (surround) button
(58)
Selects the surround mode.
rs
COMMAND MODE switch (DVD 1,2,3)
(28)
Switches the command mode for this recorder.
Match the switch to the same command mode set in
the Options Setup (page 99).
* Use the tactile dot as a reference when operating the recorder.
,
continued
www. xiaoyu163. com
QQ 376315150
9
9
2
8
9
4
2
9
8
TEL 13942296513
9
9
2
8
9
4
2
9
8
0
5
1
5
1
3
6
7
3
Q
Q
TEL 13942296513 QQ 376315150 892498299
TEL 13942296513 QQ 376315150 892498299


