1-6
24
1
Slide the TV/DVD switch to DVD.
2
Hold down
[
/
1
, and enter the
manufacturer code (see the table below)
for your AV amplifier (receiver) using the
number buttons.
3
Release
[
/
1
.
The VOL +/– buttons control the AV
amplifier’s volume.
If you want to control the TV’s volume, slide
the TV/DVD switch to TV.
z
Hint
If you want to control the TV’s volume even when the
TV/DVD switch is set to DVD, repeat the steps above
and enter the code number 90 (default).
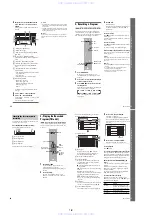
Code numbers of controllable AV amplifiers
(receivers)
If more than one code number is listed, try
entering them one at a time until you find the one
that works with your AV amplifier (receiver).
If the supplied remote interferes with your other
Sony DVD recorder or player, set the command
mode number for this recorder and the supplied
remote to one that differs from the other Sony
DVD recorder or player.
The default command mode setting for this
recorder and the supplied remote is DVD3.
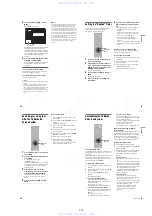
1
Press SYSTEM MENU.
The System Menu appears.
2
Select “SETUP,” and press ENTER.
Controlling the volume of your AV
amplifier (receiver) with the
remote
Manufacturer
Code number
Sony
78, 79, 80, 91
Denon
84, 85, 86
Kenwood
92, 93
Onkyo
81, 82, 83
Pioneer
99
Sansui
87
Technics
97, 98
Yamaha
94, 95, 96
1
2
3
4
6
7
8
9
0
5
TV/DVD switch
[
/
1
VOL +/–
Number buttons
If you have a Sony DVD player or
more than one Sony DVD recorder
1
2
3
4
6
7
8
9
0
5
SYSTEM
MENU
M
/
m
,
ENTER
COMMAND
MODE
switch
O
RETURN
SETUP
Settings
Easy Setup
Tuner Preset
Options
Features
Audio
Video
Clock
Set Top Box Control
Language
Area Setup
25
H
ook
up
s
and
S
e
tti
n
g
s
3
Select “Options,” and press ENTER.
4
Select “Command Mode,” and press
ENTER.
5
Select the Command mode (DVD1, DVD2,
or DVD3), and press ENTER.
6
Slide the COMMAND MODE switch on the
remote so it matches the mode you
selected above.
To return to the previous step
Press
O
RETURN.
Step 7: Easy Setup
Make the basic adjustments by following the on-
screen instructions in “Easy Setup.”
1
Turn on the recorder and switch the input
selector on your TV so that the signal from
the recorder appears on your TV screen.
The message about the initial settings appears.
• If this message does not appear, select “Easy
Setup” from “SETUP” in the System Menu
to run “Easy Setup” function (“Settings and
Adjustments” on page 88).
2
Press ENTER.
Follow the on-screen instructions to make the
following settings.
Area Setup
“Area Setup” will enable you to use the TV
Guide On Screen system (page 42).
Enter your area of residence and zip code even
if you do not want to use the TV Guide On
Screen system.
Language
Select the language for the on-screen displays.
Clock
Set the clock manually using
<
/
M
/
m
/
,
,
and press ENTER.
If the clock data has already been received, go
to “Set Top Box Control.”
Check that the command mode switch on the
remote is set to the default setting of DVD3
before you try to change the command mode for
the recorder. If the command mode for the remote
is changed to DVD1 or DVD2, you may be
unable to operate this recorder.
SETUP
Format DVD-RW :
VR
Settings
Options
Features
Audio
Video
Easy Setup
Command Mode :
Factory Setup
Tuner Audio :
Auto Stereo :
Auto Display :
Dimmer :
DVD3
Main
On
On
Normal
SETUP
Format DVD-RW :
VR
Settings
Options
Features
Audio
Video
Easy Setup
Command Mode :
Factory Setup
Tuner Audio :
Auto Stereo :
Auto Display :
Dimmer :
DVD3
On
On
On
Normal
DVD1
DVD3
DVD2
1
2
3
4
6
7
8
9
0
5
[
/
1
<
/
M
/
m
/
,
,
ENTER
O
RETURN
CH +/–
Number buttons
,
continued
27
H
ook
up
s
and
S
e
tti
n
g
s
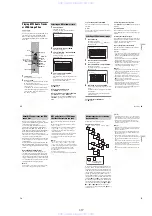
To fix the set top box controller to your cable
box/satellite receiver
Once you have confirmed that the set top box
controller controls your cable box or satellite
receiver, fix it in place.
1
Remove the backing on the double-sided tape.
2
Attach it so that the set top box controller is
directly above the remote control sensor on
your cable box/satellite receiver.
26
Set Top Box Control
If you want to use the cable box/satellite
receiver control (page 15), select “Yes,” and
set the brand code and the cable box output
channel (page 90).
If you do not have a cable box/satellite
receiver, select “No.”
Tuner Preset
“Tuner Preset” appears only when you set
“Set Top Box Control” to “No.”
Select whether or not you have a cable
connection.
The Tuner Preset function automatically
searches for all of the receivable channels and
presets them.
To set the channels manually, see page 88.
Press ENTER when “Finish” appears.
To return to the previous step
Press
O
RETURN.
z
Hint
If you want to run “Easy Setup” again, select “Easy
Setup” from “SETUP” in the System Menu (page 99).
b
Note
If you use an S-video cord to connect your cable box or
satellite receiver, set “Line1 Input” or “Line3 Input” in
“Video” setup to “S Video” (page 93).
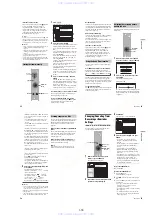
1
Point the DVD recorder’s remote at the
recorder (not at the cable box/satellite
receiver).
2
Press CH +/– and check that the channel
changes on the cable box/satellite receiver
window.
3
Press the number buttons and check that
the channel changes on the cable box/
satellite receiver window.
Tune your cable box to channel 02. Then
using your DVD recorder’s remote, enter 09
to tune your cable box to channel 09. Did the
cable box change to channel 09? If the cable
box did not tune to channel 09, follow the
instructions below for getting your recorder to
control your cable box.
If you cannot get the recorder to control your
cable box/satellite receiver
Check the settings at “Set Top Box Control” in
“Settings” setup (page 90). If more than one code
number is listed for your cable box/satellite
receiver, try entering them one at a time until you
find the one that works with your cable box/
satellite receiver.
Check the connection and position of the set top
box controller (page 15).
If your cable box or satellite receiver still does not
operate with this recorder, contact your cable or
satellite company to see if they can provide you
with a compatible cable box or satellite receiver.
To receive TV Guide On Screen data your
recorder must be turned off when not in
use. If your recorder is connected to a
cable box, be sure to leave the cable box
turned on. After initial setup, it may take
up to 24 hours to begin to receive TV
program listings. It may take up to one
week to receive all eight days of TV
program listings.
Checking the cable box/satellite
receiver control setting
www. xiaoyu163. com
QQ 376315150
9
9
2
8
9
4
2
9
8
TEL 13942296513
9
9
2
8
9
4
2
9
8
0
5
1
5
1
3
6
7
3
Q
Q
TEL 13942296513 QQ 376315150 892498299
TEL 13942296513 QQ 376315150 892498299


