background image

29

Component
Select button

TV

STB

VCR

DVD

CD

AMP

Controls the volume of

TV

TV

TV

TV

amplifier

amplifier

Advanced Features

Controlling the Volume
of Visual Components
Connected to an Audio
System

The Commander is factory preset based
on the assumption that you hear the
sound of your visual components from
your TV speakers, and that you hear
sound of your audio components from
the loudspeakers connected to your
amplifier.

This feature enables you to control the
volume of your TV or amplifier without
having to select TV or AMP each time
you want to control the volume.
For example, to control the volume while
using a VCR, you don’t need to press the
TV button to control the TV volume.
You can switch the volume of all the
visual components to the amplifier at the
same time.

The following table shows the factory
setting of which volume would be
controlled for each component.

However, if your visual components are
connected to an audio system, you
probably hear TV or VCR sound from the
loudspeakers via your amplifier, not
from your TV speakers. In this case, you
need to change the factory preset so that
you can control the volume of your
visual components without first having
to switch to the amplifier.

To change the Factory Preset of
the Volume Control

Label key

MD

TAPE A

TAPE B

CABLE

VCR2

VCR3

STB2

DVR

DVD2

LD

DAT

LIGHTING

Controls the volume of

amplifier

amplifier

amplifier

TV

TV

TV

TV

TV

TV

TV

amplifier

––––––––

Continued

MENU

EXIT

COMMANDER

OFF

MORE

3

2

1

TV

STB

VCR

DVD

CD

AMP

OTHER

TIMER

LIGHT

MUTING

RECALL

CHANNEL

VOLUME

SYSTEM CONTROL

OK

2

5

3

6
1

4

SET

Summary of Contents for RM-AV3000

Page 1: ...3 242 704 14 1 Integrated Remote Commander Operating Instructions 2002 Sony Corporation RM AV3000 ...

Page 2: ...are designed to provide reasonable protection against harmful interference in a residential installation This equipment generates uses and can radiate radio frequency energy and if not installed and used in accordance with the instructions may cause harmful interference to radio communications However there is no guarantee that interference will not occur in a particular installation If this equip...

Page 3: ...r control of automatic on off and other controls such as recording stopping etc of each component are possible Centralized control of Sony AV components with this one remote commander This Commander is preset at the factory to operate Sony brand components so you can use it out of the box as a control center for your Sony AV components Remote control signals for non Sony components are also preset...

Page 4: ...m 29 Executing a Series of Commands System Control Functions 31 Programming a series of commands for the SYSTEM CONTROL buttons or the Label keys 32 Notes on System Control Operations 37 Programming a series of commands for the Component Select buttons or the Label keys 38 Changing the interval between operation steps 40 To change the component macro executing time 42 Adding an Extra Function to t...

Page 5: ...Window 74 Setting the Key Touch Beep 77 Adjusting the Contrast of the Display Window 78 Changing the Names of the Label Keys or the Component Names on the Mode Display Key 79 Erasing All the Settings 81 Additional Information Precautions 83 Maintenance 83 Specifications 83 Troubleshooting 84 Appendix Table of Preset Functions 88 TV 88 STB Digital satellite 89 STB2 Digital cable box 90 VCR VCR2 VCR...

Page 6: ...nd come back to the first and so on each time you press the Mode Display key OTHER MORE or TIMER button according to the selected mode 5 Component Select buttons page 12 Selects the component to control 6 OTHER button page 13 Label keys change in the order from the first stage to the third stage and come back to the first and so on each time you press the OTHER button when the selected component n...

Page 7: ...ystem mode Note on the VOLUME and MUTING buttons The Commander controls or mutes the TV s volume when you select a visual component The Commander controls or mutes the amplifier s volume when you select an audio component You can change this setting also page 29 Note on the power on and off of the display of the Commander To turn on the display press any button except the COMMANDER OFF button To t...

Page 8: ...t the electrolyte from leaking remove the batteries when you plan not to use the Commander for a long period of time After replacing batteries set the clock page 8 Setting the Clock Setting the clock for the first time after installing batteries For the first time after installing batteries the Commander is in the clock setting mode CLOCK is displayed on the Mode Display key and flashes on the Clo...

Page 9: ...the week is set 12 AM and SET flash Note If you press the button the day of the week is set and setting mode skips to Step 4 Continued 3 Set the hour and AM or PM by pressing the or button The selected hour and AM or PM flash Then press the button The hour and AM or PM are set 00 minute and SET flash Note If you press the button the hour and AM or PM are set and the setting mode returns to Step 2 ...

Page 10: ...the minute by pressing the or button The selected minute flashes Notes If you press the button the minute is set and the setting mode returns to Step 2 If you press the button the minute is set and the setting mode returns to Step 3 If you want to finish the clock setting go to Step 5 5 Press the SET key The clock starts from 0 second Note If you press the SET key in any step above the clock is se...

Page 11: ...it and the other time mode flashes and the setting mode goes to Step 4 If you want to change the time mode press the flashing key STD TIME or DS TIME The selected STD TIME or DS TIME key lights and the setting mode goes to Step 4 If you do not want to change the time mode press the or button The setting mode goes to Step 4 When the time mode is changed from STD TIME to DS TIME The time of the cloc...

Page 12: ...V STB VCR DVD CD AMP Factory setting Sony TV Sony digital satellite Sony VHS VCR VTR3 Sony DVD player Sony CD player Sony amplifier Preset component TV Digital satellite VCR DVD player CD player Amplifier Label key DVD2 LD DAT LIGHTING Factory setting Sony portable DVD player Sony LD player Sony DAT deck Light Preset component DVD player LD player DAT deck Light MENU EXIT COMMANDER OFF MORE 3 2 1 ...

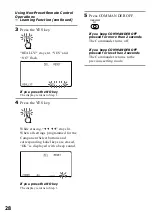
Page 13: ...le pressing COMMANDER OFF press MUTING SET appears on the Mode Display key 3 Press the PRESET key PRESET appears on the Mode Display key 4 Select the desired component by pressing the Component Select button or the Label key To change the Label keys press the OTHER button repeatedly Each time you press the OTHER button the display of the Label keys changes as follows When the desired component is ...

Page 14: ...not on the table in the supplied Component Code Numbers the Commander beeps five times and NG flashes after you press the ENTER key The setting returns to the previous one If this happens check the component code number and try setting again If you don t input anything into the Commander for over two minutes between each step the setup procedure will be canceled To set the code you must again pres...

Page 15: ... If another signal has already been programmed on that key or button by the learning function page 19 that learned signal will apply even after you set the component code number To use it as a preset component key or button first erase its learned signal page 25 Checking if the code number works 1 Press the corresponding Component Select button or the Label key for the component you have set up To...

Page 16: ...r the Label key in this case TV and the four digit component code number previously set to the component is displayed Finding a component code with the Search function You can find a code number available for a component that doesn t have one in the supplied Component Code Numbers Before starting the Search function Set each component to the following status to enable the Search function TV AMP Po...

Page 17: ...n the remote control signal is sent is shown on the display If it successfully works power off for TV AMP playback for CD MD DAT TAPE light off for LIGHTING and power on for other components go to Step 6 If it doesn t repeat Steps 4 to 5 6 Press the ENTER key A beep sounds and the selected component name the preset four digit component code number and OK light for two seconds And the display retur...

Page 18: ... case DVD repeatedly Each time you press the DVD key the display of the Label keys changes as follows 2 Press the desired key in the touch key display When the remote control signal is sent is displayed on the display If necessary you can also use buttons on the Commander such as the VOLUME buttons the MUTING button or the CHANNEL buttons other than LCD touch keys See Table of Preset Functions pag...

Page 19: ...not support the remote control of infrared signals will not work with this Commander To control the volume Press the VOLUME buttons to control the volume and the MUTING button to mute When you select a visual component the TV s volume will be controlled and when you select an audio component the amplifier s volume will be controlled You can change this setting also page 29 Notes If you have progra...

Page 20: ...Component Select button or the Label key To change the Label keys press the OTHER button repeatedly Each time you press the OTHER button the display of the Label keys changes as follows All the learnable keys flash Example To program the N Play signal of your component to the VCR N Play key of the Commander 1 Place the RM AV3000 head to head with your component s remote control 2 While pressing CO...

Page 21: ... the button that is not on the LCD Only LEARN flashes 6 Press and hold down the button on the other remote control until you hear a beep If you release the button before you hear a beep the signal may not be learned correctly LEARN stops flashing and stays lit When the command has been learned successfully the learned keys stay lit and the other learnable keys flash If NG flashes on the display Le...

Page 22: ...eys on the Commander In Step 5 page 21 while pressing the REC key press the B key to display both keys Then press the two buttons on your component s remote control in Step 6 To operate with one key on the Commander In Step 5 page 21 press only the REC key Then press the two buttons on your component s remote control in Step 6 When you teach signals to the VOLUME or MUTING buttons If you have prog...

Page 23: ...ly when you program it using the learning function If you want to change the display of the key that has learned a signal clear the signal first page 25 Then teach the key again using the above procedure to change its display If you don t change the display of a key the default display is used You cannot change the display of the area of the numeric keys 1 to 9 To change the name of the Label key ...

Page 24: ...or SYMBOL 2 key on the LCD display The cursor flashes in the left end of the Label key Begin inputting digits or characters from the left Press repeatedly the number key until you obtain the desired digit or character The digits or characters are assigned to the keys as follows 1 1 2 A t B t C t a t b t c t 2 3 D t E t F t d t e t f t 3 4 G t H t I t g t h t i t 4 5 J t K t L t j t k t l t 5 6 M t...

Page 25: ...in both remote control units Avoid learning in places under direct sunlight or strong fluorescent light The remote control detector area may differ depending on each remote unit If learning does not work try changing the positions of the two remote control units When you teach signals of an interactive signal exchange system remote control unit supplied with some of Sony s receivers and amplifiers...

Page 26: ...ess the Mode Display key SET once RESET appears and flashes on one of the Label keys on the display 3 Press the RESET key RESET appears on the Mode Display key 4 Press the COMPO key Component names appear on the Label keys To change the Label keys press the OTHER button repeatedly Each time you press the OTHER button the display of the Label keys changes as in Step 4 on page 13 COMMANDER OFF MUTIN...

Page 27: ...t to erase the learned signals for other Component Select buttons or corresponding Label keys Repeat Steps 5 6 7 Press COMMANDER OFF If you keep COMMANDER OFF pressed for more than 2 seconds The Commander turns off If you keep COMMANDER OFF pressed for less than 2 seconds The Commander returns to the previously set mode To clear all signals learned for all Component Select buttons or corresponding...

Page 28: ... corresponding Label keys are erased OK is displayed with a beep sound If you press the NO key The display returns to Step 1 5 Press COMMANDER OFF If you keep COMMANDER OFF pressed for more than 2 seconds The Commander turns off If you keep COMMANDER OFF pressed for less than 2 seconds The Commander returns to the previous setting mode Using Non Preset Remote Control Operations Learning Function c...

Page 29: ...olume You can switch the volume of all the visual components to the amplifier at the same time The following table shows the factory setting of which volume would be controlled for each component However if your visual components are connected to an audio system you probably hear TV or VCR sound from the loudspeakers via your amplifier not from your TV speakers In this case you need to change the ...

Page 30: ...shes on one of the Label keys 3 Press the MODE key MODE appears on the Mode Display key 4 Press the VOLUME key VOLUME appears on the Mode Display key and AMP flashes on one of the Label key 5 To change the volume control setting of visual components TV STB STB2 DVR VCR VCR2 VCR3 DVD DVD2 LD and CABLE press the AMP key With a beep sound the volume control setting of visual components is switched to...

Page 31: ... like the ones below are necessary COMMANDER OFF Continued Example 1 Turn on the TV 2 Turn on the video VCR 3 Turn on the amplifier 4 Set the input selector of the amplifier to VIDEO 1 5 Set the input mode of the TV to VIDEO 1 6 Start video playback You can program up to 32 consecutive operation steps to each of the SYSTEM CONTROL buttons 1 3 or the Label keys SYSTEM 4 15 If you have set the Syste...

Page 32: ...of the Label keys changes as follows The selected system number is displayed on the Mode Display key Example To program the procedure above for the SYSTEM CONTROL 2 button 1 While pressing COMMANDER OFF press MUTING SET appears on the Mode Display key Programming a series of commands for the SYSTEM CONTROL buttons or the Label keys SET MENU EXIT COMMANDER OFF MORE 3 2 1 TV STB VCR DVD CD AMP OTHER...

Page 33: ...he names of buttons on the Commander which are not on the LCD touch key display VOLUME MUTING CHANNEL RECALL MENU OK EXIT and are displayed on the right Label key To program a new series of operations for the buttons which have already been set SYSTEM CONTROL 1 or 3 button Erase the factory preset program See page 37 Other buttons Erase the program See page 35 4 Select the component to operate by ...

Page 34: ... or do not program the POWER key of the component About the interval between operation steps You can change the interval between operation steps page 40 If you cannot receive signals successfully during consecutive operation steps program the interval between steps by pressing the TIMER button between operation steps in Step 6 on page 33 This operation of programming an interval is counted also as...

Page 35: ...the Mode Display key 4 Press the SYSTEM key System numbers appear on the Label keys To change Label keys press the MORE button repeatedly until you obtain the desired system number Each time you press the MORE button the display of the Label keys changes as in Step 3 on page 32 5 Press the SYSTEM CONTROL button 1 2 or 3 or the Label key SYSTEM4 SYSTEM15 of which programmed commands you want to era...

Page 36: ... Press the YES key While erasing c c c c stays lit When all settings programmed for the Component Select buttons and corresponding Label keys are erased OK is displayed with a beep sound YES If you press the NO key The display returns to Step 4 While erasing c c stays lit When erasing finishes OK is displayed with a beep sound 7 Press COMMANDER OFF If you keep COMMANDER OFF pressed for more than 2...

Page 37: ... See To clear programmed commands for a specific SYSTEM CONTROL button or corresponding Label key page 35 programmed on SYSTEM CONTROL 1 or 3 2 Clear again the System Control function programmed on SYSTEM CONTROL 1 or 3 page 35 Select SYSTEM CONTROL 1 or 3 in Step 5 on page 35 Note The interval setting page 40 is not reset to the factory setting even if you perform these steps Notes on System Cont...

Page 38: ...ct button or key and the corresponding touch keys are displayed See also About the interval between operation steps on page 34 and Notes on System Control Operations on page 37 Example To program the procedure on page 31 for the TV button 1 Follow Steps 1 and 2 on page 32 If a series of commands is already programmed for that button The programmed operations are displayed in order To program a new...

Page 39: ...in You cannot program the System Control functions for a Component Select button or a Label key for which a signal has been programmed by learning page 45 NG flashes on the display You can program the Power On function page 43 for a Component Select button or a Label key for which a System Control function has been programmed but the Power On function cannot be used If you clear the System Control...

Page 40: ...o display and change the Label keys for component names Press the OTHER button repeatedly Changing the interval between operation steps You can control the interval from 100 900ms in units of 50ms 1 While pressing COMMANDER OFF press MUTING SET appears on the Mode Display key 2 Press the Mode Display key SET twice to display MODE on one of the Label keys on the display Executing a Series of Comman...

Page 41: ...ly For timer settings see page 61 When you select the Component name go to Step 6 When you select the system number or the timer program number go to Step 7 6 Press the INTERVAL key The current interval setting stays lit and and flash 7 Press the or key to change the interval You can control the interval from 100 to 900ms in units of 50ms Each time you the key is pressed the interval increases by ...

Page 42: ...the time from 0 to 2 sec seconds in units of 1 sec Each time you the key is pressed the time increased by 1 sec Each time you the key is pressed the time decreases by 1 sec Executing a Series of Commands System Control Functions continued 4 Press COMMANDER OFF If you keep COMMANDER OFF pressed for more than 2 seconds The Commander turns off If you keep COMMANDER OFF pressed for less than 2 seconds...

Page 43: ...onent Select Buttons Programming the Power On command of the selected component for Sony components only When using Sony components you can program the Power on signal for each component on a Component Select button or a Label key You can select the desired component and turn it on by just pressing that Component Select button or a Label key COMMANDER OFF MUTING MENU EXIT COMMANDER OFF MORE 3 2 1 ...

Page 44: ...ponent Select button or the Label key To change the Label keys press the OTHER button repeatedly The selected component name appears on the Mode display key and POWER ON appears on the display with a beep sound PowerON TV To clear the Power on command Repeat the procedure above The following display appears 6 Press COMMANDER OFF If you keep COMMANDER OFF pressed for more than 2 seconds The Command...

Page 45: ... cannot program the Power On function for it Even if you have programmed a signal by learning See Adding a command that is required when selecting a component page 45 or a System Control function page 38 for a Component Select button or a Label key you can program the Power On function for that button but it cannot be used If you clear a learned signal or the System Control function from the butto...

Page 46: ...r a beep If you release the button before you hear a beep the signal may not be learned correctly LEARN stops flashing and stays lit If NG flashes on the display Learning did not succeed Try Steps 3 and 4 again 5 Press COMMANDER OFF Adding an Extra Function to the Component Select Buttons continued COMMANDER OFF Example To program the input select signal of your amplifier to the CD button 1 Place ...

Page 47: ...l from the button you can use the Power On function Assigning Other Components to the Component Select Buttons or the Label Keys Copying the settings of a Component Select button or a Label key to another button or key You can copy the entire settings of a Component Select button or a Label key to another Component Select button or a Label key The settings of the component code page 12 the channel...

Page 48: ...lay 3 Press the COPY key COPY appears on the Mode Display key COMMANDER OFF MUTING COPY DVD 4 Press the Component Select button or the Label button of which contents are to be moved To change the Label buttons press the OTHER button The component name of which contents are to be moved appears on the Mode Display key 5 While pressing the Mode Display key in this case DVD press the Component Select ...

Page 49: ...ir original System Control functions see page 31 SYSTEM CONTROL 1 2 or 3 buttons or SYSTEM 4 15 Label keys can be programmed to learn any remote control signal As they operate independently from other buttons SYSTEM CONTROL 1 2 or 3 buttons can work as one touch buttons without any preceding operation such as pressing a Component Select button to select a component This is useful if you prefer hav...

Page 50: ... change the Label keys press the MORE button repeatedly Then press the Label key you want to teach The display for the pressed SYSTEM CONTROL button or Label key appears on the Mode Display key LEARN flashes for 10 seconds and the Commander enters receiving mode 2 Example To store the On Off signal of an air conditioner to the SYSTEM CONTROL 2 button 1 Place the Commander head to head with the rem...

Page 51: ... to program a remote control signal for that button clear programmed commands first page 35 COMMANDER OFF To clear the learned remote control signal 1 While pressing COMMANDER OFF press MUTING 2 Press the LEARN key LEARN appears on the Mode Display key 3 While pressing the DEL key press the SYSTEM CONTROL button or the Label key of which learned signals are to be cleared The learned signals are cl...

Page 52: ...he power on off button of the air conditioner s remote control for the SYSTEM CONTROL 2 button again 3 Program the signal from the same button of the remote control for another button or key for example the SYSTEM CONTROL 3 button The two buttons or keys of the Commander have been programmed with the power on signal and the power off signal of the air conditioner respectively so that you can opera...

Page 53: ... the X key X Transfer data x Receive data 1 Place the RM AV3000 head to head with another RM AV3000 2 While pressing COMMANDER OFF press MUTING SET appears on the Mode Display key 3 Press the Mode Display key SET twice to display MODE on one of the Label keys on the display COMMANDER OFF MUTING TRANSFER about 2 4 inches 5 10 cm away RM AV3000 Continued ...

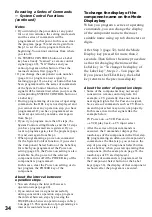
Page 54: ... the operation or press COMMANDER OFF to stop the operation 10 Press COMMANDER OFF If you keep COMMANDER OFF pressed for more than 2 seconds The Commander turns off If you keep COMMANDER OFF pressed for less than 2 seconds The Commander returns to the previous setting mode Note Be sure that the receiving Commander is ready to receive data To transfer the data of a Component Select button or a Labe...

Page 55: ...otes The data of the System Control function programmed for a Component Select button cannot be transferred Be sure that the receiving Commander is ready to receive data TV COMPO X appears on the Mode Display key and the selected component name appears on the left Label key 3 Press the Component Select button of which data you want to send Or press the Label key of which data you want to send To c...

Page 56: ... RETURN key to clear all the learned signals If NG appears during data transfer go back to Step 3 and continue the operation or press COMMANDER OFF to stop the operation If you continue the operation you have to set the sending Commander again to send data Receiving the data This Commander can receive the data of another Sony RM AV3000 To receive all the data from another remote commander 1 Follow...

Page 57: ...mmander 1 Perform Steps 1 and 2 on pages 56 2 Press the COMPO key COMPO x appears on the Mode Display key 3 Press the Component Select button to which you want to assign the data Or press the Label key to which you want to assign the data To change the Label keys press the OTHER button repeatedly The selected component name appears on the left Label key 4 Press the ENTER key During receiving the d...

Page 58: ...3 2 1 TV STB VCR DVD CD AMP OTHER TIMER LIGHT MUTING RECALL CHANNEL VOLUME SYSTEM CONTROL OK 1 8 4 3 5 2 6 COMMANDER OFF Transferring Data between Commanders continued Notes If the Commander is not ready for receiving the data press the CLEAR key then press the RETURN key to clear the learned signal on all or one of the Component Select buttons If NG appears during data transfer go back to Step 3 ...

Page 59: ...acro function can be programmed flash To change the Label keys press the OTHER button 4 Select the component by pressing the Component Select button or the Label key The selected component name appears on the Mode Display key The macro keys Label keys flash To change the Label keys press the Mode Display key in this case TV If you select the component name for which the Channel Macro function cann...

Page 60: ...MMANDER OFF Selecting a Channel with a Single Key Press Channel Macro Function continued If you press the Label key for which the Channel Macro function cannot be programmed NG flashes twice and NG sound is heard To change the name of the macro key Label key Keep the macro key Label key pressed for more than 2 seconds and follow Steps 2 5 page 24 6 Press the keys for the operation in order 1t 2 t ...

Page 61: ...to the PROG4 key 1 While pressing COMMANDER OFF press MUTING SET appears on the Mode Display key 2 Press the TIMER key TIMER appears on the Mode Display key The program numbers PROG1 PROG4 appears on the Label keys To change the Label keys press the TIMER button on the Commander repeatedly The program numbers having timer setting programs which are set to be executed stand by mode stay lit The pro...

Page 62: ...layed on the Clock Display key If the day of the week and the time for the timer program are set in this setting mode or if you try changing the program already set page 65 the set contents are displayed on the Clock Display key SETUP 3 Select the program number to which you want to set the timer by pressing the Label key PROG4 4 Press the SETUP key DAY TIME and MACRO flash on the Label keys 5 Pre...

Page 63: ... the or button Then press the ENTER key The time of the timer setting is decided The display returns to step 4 7 Press the MACRO key The Commander enters the Timer Macro setting mode Continued button button Each time the or button is pressed the display of day s of the week changes as follows SU Sunday MO Monday TU Tuesday WE Wednesday TH Thursday FR Friday SA Saturday Then press the ENTER key to ...

Page 64: ...n this case also the program cannot be executed at the set time So set the timer regarding the contents and the duration of the timer execution 8 Press a Component Select button a SYSTEM CONTROL button or a Label key to program the information of that button or key as a procedure to be executed by the timer When selecting a Label key for a component name press the OTHER button to change the Label ...

Page 65: ...set to be executed at the same time they start in order from the lowest program number According to the status of the component operated by the timer program the next program might not function successfully When setting a timer program check carefully the setting of other programs Changing the program already set or changing another program that you select 1 Follow Steps 1 3 on page 61 62 2 Press ...

Page 66: ...ed procedure use the System Control function page 31 For example if Steps A to D are frequently used when you want to program Steps A B C D and E program Steps A to D using the system macro Then program Step E in the Timer Macro adding to that system macro 4 When the program number of which contents you want to change appears on the left Label key press that Label key With a beep sound the content...

Page 67: ...s ON OFF The display turns as below With a beep sound ON appears and the Commander enters the timer standby mode The display returns to Step 2 on page 61 To reset the timer standby mode press the ON OFF key again 3 Press COMMANDER OFF If you keep COMMANDER OFF pressed for more than 2 seconds The Commander turns off If you keep COMMANDER OFF pressed for less than 2 seconds The Commander returns to ...

Page 68: ...MPORTANT The timer function of this Commander is designed for the timer operation of AV components Do not use the timer function to operate an air conditioner or electrical appliances It may cause a fire or a serious injury To switch quickly the timer standby mode to on or off using the TIMER button 1 Press the TIMER button The program numbers of which timer program is set to the standby mode stay...

Page 69: ...e Label keys press the TIMER button 5 Press the Label key of which timer settings you want to erase The selected program number is displayed on the left Label key 6 Press the YES key During erasing c c stays lit When erasing finishes OK is displayed with a beep sound If you press the NO key The display returns to Step 4 7 Press COMMANDER OFF If you keep COMMANDER OFF pressed for more than 2 second...

Page 70: ... to Step 1 4 Press the YES key If you press the NO key The display returns to Step 1 During erasing c c c c stays lit When all timer settings programmed for all PROG 1 12 Label keys are erased OK is displayed with a beep sound 5 Press COMMANDER OFF If you hold COMMANDER OFF pressed for more than 2 seconds The Commander turns off If you hold COMMANDER OFF pressed for less than 2 seconds The Command...

Page 71: ...ever the timer functions while the controls are locked MENU EXIT COMMANDER OFF MORE 3 2 1 TV STB VCR DVD CD AMP OTHER TIMER LIGHT MUTING RECALL CHANNEL VOLUME SYSTEM CONTROL OK 1 COMMANDER OFF COMMANDER OFF When the controls are locked When you press a button on the Commander the NG sound is heard twice and LOCK the clock and c mark when the timer is set to be executed are displayed for a second T...

Page 72: ... 1 and 2 And while pressing the LOCK key press the Label key on which the setting mode you want to unlock is displayed To change the Label keys press the SET key When the setting is unlocked the display of the setting mode on the Label key flashes Protecting your Settings Setting Lock Function You can lock the Commander so that you cannot change add or clear any of your data in each setting mode 1...

Page 73: ...e 1 While pressing COMMANDER OFF press MUTING SET appears on the Mode Display key 2 Press the Mode Display key SET twice to display MODE on one of the Label keys 3 Press the MODE key MODE appears on the Mode Display key 4 Press the Mode Display key MODE once to display DISP OFF on one of the Label keys Each time you press the MODE key the Label keys changes as follows 5 Press the DISP OFF key DISP...

Page 74: ...appears on the Mode Display key MENU EXIT COMMANDER OFF MORE 3 2 1 TV STB VCR DVD CD AMP OTHER TIMER LIGHT MUTING RECALL CHANNEL VOLUME SYSTEM CONTROL OK 2 4 9 10 1 3 6 Press the or key to change the Automatic Off time of the LCD display window You can adjust from 1 minute to 30 minutes Each time the key is pressed the minute increases by one Each time the key is pressed the minute decreases by on...

Page 75: ...ay returns to Step 3 You can adjust from 1 second to 60 seconds Each time the key is pressed the second increases by 1 Each time the key is pressed the second decreases by 1 For example 20sec on the Label key means 20 seconds Note When you set the Automatic Off time of the backlight longer than 10 seconds factory setting the battery life may be short If you hold COMMANDER OFF pressed for more than...

Page 76: ...s on the Commander to light the display window If you press COMMANDER OFF the display returns to Step 3 LIGHT The Display Window is lit by pressing the LIGHT button only ALL The Display Window is lit by pressing any button on the Commander except the VOLUME MUTING CHANNEL RECALL and COMMANDER OFF Note If you use the Commander frequently with the ALL position the battery life may be short In this c...

Page 77: ...NTROL OK 2 4 6 7 1 3 5 3 Press the MODE key MODE appears on the Mode Display key 4 Press the Mode Display key MODE once to display BEEP on one of the Label keys 5 Press the BEEP key BEEP appears on the Mode Display key 6 Press the ON or OFF key Each time you press the key the display changes between ON and OFF with a beep sound The display of the current setting flashes ON Turns on the key touch b...

Page 78: ...tual contrast setting 7 Press COMMANDER OFF If you keep COMMANDER OFF pressed for more than 2 seconds The Commander turns off If you keep COMMANDER OFF pressed for less than 2 seconds The Commander returns to the previously set mode COMMANDER OFF Adjusting the Contrast of the Display Window 1 While pressing COMMANDER OFF press MUTING SET appears on the Mode Display key 2 Press the Mode Display key...

Page 79: ...l keys to the most suitable name using up to 8 characters or digits COMMANDER OFF MUTING 1 While pressing COMMANDER OFF press MUTING SET appears on the Mode Display key 2 Press the Mode Display key SET once to display LABEL on one of the Label keys on the display 3 Press the LABEL key LABEL appears on the Mode Display key MENU EXIT COMMANDER OFF MORE 3 2 1 TV STB VCR DVD CD AMP OTHER TIMER LIGHT M...

Page 80: ...e Mode Display key Keep the Mode Display key on which the component name is displayed pressed for more than 2 seconds The Commander enters the component name changing mode Input the name on the Mode Display key Follow Steps 2 5 on page 24 SYSTEM Displays SYSTEM4 SYSTEM7 To change the Label keys press the MORE button TIMER Displays PROG1 PROG4 To change the Label keys press the TIMER button 5 Press...

Page 81: ...e Label keys on the display MENU EXIT COMMANDER OFF MORE 3 2 1 TV STB VCR DVD CD AMP OTHER TIMER LIGHT MUTING RECALL CHANNEL VOLUME SYSTEM CONTROL OK 2 4 3 5 6 1 7 COMMANDER OFF MUTING Continued 6 Input the name of the Label key Follow Steps 2 5 on page 24 7 Press COMMANDER OFF If you keep COMMANDER OFF pressed for more than 2 seconds The Commander turns off If you keep COMMANDER OFF pressed for l...

Page 82: ...If you keep COMMANDER OFF pressed for more than 2 seconds The Commander turns off If you keep COMMANDER OFF pressed for less than 2 seconds The Commander returns to the previous setting mode COMMANDER OFF 3 Press the RESET key RESET appears on the Mode Display key 4 Press the ALL key ALL RESET stays lit and YES and NO flash 5 Press the YES key REALLY stays lit and YES and NO flash If you press the...

Page 83: ...shock to the unit or it may cause a malfunction Do not leave the unit in a location hear heat sources or in a place subject to direct sunlight excessive dust or sand moisture rain or mechanical shock Do not put foreign objects into the unit Should any liquid or solid object fall into the unit have it checked by qualified personnel before operating the unit any further Do not expose the remote cont...

Page 84: ...plied Component Code Numbers Some features may not be preset If some or all of the keys do not function correctly even after you have set the component codes then use the learning function to program the remote control signals for the component page 19 If your visual components are connected to an audio system make sure you ve set up the Commander as described in Controlling the Volume of Visual C...

Page 85: ...etting mode page 60 In this mode only Channel Macro settings can be cleared by pressing the macro key while keeping the DEL key pressed To clear the learned signals see page 46 Learned signals have been programmed for the Label key to which you want to set the Channel Macro function Clear the learned signals page 25 and try setting again Or set to another Label key There are some keys for which le...

Page 86: ...rval may be too short See Changing the interval between operation steps page 40 and set a longer interval or adjust the series of commands by changing the order of buttons and keys When programming the system control function you can make an interval of a while by pressing the TIMER button Data transfer to from a single Component Select button or Label key cannot transfer System Control functions ...

Page 87: ...play for operation does not appear when you press a button Remedy This Commander is preset at the factory to turn the display off automatically if you do not operate for more than 10 minutes You can change the Automatic Off time from 1 to 30 minutes page 74 The batteries begin to be exhausted Replace the batteries as early as possible page 7 The batteries might have been replaced or the batteries ...

Page 88: ...o move the location of the window picture To freeze the window picture To swap the window picture Appendix Table of Preset Functions Note There may be some components or functions that cannot be operated with this Commander KEY DISPLAY CHANNEL RECALL VOLUME MUTING VIDEO1 VIDEO2 VIDEO3 VIDEO4 TV TUNER NORMAL PIP AUDIO PIP OFF AU MODE PIC MODE CAPTION FUNCTION Channel up Channel down To operate JUMP...

Page 89: ...Guide To switch the antenna input in order To rewind To play To fast forward To record press B while pressing REC First release B then release REC To stop To pause To call up the MENU display To move the cursor upward To move the cursor downward To move the cursor to the right To move the cursor to the left To bring up the Station Index when a program guide is not displayed To select the channel t...

Page 90: ...se B then release REC To stop To pause To call up the MENU display To move the cursor upward To move the cursor downward To move the cursor to the right To move the cursor to the left To bring up the Station Index when a program guide is not displayed To select the channel that is highlighted To exit the setting menu Channel up Channel down To turn on the display of a shortcut menu To display the ...

Page 91: ... rewind To play To fast forward To record press N while pressing REC 2 First release N then release REC To stop To pause To eject a cassette Channel up Channel down To change the counter display To select the recording time by 30 minutes and begin recording REVIEW locked picture search CUE locked picture search To skip over commercials 2 In order to avoid recording by mistake the REC key does not ...

Page 92: ... DVD menu To move the cursor upward To move the cursor downward To move the cursor to the right To move the cursor to the left To execute items selected from the screen To rewind To play To fast forward To stop To pause To proceed to the next location or song To proceed to the previous location or song To open or close the tray To change the time display To call up the setting up menu KEY DISPLAY ...

Page 93: ...ewind To play To fast forward To stop To pause To open close To select the next track To select the previous track To select continuous play mode To play in random order To use for program play To select repeat play mode KEY DISPLAY DISC TRACK GROUP EDIT DSP MODE DSP OFF FADER PLAYMODE FUNCTION To decide the numeric key operation To decide the numeric key operation To decide the numeric key operat...

Page 94: ...To adjust the subwoofer level To switch the digital input T To switch the digital input t KEY DISPLAY POWER 1 9 0 ENTER VIDEO 1 VIDEO 2 VIDEO 3 AUX DVD TV CD MD DAT TUNER TAPE PHONO 5 1 INPUT MENU OK AMP FUNCTION To turn the power on off Keys to use the tuner directly To enter the setting To select the input source VIDEO 1 To select the input source VIDEO 2 To select the input source VIDEO 3 To se...

Page 95: ...wind To play To fast forward To record press N while pressing REC First release N then release REC To stop To pause To open close To select the next track To select the previous track KEY DISPLAY CONTINUE SHUFFLE PROGRAM REPEAT DECK A DECK B RECMODE CD SYNC FADER FUNCTION To select continuous play mode To play in random order To use for program play To switch the repeat play of a single or all tra...

Page 96: ... To select a tape deck Deck A or B dual cassette deck only To search the beginning of a track in the rewind direction To search the beginning of a track in the fast forward direction To stop after fading out and fade in after starting KEY DISPLAY REC MUTE DOLBY NR REC LEVEL REC LEVEL C RESET C MEMORY PROGRAM FUNCTION Record muting To toggle the Dolby Noise Reduction To make the recording level hig...

Page 97: ... track number 0 selects track 10 To select track numbers above 10 see the descriptions on the 10 button below To select numbers 10 and above To enter the setting To show the current play status on the screen To clear the selected characters from the screen To switch between the TV and the video To rewind To play To fast forward To stop To pause To proceed to the next location or song To proceed to...

Page 98: ...y To fast forward To record press N while pressing REC First release N then release REC To stop recording perform the same procedure To stop To pause To call up the MENU display To move the cursor upward To move the cursor downward To move the cursor to the right To move the cursor to the left KEY DISPLAY OK EXIT CHANNEL 3 EPG 3 REPLAY 3 Live TV 3 LIST CUE SKIP 3 ADVANCE 3 PAGE 3 PAGE FUNCTION To ...

Page 99: ... and above To enter the setting To select the next disc To change the display mode or turn the display on off To clear the settings To rewind To play To fast forward To record press N while pressing REC First release N then release REC To stop To pause To open close To select the next track To select the previous track KEY DISPLAY HIGH REV HIGH CUE FADER REC MUTE FUNCTION High speed review High sp...

Page 100: ...Raise Lower RadioRA ALL OFF SCENE1 SCENE2 SCENE3 SCENE4 SCENE5 SCENE6 SCENE7 SCENE8 SCENE9 SCENE10 SCENE11 SCENE12 SCENE13 SCENE14 SCENE15 ALL ON ALL OFF Raise Lower Home Works Interac tive MACRO1 MACRO2 MACRO3 MACRO4 MACRO5 MACRO6 MACRO7 MACRO8 MACRO9 MACRO10 MACRO11 MACRO12 MACRO13 MACRO14 MACRO15 MACRO16 X10 OFF SCENE1 SCENE2 SCENE3 SCENE4 SCENE5 SCENE6 SCENE7 SCENE8 SCENE9 SCENE10 SCENE11 SCEN...

Page 101: ...tting of a Component For details see page 12 page 19 page 32 page 61 page 79 page 79 page 79 page 43 page 58 page 52 page 29 page 47 Press COMMANDER OFF MUTING If you do not perform any step within two minutes the mode ends COMMANDER OFF Component Select COMMANDER OFF SYSTEM CONTROL 1 2 3 COMMANDER OFF VOLUME VOLUME COMMANDER OFF OTHER COMMANDER OFF MORE COMMANDER OFF VOLUME OTHER To reset the com...

Page 102: ...t saving time Set the clock Lock the Remote Commander Unlock the Remote Commander For details see page 40 42 page 78 page 77 page 73 page 74 page 74 page 74 page 8 11 page 8 11 page 10 page 23 page 71 Press COMMANDER OFF EXIT COMMANDER OFF OK COMMANDER OFF MUTING ON MUTING VOLUME x OFF MUTING VOLUME COMMANDER OFF VOLUME CHANNEL Clock Display CHANNEL Clock Display CHANNEL COMMANDER OFF LIGHT COMMAN...

Page 103: ...103 Full Display ...

Page 104: ...erring data 52 COMMANDER OFF button 6 Copying settings of Component Select buttons 47 E Erasing all the settings 81 See Clearing Changing F G Factory setting 12 29 37 H Hold Function 71 K Key touch beep 77 L LCD brightness 74 full display 103 Learning Function 19 45 49 LIGHT button 6 74 Locking control of Commander 71 settings on Commander 72 Printed in Malaysia M N O MUTING button 6 19 22 P Q Pow...

Reviews: