background image

12.

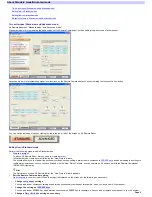
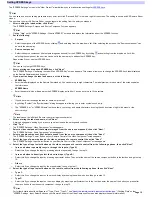
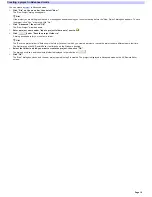
Ente r the  follow ing inform ation re garding the  input s e le ction of the  vide o com pone nt, the n click  "Ne xt".

o

What is  the  total num be r of inputs  you can s e le ct from  the  on s cre e n m e nu?

o

Click 

and select the number.

o

Which input do you s e le ct w he n you us e  "Source  com pone nt nam e "?

o

Enter the input name in the text box.

o

In w hat orde r doe s  your s e le ction (in [2]) appe ar on the  lis t (1s t, 2nd, 3rd, e tc.)?

o

Select the order number by clicking 

.

13.

Se le ct w hich input is  highlighte d w he n you pre s s  the  input s e le ct button on the  re m ote  control, the n click  "Ne xt."

After this selection, go to step 15.

14.

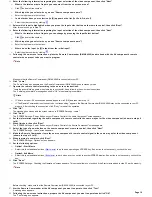
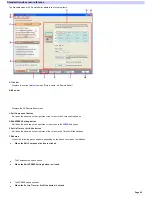
Ente r the  follow ing inform ation re garding the  input s e le ction of the  vide o com pone nt, the n click  "Ne xt".

o

What is  the  total num be r of inputs  you can change  by pre s s ing the  Input Se le ct button?

o

Click 

and select the number.

o

Which input do you s e le ct w he n you us e  "Source  com pone nt nam e "?

o

Enter the input name in the text box.

o

Whe re  doe s  the  input (in [2]) s tand from  the  initial input?

o

Select the order number by clicking 

.

15.

Follow ing the  on-s cre e n ins tructions , place  the  Re m ote  Com m ande r (RM -AX4000) he ad to he ad w ith the  AV com pone nt's  re m ote
control w hos e  pre s e t code  you w ant to program .

Note

Make sure that the Remote Commander (RM-AX4000) is connected to your PC. 


16.

Click  "Le arn."

The "Learn" dialog box appears, and the Remote Commander (RM-AX4000) goes to standby mode.

17.

Ope rate  the  re m ote  control according to the  on-s cre e n ins tructions .

"Learning is complete" appears w hen learning is successful. Keep follow ing the on-screen instructions.
The "Learning is complete" message box show s "OK" w hen learning is complete.

Hints

o

If "A time out error: 60 seconds has passed" appears, click [OK] and redo from step 16.

o

If "The Remote Commander is not connected or not responding." appears, the Remote Commander (RM-AX4000) may not be connected to your PC
properly. After checking the connection, click "Retry" to repeat the operation.

18.

Click  "OK."

The message box closes and the screen returns to "XPRESS Settings - Learn."

19.

Click  "Ne xt."

The "XPRESS Settings - Pow er Button on your Remote Control of the Audio Component" screen appears.

20.

Se t the  inform ation re garding the  audio com pone nt's  re m ote  control in the  s am e  w ay as  for the  vide o com pone nt (s how n in s te ps  9
to18).

21.

Whe n finis he d, the n click  "Ne xt."

The "XPRESS Settings - Pow er Button on your Remote Control of the Source Component" screen appears.

22.

Se le ct the  type  of pow e r button on the  s ource  com pone nt's  re m ote  control, the n click  "Ne xt."

The "XPRESS Settings - Learn" screen appears.

23.

M ak e  the  Re m ote  Com m ande r le arn the  s ource  com pone nt's  re m ote  control s ignal in the  s am e  w ay as  for the  vide o com pone nt
(s how n in s te ps  15 to18).

24.

Whe n le arning is  com ple te , click  "Ne xt."

The "XPRESS Settings - Options" screen appears.

25.

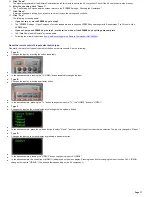
Se t the  follow ing options :

o

Option1: Start M acro

o

Select this to set additional actions (

Start macro

) to w ork w hen operating an XPRESS key. If an action is not necessary, uncheck the box.

o

Option2: Exit M acro

o

Select this to set additional actions (

Exit macro

) to w ork w henever you sw itch to another XPRESS display. If an action is not necessary, uncheck the

box.

26.

Click  "Ne xt."

The "XPRESS Settings - Checking the Operations" screen appears. This screen allow s you to check if the Start macro added in step 25 w orks properly.

Note

Before checking, make sure that the Remote Commander (RM-AX4000) is connected to your PC. 


27.

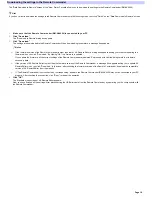
Aim  the  Re m ote  Com m ande r at the  AV com pone nt you w ant to ope rate , the n click  "Te s t."

A message box appears.

28.

Follow ing the  on-s cre e n ins tructions , pre pare  the  AV com pone nt you w ant to ope rate  and click  "OK."

The "Test" dialog box appears.

Page  16

Summary of Contents for RM-AX4000 - Integrated Remote Commander

Page 1: ...n lists is easier With AX Remote Editor it is easier to check edit a macro Action list since the macro is displayed as a list Changing Timer and Air Slide functions You can change a Timer function or Air Slide operation In Standard mode you can set up the Timer or Air Slide to operate XPRESS function In Advanced mode you can set up the Timer or Air Slide to operate a macro Action list Testing the ...

Page 2: ... side You can type in the first few letters of a keyw ord in the Type in the keyw ord to find field or select a keyw ord from the list then click Display and the explanation relating to the keyw ord is show n to the right To search using key words Search When you click the Search tab Search w ill be displayed on the left side If you enter a w ord or phrase into the Type in the keyw ord to find fie...

Page 3: ...a project Hints If you are using an operating system other than Window s XP click the Start button of Window s and point to Programs Sony Remote AX AX Remote Editor and click to start up AX Remote Editor If the shortcut icon of AX Remote Editor is displayed on the desktop of Window s double click the icon to open it Depending on the setting Window s XP may delete icons from the desktop if they hav...

Page 4: ...e upper right corner of AX Remote Editor Click File on the menu bar then select Exit AX Remote Editor closes Hint If you try to exit AX Remote Editor w ithout saving the project you are editing a dialog box appears asking you to confirm saving To save the project you are editing click Yes otherw ise click No Page 4 ...

Page 5: ... create a project In Standard mode create a project follow ing the New Project w izard The w izard allow s you to make all the necessary settings such as setting a project name components XPRESS keys and dow nloading the settings to the Remote Commander so once you have finished w ith the New Project w izard you can operate an AV component w ith the Remote Commander RM AX4000 right aw ay Hint The ...

Page 6: ...ond delete any unnecessary components If you have several AV components of the same category or if you have an AV component w hose category is not preset add a component Lastly change the assignment of components as you like o Change the settings of XPRESS keys First delete any XPRESS key s that no longer reflects your actual AV system if necessary Second add an XPRESS key s that reflects any addi...

Page 7: ...e Initialize the key button setting for a component Editable Editing the settings of XPRESS keys Change the label of an XPRESS key Editable Editable Change the assignment of XPRESS keys Editable Editable Add an XPRESS key Editable Editable Edit a Start macro Exit macro for an XPRESS key Editable Change the key button setting for an XPRESS key Editable Copy an XPRESS key Editable Page 7 ...

Page 8: ...trol signal of your AV component Advanced mode sets a preset code by SOLUTION preset or by BRAND preset method by selecting the manufacturer and the preset code 2 Only in Advanced mode can you select None for a component that has no preset code 3 In Standard mode you can set an XPRESS procedure to operate at a scheduled time In Advanced mode you can set a macro Action list to operate at a schedule...

Page 9: ...omes out of standby hibernation before connecting Notes The Remote Commander uses the battery w hen connected to the PC When you finish the setup unplug from the USB connector Before connecting the Remote Commander to your PC make sure that the battery charge is enough Do not disconnect the USB mini cable from your PC w hile your PC is communicating w ith the Remote Commander otherw ise a malfunct...

Page 10: ...e its settings file AX Remote Editor file w ith the file extension axe is saved along w ith various other files for that project You can create as many projects as necessary For example you can save several Remote Commander settings as different projects according to your needs Or you can make a backup copy of the Remote Commander settings as a precaution against accidental data loss Note Do not u...

Page 11: ...e control o Make the Remote Commander RM AX4000 learn the video component s remote control signal 6 Set the follow ing items about the audio component o Select the type of pow er button on the audio component s remote control o Se the information about the input select button on the audio component s remote control o Make the Remote Commander RM AX4000 learn the audio component s remote control si...

Page 12: ...n appears 4 Enter a project name under Input a project folder name next to 5 Click under Save the project folder in A dialog box appears for you to select a folder Hint The Save the project folder in field show s the folder location in w hich you created a project or saved the project under a different name last time The first time you start AX Remote Editor the field show s the Window s desktop 6...

Page 13: ...n appears This screen allow s you to program the preset code for each component Preset code refers to the IR code of a component s remote control 5 Connect the Remote Commander RM AX4000 to your PC w ith the USB mini cable 6 Follow ing the on screen instructions place the Remote Commander RM AX4000 head to head w ith the AV component s remote control w hose preset code you w ant to program 7 Click...

Page 14: ...ct w izard for creating a project or in the New Component w izard for adding a component be careful of the follow ing A DVD Receiver Combo is a Sony AV amplifier w ith a built in DVD player A DVR DVD Combo is a DVD recorder w ith a built in hard disk drive Except the DVD Receiver combo the components w ith the built in amplifier should be registered as Receiver All the keys that are inoperative sh...

Page 15: ...haracters by using the shortcut menu right click menu or the shortcut keys Note The label cannot be left blank Be sure to enter at least one character 5 After entering the label and name click Next A dialog box appears asking if you are sure you w ant to save the settings and continue 6 Click Yes The XPRESS Settings Video Component screen appears 7 Select a video component that outputs images from...

Page 16: ... If The Remote Commander is not connected or not responding appears the Remote Commander RM AX4000 may not be connected to your PC properly After checking the connection click Retry to repeat the operation 18 Click OK The message box closes and the screen returns to XPRESS Settings Learn 19 Click Next The XPRESS Settings Pow er Button on your Remote Control of the Audio Component screen appears 20...

Page 17: ...r RM AX4000 About the remote control s input select button type Generally there are four types of input select button on remote controls See the follow ing Type A Changes the input by pressing the button repeatedly In the above example pressing the TV VIDEO button repeatedly changes the input Type B Changes the input by pressing a particular button In the above example pressing the TV button chang...

Page 18: ...Dow nload By clicking OK the firmw are is updated If you update the firmw are all the current settings of the Remote Commander are deleted So proceed w ith caution being careful not to delete necessary data o If the version of AX Remote Editor is older than the firmw are version of the Remote Commander a message box appears asking you to update AX Remote Editor w hen you click Dow nload In this ca...

Page 19: ...lder name next to 4 Click under Save the project folder in A dialog box appears for you to select a folder Hint The Save the project folder in field show s the folder location in w hich you created a project or saved the project under a different name last time The first time you start AX Remote Editor the field show s the Window s desktop 5 Select the folder in w hich you w ant to create the proj...

Page 20: ...dit XPRESS Setting button Sw itches the edit area on the right side of the screen to the XPRESS edit pane E Set Up Timer or Air Slide button Sw itches the edit area on the right side of the screen to the Timer Air Slide edit pane F Edit area One of the follow ing panes appears depending on the button you click on the left pane When the Edit Component button is clicked The Component edit pane opens...

Page 21: ...ommander is connected to the PC You can send data When appears Tw o or more Remote Commanders are connected to the PC You cannot send data When appears The Remote Commander is not connected to the PC You cannot send data K Dow nload to Remote button Dow nloads the settings you made on AX Remote Editor to the Remote Commander L Emulate button Starts the Emulator By pressing the keys buttons on the ...

Page 22: ...agging and dropping the components you w ant to move B Component information Type Displays the selected component type category Brand Displays the manufacturer of the selected component Label Displays a label of the selected component Component key on the button By clicking the button you can change the label of the Component key Note If the component sets the preset code by SOLUTION preset by rea...

Page 23: ...Note You cannot add a component to the key position w here a component is already assigned or if 16 components are already programmed E Delete button Deletes the selected component Page 23 ...

Page 24: ...s the Component key of the component you w ant to operate the display to operate the component appears This display is called Component display Keys on the Component display are divided into tw o types Touch keys w hose labels are already set and Label keys w hose label you can enter You can create up to 12 Label keys per component Furthermore for each component you can set different actions for e...

Page 25: ...le Delete a component Editable Editable Initialize the key button setting for a component Editable 1 The Standard mode sets the preset code by SOLUTION preset by reading the preset code from the remote control signal of your AV component The Advanced mode sets the preset code by SOLUTION preset or BRAND preset by selecting the manufacturer and the preset code 2 Only in Advanced mode can you select...

Page 26: ... box appears 5 Enter the new label in the text box to the right of Label You can enter up to eight characters The label preview in the center of the screen updates the information Hints o By clicking Symbol the Symbol select dialog box appears allow ing you to enter symbols such as o The Label text box allow s you to copy and paste characters by using the shortcut menu right click menu or the shor...

Page 27: ...screen to sw itch to Standard mode 2 Click Edit Component in the upper left of the screen 3 Click the component you w ant to move from the component list on the right side then drag and drop it to the key position w here you w ant to move it If no component occupies that key the component w ill move there If another component already occupies that key the components w ill sw ap key positions Page ...

Page 28: ...f Components SOLUTION screen appears 8 Connect the Remote Commander RM AX4000 to your PC w ith the USB mini cable 9 Follow ing the on screen instructions place the Remote Commander RM AX4000 head to head w ith the AV component s remote control w hose preset code you w ant to program 10 Click Preset The Preset dialog box appears and the Remote Commander RM AX4000 goes to standby mode 11 Operate the...

Page 29: ...een instructions place the Remote Commander RM AX4000 head to head w ith the AV component s remote control w hose preset code you w ant to program 10 Click Preset The Preset dialog box appears and the Remote Commander RM AX4000 goes to standby mode 11 Operate the remote control according to the on screen instructions The preset code of component name is programmed appears w hen the programming is ...

Page 30: ... w ill also be deleted So proceed w ith caution being careful not to delete necessary data 1 Click the Standard tab in the low er left of the screen to sw itch to Standard mode 2 Click Edit Component in the upper left of the screen 3 Click the component you w ant to delete from the component list on the right side 4 Click Delete at the bottom of the screen A dialog box appears for you to confirm t...

Page 31: ... By clicking an XPRESS key on a list you can edit it You can also change the assignment of XPRESS keys on a list by dragging and dropping the XPRESS keys you w ant to move C XPRESS information XPRESS Name The name of the selected XPRESS key is displayed on this button By clicking the button you can change the name and label of the XPRESS key XPRESS structure Displays the components operated by a s...

Page 32: ...Page 32 ...

Page 33: ...ow ing three components as a target of operating Source component The component that outputs image and sound signals You cannot select PJ Projector or LIGHT for the source component Video component The component that displays the images from the source component You can select TV or PJ Projector for the video component Or you can set an XPRESS key w ithout selecting the video component Audio compo...

Page 34: ...er and DVD player 1 Sw itch the display to the XPRESS display for DVD 2 Turn on the DVD player 3 Turn on the TV 4 Set the input selector of the TV to VIDEO1 5 Turn on the amplifier receiver 6 Set the input selector of the amplifier receiver to DVD 7 Start DVD playback By programming the above Start macro you can perform the above actions by simply pressing the DVD XPRESS key An Exit macro is a lis...

Page 35: ...e label of an XPRESS key Editable Editable Change the assignment of XPRESS keys Editable Editable Add an XPRESS key Editable Editable Edit a Start macro Exit macro for an XPRESS key Editable Change the key button setting for an XPRESS key Editable Copy an XPRESS key Editable Delete an XPRESS key Editable Editable Initialize the settings of an XPRESS key Editable Note You cannot change the follow i...

Page 36: ...o The source component s remote control setting pow er button type learned setting If an XPRESS key does not w ork properly delete the XPRESS key and recreate a new XPRESS key Page 36 ...

Page 37: ...h w ill appear on the XPRESS display as its title You can enter up to 12 characters o XPRESS Key o Enter the label displayed on the Remote Commander You can enter up to eight characters o The label preview at the bottom of the screen updates the information Hints o By clicking Symbol the Symbol select dialog box appears allow ing you to enter symbols such as o The XPRESS Key or XPRESS Name text bo...

Page 38: ...o Standard mode 2 Click Edit XPRESS Setting on the left side of the screen 3 Click the XPRESS key you w ant to move from the XPRESS list on the right side then drag and drop it to the key position w here you w ant to move it If no XPRESS key occupies that key position the XPRESS key w ill move there If another XPRESS key already occupies that key position the XPRESS keys w ill sw ap key positions ...

Page 39: ... the shortcut menu right click menu or the shortcut keys Note The label cannot be left blank Be sure to enter at least one character 8 After entering the label and name click Next The Video Component screen appears 9 Select a video component that outputs images from the source component then click Next The Audio Component screen appears 10 Select an audio component that outputs sound from the sour...

Page 40: ...ote Commander is not connected or not responding appears the Remote Commander RM AX4000 may not be connected to your PC properly After checking the connection click Retry to repeat the operation 20 Click OK The message box closes and the screen returns to Learn 21 Click Next The Pow er Button on your Remote Control of the Audio Component screen appears 22 Set the information regarding the audio co...

Page 41: ...o Checking the Operations 33 Do either of the follow ing o If you set tw o or more XPRESS keys in step 5 o Click Next o The Video Component screen reappears and the second XPRESS key s setting starts Repeat steps 9 to 32 to set all the XPRESS keys o If you set only one XPRESS key in step 5 or otherw ise w hen all the XPRESS key s settings are complete o Click Finish o The XPRESS key s set in step ...

Page 42: ... 1 Click the Standard tab in the low er left of the screen to sw itch to Standard mode 2 Click Edit XPRESS Setting on the left side of the screen 3 Click the XPRESS key you w ant to delete from the XPRESS list on the right side 4 Click Delete at the bottom of the screen A dialog box appears for you to confirm the deletion 5 Click Yes The XPRESS key selected in step 3 is deleted Page 42 ...

Page 43: ...er Air Slide edit pane in Standard mode displays the follow ing items A Edit Timer button Sets an XPRESS procedure to operate at a scheduled time by the Timer function B Edit Air Slide button Sets a macro Action list to operate for an Air Slide pattern Page 43 ...

Page 44: ... for a Timer function Day Sets the day for a Timer function to operate The default setting is Everyday See also Changing the Timer function Standard mode Changing the Timer function Advanced mode About the Air Slide function The Remote Commander RM AX4000 can perform a programmed action by sliding your finger across its display This is called an Air Slide function The Air Slide has the follow ing ...

Page 45: ...Action list for each of four System Control buttons and four System Control keys This is called a System Control macro Note You cannot set a System Control macro in Standard mode See also Changing a System Control setting Advanced mode Page 45 ...

Page 46: ...acters How ever the label cannot be left blank Be sure to enter at least one character By clicking Symbol the Symbol select dialog box appears This dialog box allow s you to enter symbols such as The Label text box allow s you to copy and paste characters by using the shortcut menu right click menu or the shortcut keys o XPRESS o Sets an XPRESS key to operate by clicking and selecting from the dro...

Page 47: ...lide in the low er left of the screen 3 Click Edit Air Slide on the right side The Edit Air Slide dialog box appears 4 Select an XPRESS key you w ant to operate by clicking below the Air Slide pattern and selecting Hints o If you click Clear the setting for the Air Slide pattern is cleared o If you change an Air Slide pattern in Advanced mode the drop dow n list for the Air Slide pattern show s Ad...

Page 48: ...AX Remote Editor menu C Component edit area Displays the area for editing Component settings D XPRESS edit area Displays the area for editing an XPRESS key E Macro edit area Displays the area for editing a Macro Action list for Timer Air Slide System Control F Minimize button Minimizes the AX Remote Editor screen and show s an icon on the Window s taskbar G Close button Exits AX Remote Editor Page...

Page 49: ...Commanders are connected to the PC You cannot send data When appears The Remote Commander is not connected to the PC You cannot send data J Dow nload to Remote button Dow nloads the settings you made on AX Remote Editor to the Remote Commander K Emulate button Starts the Emulator By pressing the keys buttons on the Emulator the signal from the Remote Commander connected to your PC is sent to an AV...

Page 50: ...w ant to move B Component information Type Displays the selected component type category Brand Displays the manufacturer of the selected component Label Displays a label of the selected component Component key on the button By clicking the button you can change the label of the Component key Note If the component sets the preset code by SOLUTION preset by reading the preset code from the remote co...

Page 51: ...nge Preset button Changes the preset code of the selected component F Initialize button Returns each key button for the component to the initial setting G Edit Keys button Changes the key button setting for the selected component Page 51 ...

Page 52: ...s the Component key of the component you w ant to operate the display to operate the component appears This display is called Component display Keys on the Component display are divided into tw o types Touch keys w hose labels are already set and Label keys w hose label you can enter You can create up to 12 Label keys per component Furthermore for each component you can set different actions for e...

Page 53: ...le Delete a component Editable Editable Initialize the key button setting for a component Editable 1 The Standard mode sets the preset code by SOLUTION preset by reading the preset code from the remote control signal of your AV component The Advanced mode sets the preset code by SOLUTION preset or BRAND preset by selecting the manufacturer and the preset code 2 Only in Advanced mode can you select...

Page 54: ...Enter the new label in the text box to the right of Label You can enter up to eight characters The label preview in the center of the screen updates the information Hints o By clicking Symbol the Symbol select dialog box appears allow ing you to enter symbols such as o The Label text box allow s you to copy and paste characters by using the shortcut menu right click menu or the shortcut keys Note ...

Page 55: ...er left of the screen to sw itch to Advanced mode 2 Click the component you w ant to move from the component list in the upper left of the screen then drag and drop it to the key position w here you w ant to move it If no component occupies that key the component w ill move there If another component already occupies that key the components w ill sw ap key positions Page 55 ...

Page 56: ...d of setting the preset code from the follow ing options o SOLUTION recommended o Reads the preset code from the remote control signal of the AV component If you don t know the number use this method o BRAND o Selects the manufacturer and the preset code Refer to the supplied Preset code lists 8 Click Next One of the follow ing screens appears o If you select SOLUTION in step 7 o The Programming t...

Page 57: ...or appears 19 One by one press the keys and buttons on the Emulator to confirm the corresponding action on the AV component Note Press the keys buttons longer than usual 20 After checking all the keys and buttons click in the upper right of the Emulator The Emulator closes and the screen returns to Checking the Operations 21 Click Finish The preset code of the component selected in step 2 is chang...

Page 58: ...ts the manufacturer and the preset code Refer to the supplied Preset code lists 8 Click Next One of the follow ing screens appears o If you select SOLUTION in step 7 o The Programming the Preset Codes of Components SOLUTION screen appears Go to step 9 o If you select BRAND in step 7 o The Programming the Preset Codes of Components BRAND screen appears Skip to step 15 9 Connect the Remote Commander...

Page 59: ... click Emulate The Emulator appears 19 One by one press the keys and buttons on the Emulator to confirm the corresponding action on the AV component Note Press the keys buttons longer than usual 20 After checking all the keys and buttons click in the upper right of the Emulator The Emulator closes and the screen returns to Checking the Operations 21 Click Finish The new component is added to the p...

Page 60: ...action Learn Signal in Order dialog box below o Display this key o This is displayed w hen a touch key is selected If you uncheck the box the key is hidden on the Remote Commander Note A touch key for w hich no action is programmed is hidden on the Remote Commander so in this case you cannot check the box o Label o If a touch key is selected o Its label is displayed o You can change the label by c...

Page 61: ...trol signal as raw data box the remote control signal of the AV component is programmed as the raw data onto the Remote Commander If the AV component does not w ork properly w hen a learned key is pressed check this box to try the learning In this case the learned data is larger than normal learning 6 Press and hold dow n the button on the remote control until Learning is complete appears If Learn...

Page 62: ...des that component w ill also be deleted So proceed w ith caution being careful not to delete necessary data 1 Click the Advanced tab in the low er left of the screen to sw itch to Advanced mode 2 Click the component you w ant to delete from the component list in the upper left of the screen 3 Click Delete in the upper right of the screen A dialog box appears for you to confirm the deletion 4 Clic...

Page 63: ...component w ill also be deleted So proceed w ith caution being careful not to delete necessary data 1 Click the Advanced tab in the low er left of the screen to sw itch to Advanced mode 2 Click the component w hose settings you w ant to return to default initialize from the component list in the upper left of the screen 3 Click Initialize in the upper right of the screen A dialog box appears for y...

Page 64: ...cking an XPRESS key on a list you can edit it You can also change the assignment of XPRESS keys on a list by dragging and dropping the XPRESS keys you w ant to move C XPRESS Name The name of the selected XPRESS key is displayed on this button By clicking the button you can change the name and label of the XPRESS key D XPRESS structure Displays the components operated by a selected XPRESS function ...

Page 65: ...tes the selected XPRESS key H Initialize button Returns the selected XPRESS key to the initial setting I Duplicate button Copies the selected XPRESS key to the empty key position w here no XPRESS key is assigned Note If eight XPRESS keys are already programmed you cannot copy an XPRESS key Page 65 ...

Page 66: ...ow ing three components as a target of operating Source component The component that outputs image and sound signals You cannot select PJ Projector or LIGHT for the source component Video component The component that displays the images from the source component You can select TV or PJ Projector for the video component Or you can set an XPRESS key w ithout selecting the video component Audio compo...

Page 67: ...er and DVD player 1 Sw itch the display to the XPRESS display for DVD 2 Turn on the DVD player 3 Turn on the TV 4 Set the input selector of the TV to VIDEO1 5 Turn on the amplifier receiver 6 Set the input selector of the amplifier receiver to DVD 7 Start DVD playback By programming the above Start macro you can perform the above actions by simply pressing the DVD XPRESS key An Exit macro is a lis...

Page 68: ...e label of an XPRESS key Editable Editable Change the assignment of XPRESS keys Editable Editable Add an XPRESS key Editable Editable Edit a Start macro Exit macro for an XPRESS key Editable Change the key button setting for an XPRESS key Editable Copy an XPRESS key Editable Delete an XPRESS key Editable Editable Initialize the settings of an XPRESS key Editable Note You cannot change the follow i...

Page 69: ...o The source component s remote control setting pow er button type learned setting If an XPRESS key does not w ork properly delete the XPRESS key and recreate a new XPRESS key Page 69 ...

Page 70: ...XPRESS display as its title You can enter up to 12 characters o XPRESS Key o Enter the label displayed on the Remote Commander You can enter up to eight characters o The label preview at the bottom of the screen updates the information Hints o By clicking Symbol the Symbol select dialog box appears allow ing you to enter symbols such as o The XPRESS Key or XPRESS Name text box allow s you to copy ...

Page 71: ...the screen to sw itch to Advanced mode 2 Click the XPRESS key you w ant to move from the XPRESS list on the left side of the screen then drag and drop it to the key position w here you w ant to move it If no XPRESS key occupies that key position the XPRESS key w ill move there If another XPRESS key already occupies that key position the XPRESS keys w ill sw ap key positions Page 71 ...

Page 72: ...abel cannot be left blank Be sure to enter at least one character 7 After entering the label and name click Next The Video Component screen appears 8 Select a video component that outputs images from the source component then click Next The Audio Component screen appears 9 Select an audio component that outputs sound from the source component then click Next The Pow er Button on your Remote Contro...

Page 73: ...cted to your PC properly After checking the connection click Retry to repeat the operation 19 Click OK The message box closes and the screen returns to Learn 20 Click Next The Pow er Button on your Remote Control of the Audio Component screen appears 21 Set the information regarding the audio component s remote control in the same w ay as for the video component show n in steps 10 to19 22 When fin...

Page 74: ...et tw o or more XPRESS keys in step 4 o Click Next o The Video Component screen reappears and the second XPRESS key s setting starts Repeat steps 8 to 31 to set all the XPRESS keys o If you set only one XPRESS key in step 4 or otherw ise w hen all the XPRESS key s settings are complete o Click Finish o The XPRESS key s set in step 4 is added Page 74 ...

Page 75: ...ed for an XPRESS key If you click Edit Start Macro you can change the setting of the macro Action list o Edit Start Macro o By clicking this the Edit Start Macro dialog box appears This dialog box allow s you to add change delete the action of a Start macro or change the action order o Exit Macro o Displays an Exit macro Action list programmed for an XPRESS key If you click Edit Exit Macro you can...

Page 76: ...s is displayed w hen a touch key is selected If you uncheck the box the key is hidden on the Remote Commander Note A touch key for w hich no action is programmed is hidden on the Remote Commander so in this case you cannot check the box o Label o If a touch key is selected o Its label is displayed o You can change the label by clicking and selecting from the drop dow n list o If a Label key is sel...

Page 77: ... Note If eight XPRESS keys are already programmed you cannot copy an XPRESS key 1 Click the Advanced tab in the low er left of the screen to sw itch to Advanced mode 2 Click the XPRESS key you w ant to copy from the XPRESS list on the left side of the screen 3 Click Duplicate on the right side A dialog box appears for you to confirm copying 4 Click Yes The copy of the XPRESS key selected in step 2...

Page 78: ...key does not w ork properly 1 Click the Advanced tab in the low er left of the screen to sw itch to Advanced mode 2 Click the XPRESS key you w ant to delete from the component list on the left side of the screen 3 Click Delete on the right side A dialog box appears for you to confirm the deletion 4 Click Yes The XPRESS key selected in step 2 is deleted Page 78 ...

Page 79: ...ys dialog box The settings of any Start macro Exit macro edited in the Edit Actions dialog box 1 Click the Advanced tab in the low er left of the screen to sw itch to Advanced mode 2 Click the XPRESS key w hose settings you w ant to return to default initialize from the XPRESS list on the left side of the screen 3 Click Initialize on the right side A dialog box appears for you to confirm initializ...

Page 80: ...ys the follow ing items A Edit Timer button Sets a macro Action list to operate at a scheduled time by the Timer function B Edit Air Slide button Sets a macro Action list to operate for an Air Slide pattern C Edit System Control button Sets a macro Action list to operate for a System Control button key Page 80 ...

Page 81: ... for a Timer function Day Sets the day for a Timer function to operate The default setting is Everyday See also Changing the Timer function Standard mode Changing the Timer function Advanced mode About the Air Slide function The Remote Commander RM AX4000 can perform a programmed action by sliding your finger across its display This is called an Air Slide function The Air Slide has the follow ing ...

Page 82: ...Action list for each of four System Control buttons and four System Control keys This is called a System Control macro Note You cannot set a System Control macro in Standard mode See also Changing a System Control setting Advanced mode Page 82 ...

Page 83: ...r By clicking Symbol the Symbol select dialog box appears This dialog box allow s you to enter symbols such as The Label text box allow s you to copy and paste characters by using the shortcut menu right click menu or the shortcut keys o Timer Macro o By clicking Edit Actions the Edit Actions dialog box appears This dialog box allow s you to add change delete the action of a Timer macro or change ...

Page 84: ... low er left of the screen The Edit Air Slide dialog box appears 3 Click Edit Actions under an Air Slide pattern you w ant to edit The Edit Actions dialog box appears This dialog box allow s you to add change delete an action of the macro for the Air Slide or change the action order Hint If you click Clear the setting for the Air Slide pattern is cleared 4 Click OK The Edit Air Slide dialog box cl...

Page 85: ...ey The default labels are show n as SYSTEM5 to SYSTEM8 o By clicking the key you w ant to edit and clicking Edit Label the Edit Label dialog box appears Enter a label and click OK to update the information Hints You can enter up to eight characters How ever the label cannot be left blank Be sure to enter at least one character By clicking Symbol the Symbol select dialog box appears This dialog box...

Page 86: ...e its settings file AX Remote Editor file w ith the file extension axe is saved along w ith various other files for that project You can create as many projects as necessary For example you can save several Remote Commander settings as different projects according to your needs Or you can make a backup copy of the Remote Commander settings as a precaution against accidental data loss Note Do not u...

Page 87: ...e control o Make the Remote Commander RM AX4000 learn the video component s remote control signal 6 Set the follow ing items about the audio component o Select the type of pow er button on the audio component s remote control o Se the information about the input select button on the audio component s remote control o Make the Remote Commander RM AX4000 learn the audio component s remote control si...

Page 88: ...n appears 4 Enter a project name under Input a project folder name next to 5 Click under Save the project folder in A dialog box appears for you to select a folder Hint The Save the project folder in field show s the folder location in w hich you created a project or saved the project under a different name last time The first time you start AX Remote Editor the field show s the Window s desktop 6...

Page 89: ...n appears This screen allow s you to program the preset code for each component Preset code refers to the IR code of a component s remote control 5 Connect the Remote Commander RM AX4000 to your PC w ith the USB mini cable 6 Follow ing the on screen instructions place the Remote Commander RM AX4000 head to head w ith the AV component s remote control w hose preset code you w ant to program 7 Click...

Page 90: ...ct w izard for creating a project or in the New Component w izard for adding a component be careful of the follow ing A DVD Receiver Combo is a Sony AV amplifier w ith a built in DVD player A DVR DVD Combo is a DVD recorder w ith a built in hard disk drive Except the DVD Receiver combo the components w ith the built in amplifier should be registered as Receiver All the keys that are inoperative sh...

Page 91: ...haracters by using the shortcut menu right click menu or the shortcut keys Note The label cannot be left blank Be sure to enter at least one character 5 After entering the label and name click Next A dialog box appears asking if you are sure you w ant to save the settings and continue 6 Click Yes The XPRESS Settings Video Component screen appears 7 Select a video component that outputs images from...

Page 92: ... If The Remote Commander is not connected or not responding appears the Remote Commander RM AX4000 may not be connected to your PC properly After checking the connection click Retry to repeat the operation 18 Click OK The message box closes and the screen returns to XPRESS Settings Learn 19 Click Next The XPRESS Settings Pow er Button on your Remote Control of the Audio Component screen appears 20...

Page 93: ...r RM AX4000 About the remote control s input select button type Generally there are four types of input select button on remote controls See the follow ing Type A Changes the input by pressing the button repeatedly In the above example pressing the TV VIDEO button repeatedly changes the input Type B Changes the input by pressing a particular button In the above example pressing the TV button chang...

Page 94: ...Dow nload By clicking OK the firmw are is updated If you update the firmw are all the current settings of the Remote Commander are deleted So proceed w ith caution being careful not to delete necessary data o If the version of AX Remote Editor is older than the firmw are version of the Remote Commander a message box appears asking you to update AX Remote Editor w hen you click Dow nload In this ca...

Page 95: ...lder name next to 4 Click under Save the project folder in A dialog box appears for you to select a folder Hint The Save the project folder in field show s the folder location in w hich you created a project or saved the project under a different name last time The first time you start AX Remote Editor the field show s the Window s desktop 5 Select the folder in w hich you w ant to create the proj...

Page 96: ...roject folder in field show s the folder location in w hich you created a project or saved the project under a different name last time The first time you start AX Remote Editor the field show s the Window s desktop 4 Select the folder in w hich you w ant to save the project then click OK The display returns to the Save as dialog box and the selected folder is displayed on the left side of 5 Click...

Page 97: ...ng is not saved a message box appears asking you to confirm saving before the Open dialog box appears To save the project click Yes otherw ise click No 2 Click of Look in then select the project folder you w ant to open 3 Select the AX Remote Editor file w ith the file extension axe and click Open The Open dialog box closes and the selected project is displayed on AX Remote Editor Page 97 ...

Page 98: ... follow ing items o Project o Displays the project name You cannot change it o Username Enter the user name for the project You can enter up to 30 characters o Comments o Enter the comments for the project You can enter up to 60 characters but cannot start a new line o You can enter project information overview date saved version etc 2 Click OK The Properties dialog box closes and the user name an...

Page 99: ... you to confirm updating the firmw are w hen you click Emulate By clicking OK the firmw are is updated If you update the firmw are all the current settings of the Remote Commander are deleted So proceed w ith caution being careful not to delete necessary data o If The Remote Commander is not connected or not responding appears w hen you click Emulate the Remote Commander RM AX4000 may not be conne...

Page 100: ...ading is complete a message box appears Notes o If the data capacity to be dow nloaded from AX Remote Editor is larger than the memory capacity of the Remote Commander an error message appears w hen you click Dow nload In this case decrease the data capacity by Deleting macros Action lists Deleting learned settings from keys buttons Hiding unnecessary keys o If the firmw are version of the Remote ...

Page 101: ...levels A larger number means a brighter setting Backlight Fade Effect FADE Sw itches ON OFF of the backlight fade effect Backlight Turn On Mode ON MODE Sets the conditions for the backlight to turn on Turn On w ith Any Valid Key ALL When you press a key button on the Remote Commander the backlight turns on Turn On w ith LIGHT button LIGHT When you press the LIGHT button on the Remote Commander the...

Page 102: ...y connect one Remote Commander to your PC at a time Otherw ise you w on t be able to upload the settings correctly 2 Click Upload in the Unit Settings dialog box The Upload from Remote dialog box appears 3 Click Upload The settings upload to your PC starts When uploading is complete a message box appears Notes o If the firmw are version of the Remote Commander is older than that of AX Remote Edito...

Page 103: ...i cable Notes o Do not disconnect the USB mini cable from your PC until dow nloading is complete otherw ise a malfunction may occur o Only connect one Remote Commander to your PC at a time Otherw ise you w on t be able to dow nload the settings correctly 2 Click Tools on the menu bar then select Backup The Backup dialog box appears 3 Click Send the raw data saved on your PC to the Remote Commander...

Page 104: ...bar then select Update Firmw are for Remote A confirmation dialog box appears Notes If the version of AX Remote Editor is older than the firmw are version of the Remote Commander a message box appears asking you to update AX Remote Editor In this case after checking the firmw are version of the Remote Commander dow nload the compatible version of AX Remote Editor from the w ebsite 3 Click Yes AX R...

Page 105: ...uent remote control signals immediately after pow ering on Therefore use the Delay action command 2 to set an interval after the pow er on action that turns an AV component on Hint You can also change the order of the Action list rather than inserting a Delay action command Using the follow ing list as an example if you rearrange the action order the Delay actions can be omitted because the remote...

Page 106: ... a Learn action to an Action list w ith a key button that already has a Preset action or Learn action You can program up to four Learn actions or Learn actions to one key button If you taught several remote control signals to one key button the signal is sent in the order in w hich the signal is taught w ith each press of the key button Hint If you teach remote control signals to a key that does n...

Page 107: ...he signal history thereby determining that the Start macro of the XPRESS key does not need to send a pow er on signal for the TV About invalid actions A programmed action becomes invalid w hen The display you w ant to jump to no longer exists Example When the TV component is deleted any Jump action to the TV Component display becomes invalid The invalid Jump action is displayed as Jump Invalid The...

Page 108: ...arn the Learn dialog box appears This dialog box allow s you to teach the remote control signal of an AV component to a key button for a component or XPRESS key For further details see Adding a Learn action Learn dialog box below Hints A Learn action is added w hen you teach the signal to a key button that does not have a Preset action A Learn action replaces the Preset action if you teach to a ke...

Page 109: ...arned key is pressed check this box to try the learning In this case the learned data is larger than normal learning 4 Press and hold dow n the button on the remote control until Learning completed appears If Learning is complete appear learning w as successful Hints If A time out error 60 seconds has passed appears click OK and redo from step 3 If The Remote Commander is not connected or not resp...

Page 110: ...Page 110 ...
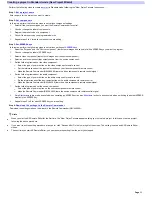
Page 111: ...dit XPRESS Setting button Sw itches the edit area on the right side of the screen to the XPRESS edit pane E Set Up Timer or Air Slide button Sw itches the edit area on the right side of the screen to the Timer Air Slide edit pane F Edit area One of the follow ing panes appears depending on the button you click on the left pane When the Edit Component button is clicked The Component edit pane opens...

Page 112: ...ommander is connected to the PC You can send data When appears Tw o or more Remote Commanders are connected to the PC You cannot send data When appears The Remote Commander is not connected to the PC You cannot send data K Dow nload to Remote button Dow nloads the settings you made on AX Remote Editor to the Remote Commander L Emulate button Starts the Emulator By pressing the keys buttons on the ...

Page 113: ...AX Remote Editor menu C Component edit area Displays the area for editing Component settings D XPRESS edit area Displays the area for editing an XPRESS key E Macro edit area Displays the area for editing a Macro Action list for Timer Air Slide System Control F Minimize button Minimizes the AX Remote Editor screen and show s an icon on the Window s taskbar G Close button Exits AX Remote Editor Page...

Page 114: ...Commanders are connected to the PC You cannot send data When appears The Remote Commander is not connected to the PC You cannot send data J Dow nload to Remote button Dow nloads the settings you made on AX Remote Editor to the Remote Commander K Emulate button Starts the Emulator By pressing the keys buttons on the Emulator the signal from the Remote Commander connected to your PC is sent to an AV...

Page 115: ...are editing Save as Saves the project you are editing under a different name Dow nload to Remote Dow nloads the AX Remote Editor settings to the Remote Commander w ith the USB mini cable Properties Enters the user name and comments for the project you are editing Exit Exits AX Remote Editor Option Unit Settings Changes the unit settings of the Remote Commander such as LCD screen and Beep sound and...

Page 116: ... in a room it is recommended that you check this box for all of them except for the one you mainly use Tools Update Firmw are for Remote Transfers the latest firmw are the Remote Commander s basic program to the Remote Commander Backup Makes a backup copy of the Remote Commander settings raw data or dow nloads the settings to the Remote Commander Help AX Remote Editor Help Displays this Help file ...

Page 117: ...operate an XPRESS key the AV component does not turn on off or change the input select Delete the XPRESS key and recreate a new XPRESS key Even if you press the keys buttons on the Emulator the AV component does not w ork Press the keys buttons longer You w ant to change the settings made on AX Remote Editor on the Remote Commander Update the firmw are of the Remote Commander Your PC does not reco...

Page 118: ...this softw are and Help or renting the softw are w ithout authorization are prohibited by copyright law s The Company cannot accept liability for damage or loss resulting from the use of this softw are or for any claim from a third party The Company assumes no responsibility aside from the replacement of the media due to manufacturing fault The softw are is applied only for the devices specified T...

Reviews: