1-22
93
Playing JPEG image files
DV
D Ad
diti
onal
O
p
eratio
ns
Playing JPEG image files
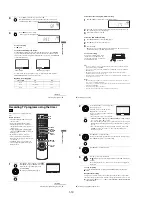
You can play JPEG image files on DATA CDs
(CD-ROMs/CD-Rs/CD-RWs).
1
Press
Z
and place a DATA CD on the disc tray,
then press
Z
to close the tray.
When you load a DATA CD which contains
MP3 audio tracks and JPEG image files,
“Select a Media Type” menu appears.
If you load a DATA CD which contains only
JPEG image files, the “Album” display
appears. Then you can skip step 2.
2
Press
V/v
to select “JPEG”, then press
ENTER.
The “Album” display will appears.
If you do not press ENTER after selecting a
media type, the selected media will be
automatically played.
V/v/B/b
ENTER
H
PLAY
Z
TOP MENU
.
/
>
DISPLAY
x
STOP
MENU
Select a Media Type
2 JPEG
1 MP3
ENTER
v
V
Album
Photo
SLIDE SHOW
continued
94
Playing JPEG image files
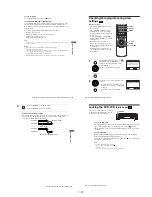
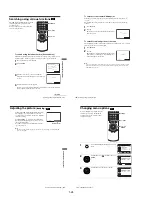
To rotate the selected image
To zoom in an image
3
Press
./>
to select the next/previous album page, then press
V/v/
B/b
to select an image in the “Album” display.
To display the selected image
1
Press ENTER.
The selected image number appears in the
display window.
2
To display the next/previous image, press
./>
.
To play the Slide show
1
Press
H
PLAY.
You can also play the Slide show using the
menu on the selected image.
For details, see “To enjoy the Slide show”
on page 95.
2
Press
B/b
to select the desired playing
speed on the “Interval” menu, then press
ENTER.
Slide show starts from the selected image.
1
Press
V/v/B/b
to select an image in the “Album”
display, then press ENTER.
2
Press
B/b
to select “
”, then press ENTER.
Each time you press ENTER, the image turns
clockwise by 90°.
1
Press
V/v/B/b
to select an image in the “Album”
display, then press ENTER.
2
Press
B/b
to select “
”, then press ENTER.
“
”
appears.
3
Press
V/v/B/b
to move “
” to the position
where you want to zoom in.
4
Press ENTER repeatedly to change the
magnification. Each time you press ENTER, the
magnification changes as shown below.
2
×
t
normal magnification
IMAGE
Interval
IMAGE
: Fast
: Normal
: Slow
IMAGE
IMAGE
95
Playing JPEG image files
DV
D Ad
diti
onal
O
p
eratio
ns
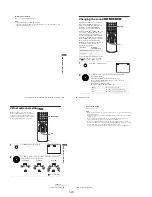
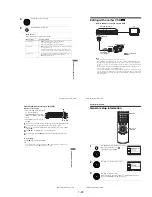
To enjoy the Slide show
To turn on/off the menu in the single image display
Press CLEAR to turn off the menu. Press
B
or
b
to turn on the menu.
To return to the “Album” display
Press MENU to return to the “Album” display. Press
.
repeatedly to return to the
first “Album” page.
To return to the “Select a Media Type” menu
Press
x
STOP twice, then press TOP MENU.
Notes
• Slide show can play in only one direction.
• You cannot rotate or zoom in the image during Slide show.
• If you select
“
”
in the rotated image display, the images in the “Album” display will not
be rotated. But if you start the slide show, the images will be rotated. Correct the rotation in
the
“
”
menu.
About JPEG image files
You can play JPEG image files on CD-ROMs, CD-Rs, or CD-RWs. However, the
discs must be recorded according to ISO9660 level 1 or level 2 for the player to
recognize the files.
You can also play discs recorded in Multi Session.
See the instructions of the CD-R/RW device or recording software (not supplied) for
details on the recording format.
Note
• A total of up to 999 files can be recognized for discs that contain both MP3 and JPEG files.
Files are recognized in the order that they were recorded. For example, if 990 JPEG files are
recorded then 100 MP3 files are recorded, the 990 JPEG files recorded first and only the first
9 MP3 files can be recognized.
1
Press
V/v/B/b
to select an image in the “Album”
display, then press ENTER.
2
Press
B/b
to select “
”, then press ENTER.
The “Interval” menu appears.
3
Press
B/b
to select the desired play speed, then press
ENTER.
Slide show starts.
Interval
IMAGE
continued
96
Playing JPEG image files
To play a Multi Session CD
This player can play Multi Session CDs when an JPEG image file is located in the
first session. Any subsequent JPEG image files, recorded in the later sessions, can
also be played back. When audio tracks and images in music CD format or video CD
format are recorded in the first session, only the first session will be played back.
Notes
• The system can play the extension “.JPG” or “.JPEG.”
• Some CD-Rs or CD-RWs cannot be played on this system depending on file format.
• If you add the extension “.JPG” or “.JPEG” to data not in JPEG format, “Can not Display”
will appear.
• Depending on the disc or the size of image files, playback may take some time to start.
• Progressive and lossless compression JPEG image files are not supported.
• The image size that can be displayed is limited. You can display the following images;
width 32 - 7680 pixels by height 32 - 8192 pixels.
Tip
• If you add numbers (01, 02, 03, etc.) to the front of the file names, the files will be played in
that order.
Summary of Contents for RMT-V501C
Page 10: ... 10 MEMO ...
Page 67: ...3 BLOCK DIAGRAM 3 2 3 1 SLV D350P D550P ...
Page 68: ...3 4E MEMO ...
Page 70: ...4 3 4 4 4 1 VCR MAIN FUNCTION TIMER COMPONENT SIDE ...
Page 71: ...4 6 4 5 CONDUCTOR SIDE ...
Page 72: ...4 7 4 8 COMPONENT SIDE CONDUCTOR SIDE 4 2 DVD MAIN ...
Page 73: ...4 10 4 9 4 3 DIAL TIMER SLV D550P Only COMPONENT SIDE CONDUCTOR SIDE ...
Page 74: ...4 12E MEMO ...
Page 76: ... BLOCK IDENTIFICATION OF MAIN PCB 5 3 5 4 Component Side Conductor Side VCR MAIN PCB ...
Page 77: ...5 1 S M P S 5 6 5 5 ...
Page 78: ...5 2 POWER DRIVE 5 7 5 8 ...
Page 79: ...5 3 LOGIC FUNCTION TIMER 5 10 5 9 ...
Page 80: ...5 4 A V 5 11 5 12 ...
Page 81: ...5 5 Hi Fi MTS 5 14 5 13 ...
Page 82: ...5 6 INPUT OUTPUT 5 15 5 16 ...
Page 83: ...5 7 DVD 5 18 5 17 ...
Page 84: ...MEMO 5 20E ...
Page 112: ...7 18E MEMO ...


