


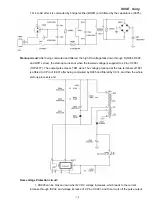


S95E Sony
20
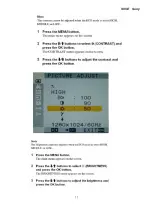
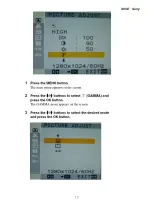
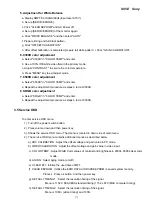
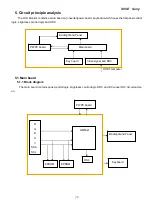
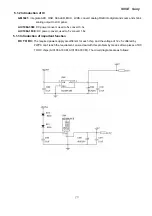
3.4 Adjustment
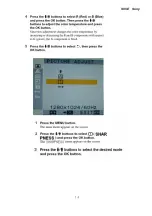
1. Procedures of how to go to service mode.
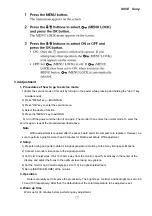
1) Enter the service mode of this unit by turning on the power while pressing and holding the "
MENU
" key
simultaneously.
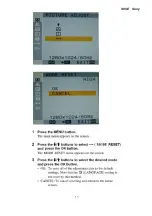
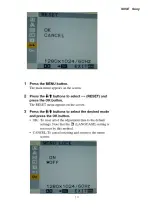
2) Press "MENU" key----MAINTAIN.
3) Press "OK" key to enter the service menu.
4) Select the desired function.
5) Press the "MENU" key to exit OSD.
6) Turn off the power and then turn it on again. The monitor then enters the normal mode.To enter the
service again, repeat the proceduredescribed above.
Note
W/B readjustment is required after the panel, board and microcomputer are replaced. However, be
sure to perform aging for more than 30 minutes for RGB reset before W/B adjustment.
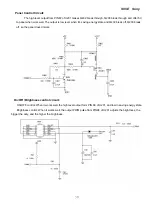
2. Setup
1) Prepare timing and pattern data for a signal generator according to the Sony timing specifications.
2) Connect a monitor video cable to the signal generator.
3) Put Color Analyzer(ex. CA-110) 50cm away from the monitor, specify it vertically in the center of the
display, and adjust the focus to the optimum level using an eyepiece.
4) Put the monitor and Color Analyzer(ex. CA-110) in a light-shielded room.
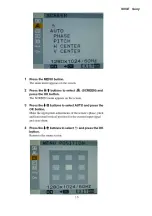
5) Set up [SERVICE MODE] of the monitor.
3. Operation
Data is manually set to improve the productivity. The brightness, contrast, and backlight are set to 50,
70 and 100 respectively. After that, the default data of the color temperature to be adjusted is set.
4. Warm up time
Warm up for 30 minutes before performing any adjustment.
Summary of Contents for S95E
Page 1: ...S95E Sony 1 Service Manual TFT LCD COLOR COMPUTER DISPLAY SONY ...
Page 3: ...S95E Sony 3 1 Precaution Warning on power connections Installation ...
Page 4: ...S95E Sony 4 Handing the LCD screen Maintenance Transportation ...
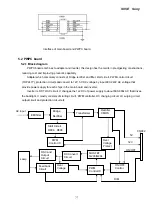
Page 10: ...S95E Sony 10 Adjustment steps of each menu ...
Page 11: ...S95E Sony 11 ...
Page 12: ...S95E Sony 12 ...
Page 13: ...S95E Sony 13 ...
Page 14: ...S95E Sony 14 ...
Page 15: ...S95E Sony 15 ...
Page 16: ...S95E Sony 16 ...
Page 17: ...S95E Sony 17 ...
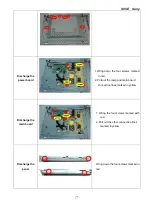
Page 18: ...S95E Sony 18 ...
Page 19: ...S95E Sony 19 ...
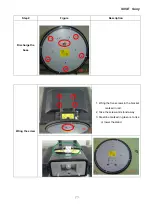
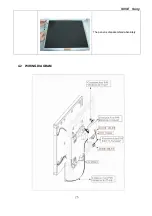
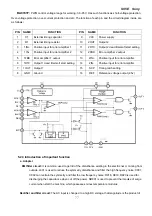
Page 26: ...S95E Sony 26 The panel is disassembled absolutely 4 2 WIRING DIAGRAM ...
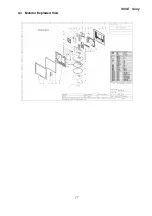
Page 27: ...S95E Sony 27 4 3 Monitor Exploded View ...
Page 39: ...S95E Sony 39 ...
Page 63: ...S95E Sony 63 8 Schematic ...
Page 64: ...S95E Sony 64 ...
Page 65: ...S95E Sony 65 ...
Page 66: ...S95E Sony 66 ...
Page 67: ...S95E Sony 67 ...
Page 68: ...S95E Sony 68 ...
Page 69: ...S95E Sony 69 ...


