background image

39

Sony Software License Agreement

Sony Software License Agreement

ATTENTION: USE OF THE SOFTWARE IS SUBJECT TO THE SONY 
SOFTWARE LICENSE TERMS SET FORTH BELOW. USING THE 
SOFTWARE OR THE PRODUCT IN WHICH IT IS INCORPORATED 
INDICATES USER’S ACCEPTANCE OF THESE LICENSE TERMS. IF 
THE USER DOES NOT ACCEPT THESE LICENSE TERMS, THE USER 
SHOULD IMMEDIATELY RETURN THE ENTIRE PRODUCT IN ITS 
ORIGINAL PACKING IN ORDER TO RECEIVE A FULL REFUND OF 
THE PURCHASE PRICE.

License and Restrictions 

Sony Electronics Inc. (“Sony”) grants User a license to Use one copy of the 
software which is provided to you as part of this Sony product 
(“Software”). “Use” means storing, loading, installing, executing or 
displaying the Software. User may not copy, modify the Software or disable 
any licensing or control features of the Software. No portion of the Software 
may be reproduced in any form, or by any means, without prior written 
permission from Sony. User is not permitted to modify, distribute, publish, 
transmit or create derivative works of any Software included for any public 
or commercial purposes. In consideration of this authorization, User agrees 
that any copy of this Software which User makes shall retain all copyright 
and other proprietary notices in the same form and manner as on the 
original. Except as specified above, nothing contained herein shall be 
construed as conferring by implication, estoppel or otherwise any license or 
right under any patent, trademark or copyright of Sony, its affiliates or any 
third party licensor. User may not in any way sell, lease, rent, license, 
sublicense or otherwise distribute the Software. The Software may only be 
accessed by the functionality of the Sony product in which the Software is 
incorporated by Sony (the “Product(s)”), and a User shall not intentionally 
make the Software directly accessible to others or to hardware other than 
the Products, or otherwise expose an API. Nothing in this Agreement 
grants User any rights, license or interest with respect to source code of the 
Software. User shall not modify, translate, reverse engineer, decompile or 
disassemble the Software or any part thereof or otherwise attempt to derive 
source code or create derivative works therefrom, and shall not authorize 
any third party to do any of the foregoing unless Sony's prior written 
consent is obtained. Sony may elect to provide to User updates and other 
support services for the licensed Software. All updates provided to User 
shall constitute licensed Software under this License, and such updates 
shall be governed by the terms hereof. 

Intellectual Property 

The Software is owned and copyrighted by Sony, its affiliates or its third 
party licensors. User's license confers no title or ownership in the Software 
and is not a sale of any rights in the Software. Sony's affiliates and/or third 
party suppliers may protect their rights directly in the event of any User's 
violation of this Agreement. The trademarks, tradenames, Product 
designation, logos and service marks (“Marks”) displayed with this 
Software are the property of Sony, its affiliates or third party licensors, and 
User shall acquire no rights of any kind in or to any Mark under which the 
Software and/or Products are marketed. User is not permitted to use these 
Marks without the prior written consent of Sony, its affiliates or the 
applicable third party licensor which may own the Mark. “Sony” is a 
registered trademark of Sony Corporation. User agrees not to remove, alter 
or destroy any patent, trademark or copyright markings or notices placed 
upon or contained within the Software, User Manuals or documentation. 
User further agrees to insert and maintain with the Software and any 
documentation a copyright notice in User's name. 

Termination 

User's license will automatically terminate upon any transfer of the 
Product. Upon transfer, User must deliver the Software, including any 
copies and related documentation, to the transferee. The transferee must 
accept these License Terms as a condition to the transfer. Otherwise, Sony 
does not authorize the transfer and the User and transferee will be in 
violation of this Agreement should the transferee use the Product. This 
license will automatically terminate upon User's failure to comply with any 
of these License Terms. Upon termination, User must stop using the 
Product and immediately destroy the Software, together with all copies, 
adaptations and merged portions in any form and/or return it to Sony. 

Export Requirements and U.S. Government Restricted Rights 

User may not export or re-export the Software or any copy or adaptation in 
violation of any applicable laws or regulations.   The Software and 
documentation have been developed entirely at private expense and are 
provided as “Commercial Computer Software - Restricted Rights” in 
accordance with FAR 52.227-19 (1987) or limited rights in technical data in 
accordance with FAR 52.227-14 (1987).   User has only those rights provided 
for such Software and documentation by the applicable FAR or DFARS 
clause or this Sony Software License Agreement. 

Summary of Contents for SAT-T60 Welcome to DIRECTV & TiVo Instructions (primary )

Page 1: ......

Page 2: ......

Page 3: ...onds It is not necessary to install a separate phone line Simply plug the receiver into any existing phone jack it can detect when your phone line is in use and make calls when the phone is available If the phone jack is used for another phone use the provided splitter The Satellite Receiver is intended for use only within the United States Local Programming With this Digital Satellite Receiver an...

Page 4: ...ience a disruption in reception for a short period of time Your reception should return to normal after the modification is complete Your receiver must be plugged in to receive any upgrades Do not unplug your receiver while an upgrade is in progress Trademark Copyright and License Information Sony and Remote Commander are trademarks and the Sony Partnership and Express Support are service marks of...

Page 5: ...ephone Line 20 Step 2 Connecting Your TV 21 Step 3 Adding a VCR Advanced Connection 22 Step 4 Connecting the IR Controller Advanced Connection 23 Step 5 Adding an Audio System Advanced Connection 24 Step 6 Connecting the AC Power Cord 25 Step 7 Inserting the Access Card Additional Information 27 Programming Your Remote Control 29 Code Search Method 30 Troubleshooting 36 Specifications 37 FCC Regul...

Page 6: ...tion Guide to help you connect the Satellite Receiver to your other audio video equipment 2 Install the Satellite Dish Antenna Refer to your Satellite Dish Antenna s installation instructions or have the Satellite Dish Antenna professionally installed 3 Set up the Satellite Dish Antenna Refer to the Viewer s Guide to complete the setup of your Satellite Dish Antenna 4 Activate your services Call D...

Page 7: ...ellite Receiver only needs to share the phone line for five to ten minutes a day but you may wish to consider installing a jack nearby Your Satellite Receiver cannot be used with any digital phone system Doing so will damage your Satellite Receiver and void your warranty Size AA R6 batteries 2 AC power cord Phone cord S Video cable Audio Video cable Phone splitter Remote Control POWER 9 8 7 6 5 4 ...

Page 8: ... off your Satellite Receiver The indicator lights when the Satellite Receiver is on B RECEIVING indicator Yellow indicates that the Satellite Receiver is receiving a signal from the Remote Control C Remote Control Signal Reception Window Receives control signals from your Remote Control 1 2 3 4 5 6 7 8 9 ...

Page 9: ...g a program and using the telephone line E Guide button Press to open the Program Guide F MENU button Press to open the DIRECTV Menu G SELECT button Press the buttons to move the highlight within menus and guides Press SELECT to select the highlighted item H TiVo button Press to open the TiVo Central Menu I DISPLAY button Press to open a display that shows information about the current program Whe...

Page 10: ...T jacks Output audio and video signals to your TV and other audio video equipment using A V cables and S Video cable supplied D DIGITAL AUDIO OUT OPTICAL jack Outputs digital audio signals to the digital optical input of your audio system E VHF UHF IN jack Inputs analog non satellite signals from your TV antenna or cable TV connection Some antennas require an adapter not supplied S VIDEO TEL LINE ...

Page 11: ...gnals to your Sony VCR so the Satellite Receiver can operate your Sony VCR using the IR controller supplied I TEL LINE jack Connects the Satellite Receiver to a telephone outlet using a telephone cord supplied J ACCESS CARD slot This is the slot where you insert your DIRECTV Access Card supplied After you have inserted the Access Card do not remove the Access Card unless instructed to do so by you...

Page 12: ...s the TV Menu when the TV SAT function switch is set to TV F LIVE TV button Changes to the live programming on the last selected channel G SELECT buttons Press the buttons to move the highlight within menus and guides Press SELECT to select the highlighted item H Thumbs Down button Use to indicate that you do not like a program You can apply up to three thumbs down for any program I PLAY button Pl...

Page 13: ...trol to operate your TV or audio system O POWER SAT button Turns the Satellite Receiver on and off When the power to the Satellite Receiver is off the antenna or cable signal passes through to your TV see VHF UHF SAT OUT on page 11 P Remote Active indicator Flashes while the Remote Control is transmitting signals or being programmed Q ENTER JUMP button Selects the currently entered number as the c...

Page 14: ...mbs up for any program X SLOW button Plays a program in slow speed Y FWD forward button Plays a program in fast search mode Shows a program frame by frame when in pause mode Press up to three times to increase the speed of the search or frame by frame viewing wh ADVANCE button While watching a live program pressing this button advances viewing to the current time While watching a recorded program ...

Page 15: ...Insert two size AA batteries supplied Be sure to match the and marks on the batteries with the and marks inside the battery compartment 3 Close the cover Insert the tabs on the cover into the gaps in the rear of the battery compartment Then lower the cover onto the Remote Control until you hear the latch click Notes When the batteries become weak the Remote Active indicator flashes If the Remote C...

Page 16: ......

Page 17: ...ive signals from DIRECTV Satellites through your Satellite Dish Antenna Audio Video Cables with RCA type plugs for Audio Video A V jacks Use the audio video jacks to send good quality analog video and stereo audio signals S Video Cables with S Video plugs for S VIDEO jacks Use the S VIDEO jack to send excellent quality analog video signals Optical Cable with Optical plug not supplied for DIGITAL A...

Page 18: ...e Satellite Receiver Your programming source signal s and equipment may allow for other connection possibilities If you have any questions refer to the operating instructions for that equipment or contact your programming provider s Step 1 Connecting the Satellite Dish Antenna and Telephone Line Page 19 Step 2 Connecting Your TV Page 20 Step 3 Adding a VCR Advanced Connection Page 21 Step 4 Connec...

Page 19: ...AL jack VHF UHF SAT OUT VHF UHF IN POWER OFF PASS THRU ONLY VHF UHF POWER OFF PASS THRU 1 2 Satellite Receiver RG 6 Coaxial Cable from Satellite Dish Antenna Telephone Cord 2 1 Connect the TEL LINE jack to a telephone line wall jack using the supplied telephone cord Connect the SATELLITE IN REQUIRED jack to your Satellite Dish Antenna using RG 6 coaxial cable not supplied Note Your Satellite Dish ...

Page 20: ...dio input connect it to the AUDIO L jack on the receiver Be sure to match the colors on the jacks with the colored plugs on the A V cable If your TV has an S Video input Use the S Video cable instead of the yellow video connection shown in If your TV does not have A V jacks Connect the VHF UHF SAT OUT jack to the VHF UHF input jack on your TV using coaxial cable Notes With this connection your inp...

Page 21: ...e 22 If your TV and VCR do not have A V jacks Connect the VHF UHF SAT OUT jack on the Satellite Receiver to the VHF UHF input jack on your VCR using coaxial cable Then connect the VHF UHF output jack on your VCR to the VHF UHF input jack on your TV using coaxial cable Set the CH 3 4 switch of your VCR to the channel that does not carry broadcasts in your area Note With this connection your input s...

Page 22: ... front of the VCR The IR Controller must extend just in front of the infrared sensor of the VCR z Tip If the infrared sensor is not marked on your Sony VCR refer to your VCR s operating instructions 1 2 to 1 IR Sensor VCR front view IR Controller In AC S VIDEO TEL LINE SERIAL AUDIO R AUDIO L VIDEO IR OUTPUT ACCESS CARD SATELLITE IN DIGITAL AUDIO OUT OPTICAL CH 3 4 OPTIONAL REQUIRED CNTRL OUT 2 1 2...

Page 23: ...GITAL AUDIO OUT OPTICAL jack on the Satellite Receiver to the optical digital input of your audio system z Tip If you connect your Satellite Receiver to a Dolby Digital receiver refer to the Viewer s Guide for more information on how to set up Dolby Digital In AC S VIDEO TEL LINE SERIAL AUDIO R AUDIO L VIDEO IR OUTPUT ACCESS CARD SATELLITE IN VHF UHF IN DIGITAL AUDIO OUT OPTICAL CH 3 4 OPTIONAL RE...

Page 24: ...llite Receiver and a power outlet In AC S VIDEO TEL LINE SERIAL AUDIO R AUDIO L VIDEO IR OUTPUT ACCESS CARD SATELLITE IN DIGITAL AUDIO OUT OPTICAL CH 3 4 OPTIONAL REQUIRED CNTRL OUT 2 1 2 1 VHF UHF SAT OUT VHF UHF IN POWER OFF PASS THRU ONLY VHF UHF POWER OFF PASS THRU Satellite Receiver AC Power Cord to power outlet ...

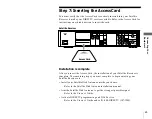
Page 25: ...o begin enjoying your Satellite Receiver are Install your Satellite Dish Antenna outside your home Refer to the Satellite Dish Antenna installation manual Aim the Satellite Dish Antenna to get the strongest possible signal Refer to the Viewer s Guide Activate DIRECTV programming and TiVo Service Refer to the Viewer s Guide and call 1 800 DIRECTV 347 3288 In AC S VIDEO TEL LINE SERIAL AUDIO R AUDIO...

Page 26: ......

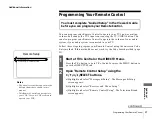
Page 27: ...at TiVo Central or the DIRECTV Menu Press the TiVo button to go to TiVo Central or press the MENU button to go to the DIRECTV Menu 2 Open Remote Control Setup using the SELECT buttons a Highlight and select Messages Setup The Messages Setup screen appears b Highlight and select Receiver and Phone Setup c Highlight and select Remote Control Setup The Television Brand screen appears Remote Setup PTV...

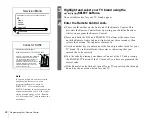
Page 28: ...V turns off you have programmed the correct code e If the Remote Control did not turn off your TV repeat steps 4a through 4d and try the next code listed for your TV FPO Television Brand Press SELECT to choose your TV brand and continue SEARS SHARP SIEMENS SIGNATURE SONY SOUNDESIGN FPO Codes for SONY Possible codes for this device are Program your TV PWR VOL and MUTE buttons Point the PTV Remote a...

Page 29: ...TING and VOL volume to make sure they operate the TV If these buttons operate the TV go to step 4 below 3 Press the CH channel button to cycle to the next code then test the code by repeating step 2 above The Remote Control has hundreds of available codes If the Remote Active indicator goes out you have tested all of the codes 4 Press ENTER to set the code and exit Code Search mode Press CLEAR to ...

Page 30: ...s not function properly after restart Questions about your Limited Warranty Contact DIRECTV and TiVo customer support at 1 800 DIRECTV 347 3288 if you need assistance with Activating DIRECTV programming Activating or using a feature of the TiVo Service Getting correct Program Guide data Understanding an on screen message from TiVo regarding your TiVo Service account You can also refer to the FAQ s...

Page 31: ... test call press the TiVo button to go to TiVo Central then choose Messages Setup then Receiver Phone Setup then Phone Connection and select Make Test Call If you have voice mail or other non standard dial tone press the TiVo button to go to TiVo Central then choose Messages Setup then Receiver Phone Setup then Phone Connection then Change Dialling Options and turn off dial tone detection If you h...

Page 32: ...er is trying to make a call It could be that you have too much line noise to make a connection The Satellite Receiver ships with a 50 foot cord try a shorter cord or you can buy a line noise filter at your local electronics store When I turn on my TV Searching for Satellite Signal appears Your Satellite Receiver is having trouble tuning to the channel you are on Follow these steps to restore the v...

Page 33: ...V is displaying the appropriate video source You may need to use the Input Source Select or TV Video button on your TV to change video sources If you are having trouble changing the video source refer to the instructions that came with your TV If you used coaxial RF cable to connect your Satellite Receiver make sure you are viewing the same channel 3 or 4 that you selected using the switch on the ...

Page 34: ...on screen menu If you are having trouble changing the video source refer to the instructions that came with your TV If you have the antenna or cable connected to your Satellite Receiver make sure the Satellite Receiver is in standby mode by pressing the POWER button on the front of the Satellite Receiver or POWER SAT on the Remote Control The green power light on the front of the Satellite Receive...

Page 35: ...e Control to TV If you are using the Remote Control to operate your TV stereo or A V receiver make sure you have programmed the Remote Control properly I m having problems with my Access Card Make sure the Access Card is inserted properly If the card is not protruding at least one quarter inch from the back panel of the Satellite Receiver the Access Card has been inserted incorrectly If you are re...

Page 36: ...W Operating temperature 21 C to 45 C 70 F to 113 F Operating Humidity 5 to 80 Dimensions Approx 381 76 325 mm w h d Approx 15 3 12 13 16 inches including projecting parts and controls Mass Approx 4 6 kg 10 lbs Supplied accessories Remote Control 1 Size AA R6 batteries 2 AC power cord 1 RF Coaxial cable 1 Audio Video cable 1 IR Control cable 1 S Video cable 1 Phone cord 1 Phone splitter 1 Access Ca...

Page 37: ...connect service 3 The telephone company may make changes in its technical operations and procedures if such changes affect the compatibility or use of this device the telephone company is required to give adequate notice of the changes You will be advised of your right to file a complaint with the FCC 4 If the telephone company requests information on what equipment is connected to their lines inf...

Page 38: ...te Receiver with respect to the radio or television equipment that is receiving the interference Move the Satellite Receiver away from the equipment that is receiving the interference Plug the Satellite Receiver into a different outlet so that the Satellite Receiver and the equipment receiving the interference are on different branch circuits Shielded I O cable and cords must be used for this equi...

Page 39: ...re All updates provided to User shall constitute licensed Software under this License and such updates shall be governed by the terms hereof Intellectual Property The Software is owned and copyrighted by Sony its affiliates or its third party licensors User s license confers no title or ownership in the Software and is not a sale of any rights in the Software Sony s affiliates and or third party s...

Page 40: ...EDIES EXCEPT AS INDICATED ABOVE IN NO EVENT WILL SONY ITS AFFILIATES OR ANY OF ITS THIRD PARTY LICENSORS BE LIABLE FOR LOSS OF DATA OR FOR DIRECT INDIRECT SPECIAL INCIDENTAL CONSEQUENTIAL INCLUDING LOST PROFIT EXEMPLARY OR OTHER DAMAGE WHETHER BASED IN CONTRACT TORT OR OTHERWISE EVEN IF SUCH PARTY HAS BEEN ADVISED OF THE POSSIBILITY OF SUCH DAMAGES IN NO EVENT WILL SONY OR ANY OF ITS AFFILIATES OR...

Page 41: ... SONY authorized DIRECTV System installer you must take the Product or deliver the Product in either its original packaging or packaging affording an equal degree of protection with freight prepaid to a SONY authorized DIRECTV System service facility To locate the closest such facility please call the telephone number listed below This warranty does not cover customer instruction installation set ...

Page 42: ...quently asked questions For assistance with installation contact the dealer from whom you purchased your Digital Satellite Receiver Recorder For product information or operation for service assistance or for resolution of a service problem call SONY SATELLITE SYSTEM INFORMATION CENTER 1 800 838 SONY 7669 For an accessory or part not available from your authorized dealer call 1 800 488 SONY 7669 RE...

Page 43: ......

Page 44: ...nd TiVo at 1 800 DIRECTV 347 3288 http www directv com Refer to this Installation Guide specifically the Troubleshooting section for questions about your Warranty connecting the Satellite Receiver initial Guided Setup difficulties e g phone calls failing programming the Remote Control or if your system does not function properly after restart If you still have questions contact Sony at 1 877 585 S...

Reviews: